Entering Date Ranges in Dynamics NAV
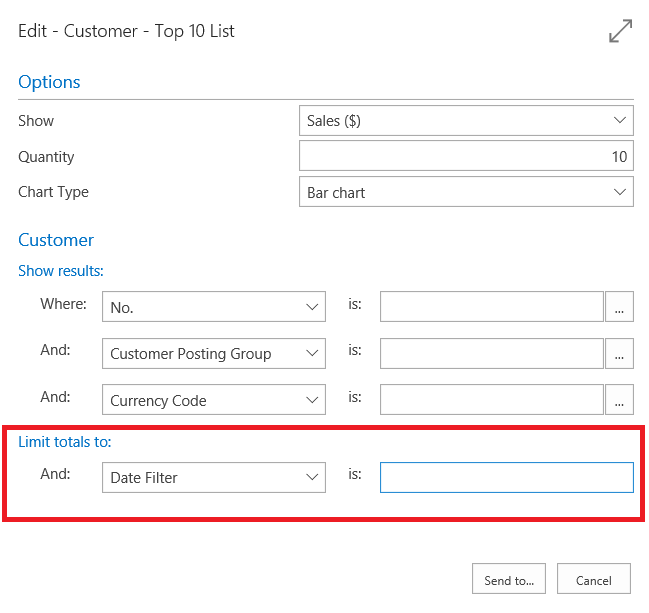
You can set filters containing a start date and an end date to display only the data contained in that date range or time interval. Special rules apply to the way you set date ranges. Let's take the Customer Top 10 as an example:

Here you can limit the report to a date range such as the past 2 weeks, or a total of 6 weeks, or whatever range you want. To set date ranges, you enter dates and then use either .. or | to set the range. In our example, to show the top 10 customers for the first two weeks of May, you would set the date filter to 05 01 17..05 14 17. Here are a couple of other examples:
| Meaning | Example | Entries included |
|---|---|---|
| Equal to | 12 15 16 | Only those posted on December 15 2016. |
| Interval | 12 15 16..01 15 17 ..12 15 16 |
Those posted on dates between and including December 15 2016 and January 15 2017. Those posted on December 15 2016 or earlier. |
| Either/or | 12 15 16|12 16 16 | Those posted on either December 15 or December 16 2016. If there are entries posted on both days, they will all be displayed. |
You can also combine the various format types.
| Example | Entries included |
|---|---|
| 12 15 16|12 01 16..05 31 17 | Entries posted either on December 15 2016 or on dates between and including December 01 2016 and May 31 2017. |
| ..12 14 16|12 30 16.. | Entries posted on December 14 or earlier, or entries posted on December 30 or later - that is, all entries except those posted on dates between and including December 15 and 29. |
Note that we have used the US date format MMDDYY here. As Dynamics NAV becomes available in other markets, you'll be able to use the formats that you are used to.
See Also
Dynamics 365 Business Central
Working with Microsoft Dynamics NAV
Entering Criteria in Filters
General Business Functionality