Native query support in Power Query custom connectors
Note
This article covers advanced topics around the implementation of native query support for custom connectors, as well as query folding on top of them. This article assumes you already have a working knowledge of these concepts.
To learn more about Power Query custom connectors, go to Power Query SDK Overview.
In Power Query, you're able to execute custom native queries against your data source to retrieve the data that you're looking for. You can also enable the capability to maintain query folding throughout this process and subsequent transformation processes done inside of Power Query.
The goal of this article is to showcase how you can implement such capability for your custom connector.
Prerequisites
This article uses as a starting point a sample that uses the SQL ODBC driver for its data source. The implementation of the native query capability is currently only supported for ODBC connectors that adhere to the SQL-92 standard.
The sample connector uses the SQL Server Native Client 11.0 driver. Make sure that you have this driver installed to follow along with this tutorial.
You can also view the finished version of the sample connector from the Finish folder in the GitHub Repository.
Modify the SQLCapabilities of your connector
In the SqlCapabilities record of the sample connector, you can find a record field with the name Sql92Translation and the value PassThrough for it. This new field is necessary for the native query to be passed using Power Query without any validation.
SqlCapabilities = Diagnostics.LogValue("SqlCapabilities_Options", defaultConfig[SqlCapabilities] & [
    // Place custom overrides here
    // The values below are required for the SQL Native Client ODBC driver, but might
    // not be required for your data source.
        SupportsTop = false,
        SupportsDerivedTable = true,
        Sql92Conformance = 8 /* SQL_SC_SQL92_FULL */,
        GroupByCapabilities = 4 /* SQL_GB_NO_RELATION */,
        FractionalSecondsScale = 3,
        Sql92Translation = "PassThrough"
]),
Make sure that this field appears in your connector before moving forward. If not, you'll face warnings and errors later on when it comes down to using a capability that isn't supported because it isn't declared by the connector.
Build the connector file (as .mez or.pqx) and load it into Power BI Desktop for manual testing and to define the target for your native query.
Manually test the native query capabilities of your connector
Note
For this article, we'll be using the AdventureWorks2019 sample database. But you can follow along with any SQL Server database of your choice and make the necessary changes when it comes down to the specifics of the database chosen.
The way native query support will be implemented in this article is that the user will be requested to enter three values:
- Server name
- Database name
- Native query at the database level
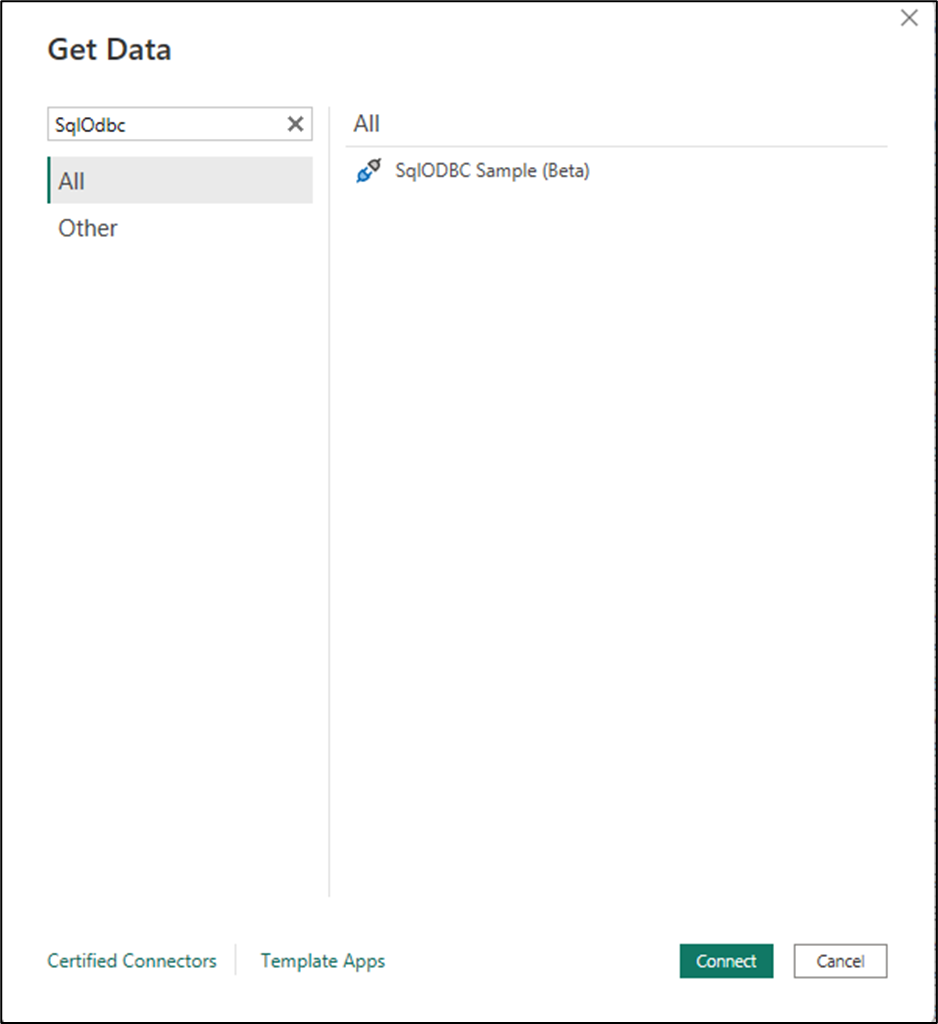
Now inside Power BI Desktop, go to the Get Data experience and find the connector with the name SqlODBC Sample.
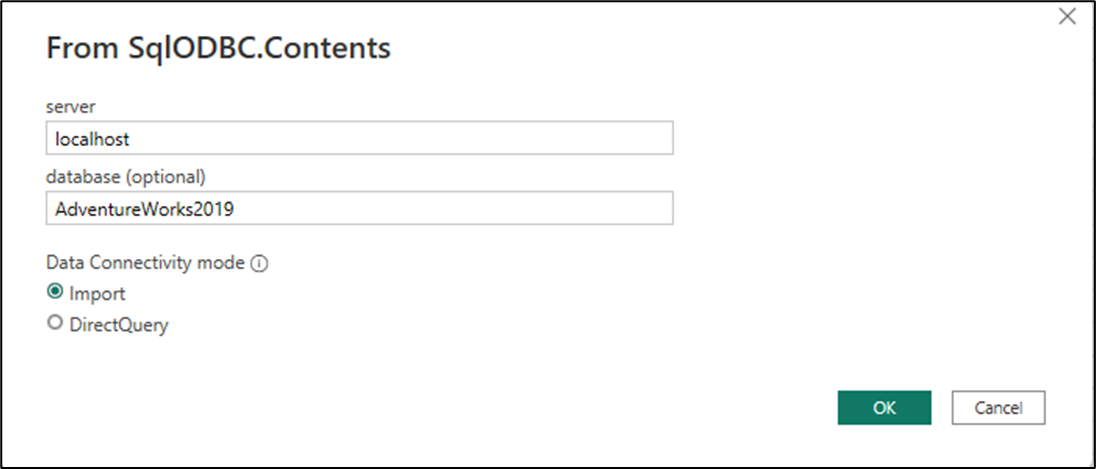
For the connector dialog, enter the parameters for your server and your database name. Then select OK.
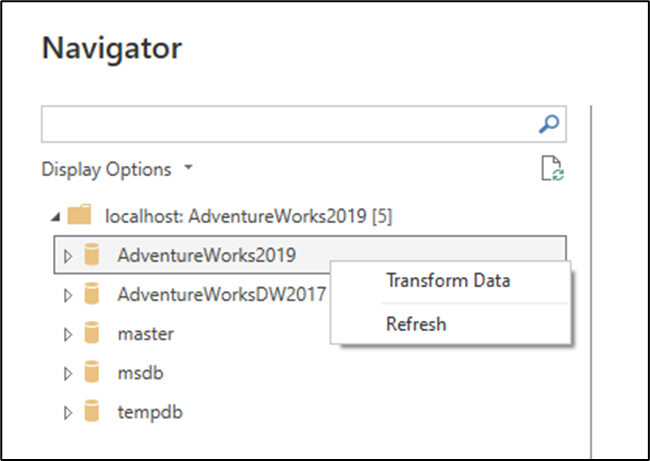
A new navigator window appears. In Navigator, you can view the native navigation behavior from the SQL driver that displays the hierarchical view of the server and the databases within it. Right-click the AdventureWorks2019 database, then select Transform Data.
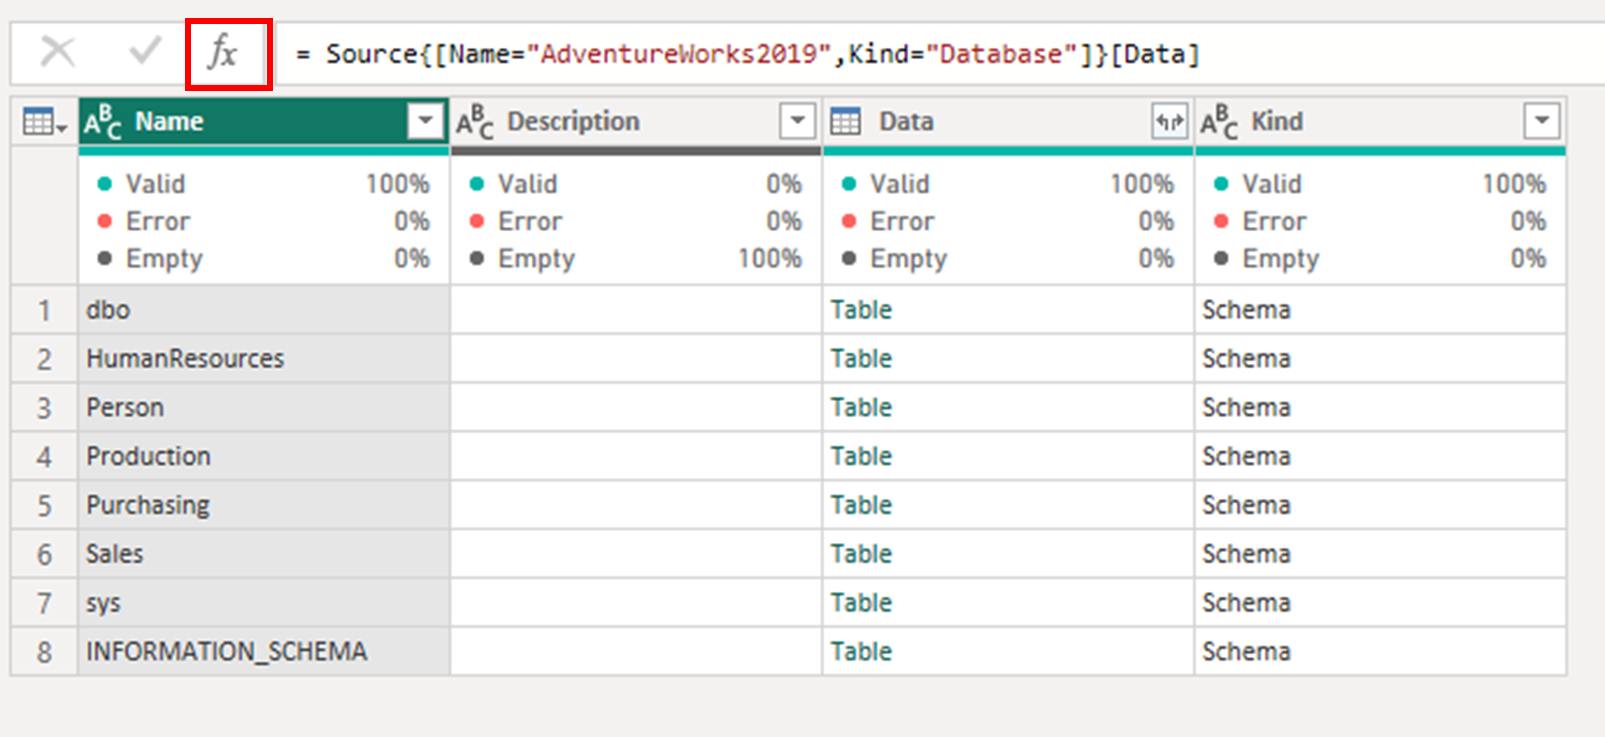
This selection brings you to the Power Query editor and a preview of what's effectively the target of your native query since all native queries should run at the database level. Inspect the formula bar of the last step to better understand how your connector should navigate to the target of your native queries before executing them. In this case the formula bar displays the following information:
= Source{[Name="AdventureWorks2019",Kind="Database"]}[Data]
Source is the name of the previous step that, in this case, is simply the published function of your connector with the parameters passed. The list and the record inside of it just helps navigate a table to a specific row. The row is defined by the criteria from the record where the field Name has to be equal to AdventureWorks2019 and the Kind field has to be equal to Database. Once the row is located, the [Data] outside of the list {} lets Power Query access the value inside the Data field, which in this case is a table. You can go back to the previous step (Source) to better understand this navigation.

Test native query
With the target now identified, create a custom step after the navigation step by selecting the fx icon in the formula bar.
Replace the formula inside the formula bar with the following formula, and then select Enter.
= Value.NativeQuery( AdventureWorks2019_Database, "SELECT TOP (1000) *
  FROM [Person].[Address]")
After you apply this change, a warning should appear underneath the formula bar requesting permission to run the native query against your data source.

Select Edit Permission. A new Native Database Query dialog is displayed that tries to warn you about the possibilities of running native queries. In this case, we know that this SQL Statement is safe, so select Run to execute the command.
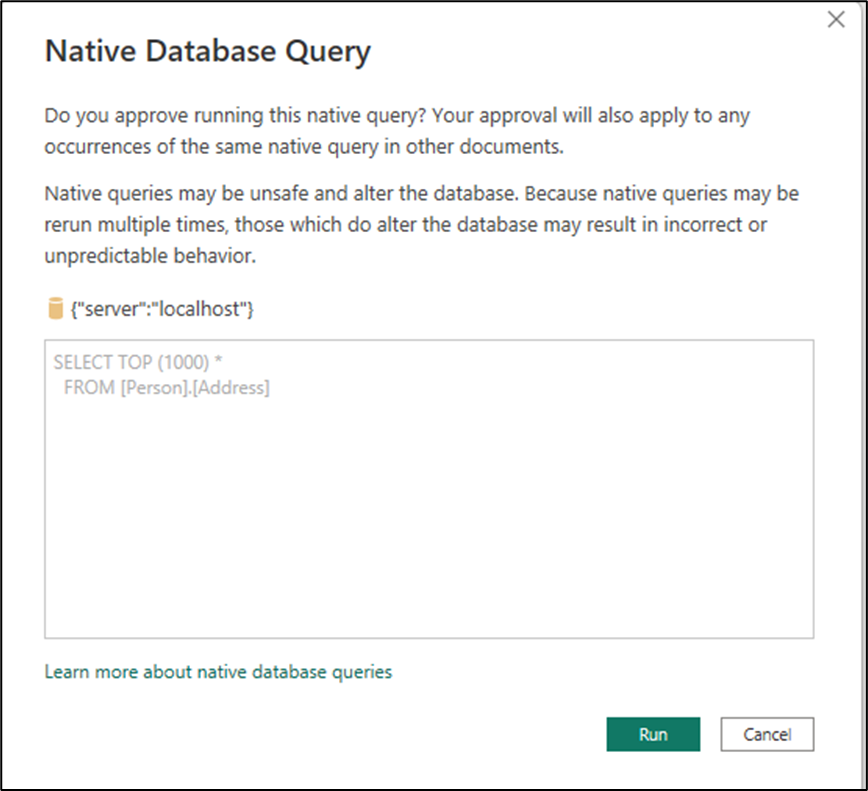
After you run your query, a preview of your query appears in the Power Query editor. This preview validates that your connector is capable of running native queries.

Implement native query logic in your connector
With the information gathered from the previous sections, the goal now is to translate such information into code for your connector.
The way that you can accomplish this translation is by adding a new NativeQueryProperties record field to your connector's Publish record, which in this case is the SqlODBC.Publish record. The NativeQueryProperties record plays a crucial role in defining how the connector will interact with the Value.NativeQuery function.
The new record field consists of two fields:
- NavigationSteps: This field defines how the navigation should be performed or handled by your connector. It contains a list of records that outline the steps for navigating to the specific data you want to query using the
Value.NativeQueryfunction. Within each record, it defines what parameters are required or needed in order for such navigation to reach your desired target. - DefaultOptions: This field helps identify how certain optional parameters should be included or added to the
Value.NativeQueryoptions record. It provides a set of default options that can be used when querying the data source.
NavigationSteps
Your navigation steps can be categorized into two groups. The first contains those values that are entered by the end-user, such as the name of the server or the database, in this case. The second contains those values that are derived by the specific connector implementation, such as the name of fields that aren't displayed to the user during the get data experience. These fields could include Name, Kind, Data, and others depending on your connector implementation.
For this case, there was only one navigation step that consisted of two fields:
- Name: This field is the name of the database that was passed by the end-user. In this case, it was
AdventureWorks2019, but this field should always be passed as-is from what the end-user entered during the get data experience. - Kind: This field is information that isn't visible to the end-user and is specific to the connector or driver implementation. In this case, this value identifies what type of object should be accessed. For this implementation, this field will be a fixed value that consists of the string
Database.
Such information will be translated to the following code. This code should be added as a new field to your SqlODBC.Publish record.
NativeQueryProperties = [
    NavigationSteps = {
        [
            Indices = {
                [
                    FieldDisplayName = "database",
                    IndexName = "Name"
                ],
                [
                    ConstantValue = "Database",
                    IndexName = "Kind"
                ]
            },
            FieldAccess = "Data"
        ]
    }
]
Important
The name of the fields are case sensitive and must be used as shown in the sample above. All information passed to the fields, either ConstantValue, IndexName, or FieldDisplayName must be derived from the connector's M code.
For values that will be passed from what the user entered, you can use the pair FieldDisplayName and IndexName. For values that are fixed or predefined and can't be passed by the end-user, you can use the pair ConstantValue and IndexName. In this sense, the NavigationSteps record consists of two fields:
- Indices: Defines what fields and what values to use to navigate to the record that contains the target for the
Value.NativeQueryfunction. - FieldAccess: Defines what field holds the target, which is commonly a table.
DefaultOptions
The DefaultOptions field lets you pass optional parameters to the Value.NativeQuery function when using the native query capability for your connector.
To preserve query folding after a native query, and assuming that your connector has query folding capabilities, you can use the following sample code for EnableFolding = true.
NativeQueryProperties = [
    NavigationSteps = {
        [
            Indices = {
                [
                    FieldDisplayName = "database",
                    IndexName = "Name"
                ],
                [
                    ConstantValue = "Database",
                    IndexName = "Kind"
                ]
            },
            FieldAccess = "Data"
        ]
    },

    DefaultOptions = [
        EnableFolding = true
    ]
]
With these changes in place, build the connector and load it into Power BI Desktop for testing and validation.
Test and validate the connector
In Power BI Desktop with your new custom connector in place, launch the connector from the Get Data experience. When launching the connector, you'll notice that the dialog now has a long text field with the name Native query and, in parenthesis, it has the required fields for it to work. Enter the same values for the server, database, and the SQL statement that you previously entered when testing the connector.
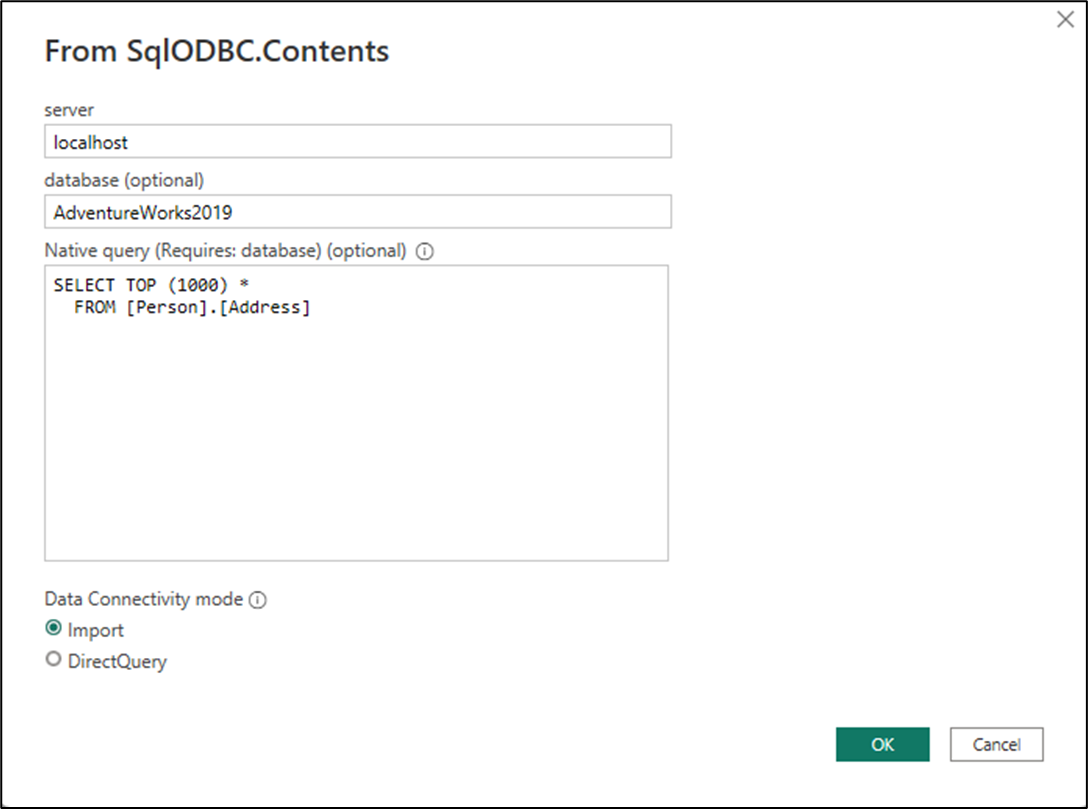
After you select OK, a table preview of the executed native query is shown in a new dialog.
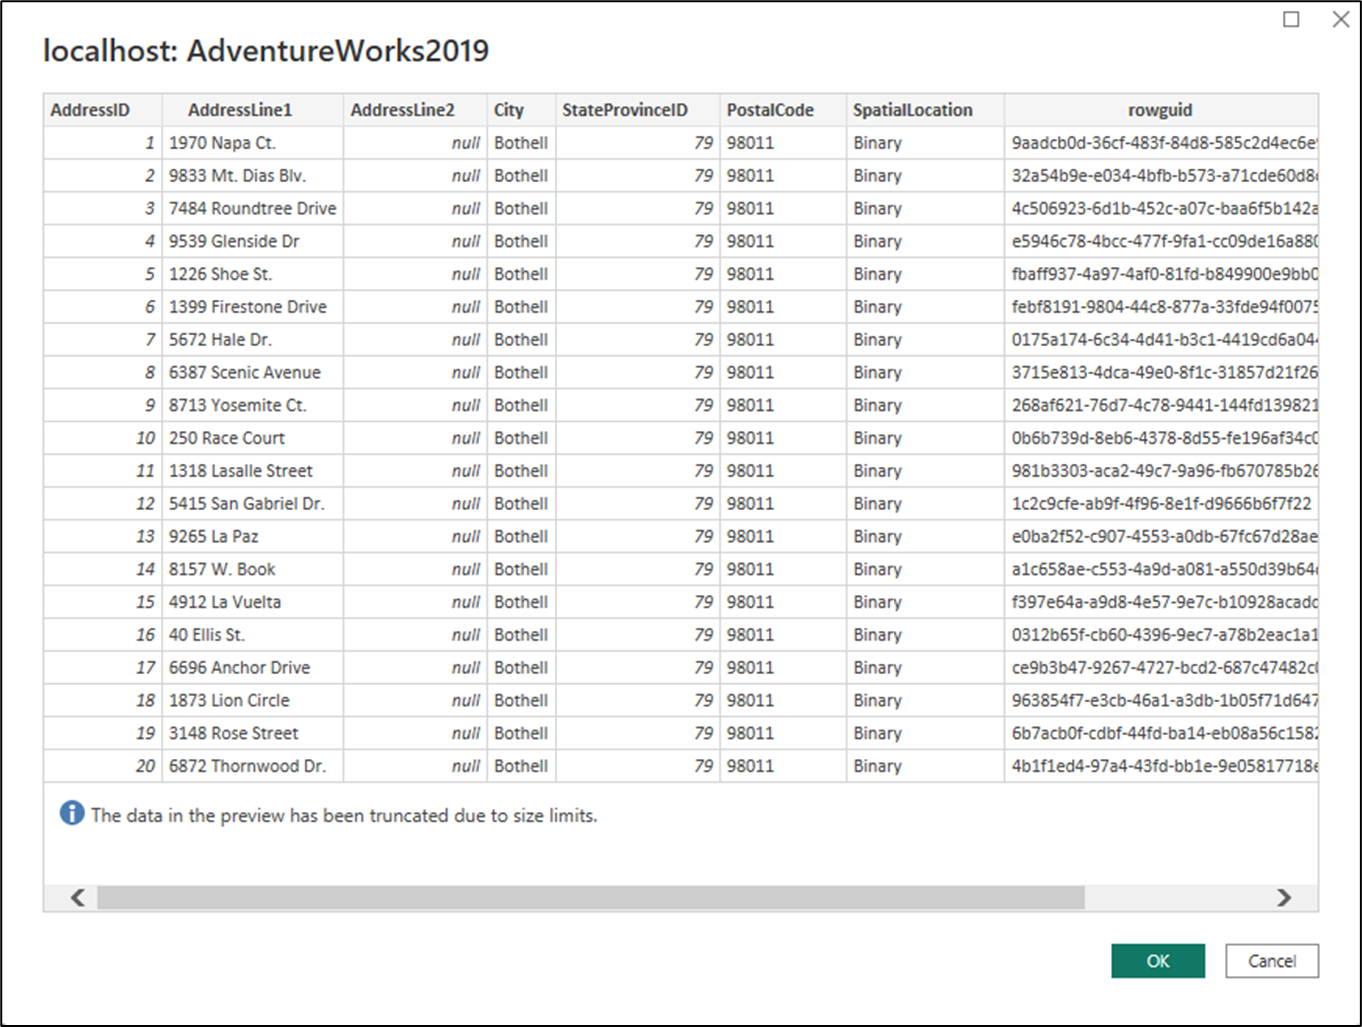
Select OK. A new query will now load inside the Power Query editor where you can do further testing of your connector as required.
Note
If your connector has query folding capabilities and has explicitly defined EnableFolding=true as part of the optional record for Value.NativeQuery, then you can further test your connector in the Power Query editor by checking if further transforms fold back to the source or not.