ALM Accelerator for Power Platform new maker experience
Demo: The ALM Accelerator for Power Platform app new maker experience
Watch the demo video to learn more about the new maker experience in the ALM Accelerator.
Configure new maker settings
The following table describes how to configure the User Functions settings in the ALM Accelerator app to turn on the new maker experience.
| Field | Value | Description |
|---|---|---|
| Import Solutions | Not Allowed | Disallow this function to hide the Import Solution command in the app. |
| Delete Solutions | Not Allowed | Disallow this function to hide the Delete Solution command in the app. |
| Manage Solutions | Allowed | Allow this function to show the Manage Solutions command in the app. |
| Drillthrough Status | Not Allowed | Disallow this function to prevent users from drilling into promote and deploy pipeline runs in the app. |
| Profile Creation | Not Allowed | Disallow this function to prevent users from creating deployment profiles in the app. |
| Profile Updates | Not Allowed | Disallow this function to prevent users from updating—or creating—deployment profiles in the app. |
| Advanced Promote | Not Allowed | Disallow this function to disable the advanced promote functionality. Changes are committed to the user's default branch. |
| Advanced Deploy | Not Allowed | Disallow this function to disable the advanced deploy functionality. Users can select target environments that are enabled for deployment. |
| Bypass Prepare | Not Allowed | Disallow this function to force the user to go through the prepare step during the promotion of a solution. |
| Show All Solutions | Not Allowed | Disallow this function to only show solutions for which the user has a deployment profile in the user settings. |
The following table shows how the User Labels are configured for the new maker experience.
| Field | Description |
|---|---|
| Deploy Solution | Enter a label or set the value to blank to use the default label, DEPLOY SOLUTION. |
| Commit Solution | Enter a label or set the value to SAVE SOLUTION. |
| Import Solution | This button is hidden by the User Functions settings described in the previous table. |
| Delete Solution | This button is hidden by the User Functions settings described in the previous table. |
Walk-through: ALM Accelerator new maker experience
The ALM Accelerator administration app was used to configure the following user experience. The administrator app is installed with the ALM Accelerator. Learn how to use the administration app to configure and share experiences.
Start the ALM Accelerator new maker experience
Select Apps > ALM Accelerator for Power Platform.
Create connections and grant consent when prompted.
If prompted to create an HTTP with Microsoft Entra connection, enter
https://graph.microsoft.comfor both the Base Resource URL and Azure AD Resource URI.Select Create for each connection when prompted.
The first time you open the app, select an environment.
The next time you open the app, it remembers which environment you were working in.
A list of the unmanaged solutions in the environment appears. Depending on your user deployment settings, the following options are available for each solution:
- Save Solution: Saves the current state of the solution into version control so that all changes made to it can be tracked. Deployment pipelines are created as part of the save process.
- Publish Solution: Allows you to request to move the solution across environments.
- Choose a Profile: Allows you to associate a solution with a solution profile. If you're unsure what profile to select, ask your administrator for the name of the profile for your solution.
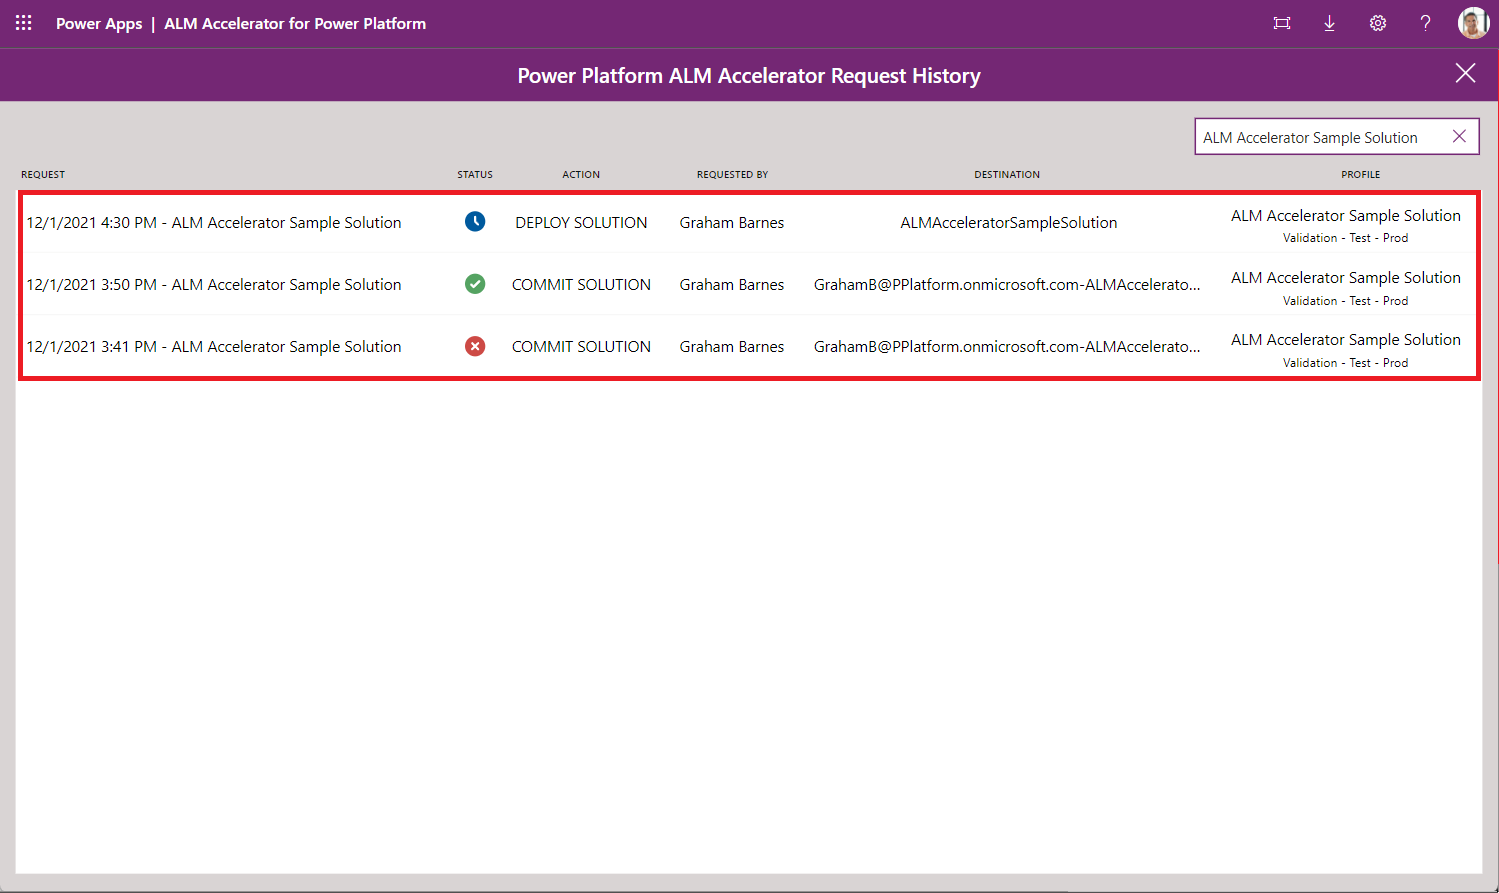
- Request History (>): Lists saves and deployments requested and completed for the solution.
Configure deployment settings
Find your solution in the list and select Choose a Profile. Your selection determines which environments you can deploy the solution to.
Select a profile, and then select Save.
Note
If you don't find a solution profile that suits your needs, ask your administrator to create one for you.
Under the name of the solution, select Configure Deployment Settings.
Configure the following settings:
Deployment Environment List
- The environments in the list are the ones that are specified in the solution profile. They correspond with the environments in which your solution is available after you publish. Select an environment to deploy the solution to.
Connection References
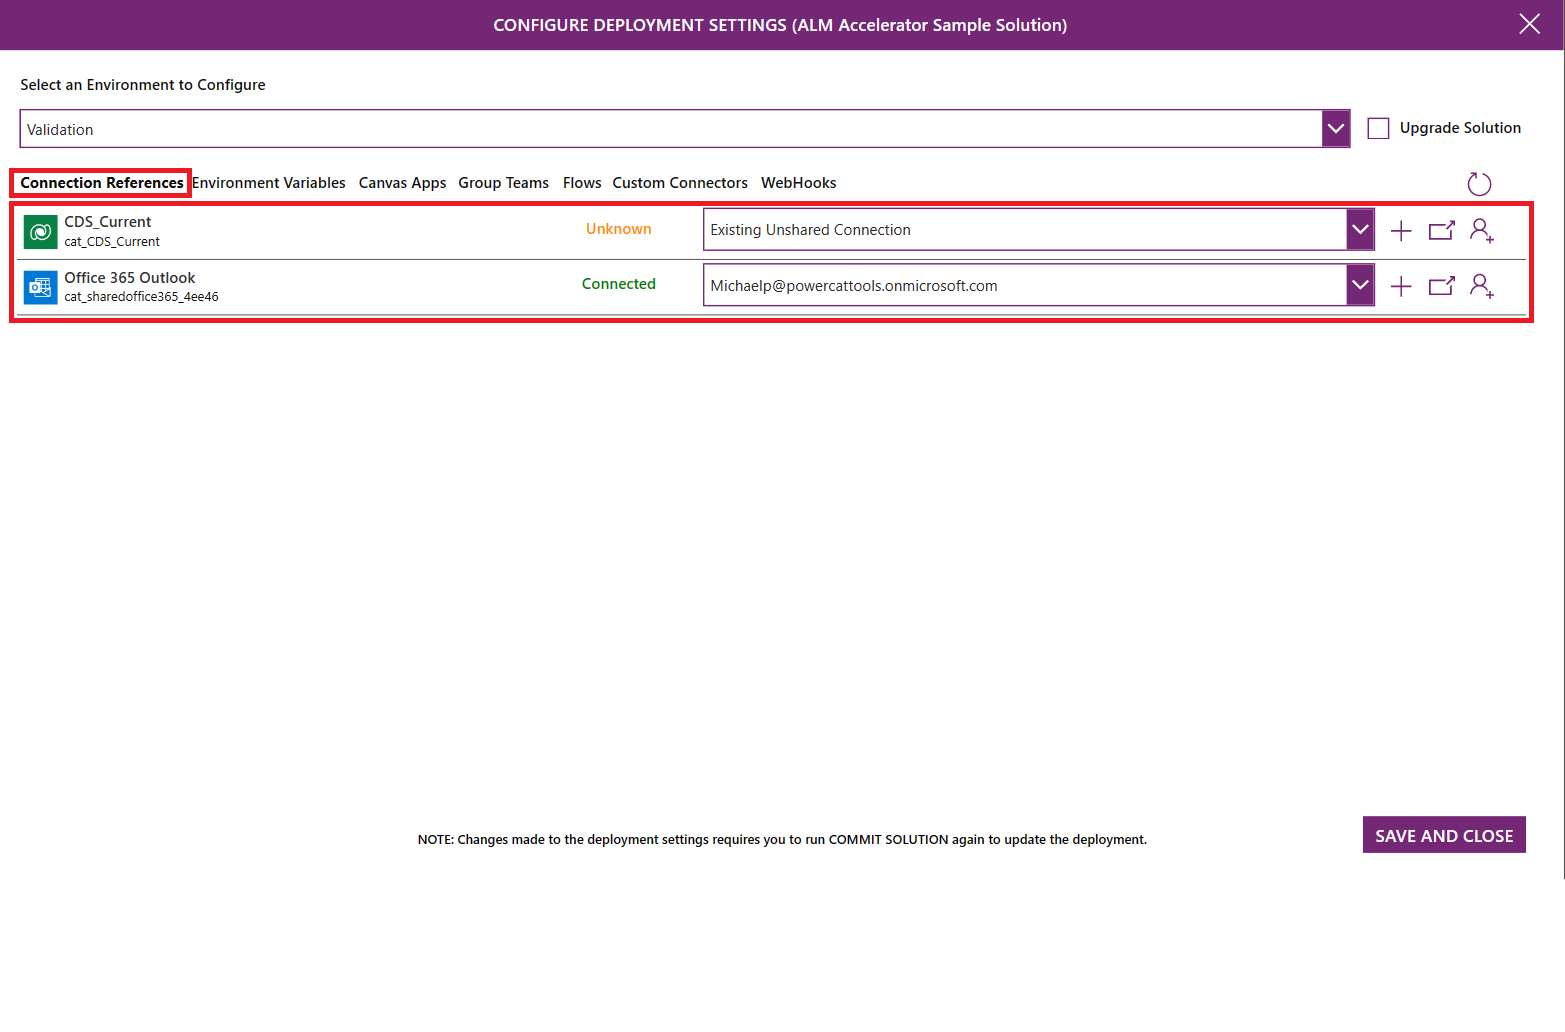
- All the connection references in your solution are listed. Users can create connections in their downstream environments to hook up the connection references in the target environment.
- If you have permissions to create connections in the target environment, the + button is displayed. To create a connection, select +. After you create a connection, select Refresh in the upper-right corner to update the list.
- To select a connection in the target environment, select a connection in the list.
- To open the connection in the target environment, select the connection's name or status.
- If you don't have permission to create connections in the target environment, the + button is disabled. Ask another user to create the connection for you:
- Select Request a Connection.
- Enter the name of the team member you need to create the connection, and then select the user.
- To open the preformatted email, select Send. The preformatted email includes a link for the recipient to create the connection.
Environment Variables
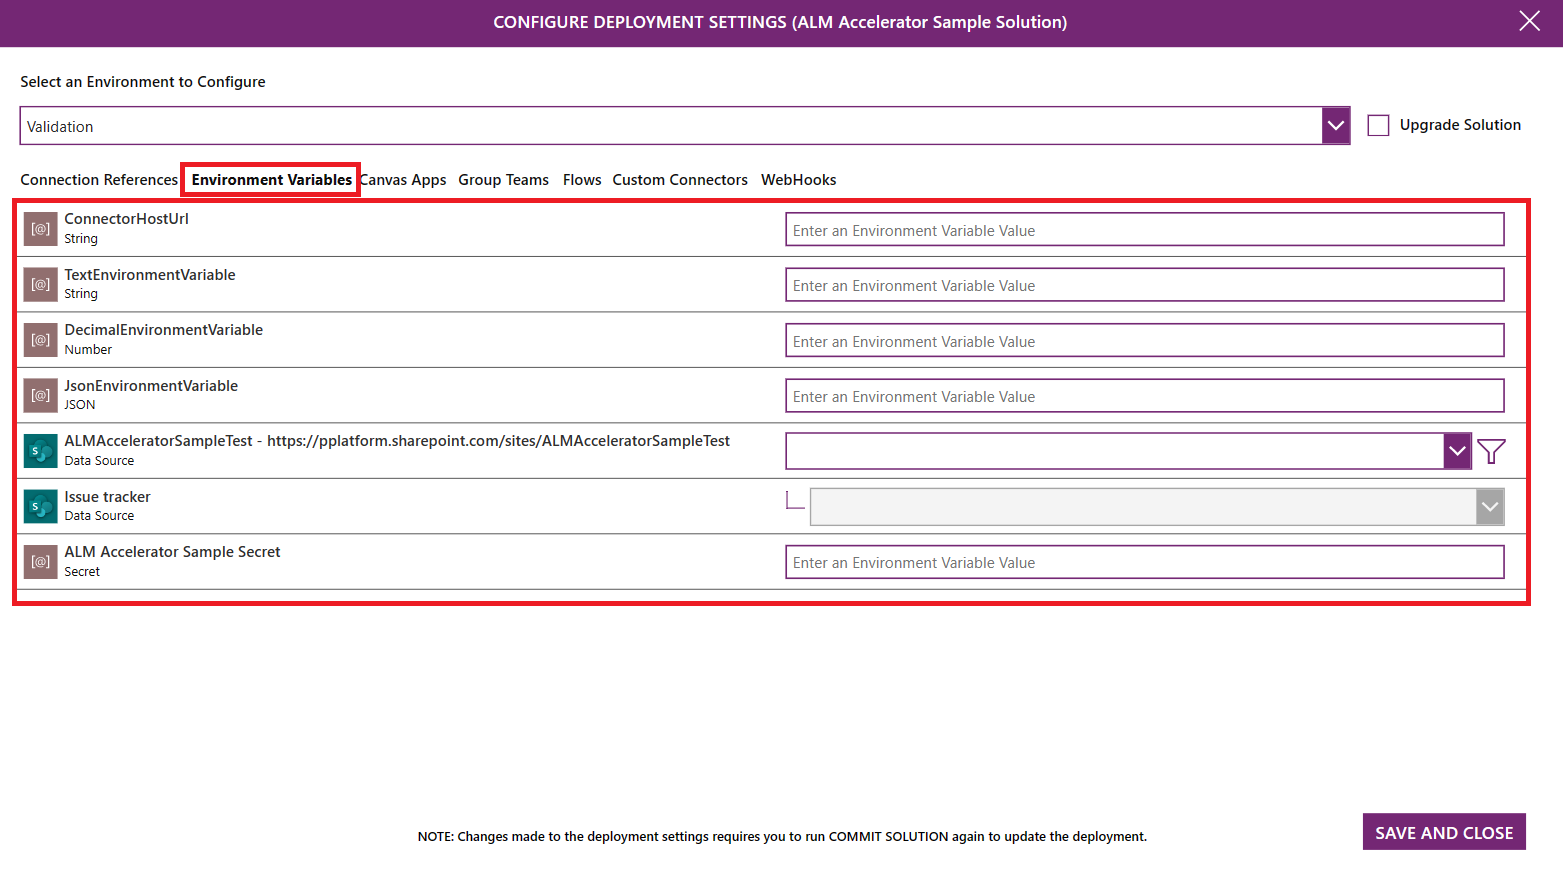
- All the environment variables in your solution are listed. Users can set the value of the environment variables in their downstream environments.
- For standard environment variables like string, number, and JSON, enter the value in the text box to the right of the variable name.
- For data source environment variables, use the dropdown lists to select the appropriate data source to use in the downstream environment.
Canvas Apps
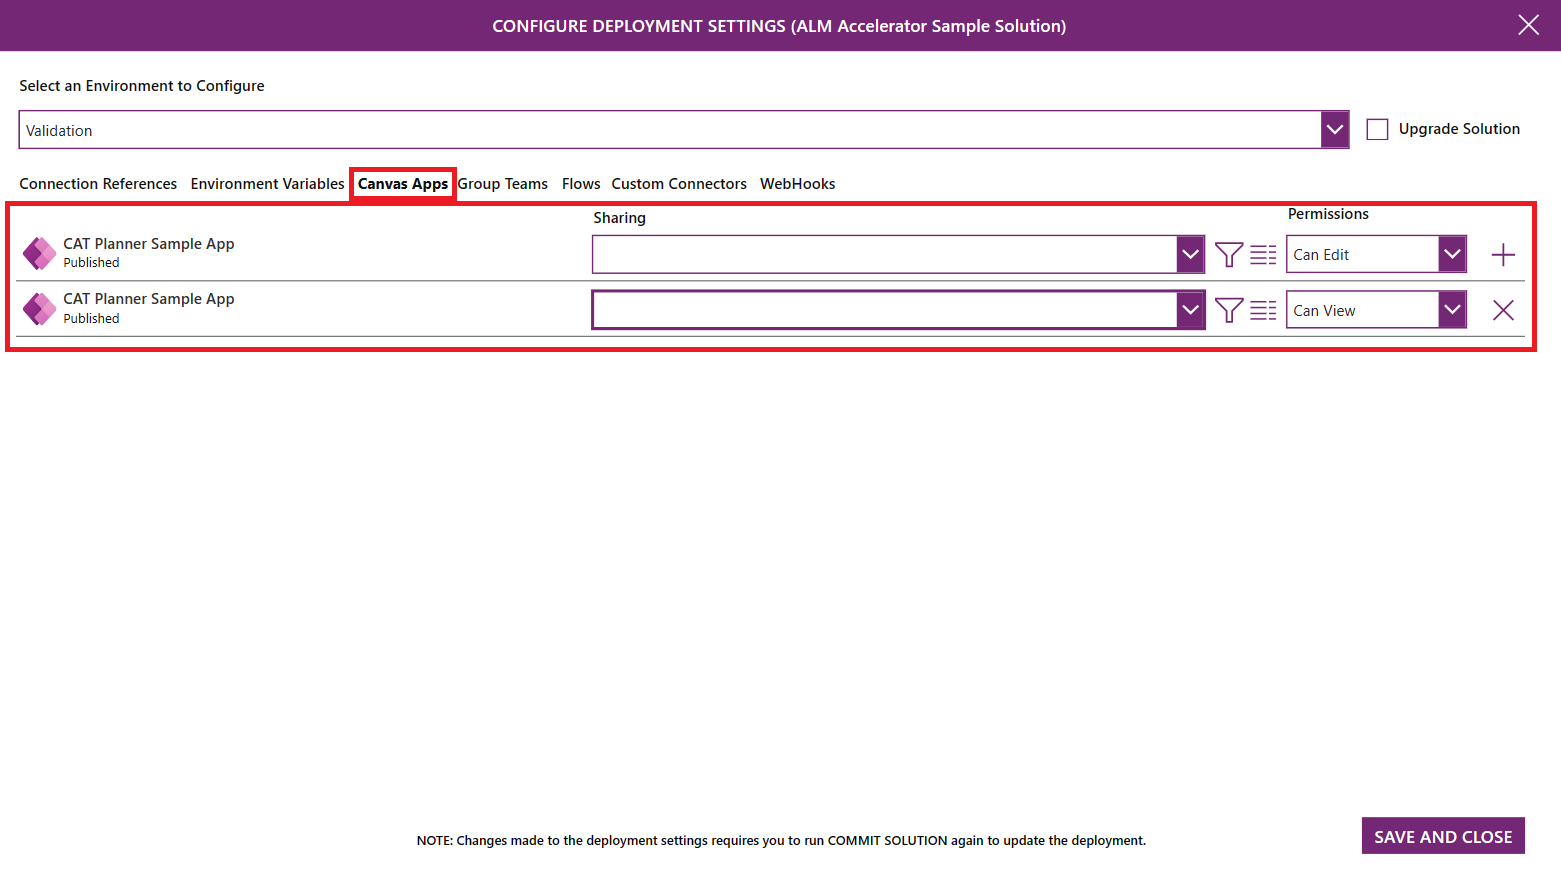
- All the apps in your solution are listed. Users can share them in their downstream environments with a Microsoft Entra group.
- Use the dropdown list to select the Azure AAD group with which you'd like to share the app.
- To view the group details, select Details. A new browser tab opens with a link to the Microsoft Entra group in the Azure portal.
- Use the permissions dropdown list to set the permissions to Can View, Can Edit, or Can View and Share.
Group Teams
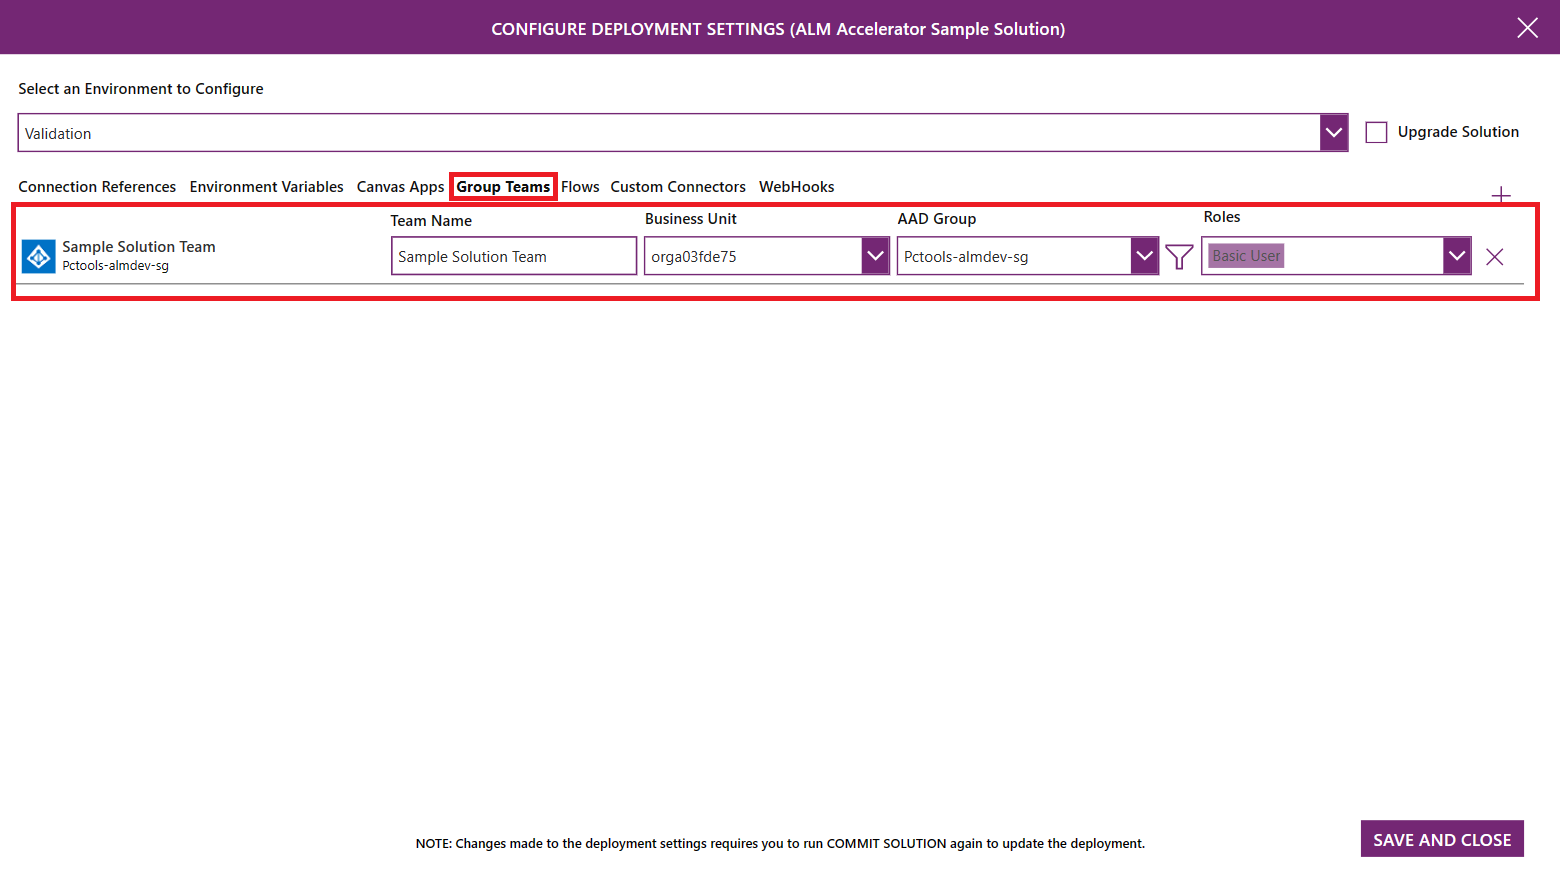
- Dataverse Teams of type AAD Security Group are listed. Users can configure new Group Teams for sharing flows and custom connectors.
- To add a new Group Team configuration, select '+'. Enter a Team Name, select an AAD Group that the team should be linked to, and select Security Roles as required. The list of security roles is based on the roles available in the selected development environment. Add any custom security roles to the solution to make sure they're available in the target environment.
Flows
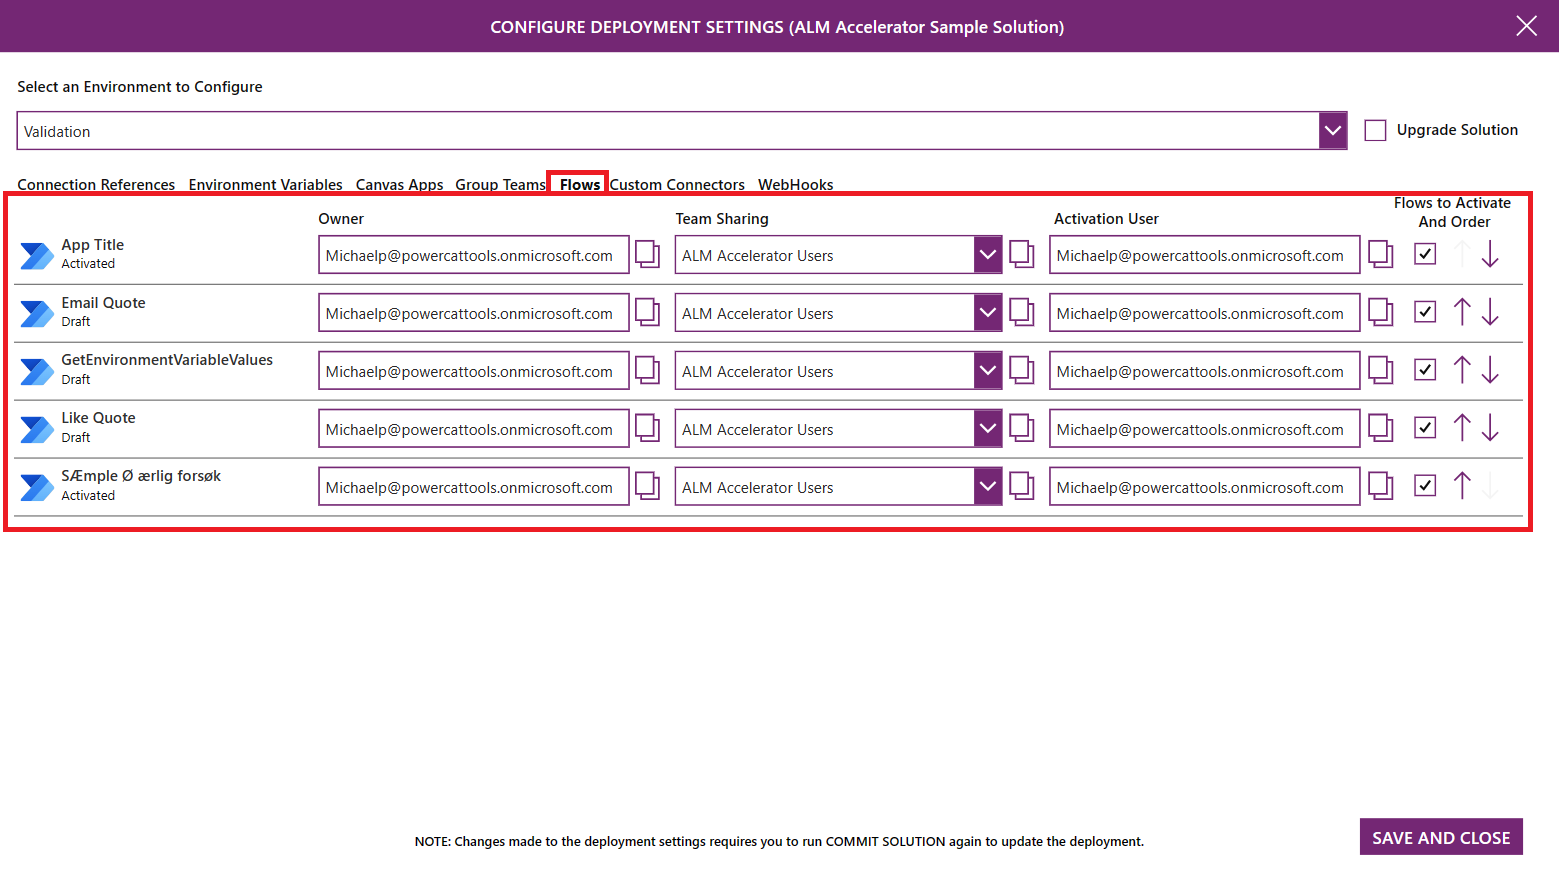
- All the flows in your solution are listed. Users can configure the owner of the flow, Dataverse Team sharing, the user with which to activate the flow, whether a flow should be activated or not, and the sequence of flow activation in their downstream environments.
- To view the flow, select its name. The flow definition opens in a new browser tab.
- Use the Owner list to select a Dataverse user to own the flow in the downstream environment.
- Use the Team Sharing list to select the Dataverse Team to share the flow to. The list includes Dataverse Teams in the downstream environment and Dataverse Teams that are configured in the Group Teams settings.
- Use the Activation User list to select the user to activate the flow.
- In the Flows to Activate and Order column, select the checkbox to indicate whether a flow should be activated or not. Use the up and down arrows to place the rows in the order in which they should be activated. The sequencing of activation is particularly useful if the solution includes parent and child flows, where child flows must be activated before parent flows.
Custom Connectors
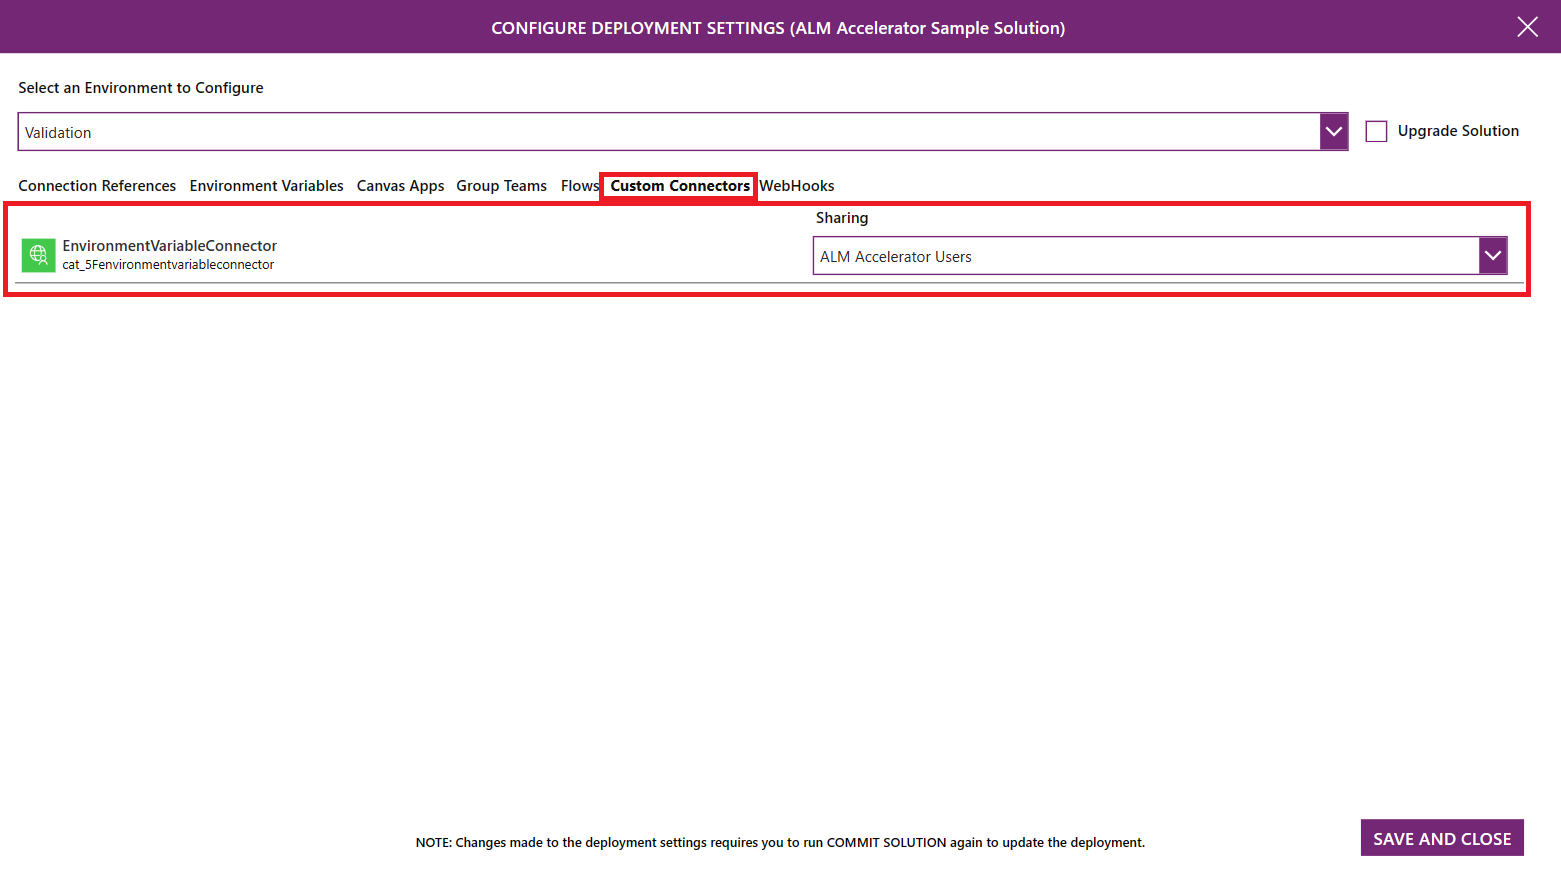
- All the custom connectors in the solution are listed. Users can configure sharing of custom connectors to Dataverse Teams in their downstream environments.
- Use the Sharing list to select the Dataverse Team to share the custom connector to. The list includes Dataverse Teams in the downstream environment and Dataverse Teams that are configured in the Group Teams settings.
Save and deploy the solution
Publish any changes to your app.
Select Save Solution to push your changes to Git.
Be sure to publish any app changes before you start a save.
In the background, the app pushes your change to version control, automatically creating a branch. Repeat the pushes as you make changes to your solution to preserve your change history.
During this step, you're asked to configure the deployment settings.
A waiting indicator appears when the push begins. When the push succeeds, a checkbox appears. A red X indicates the push failed.
When you're ready to deploy your changes across other environments, select Deploy Solution.
Enter a Title and Notes for the pull request that's created in Azure DevOps.
Select an Environment to deploy the solution to.
Depending on the Solution Profile configuration, the application either creates a pull request that needs to be completed in Azure DevOps or triggers a pipeline that someone must approve before it can run and complete the publishing.
When the progress indicator appears, it means the deployment has started. Select the right angle bracket (>) to visualize the request history.
