Get started managing the Employee Kudos app
Follow the steps to create custom Kudos types, opt out users, and localize the application strings.
Create custom Kudos types
To add Kudos types or badges, follow these steps:
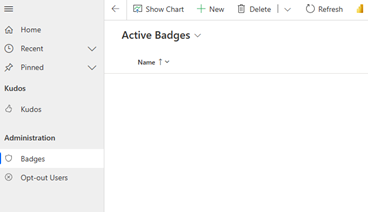
Start the Kudos Administration app and select Badges under Administration.

Select + New on the top toolbar and fill out the Name, SubTitle, and Sort Order for the new badge.
Select Save. Once done, you can associate an image with the badge. Kudos is a visual experience, so it's important to assign an image to each badge.
Repeat the process until you have all the types of Kudos that you want to be available in the experience.
Opt out users
If a user doesn't want to be part of the program, you can add them to the opt-out list. To add a user to the opt-out list, follow these steps:
Start the Kudos Administration app.
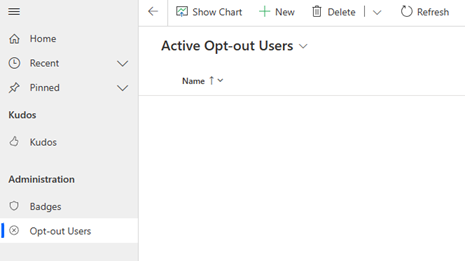
Select Opt-out Users under Administration.

Select + New on the top toolbar and fill out the form.
Select Save.
The user is no longer eligible to receive Kudos in the app and a background flow deletes all previous Kudos the user received.
Support more languages
You can localize all the strings in the Employee Kudos app to support the diverse set of languages that may be spoken at your organization. The app contains default strings for all text, but checks to see if there's a localized version in the Employee Experience Localization table. The table is included in the Employee Experience base solution that gets installed alongside the Kudos solution. The Employee Experience base solution and the Kudos solution are accessed together from AppSource.
The Kudos Localization Data Import instructions guide you through importing all of the English localization strings into the Employee Experience Localization table. You'll also get a full list of English values that you can then use as a reference to do your localization into other languages.
To localize app strings, users must have the Employee Experience Localizer security role assigned to them by a Power Platform admin. Once assigned, the user takes these steps:
Go to the Employee Experience Admin app.
Select + New.

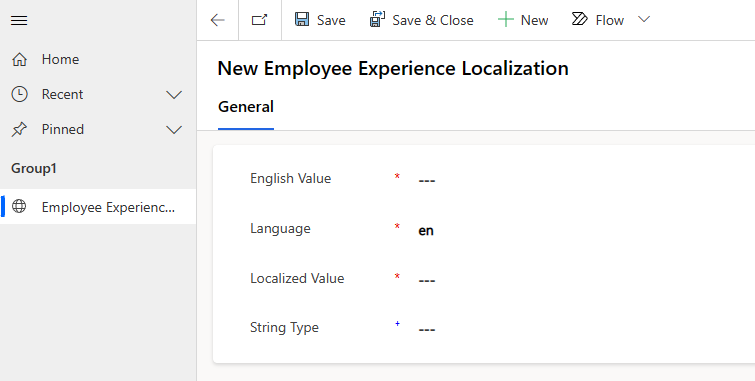
Fill out the form.
- English Value is the text in the app that you want to replace.
- Language is the language you want to provide a localized value for.
- Localized Value is the translated text.
- String Type is the type of string you're replacing. This field is optional.
Select Save & Close.