Install and set up the SAP Setup Assistant
As a Power Platform admin, you install, set up, and deploy the SAP Setup Assistant for your organization. This article covers the following steps:
Step 1: Create connections
Cloud flows need specific connection references to work correctly. Connection references are included in the solution, but connectors often need to be set up manually. You need to set up seven new connections for the SAP Setup Assistant app.
It's best to create the connections before you import the solution. If you create the connections during import, you have to jump between browser windows.
Go to Power Apps.
Select the target environment where you want to install the SAP Setup Assistant.
Go to Connections and select + New Connection to create the connections that are not already set up in your target environment:
Learn how to manage connections in canvas apps.
Step 2: Install SAP Setup Assistant from AppSource
AppSource is a Microsoft digital storefront. Take these steps to go through the AppSource install process:
Go to the SAP Setup Assistant on AppSource and select Get it now.
In the Install SAP Setup Assistant window in the Power Platform admin center, select the developer environment that you prepared.
Agree to the Terms and Privacy statements when prompted.
Select Install to install one solution in your environment:
- SAP Setup Assistant
The installation may take several minutes. Before proceeding with next step, find the SAP Setup Assistant from the list of apps and make sure the template is Installed.
Step 3: Update Connection References
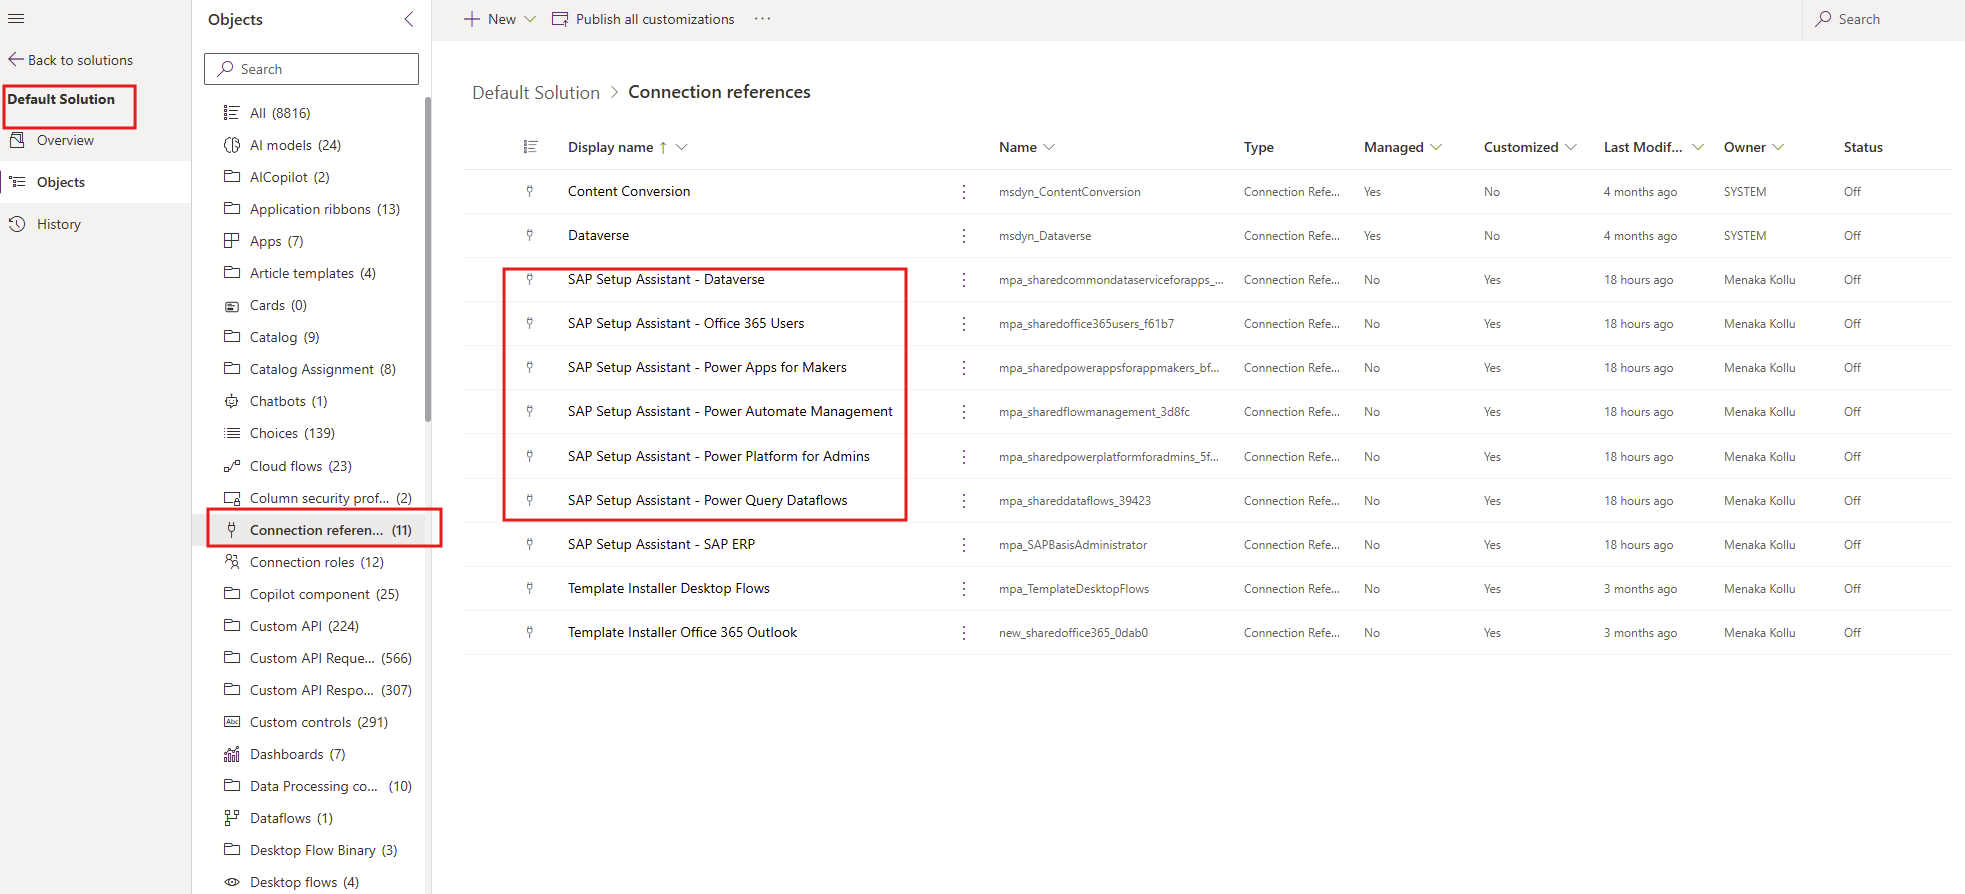
Six connection references are imported as part of the solution. In order for the cloud flows to run, you need to update each connection reference with the connections created in step one.
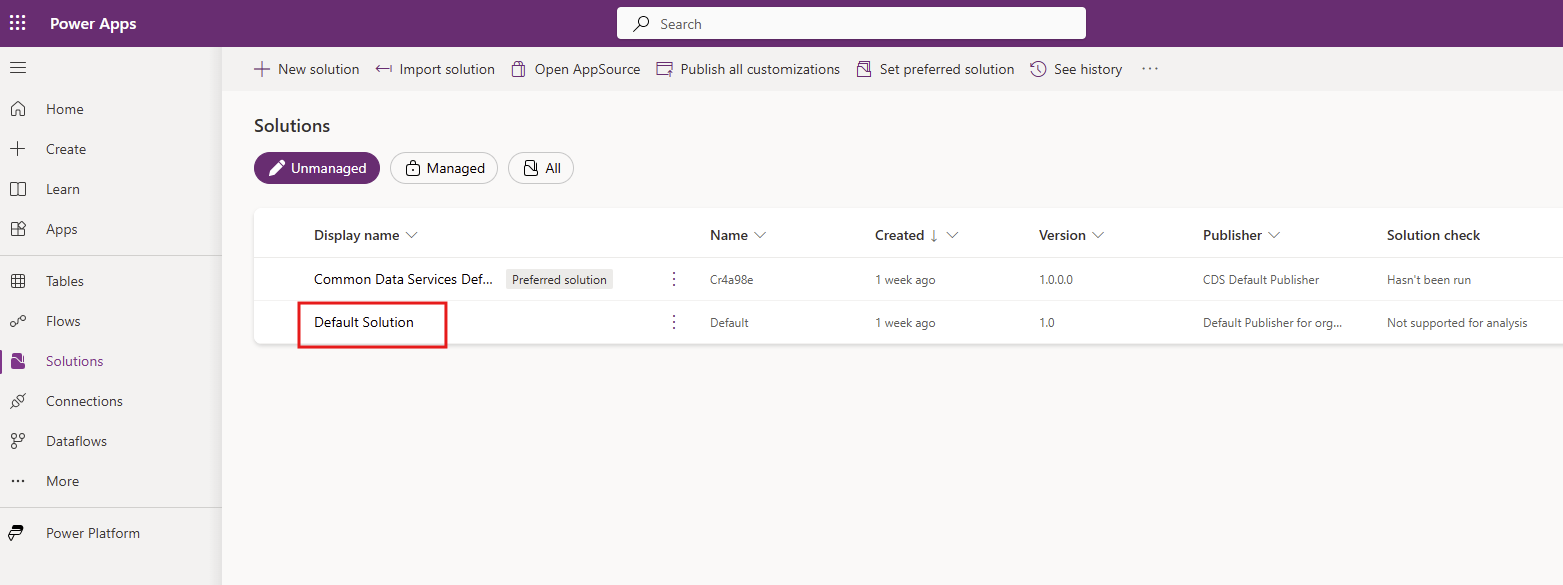
Go to the solution, find the Default Solution in your environment and open it.
Select Connection References from the list of the Objects in the left pane.
Select each Connection References from the list:
SAP Setup Assistant - Dataverse
SAP Setup Assistant - Office 365 Outlook
SAP Setup Assistant - Office 365 Users
SAP Setup Assistant - Power Apps for Makers
SAP Setup Assistant - Power Automate Management
SAP Setup Assistant - Power Platform for Admins
SAP Setup Assistant - Power Query Dataflows
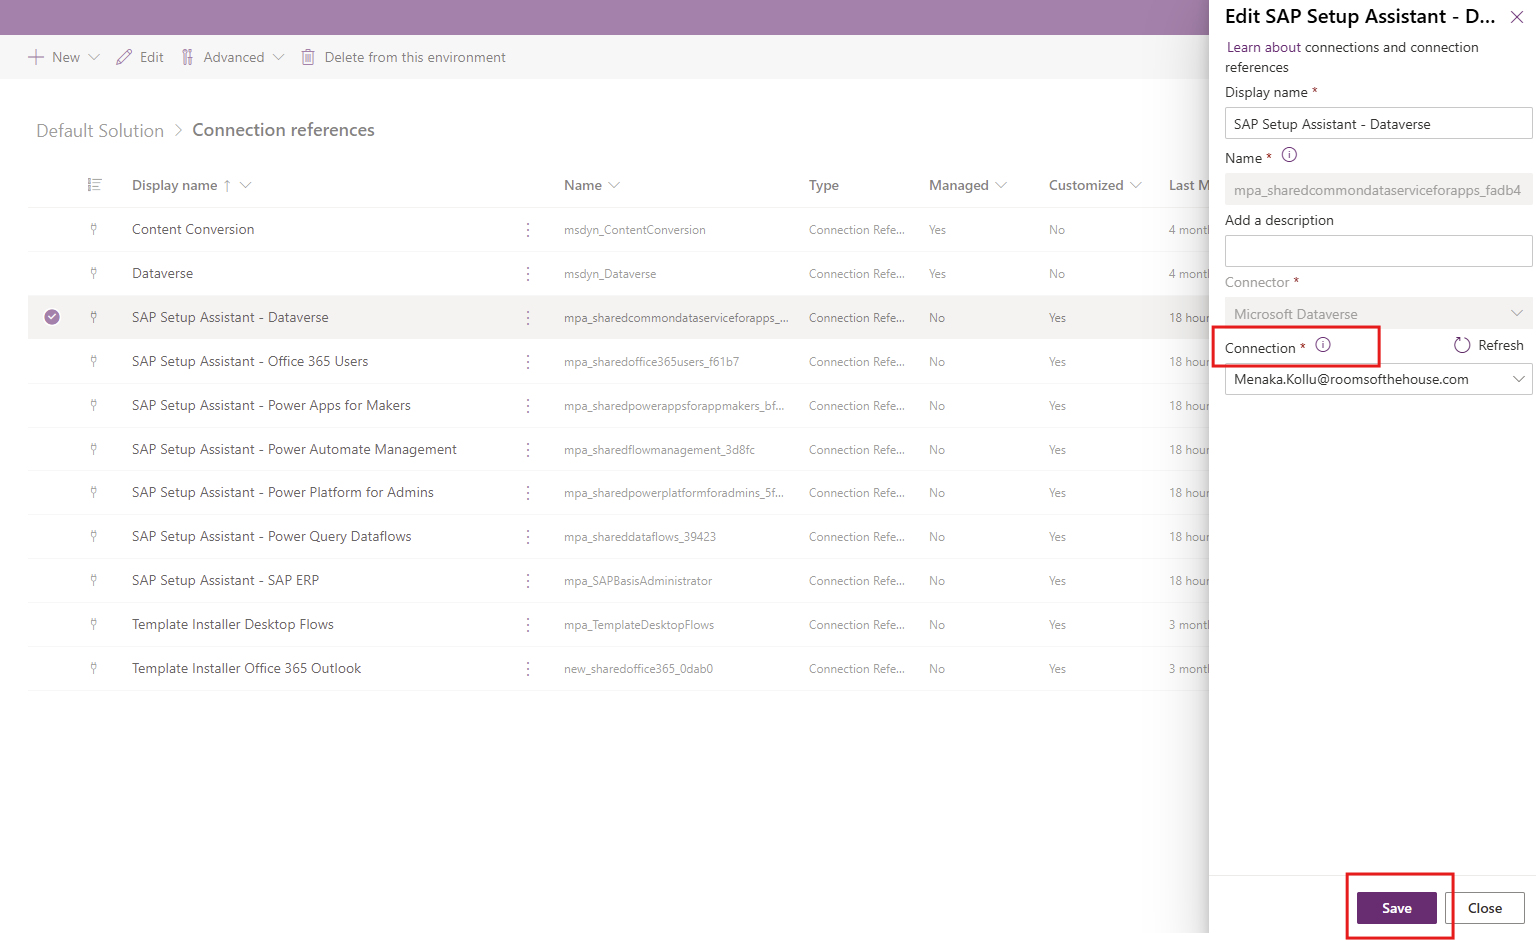
For each connection :
Select the Connection Reference.
Select the Connection you created in step two from the Connection dropdown.
Save the changes.
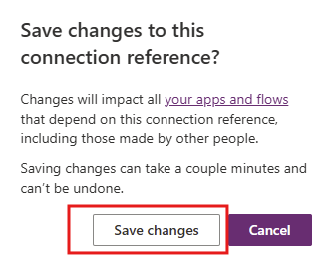
A pop-up will be prompted for confirmation, select Save changes.
Step 4: Turn on cloud flows
Open the newly installed SAP Setup Assistant and verify that the eight cloud flows are set to the On status.If they aren't turn them On
Select Solutions on the left pane
Go to the Managed Solutions list, Select the SAP Setup Assistant
Select Cloud flows(8) on the left pane
Check for the Status column
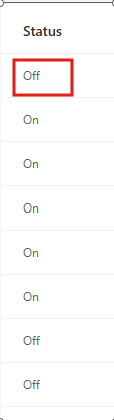
Navigate into the cloud flows that have Status="Off"
Select Turn on on the command bar.
Step 5 : Use the SAP Setup Assistant
You are now ready to use the SAP Setup Assistant canvas app, installed as part of the SAP Setup Assistant solution.
Tip
Go to the Templates-for-Power-Platform GitHub project site to log your questions or issues and get support for the SAP Setup Assistant template.
Learn more about the SAP Setup Assistant solution.