Add a language to a report in Translations Builder
When you open a .pbix project in Translations Builder for the first time, the translation grid displays a row for each unhidden table, measure, and column in the project's underlying data model. The translation grid doesn't display rows for data model objects in the data model that are hidden from the report view. Hidden objects aren't displayed on a report and don't require translations.
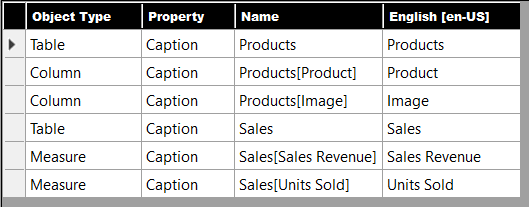
The following screenshot shows the starting point for a simple data model before it's been modified to support secondary languages.
Note
If you haven't installed Translations Builder yet, see Create multiple-language reports with Translations Builder.
If you examine the translation grid for this .pbix project, you can see the first three columns contain read-only columns used to identity each metadata translation. Each metadata translation has an Object Type, a Property, and a Name. Translations for the Caption property are always used. You can add translations for the Description and DisplayFolder properties if necessary.
The fourth column in the translation grid always displays the translations for the data model's default language and locale, which in this case is English [en-US].

Note
Translations Builder makes it possible to update the translations for the default language. Use this technique sparingly. It can be confusing because translations for the default language don't load in Power BI Desktop.
Add languages
Translations Builder provides an Add Language option to add secondary languages to the project's data model.
Translations Builder doesn't add metadata translations for a specific language. Instead, it adds metadata translations for a culture name that identifies both a language and a locale. For more information, see Use locale values in multiple-language Power BI reports.
Translations Builder abstracts away the differences between a language and a culture name to simplify the user experience. Content creators can think in terms of languages instead of culture names.
To add one or more secondary languages, follow these steps.
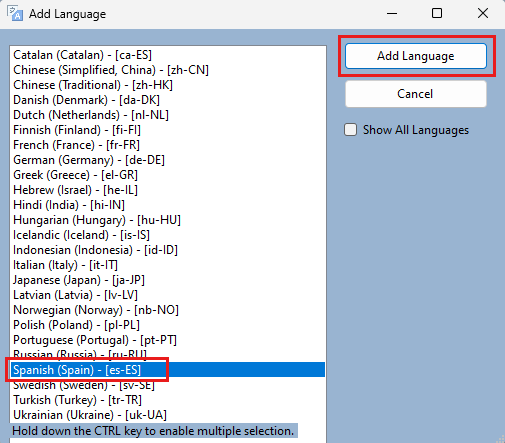
Select Add Language to display the Add Language dialog box.
Select a language in the list or use Ctrl to select multiple languages.
Select Add Language.

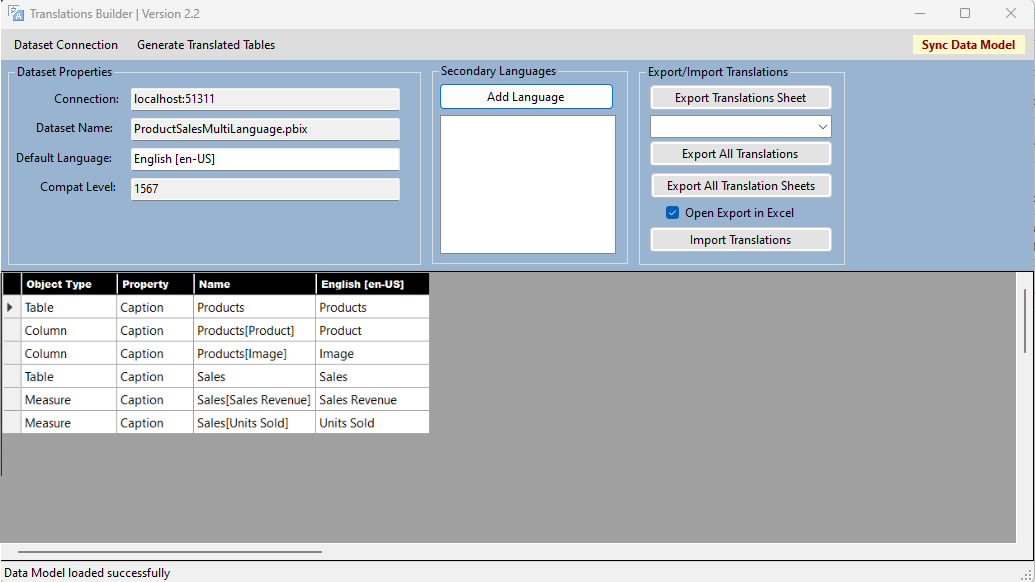
The added language or languages now appear in the Secondary Languages list.
In Power BI Desktop, select Save.
Important
Translations Builder can modify the data model loaded in memory, but it can't save the in-memory changes back to the underlying .pbix file. Always return to Power BI Desktop and select the Save command after you add languages or create or update translations.
Adding a new language adds a new column of editable cells to the translations grid.
If content creators speak all the languages involved, they can add and update translations for secondary languages directly in the translation grid with an Excel-like editing experience.
Test translations in the Power BI service
You can't verify your multiple-language work in Power BI Desktop. Instead, you must test your work in the Power BI service in a workspace associated with a Premium capacity. After you add translation support with Translations Builder, follow these steps:
In Power BI Desktop, save changes to the underlying .pbix file.
In the Home ribbon, select Publish.
In the Publish to Power BI dialog box, highlight a workspace and then choose Select.
When the publishing finishes, select the link to open the project in the Power BI service.
After the report loads with its default language, select the browser address bar and add the following language parameter to the report URL.
?language=es-ES
When you add the language parameter to the end of the report URL, assign a value that is a valid culture name. After you add the language parameter and press Enter, you can verify that the parameter has been accepted by the browser as it reloads the report.
If you forget to add the question mark (?) or if you don't format the language parameter correctly, the browser rejects the parameter and removes it from the URL. After you correctly load a report using a language parameter value of es-ES, you should see the user experience for the entire Power BI service UI change from English to Spanish.
The report also displays the Spanish translations for the names of columns and measures.
Implement multiple-language workflow
After you test your work and verify that the translations are working properly, you can store the .pbix file in a source control system such as GitHub or Azure Repos. This approach can be part of an application lifecycle management (ALM) strategy where support for secondary languages and translations evolves over time.
As you begin to work with secondary languages and translations to localize a .pbix project, follow the same set of steps:
- Make changes in Power BI Desktop.
- Publish the .pbix project to the Power BI service.
- Test your work with a browser in the Power BI service using the language parameter.
- Repeat these steps until you complete all the translations.
Embed Power BI reports using a specific language and locale
If you're developing with Power BI embedding, you can use the Power BI JavaScript API to load reports with a specific language and locale. This task is accomplished by extending the config object passed to powerbi.embed with a localeSettings object that contains a language property as shown in the following code.
let config = {
  type: "report",
  id: reportId,
  embedUrl: embedUrl,
  accessToken: embedToken,
  tokenType: models.TokenType.Embed,
  localeSettings: { language: "de-DE" }
};

let report = powerbi.embed(reportContainer, config);


