Regenerate the SAS key used in HTTP trigger flows
This article provides instructions on how to regenerate the SAS (Shared Access Signature) key used in HTTP trigger flows in Power Automate. Regenerating the SAS key is essential for maintaining the security and functionality of your HTTP trigger flows. Over time, the SAS key might become compromised or need to be updated to adhere to security policies. By regenerating the key, you ensure that only authorized requests can trigger your flow, which protects your data and processes from unauthorized access.
Step 1: Identify the SAS string being used by your flow
Identifying the SAS string being used by your flow is crucial because it allows you to confirm that the key regeneration process was successful. By noting the current SAS string, you can compare it with the new string after regeneration to ensure that the operation was executed correctly. This step helps in validating that the flow is using the updated key, which is essential for maintaining the security and functionality of your HTTP trigger flows.
To identify the SAS string being used by your flow:
Sign in to Power Automate.
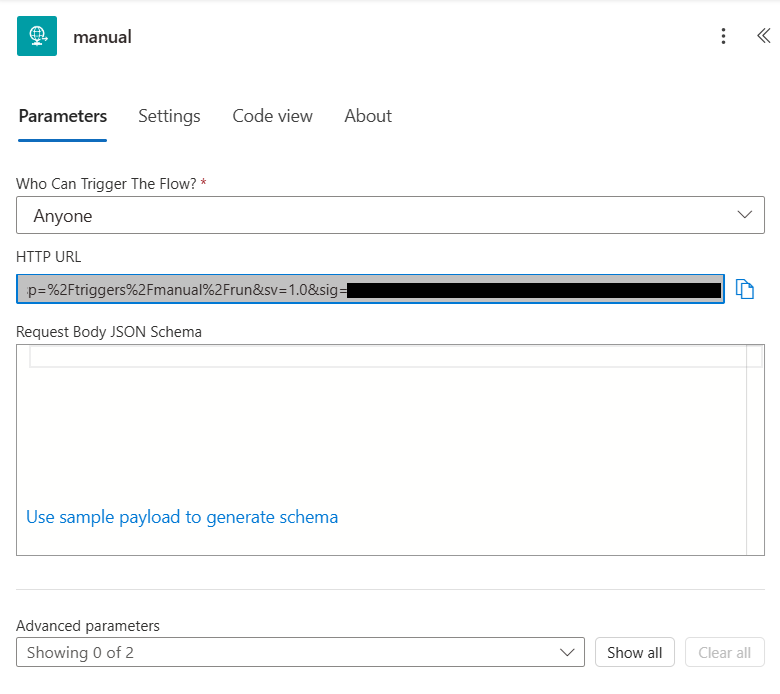
Open your flow in the designer.

Copy the HTTP trigger URL.
https://<region>/workflows/<workflowid>/triggers/manual/paths/invoke?api-version=2016-06-01&sp=%2Ftriggers%2Fmanual%2Frun&sv=1.0&sig=<value>Make a note of the URL string that starts with
sig=.Once the key is regenerated, this value changes and serves as a confirmation that the execution of the following steps was successful.
Step 2: Create the request to regenerate the string
Creating the request to regenerate the SAS string is essential for maintaining the security and functionality of your HTTP trigger flows. This multi-step process requires using the browser tools. The steps in this section use Microsoft Edge browser.
To create the request to regenerate the string:
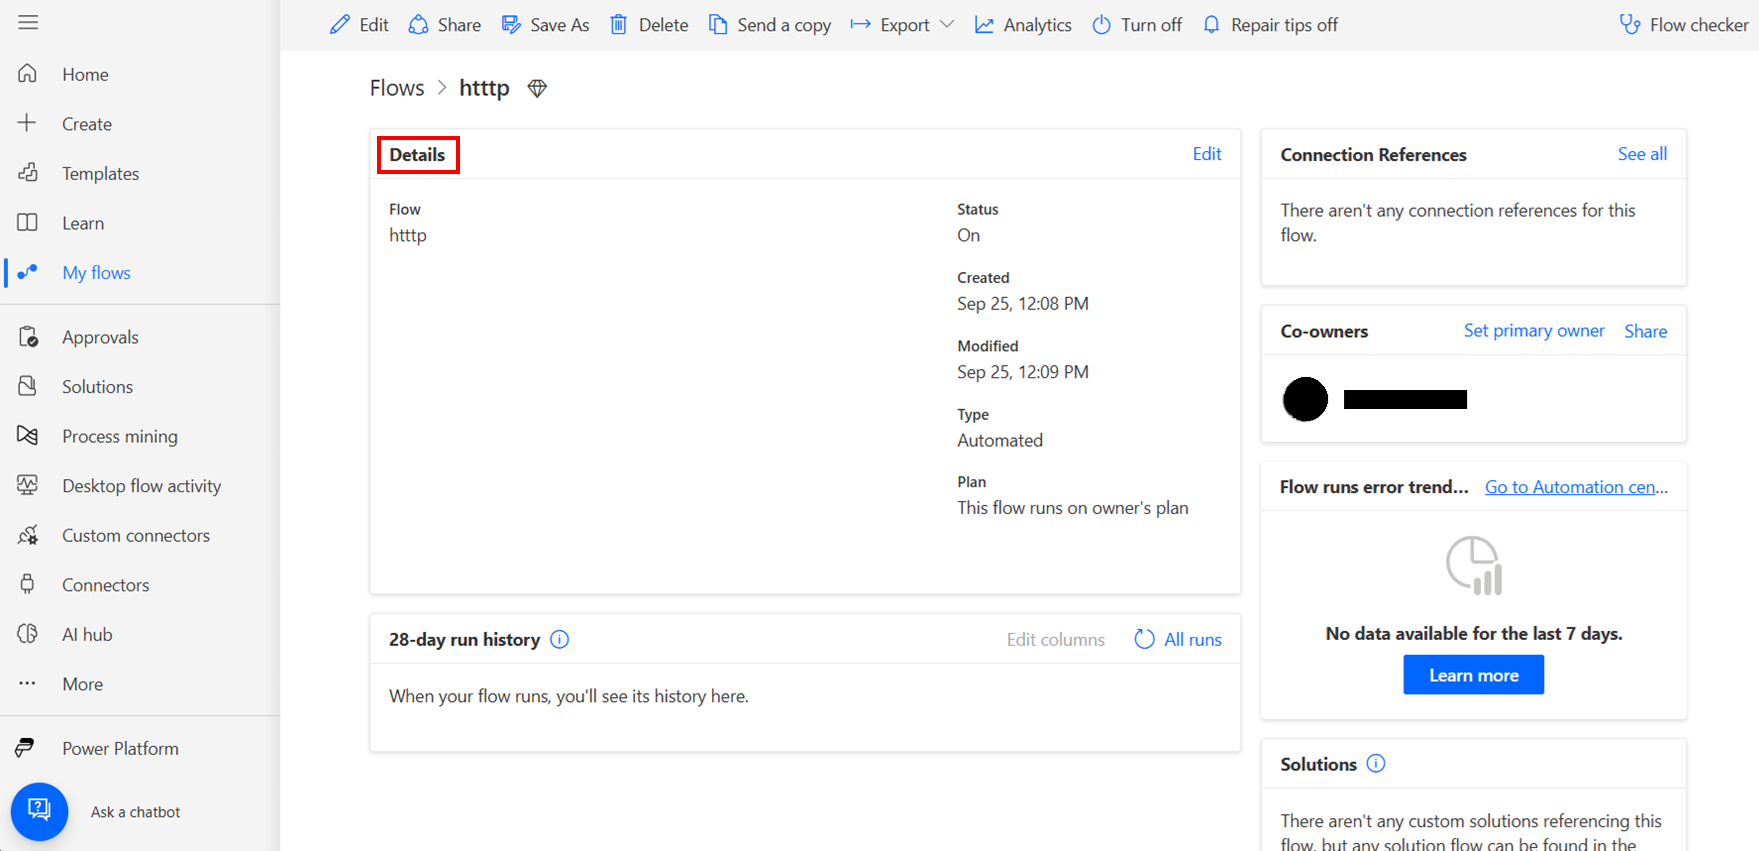
Navigate to the flow Details page (not the designer page).

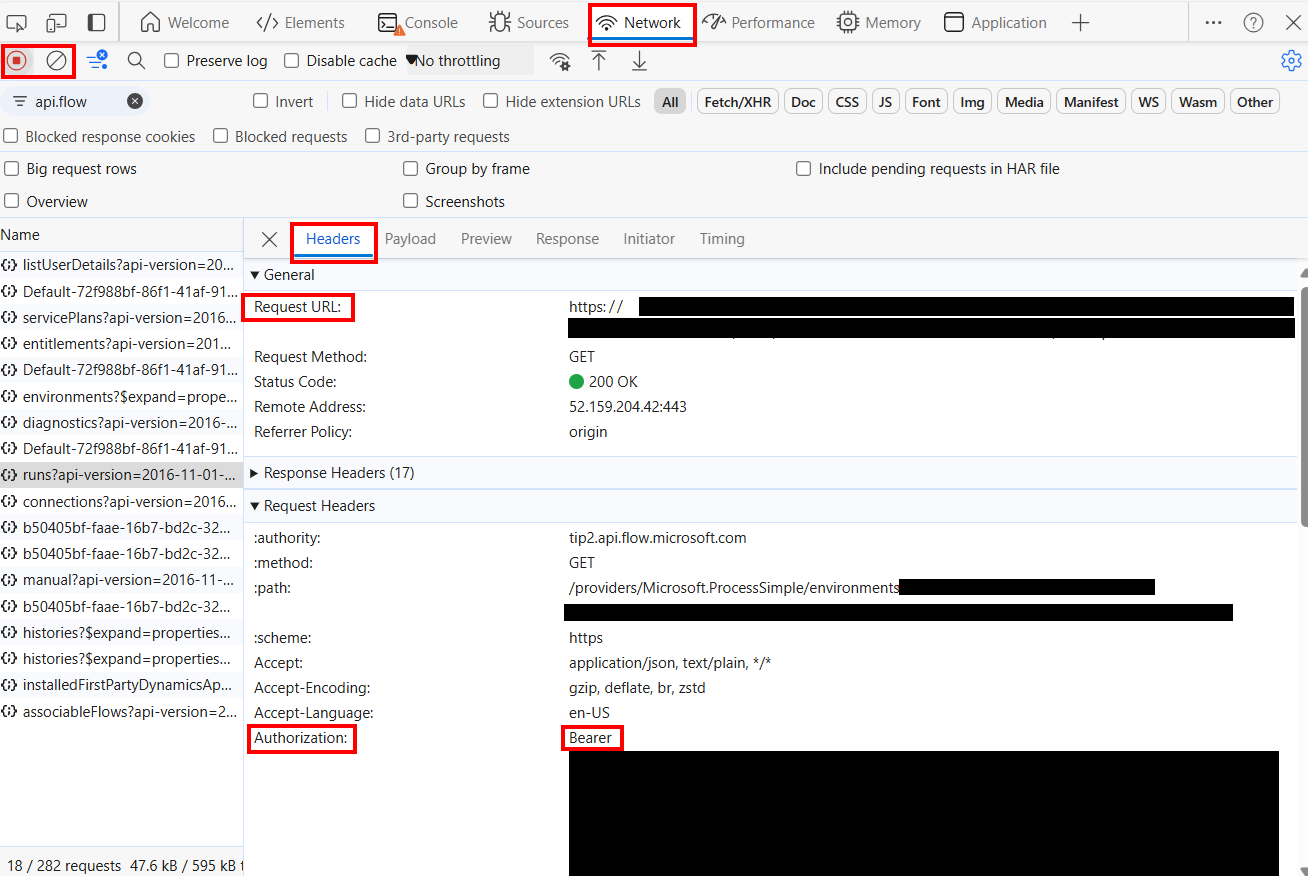
In the Windows Settings menu, select More tools > Developer tools and navigate to the Network tab.
Select Clear network log (or select Ctrl + L).
Select Record network log (or select Ctrl + E).
Refresh the page by selecting Ctrl + R.
Filter the items with api.flow and select the request that starts with runs?api-version=.

From the Network tab > Headers subtab, copy the Request URL to a text editor.
Replace the word runs with regenerateAccessKey.
From the Network tab > Headers subtab, copy the Authorization header. Make sure you don't include the next header in your selection.
Copy the following text in your text editor:
fetch('<regenerateAccessKeyUrl>', {
  method: 'POST',
  headers: {
    'Content-type': 'application/json; charset=UTF-8',
   'Authorization': '<Authentication Header>'
  }
})
.then(result => result.json())
.then(console.log)
- In the fetch command, replace
<regenerateAccessKeyUrl>with the request URL you constructed in Step 8 in your text editor. - Replace
<regenerateAccessKeyUrl>with the Authorization header you copied in Step 9 to your text editor.
Congratulations! You're now ready with the command to regenerate the key.
Step 3: Execute the regenerate request
When you execute the regenerate request, the SAS key associated with your HTTP trigger flow is regenerated. This means that a new key is created, and the old key is invalidated. The new key is reflected in the sig= parameter of the HTTP trigger URL. This ensures that only requests with the new key can trigger the flow, enhancing the security of your automation.
To execute the regenerate request:
Copy the code snippet from Step 2 that you constructed in the text editor.
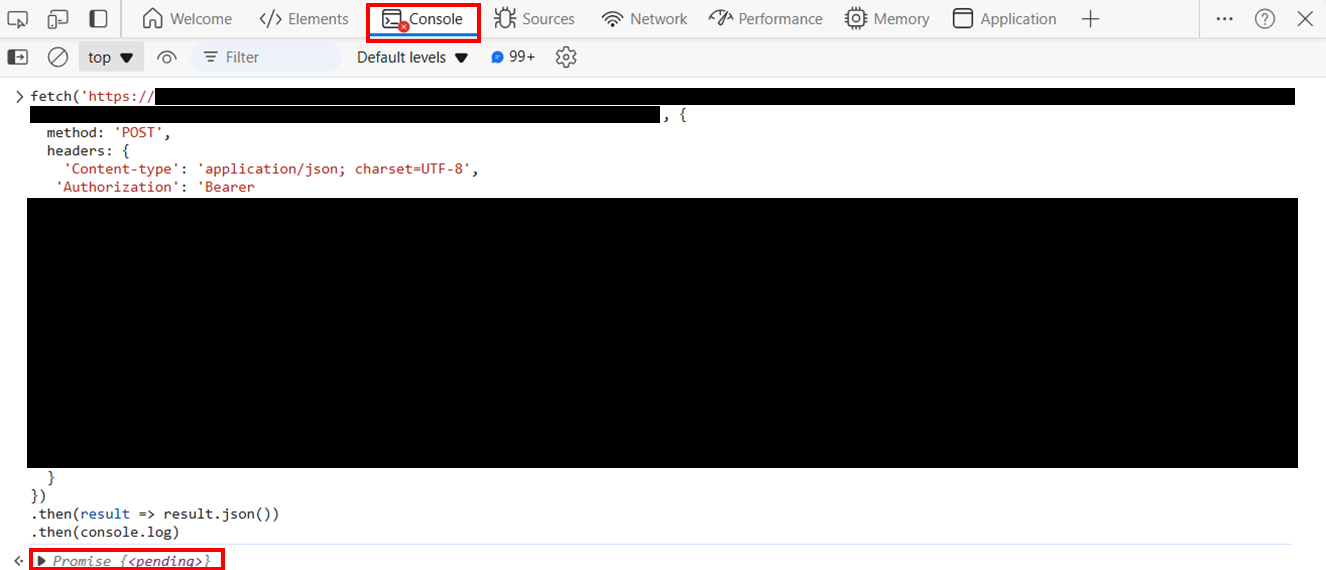
Navigate to the Console tab and paste the text here.
Select Enter.
The command executes as Promise Pending.

Open your flow in the Power Automate designer and open the HTTP trigger action.
The Post URL should have a different value for
sig=than what was recorded at the end of Step 1.
Congratulations! You successfully refreshed the SAS key.
Troubleshooting
If you encounter an error executing the command, make sure the text in the command doesn't have any extra spacings and is well constructed.
If the command execution returns Rejected, the key might still be updated successfully. It’s best to validate the flow URL to ensure the
sig=value is indeed updated.