Create a desktop flow that connects to SAP
In this section, we'll create a new flow with Power Automate Desktop and use the previously prepared VBScript code in a Run VBScript action within the flow.
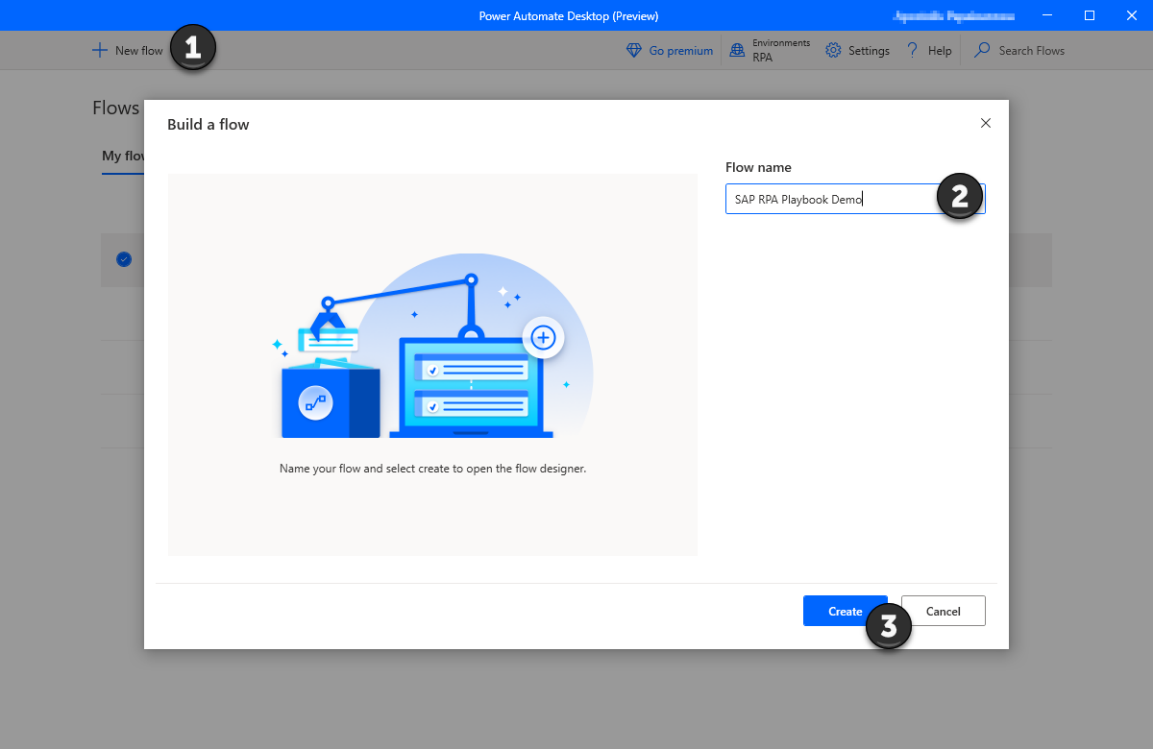
Select New flow in Power Automate Desktop.
Enter a name for the flow, and then select Create.
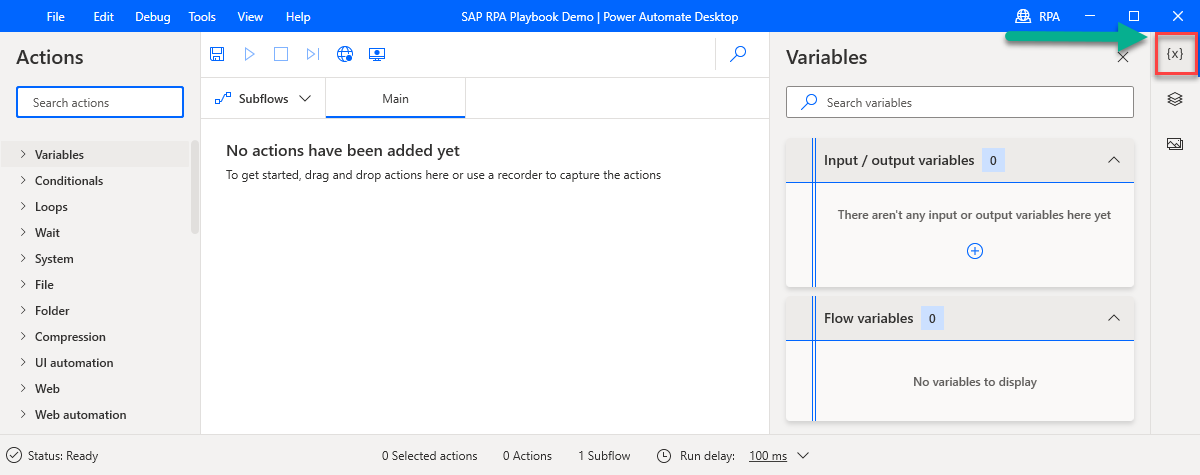
Select the Power Automate Desktop designer window, and then select Variables.
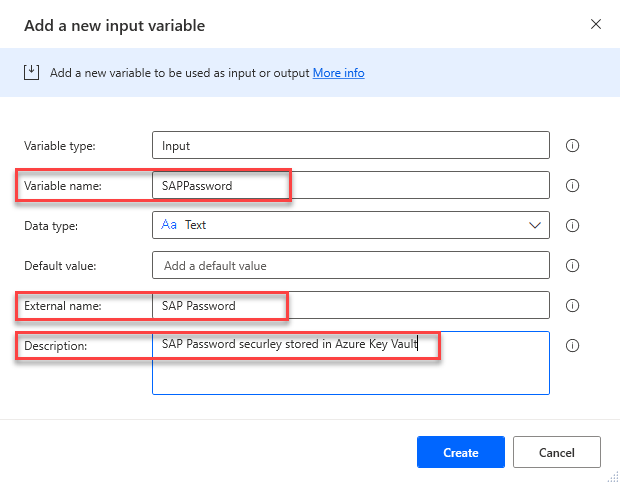
Select the plus sign (+), and then select Input to create several input variables. You'll pass these variables into the flow from a desktop flow.

First, we'll create a few technical SAP variables, which will be needed in almost all SAP-based automation flows. For each variable, enter the Variable name, External name, and Description, and then select Update:
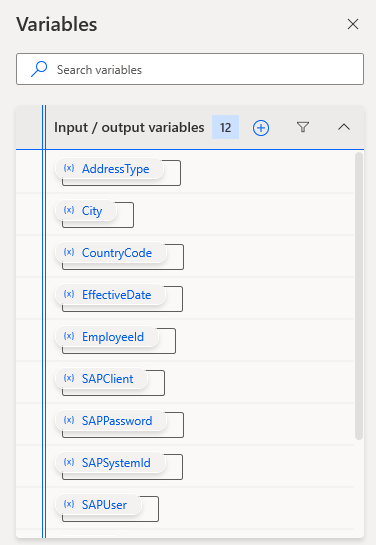
SAPPassword
SAPUser
SAPClient
SAPSystemId
Create the following use-case–specific variables:
EmployeeId
AddressType
EffectiveDate
Street
City
State
ZipCode
CountryCode
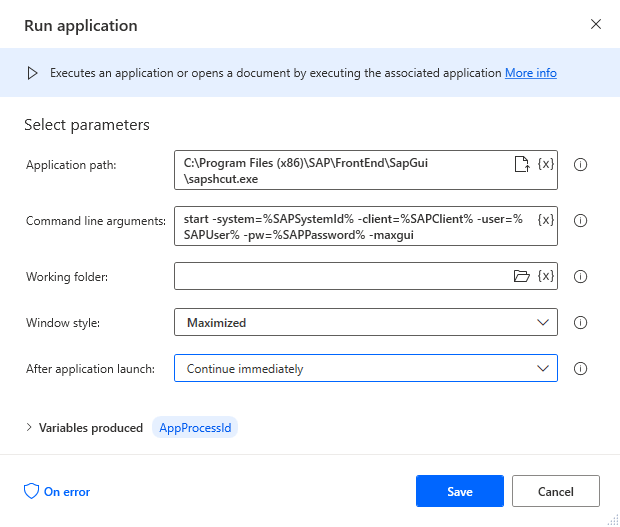
In the Actions pane, search for Run application and then drag it onto the design canvas to create our first process action.
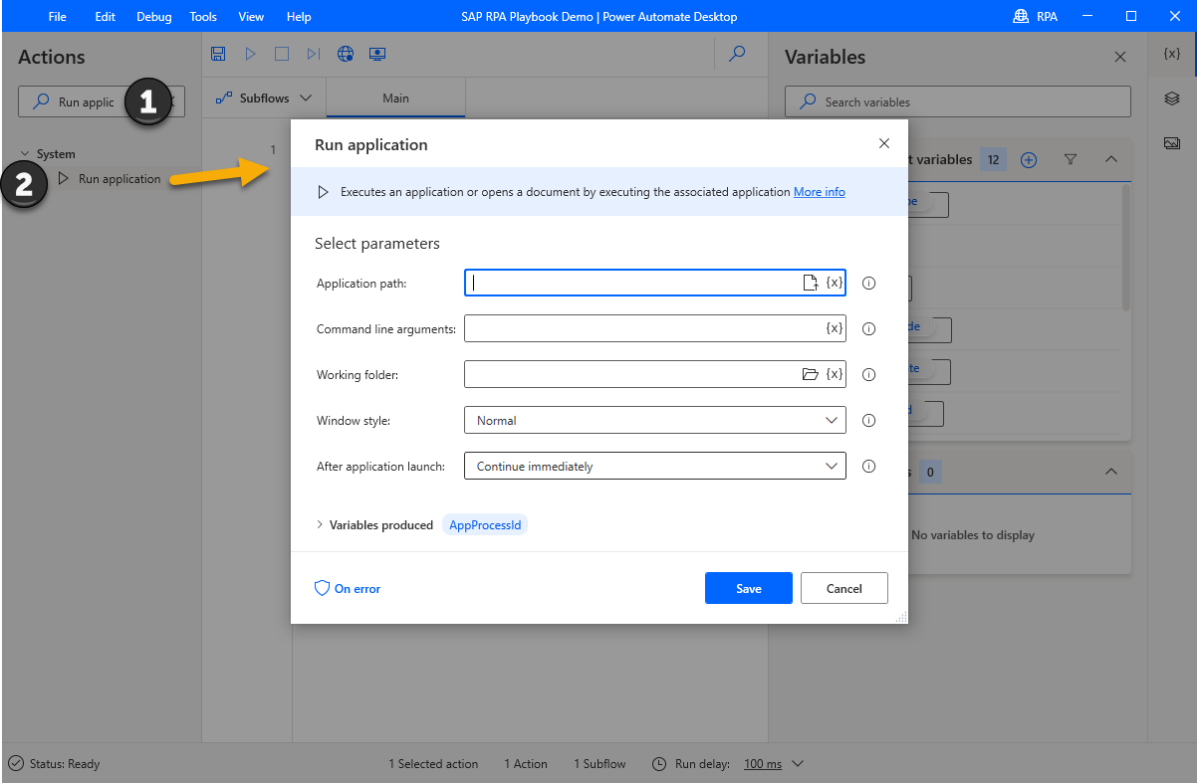
Enter the following information in the parameter list, and then select Save:
Application Path: C:\Program Files (x86)\SAP\FrontEnd\SapGui\sapshcut.exe
Command line arguments: start -system=%SAPSystemId% -client=%SAPClient% -user=%SAPUser% -pw=%SAPPassword% -maxgui
Window style: Maximized
After application launch: Wait for application to complete
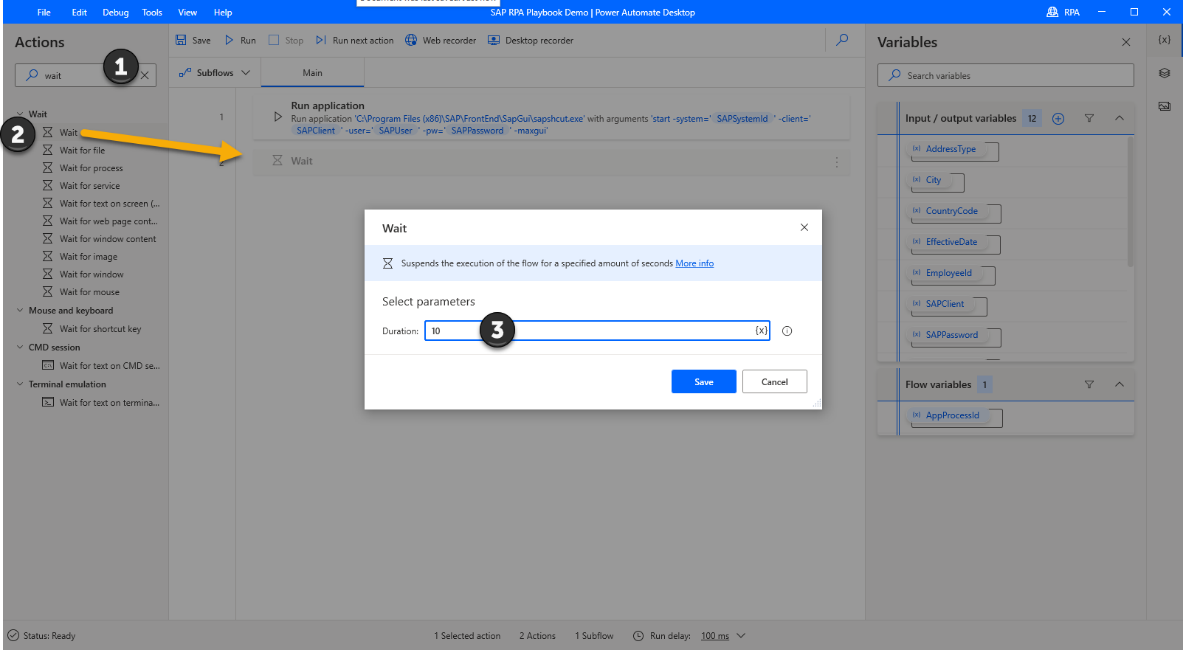
Now search for the Wait action, drag it onto the design canvas, enter 10 seconds wait time into the Duration field, and then select Save.
Search for the Run VBScript action, drag it onto the design canvas, and paste the previously generated and optimized VBScript into the VBScript to run field, and then select Save.

Open the SAP Logon 760 (your version might differ) application, connect to an SAP system, and then sign in to SAP Easy Access.
In Power Automate Desktop, select the UI elements icon on the right pane, expand Add UI element, and then select Add a screen.


Bring SAP Easy Access to the foreground, and then hover over the outermost frame of the SAP Easy Access window until a red border labeled Window appears. While the border is active, hold down Ctrl, and then click to select the window.

Repeat steps 12 and 13 for the SAP Logon 760 (your version might differ) window. You should now see the following in the UI elements pane.

Search for the Close Window action, drag it onto the design canvas, and then in the Window dropdown menu, select Windows 'SAP Easy Access'.

Repeat step 15, but this time select Window 'SAP Logon 760'.
Select Save. Your authoring canvas should look like this now.

That's it! You've just configured your first SAP GUI automation desktop flow with Power Automate Desktop. In the next step, we'll set up a cloud flow that provides the input variables based on the employee's request.