Note
Access to this page requires authorization. You can try signing in or changing directories.
Access to this page requires authorization. You can try changing directories.
You can use the Power Automate Desktop recorder to record SAP GUI interactions. The desktop recorder translates each mouse click and keystroke into Power Automate Desktop actions, and then adds these actions to your desktop flow.
If you want to see the new desktop recording experience in action, follow these steps to reconfigure the action-based automation you built in the Low-code RPA with SAP GUI in Power Automate Desktop section of this playbook.
You can also follow along in the no-code approach in episode 6 of the video series:
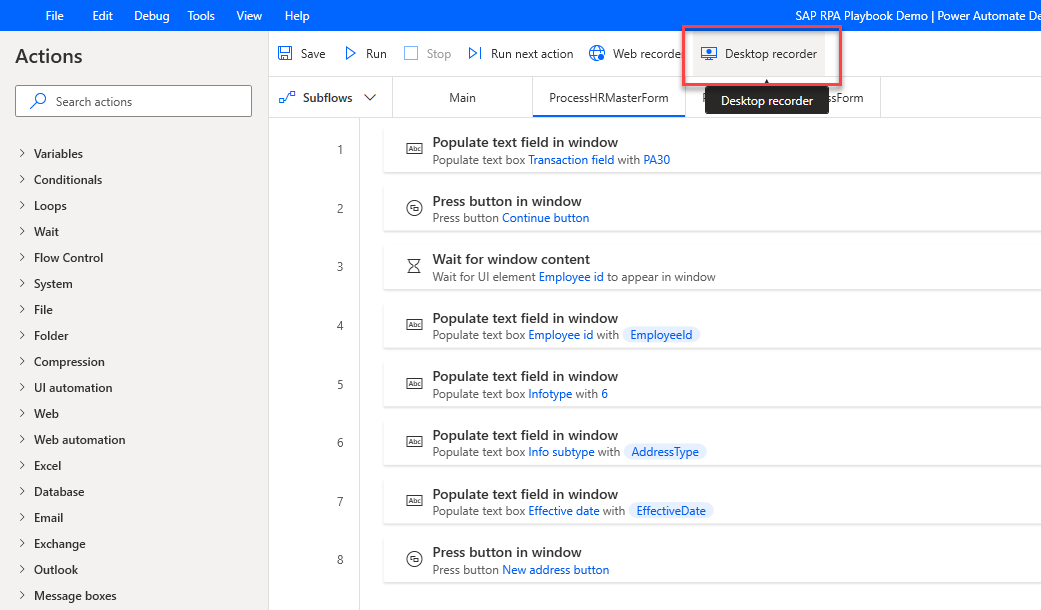
Select the ProcessHRMasterForm subflow tab, and then select Desktop recorder.
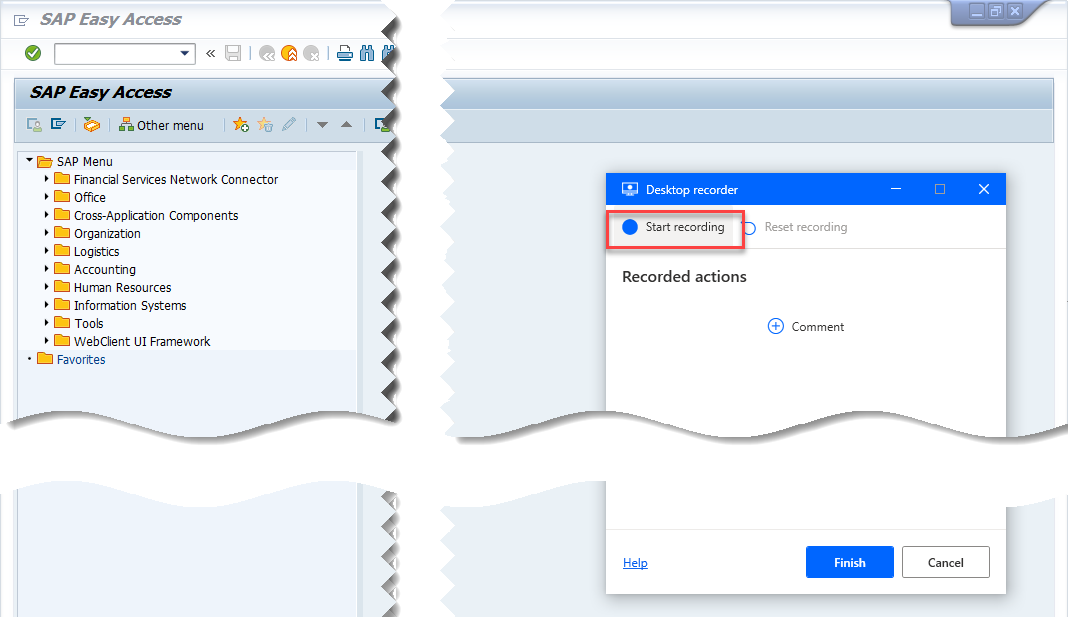
Open SAP, bring the SAP Easy Access window to the foreground, and then in the Desktop recorder window, select Start recording.
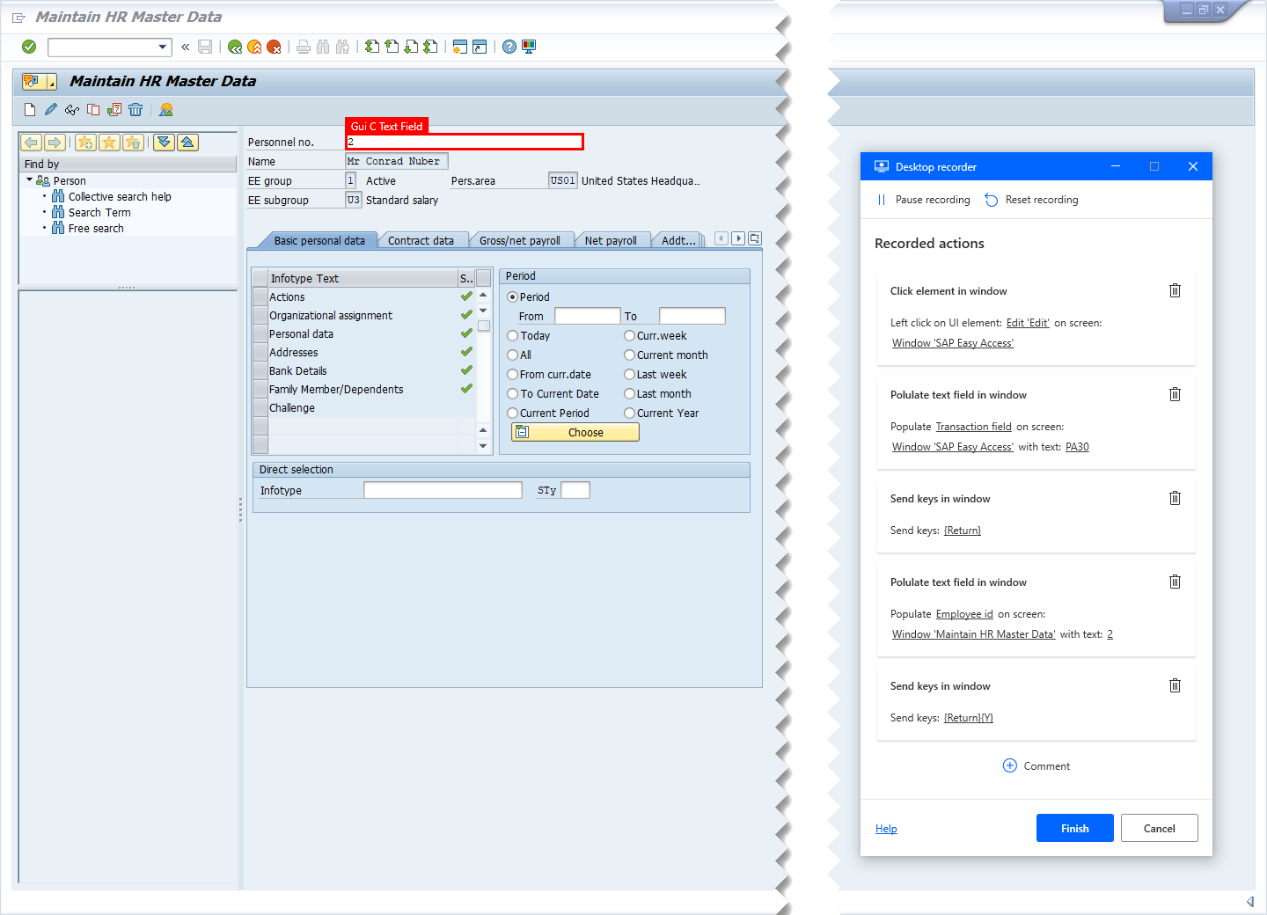
Enter PA30 into the Transaction field, and then select Enter.
![]()
Enter a Personnel number, and then select Enter.
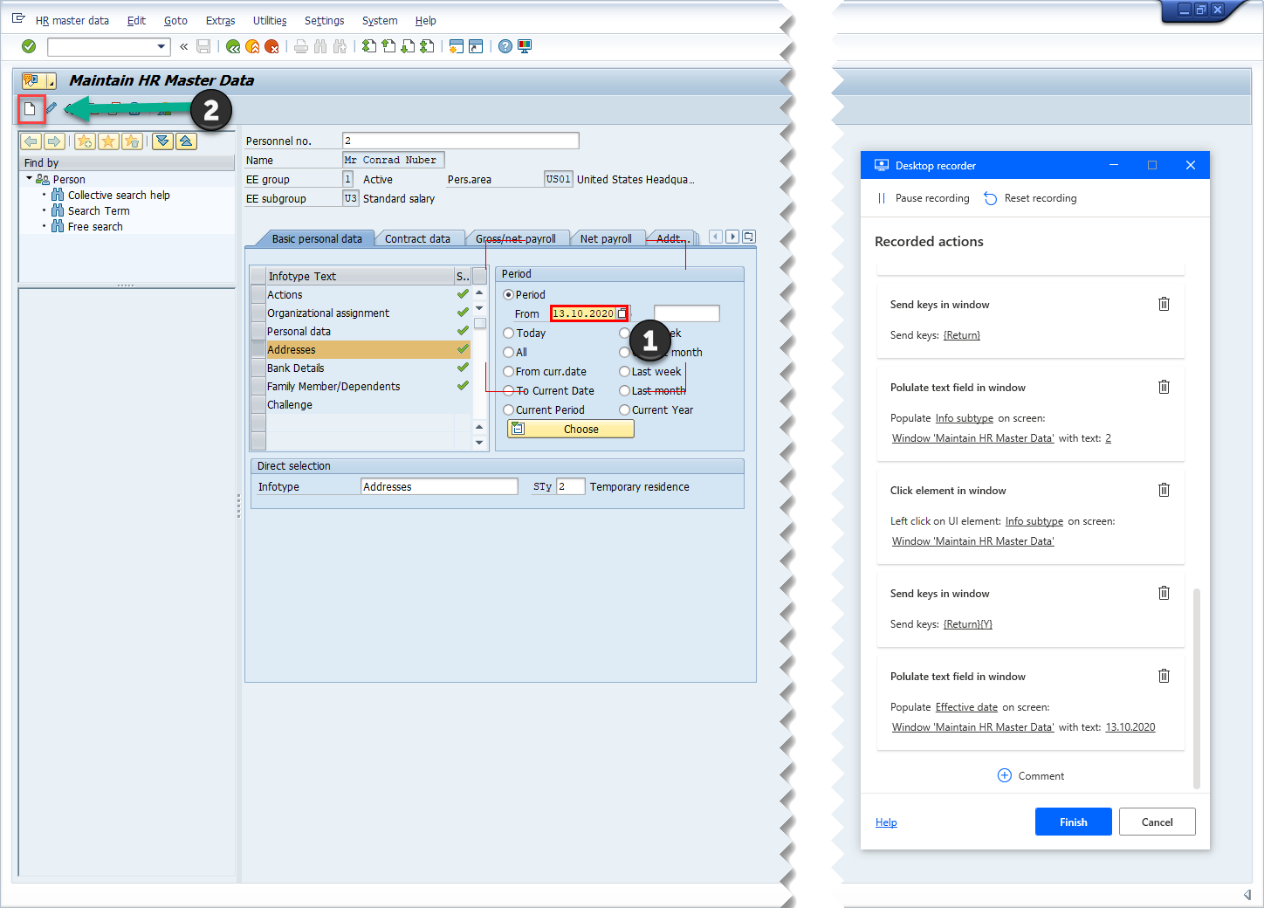
Select Addresses as the Infotype Text, and then enter a value in STy (such as 2 or any other value suitable for your use case).

Enter a date in the From field, and then select the New icon.
Enter a street name along with a house number in Address line 1.
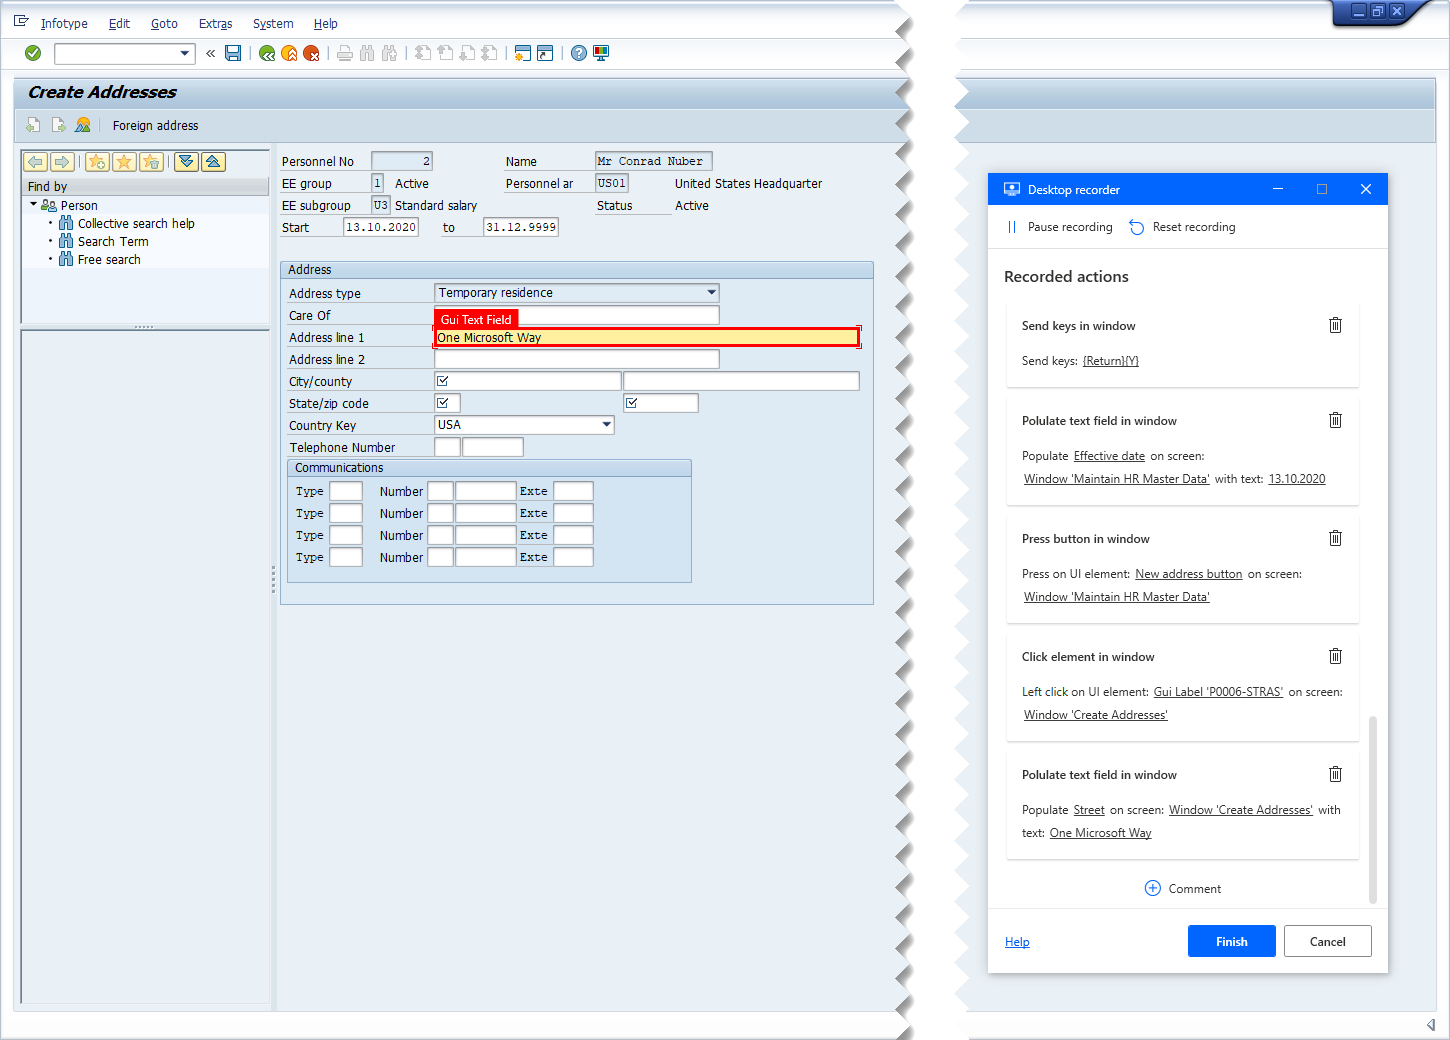
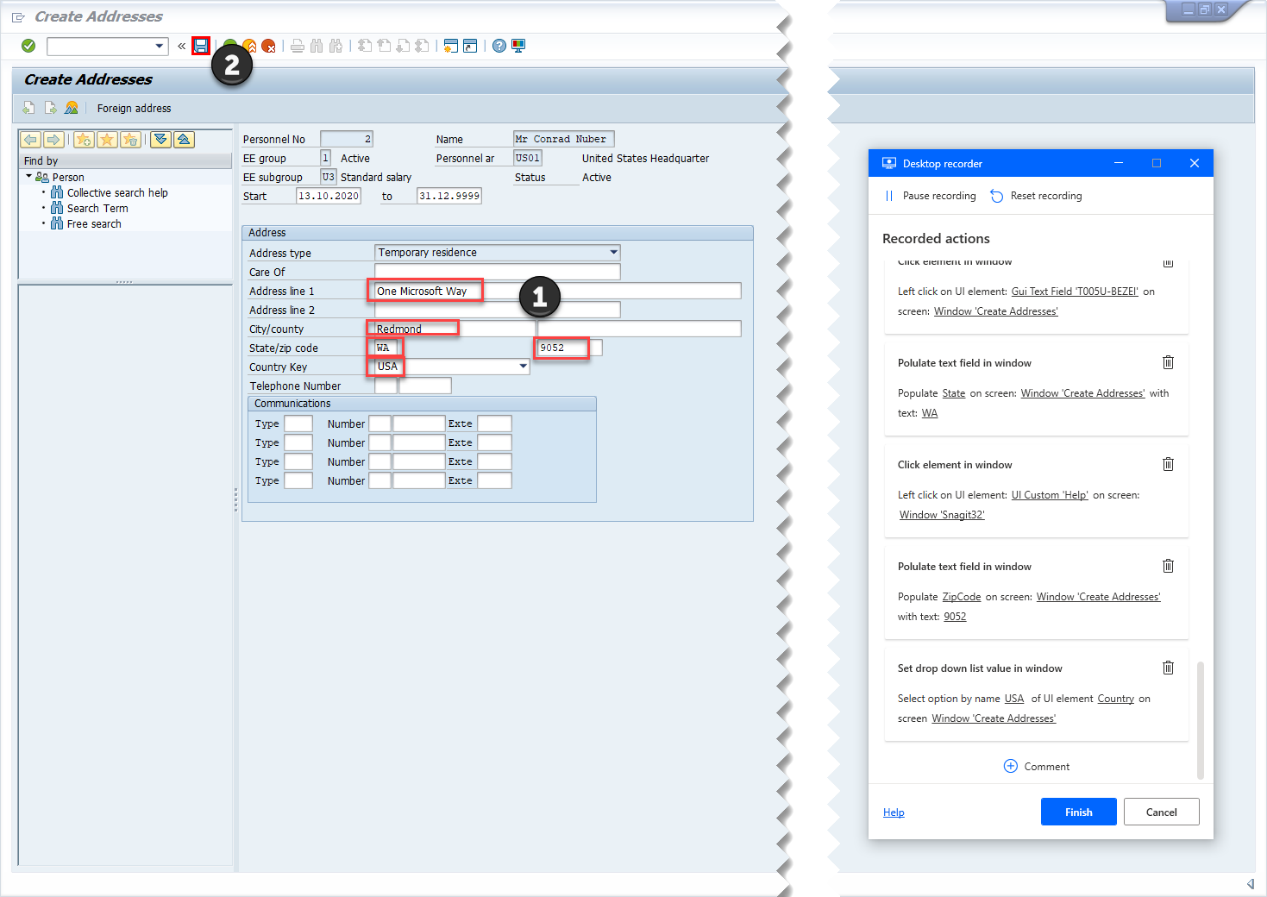
Enter values for City, State/zip code and Country key, and then select Save.
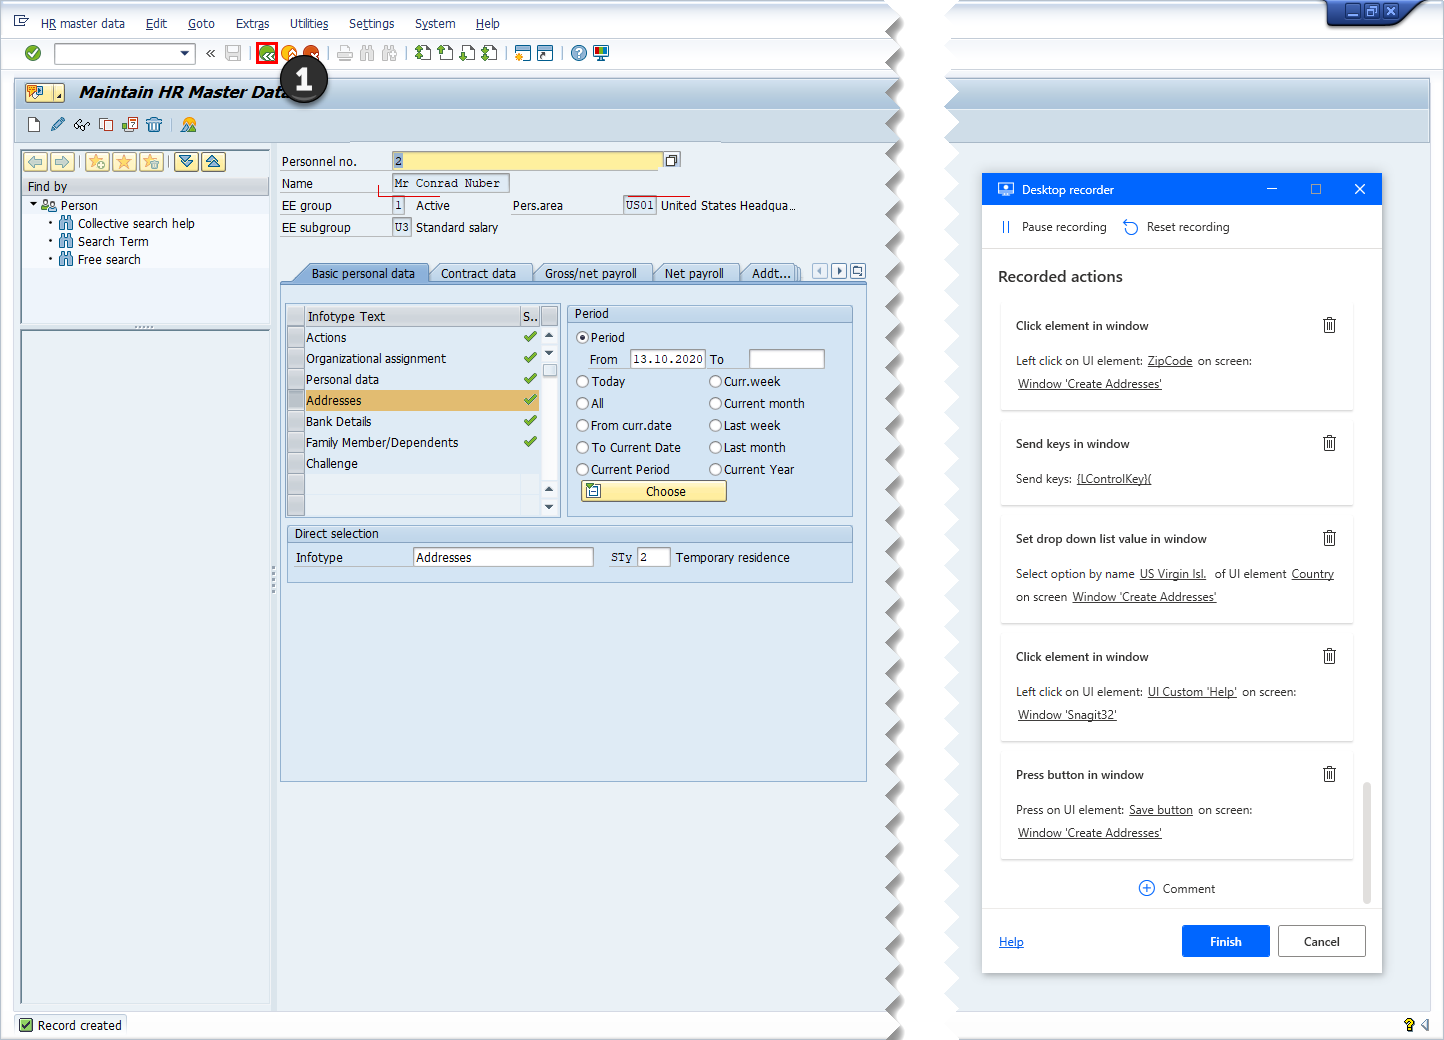
Select the Back (F3) icon.
This completes the address creation process, so select Finish in the desktop recorder window.
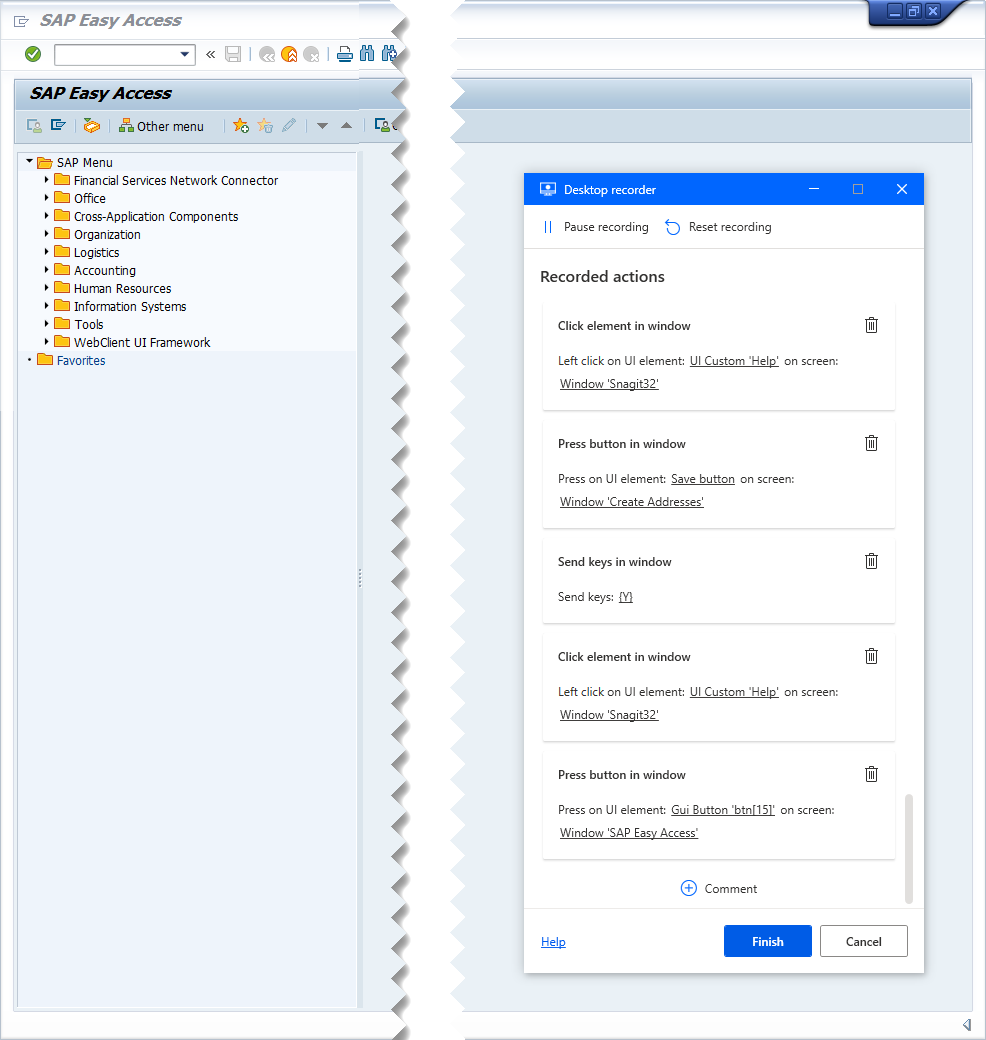
Your desktop flow script should look similar to the following image.
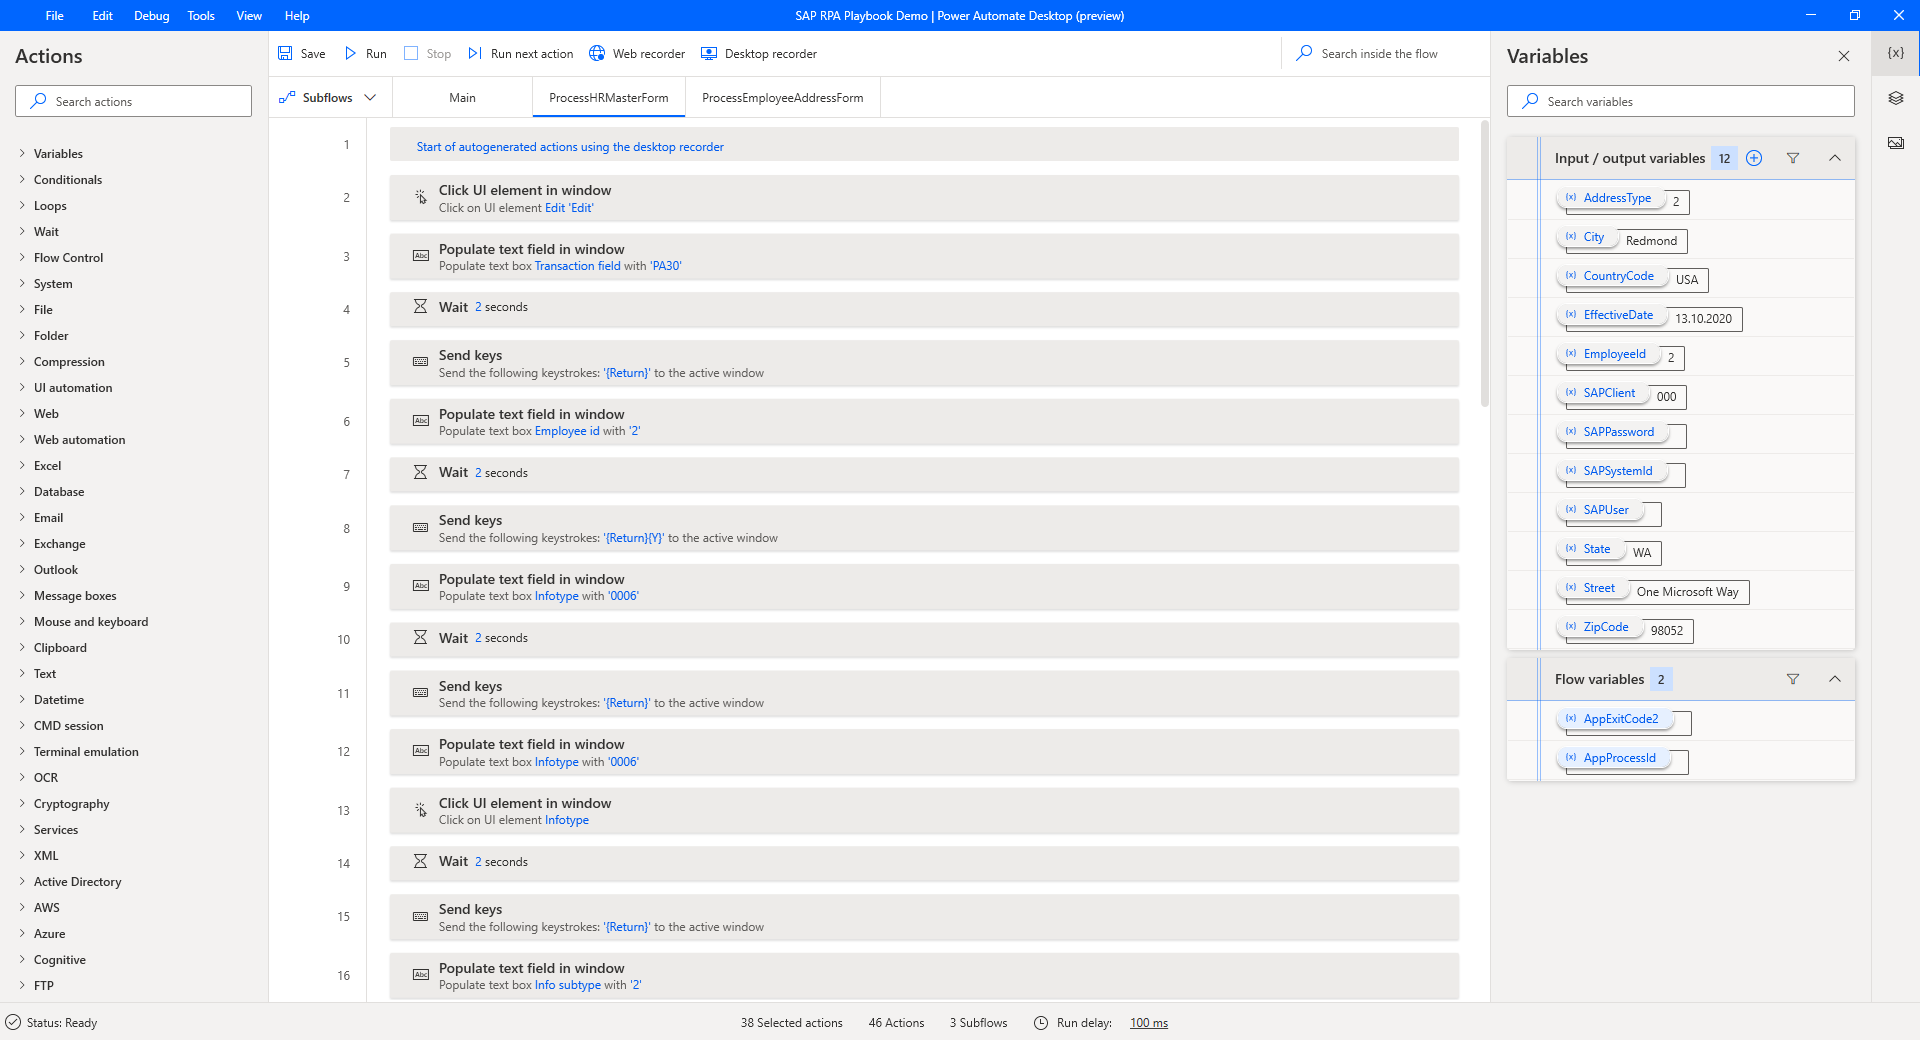
During recording, you might have accidentally selected windows or other UI elements that aren't relevant to your flow. If this happens, you can remove duplicate or unnecessary action steps from the script.
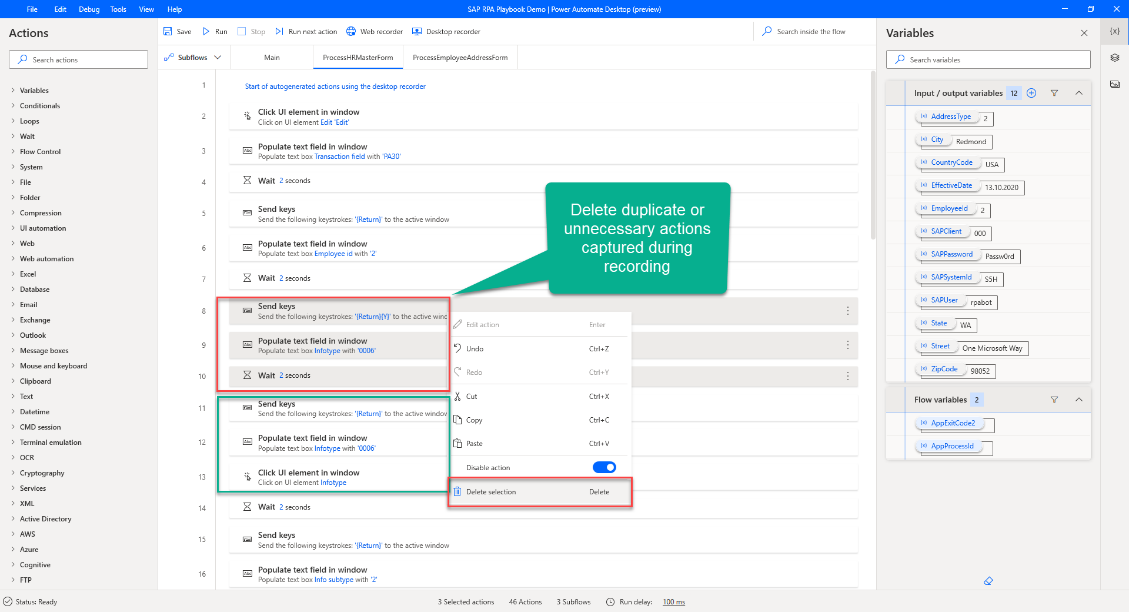
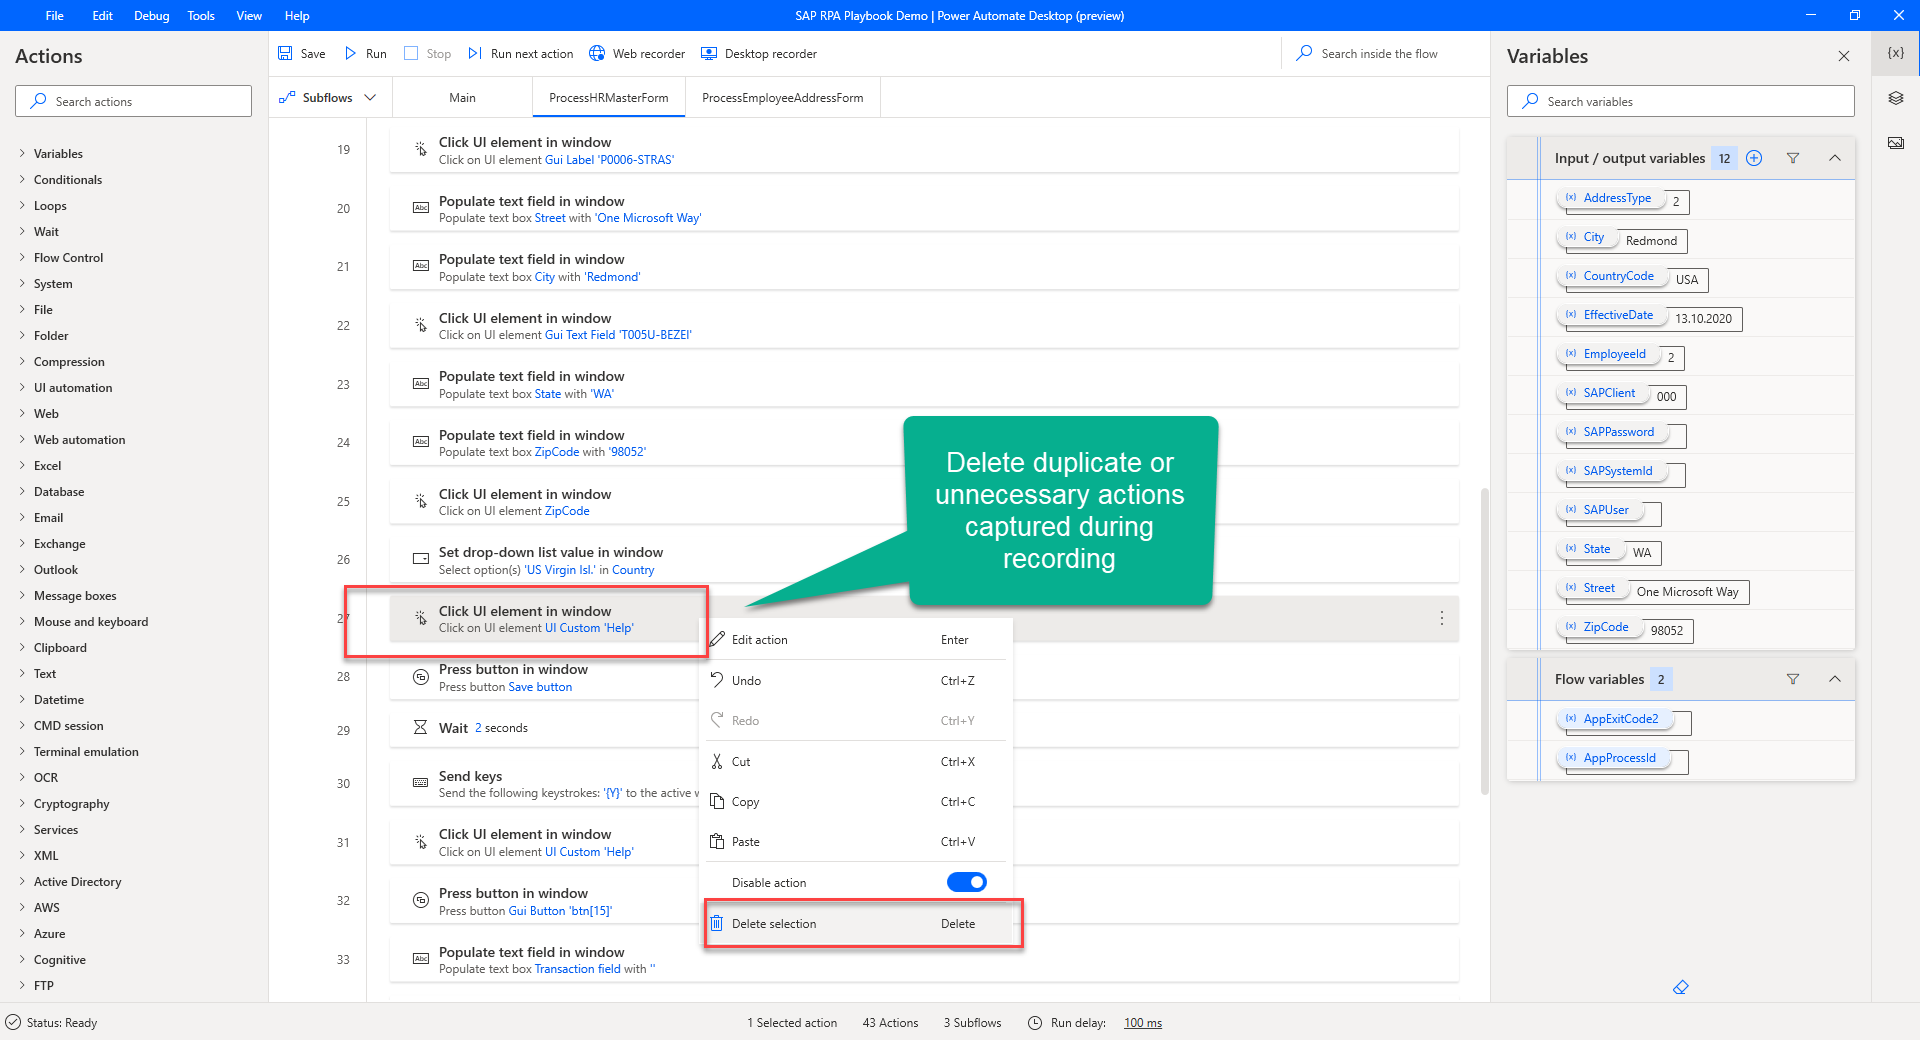
Highlight all actions that were manually defined in Low-code RPA with SAP GUI in Power Automate Desktop, right-click, and then select Delete selection to remove them from the subflow.
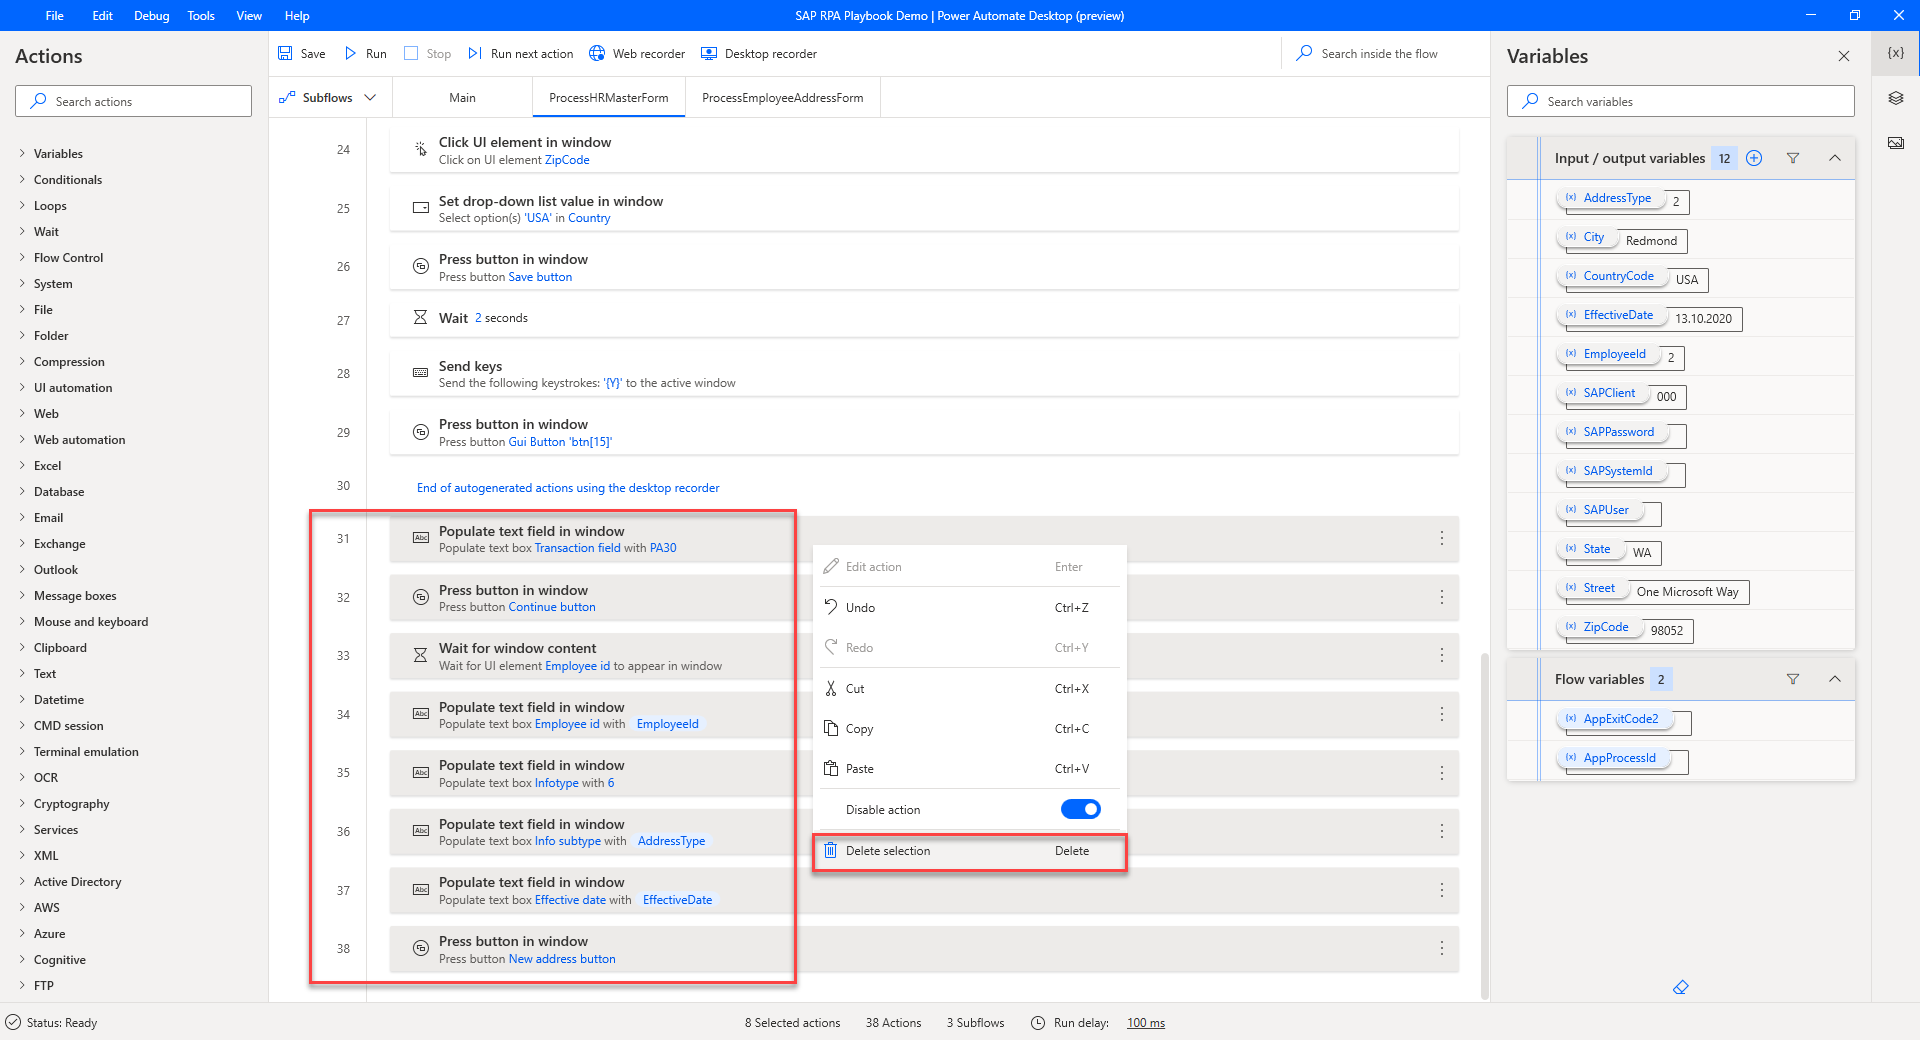
Edit the Populate text field in window action for Employee Id, and replace the Text to fill-in value with the previously defined EmployeeId variable.
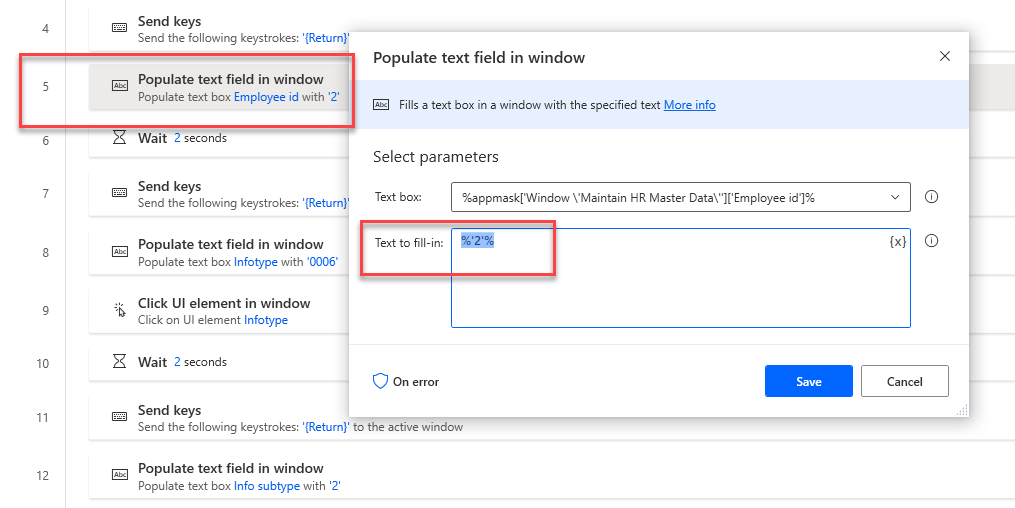
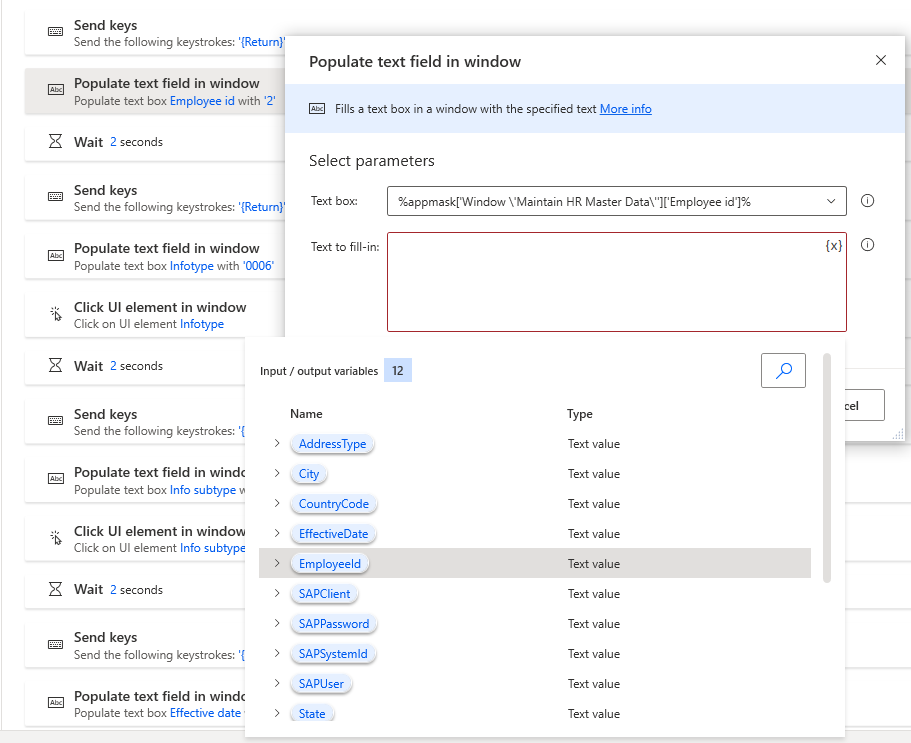
Edit the Populate text field in window action for Info subtype, and replace the Text to fill-in value with the previously defined AddressType variable.
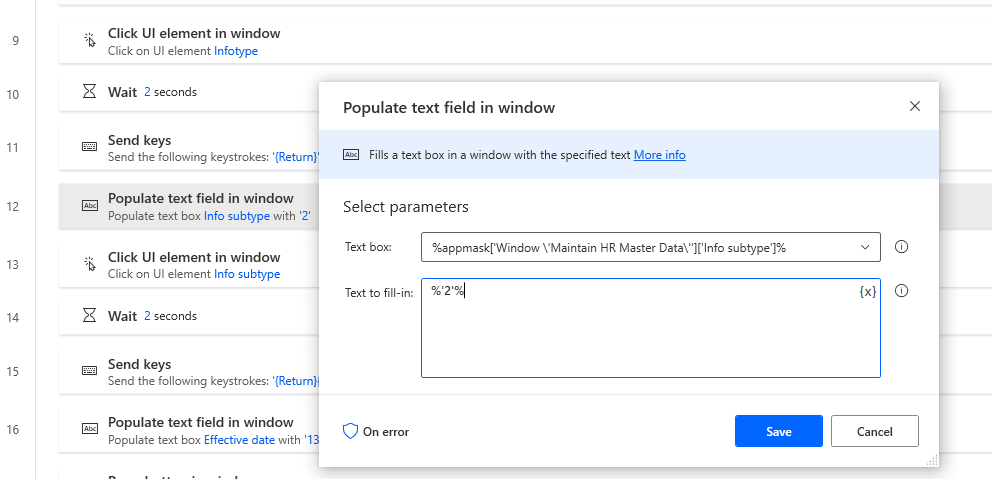
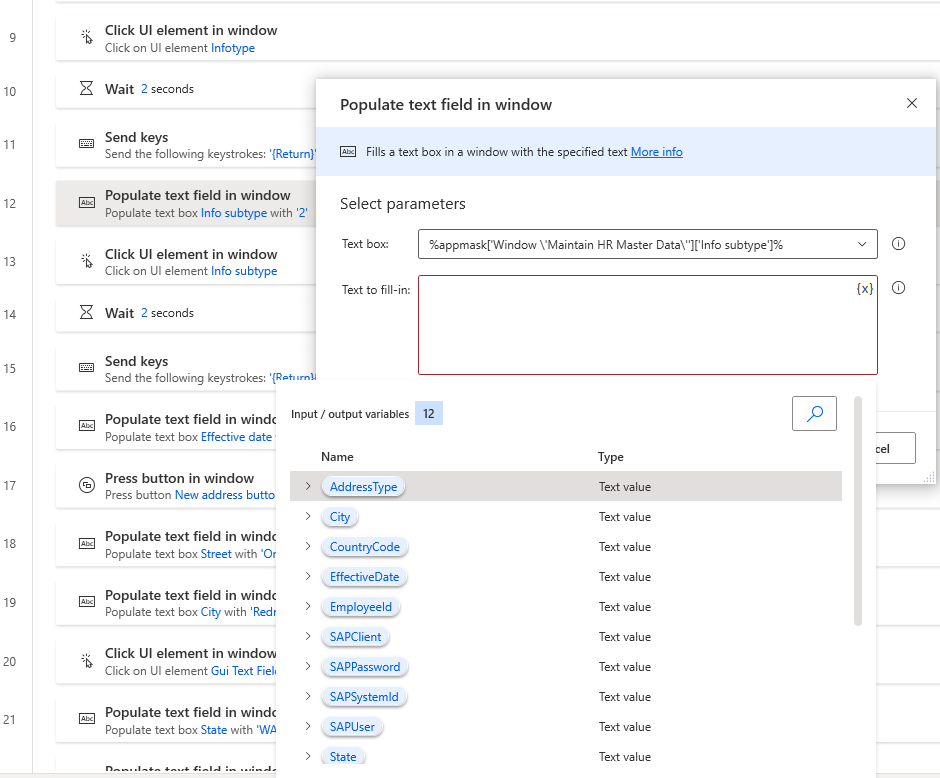
Edit and replace the hard-coded text with variables in the Populate text field in window actions for Effective Date, Street, City, State, ZipCode, and Country.
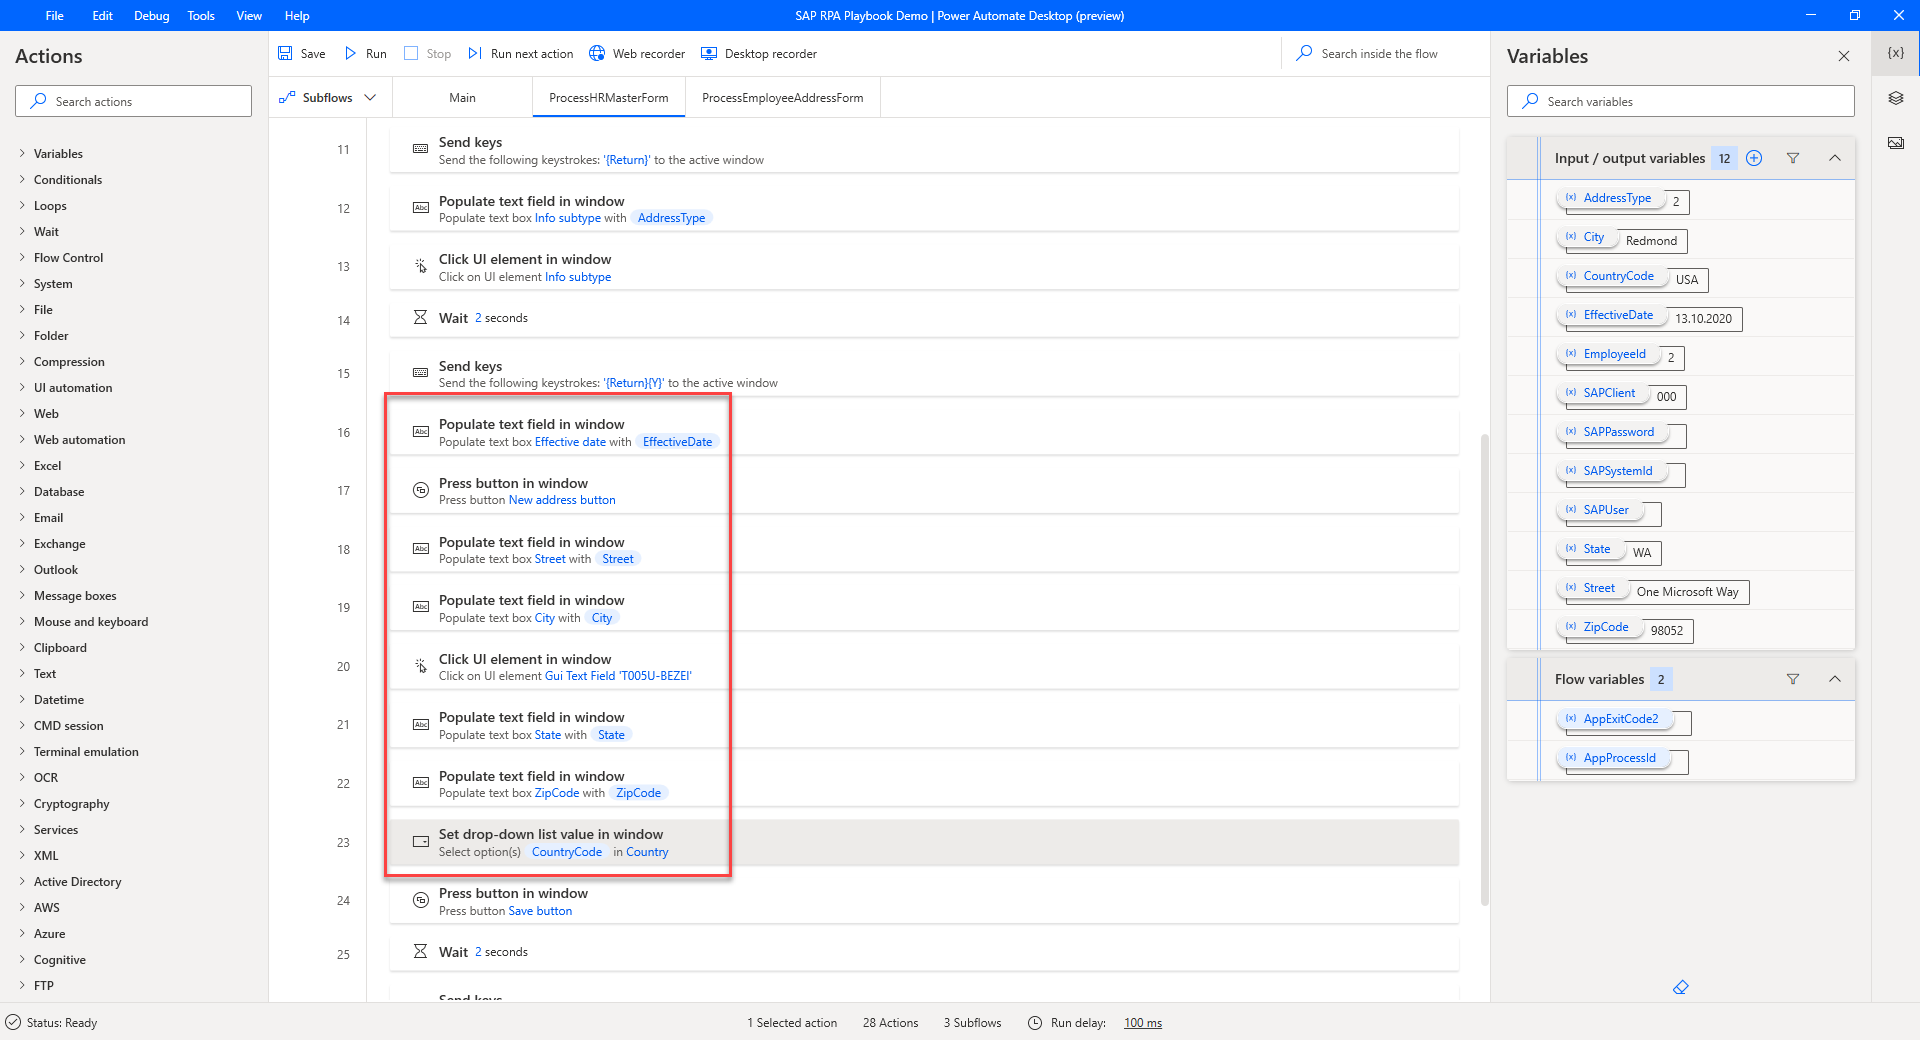
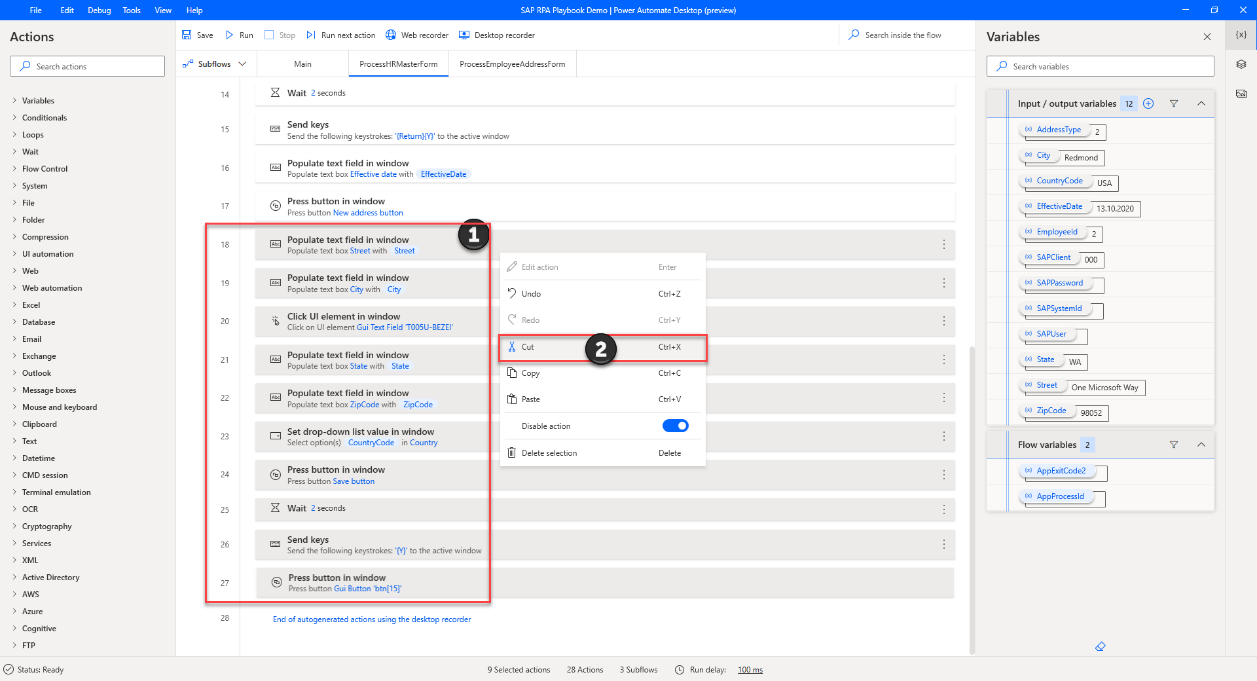
Highlight the actions that you'll need for the employee address creation subflow, right-click the actions you selected, and then select Cut.
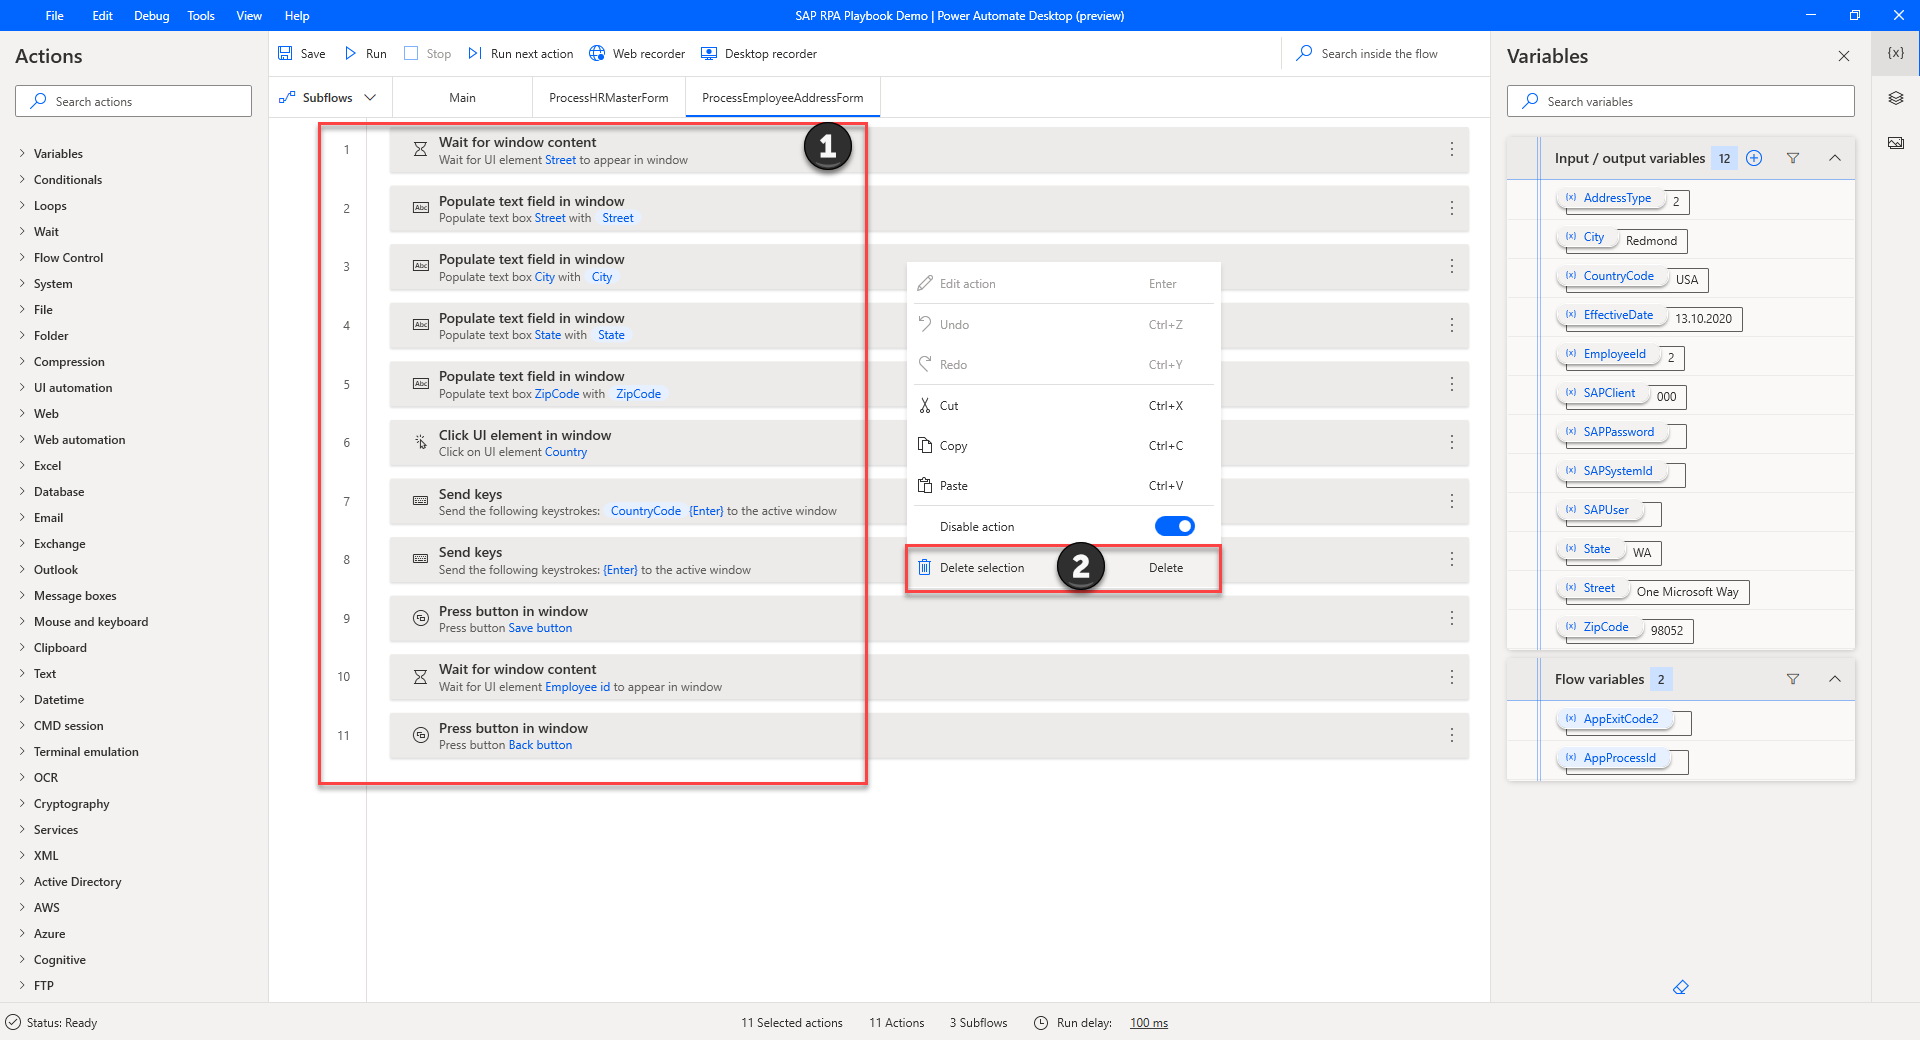
Open the ProcessEmployeeAddressForm subflow, select all actions, right-click, and then select Delete.
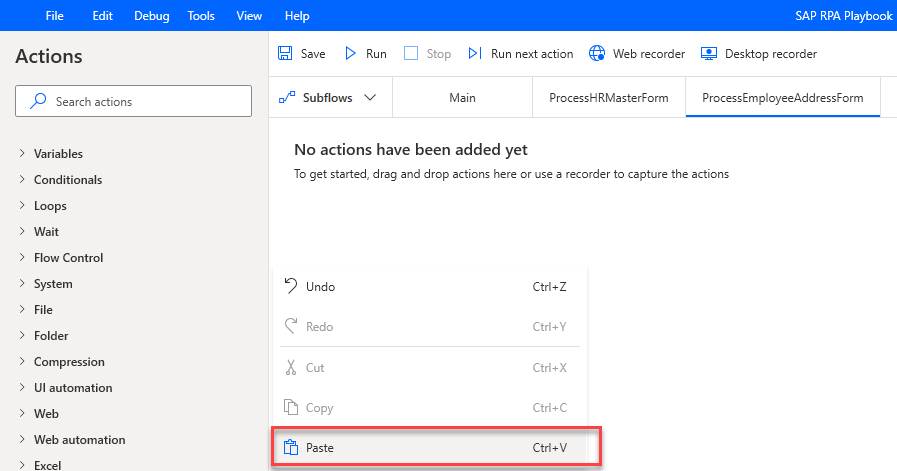
In ProcessEmployeeAddressForm subflow, right-click, and then select Paste.
Under the Variables pane, edit all variables and then provide Default values. These default values will be used to test the updated desktop flow.
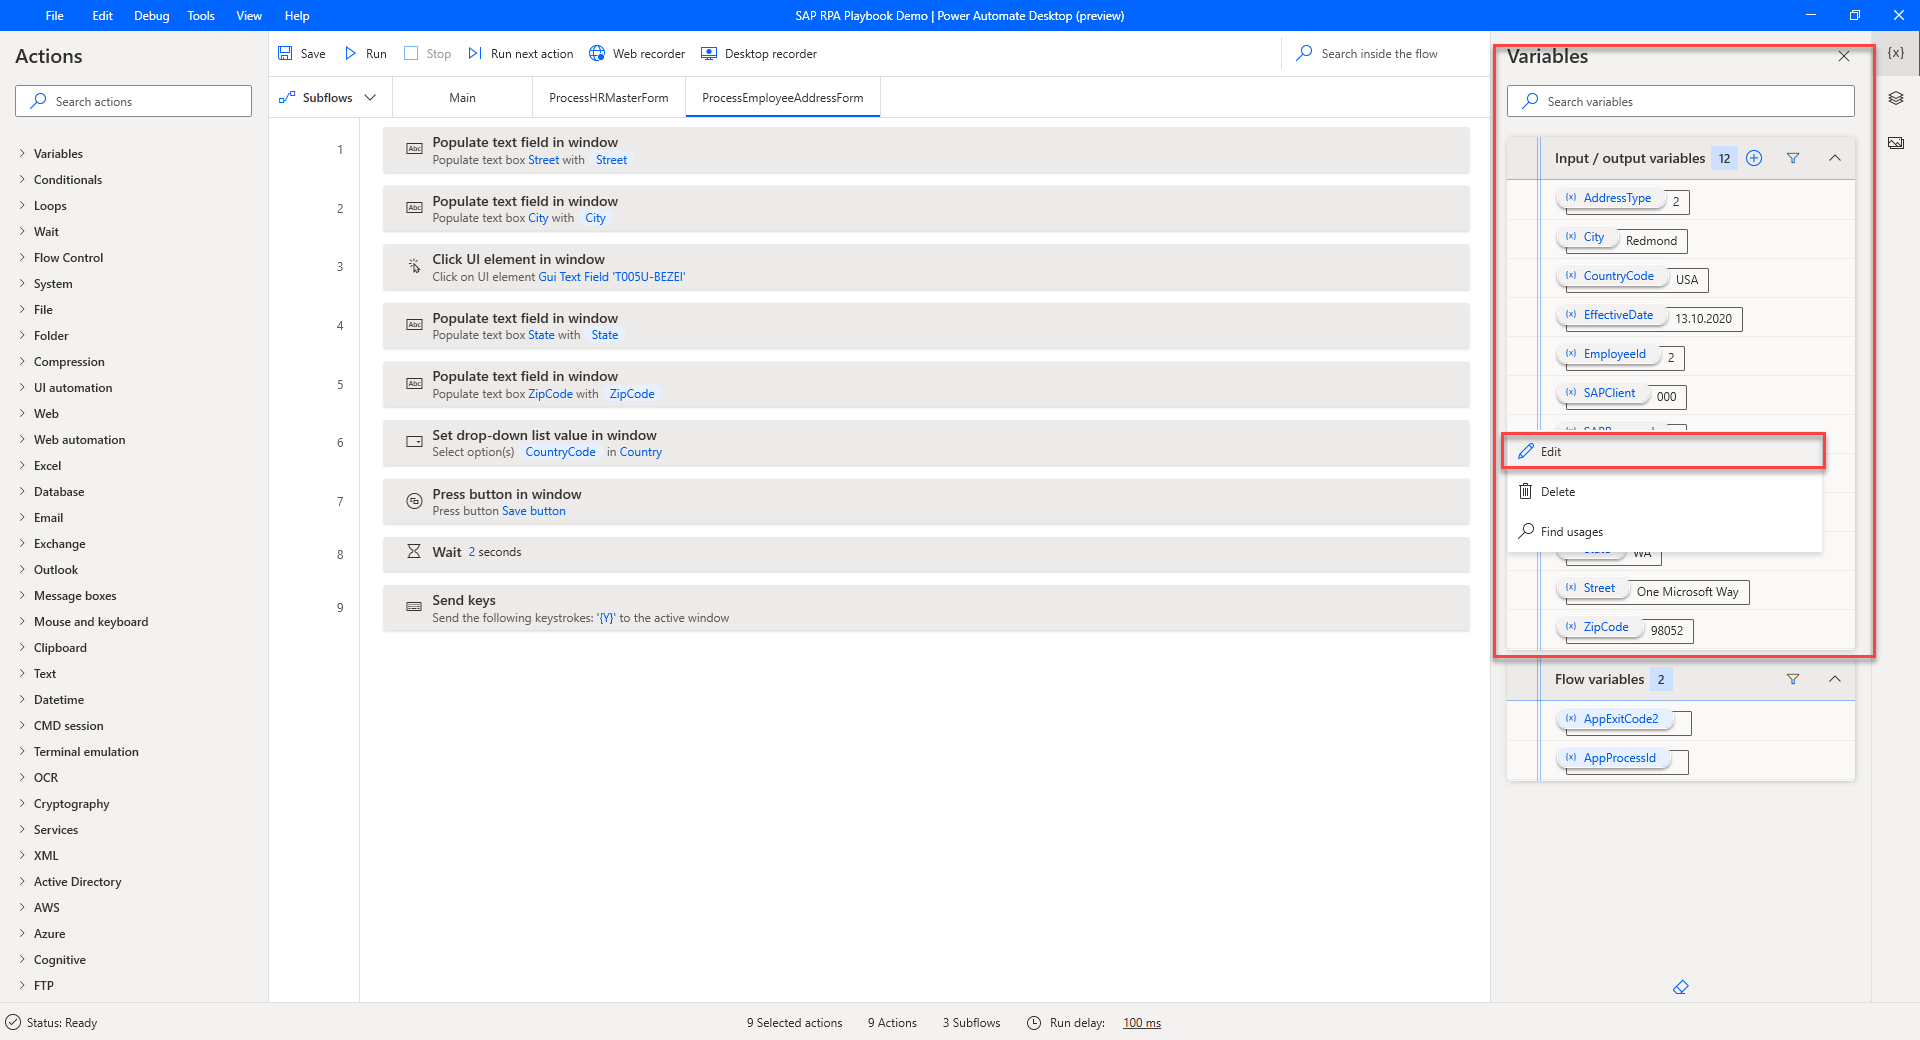
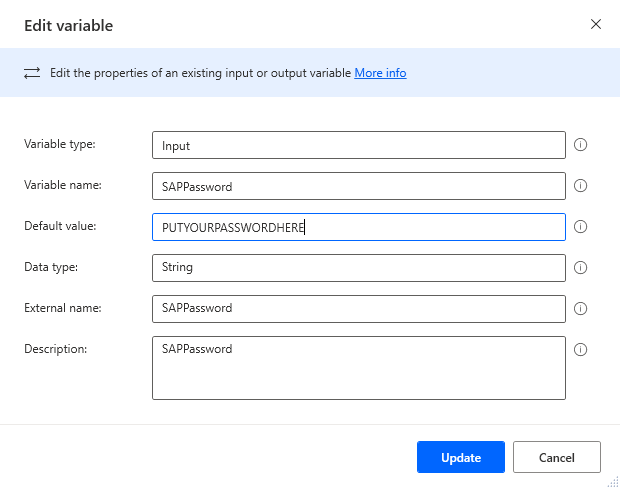
Select Save, and then close the confirmation message.
Select Run.
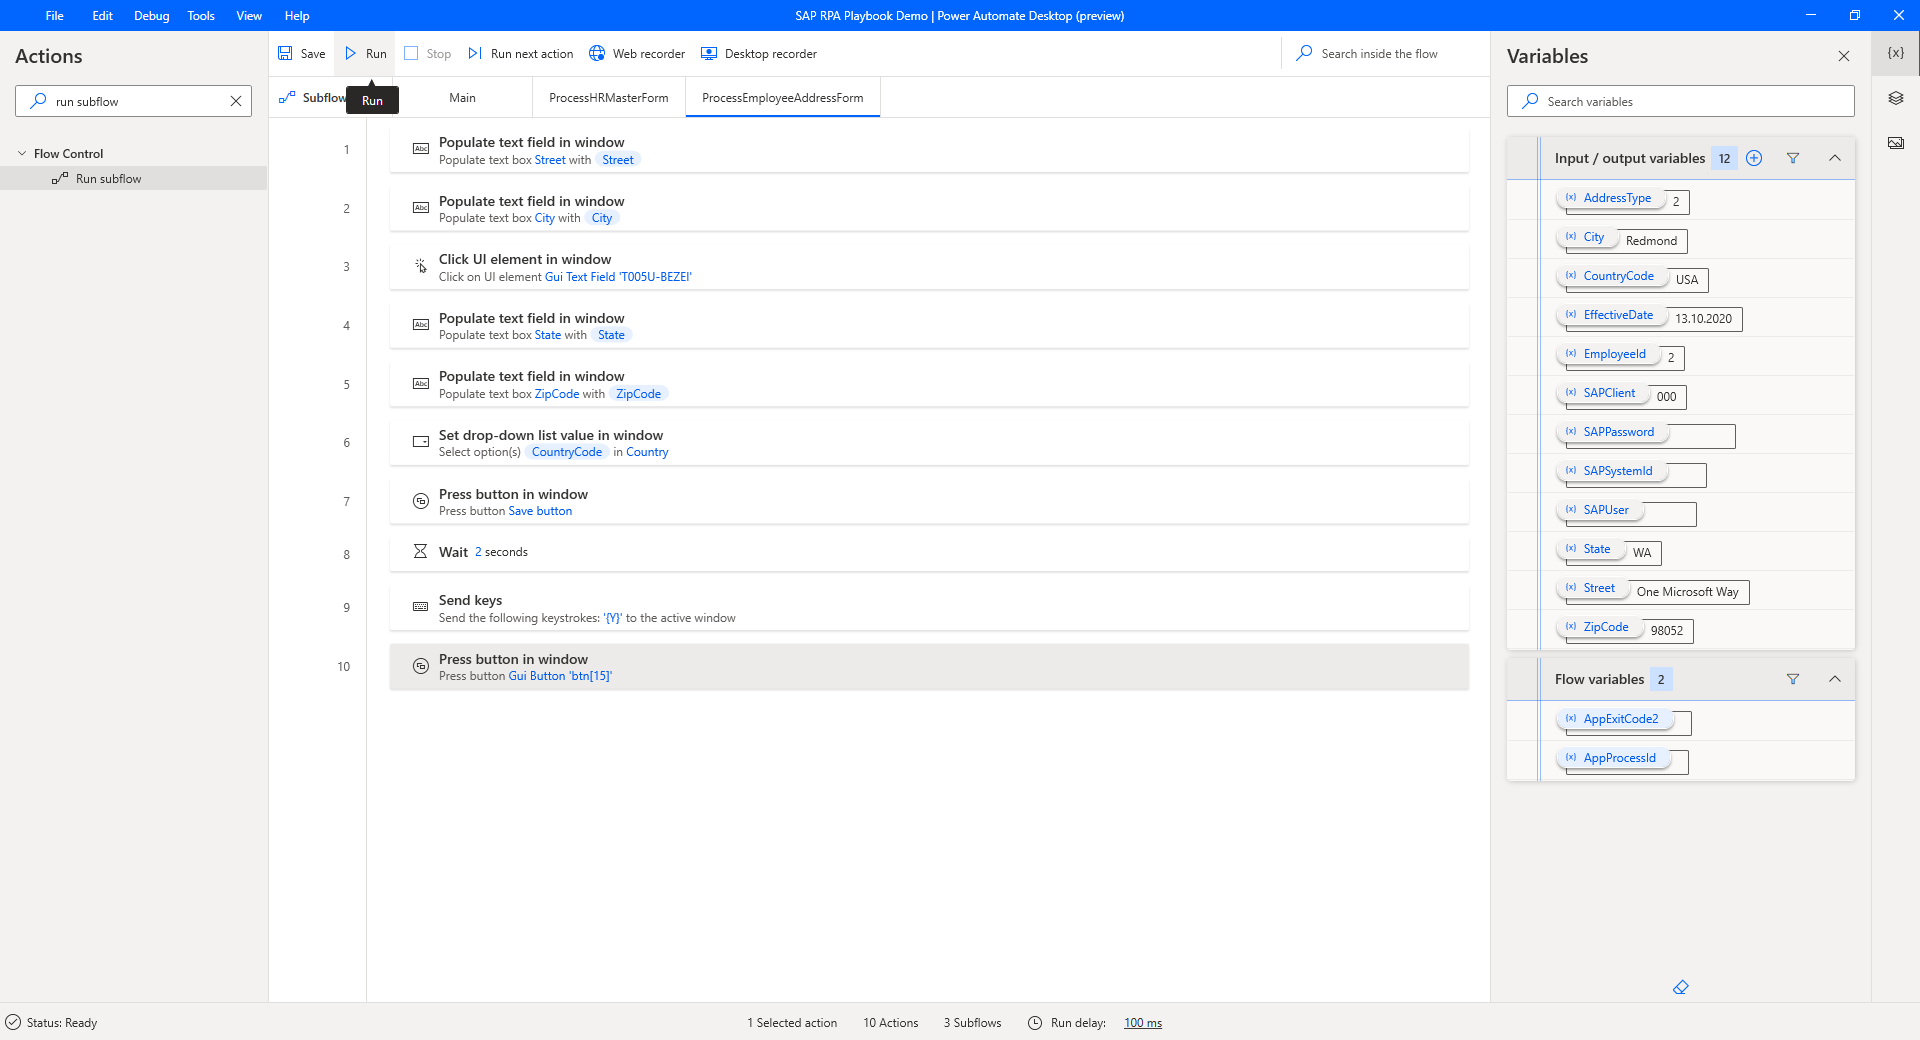
Awesome! With this new desktop recording option, some minor action tweaks, and a bit of refactoring, you've reduced development time and simplified the overall desktop flow action definition process.
Important
Delete all previously defined default values before you leave the desktop flow authoring experience.