Get started with Copilot in Power Automate for desktop (preview)
[This topic is prerelease documentation and is subject to change.]
Copilot in desktop flows allows you to create automation that helps streamline your workflow creation quickly and easily using natural language. You can create a new flow or add more steps to an existing flow by just describing what you want to achieve using natural language prompts.
Important
- This is a preview feature.
- Preview features aren’t meant for production use and may have restricted functionality. These features are available before an official release so that customers can get early access and provide feedback.
- Copilot is a new technology that is still being developed. It is optimized for use with English language and has limited support with other languages. As such, parts of it may appear in English rather than your preferred language.
- Copilot’s Natural Language to flow creation is powered by the Azure OpenAI service. This feature is in Early Access.
- Copilot’s generative answers capability is powered by the Azure OpenAI Service and Bing Search.
Copilot can perform the following actions:
- Understand your intent and either create a new flow or enhance an existing one based on the scenario prompt you provide.
- Answer product related questions. For example, you can ask Copilot questions about desktop flows such as:
- How do I read data from an Excel file?
- How do I run a PowerShell script?
Prerequisites
Availability by region
Copilot in Power Automate for desktop offers different capabilities, which are available in environments located in the following countries/regions:
- Create flows using Copilot
- United States
- Answer product related questions
- Australia
- India
- United Kingdom
- United States
- Summarize actions and subflows
- United States
Availability by account type
Currently, Copilot in Power Automate for desktop is only available for users with a work or school account.
Note
If your environment is in a supported region, you are signed in with a work or school account, and you still can't see Copilot in the Power Automate for desktop experience, contact your Power Platform administrator. An admin can turn Copilot off or on in the Power Platform admin center.
Create a desktop flow using Copilot (preview)
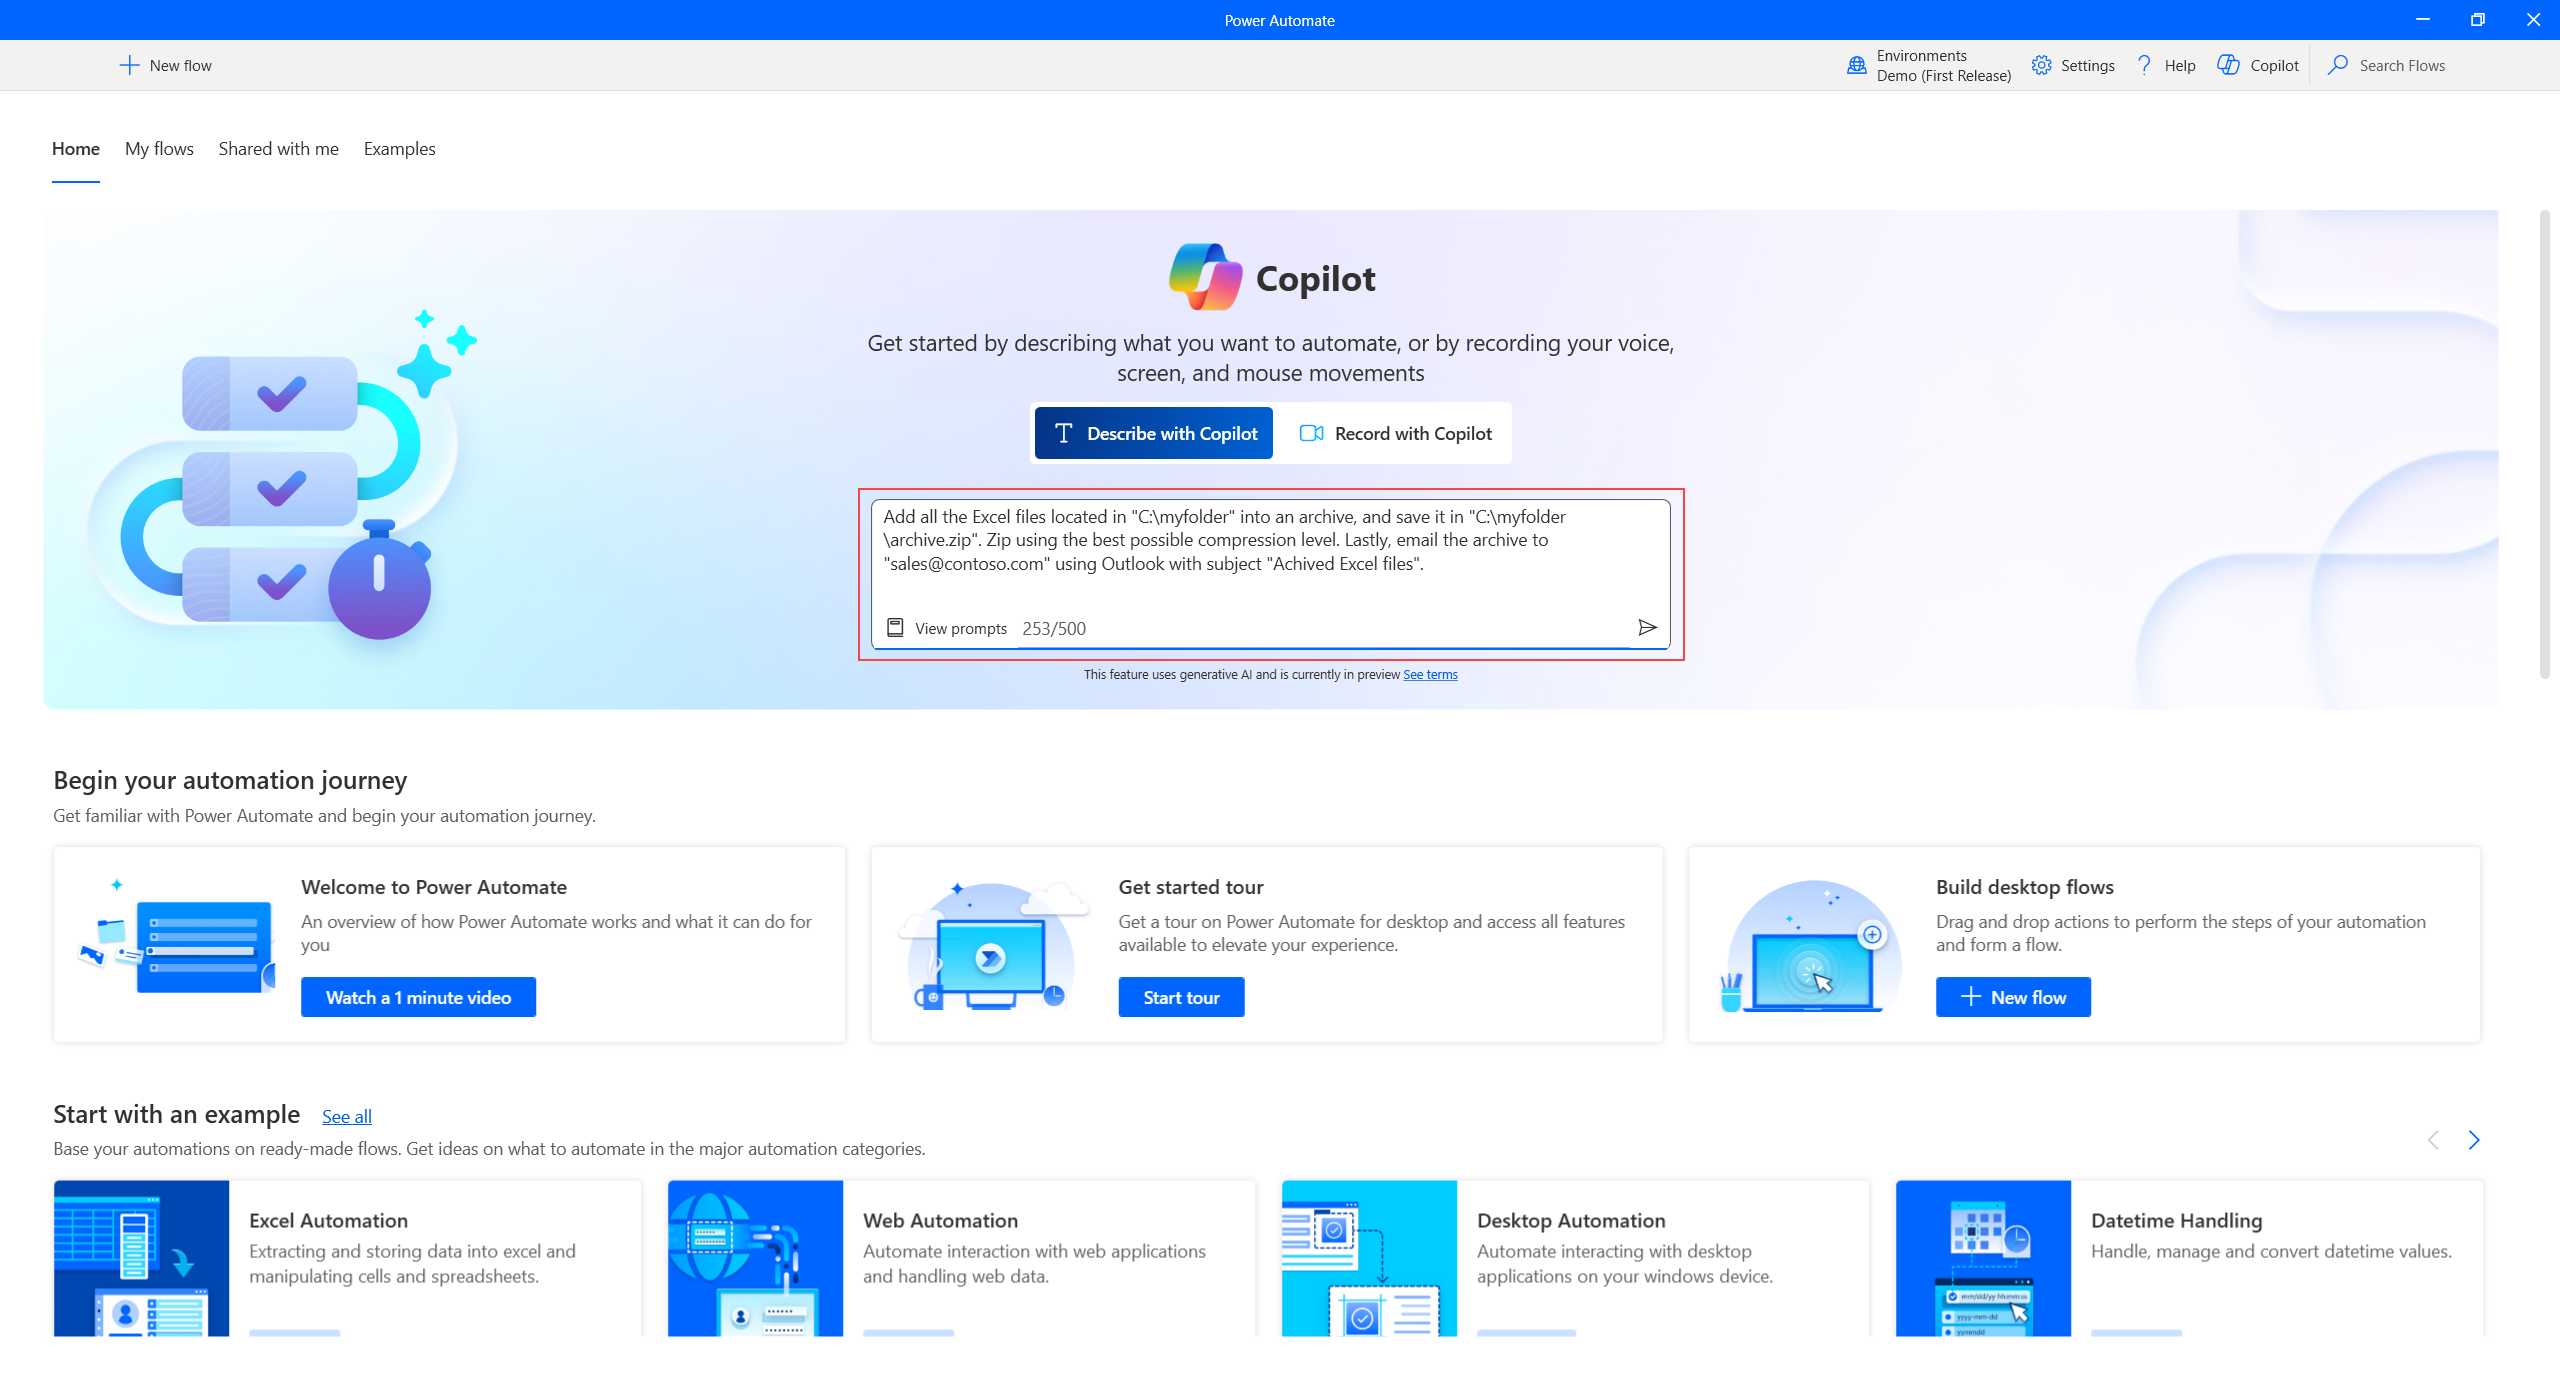
You can create a new flow in the Power Automate for desktop console from either Copilot in the home page or from the Copilot side panel. To create a flow from the home page, type your prompt in Copilot’s chat area:
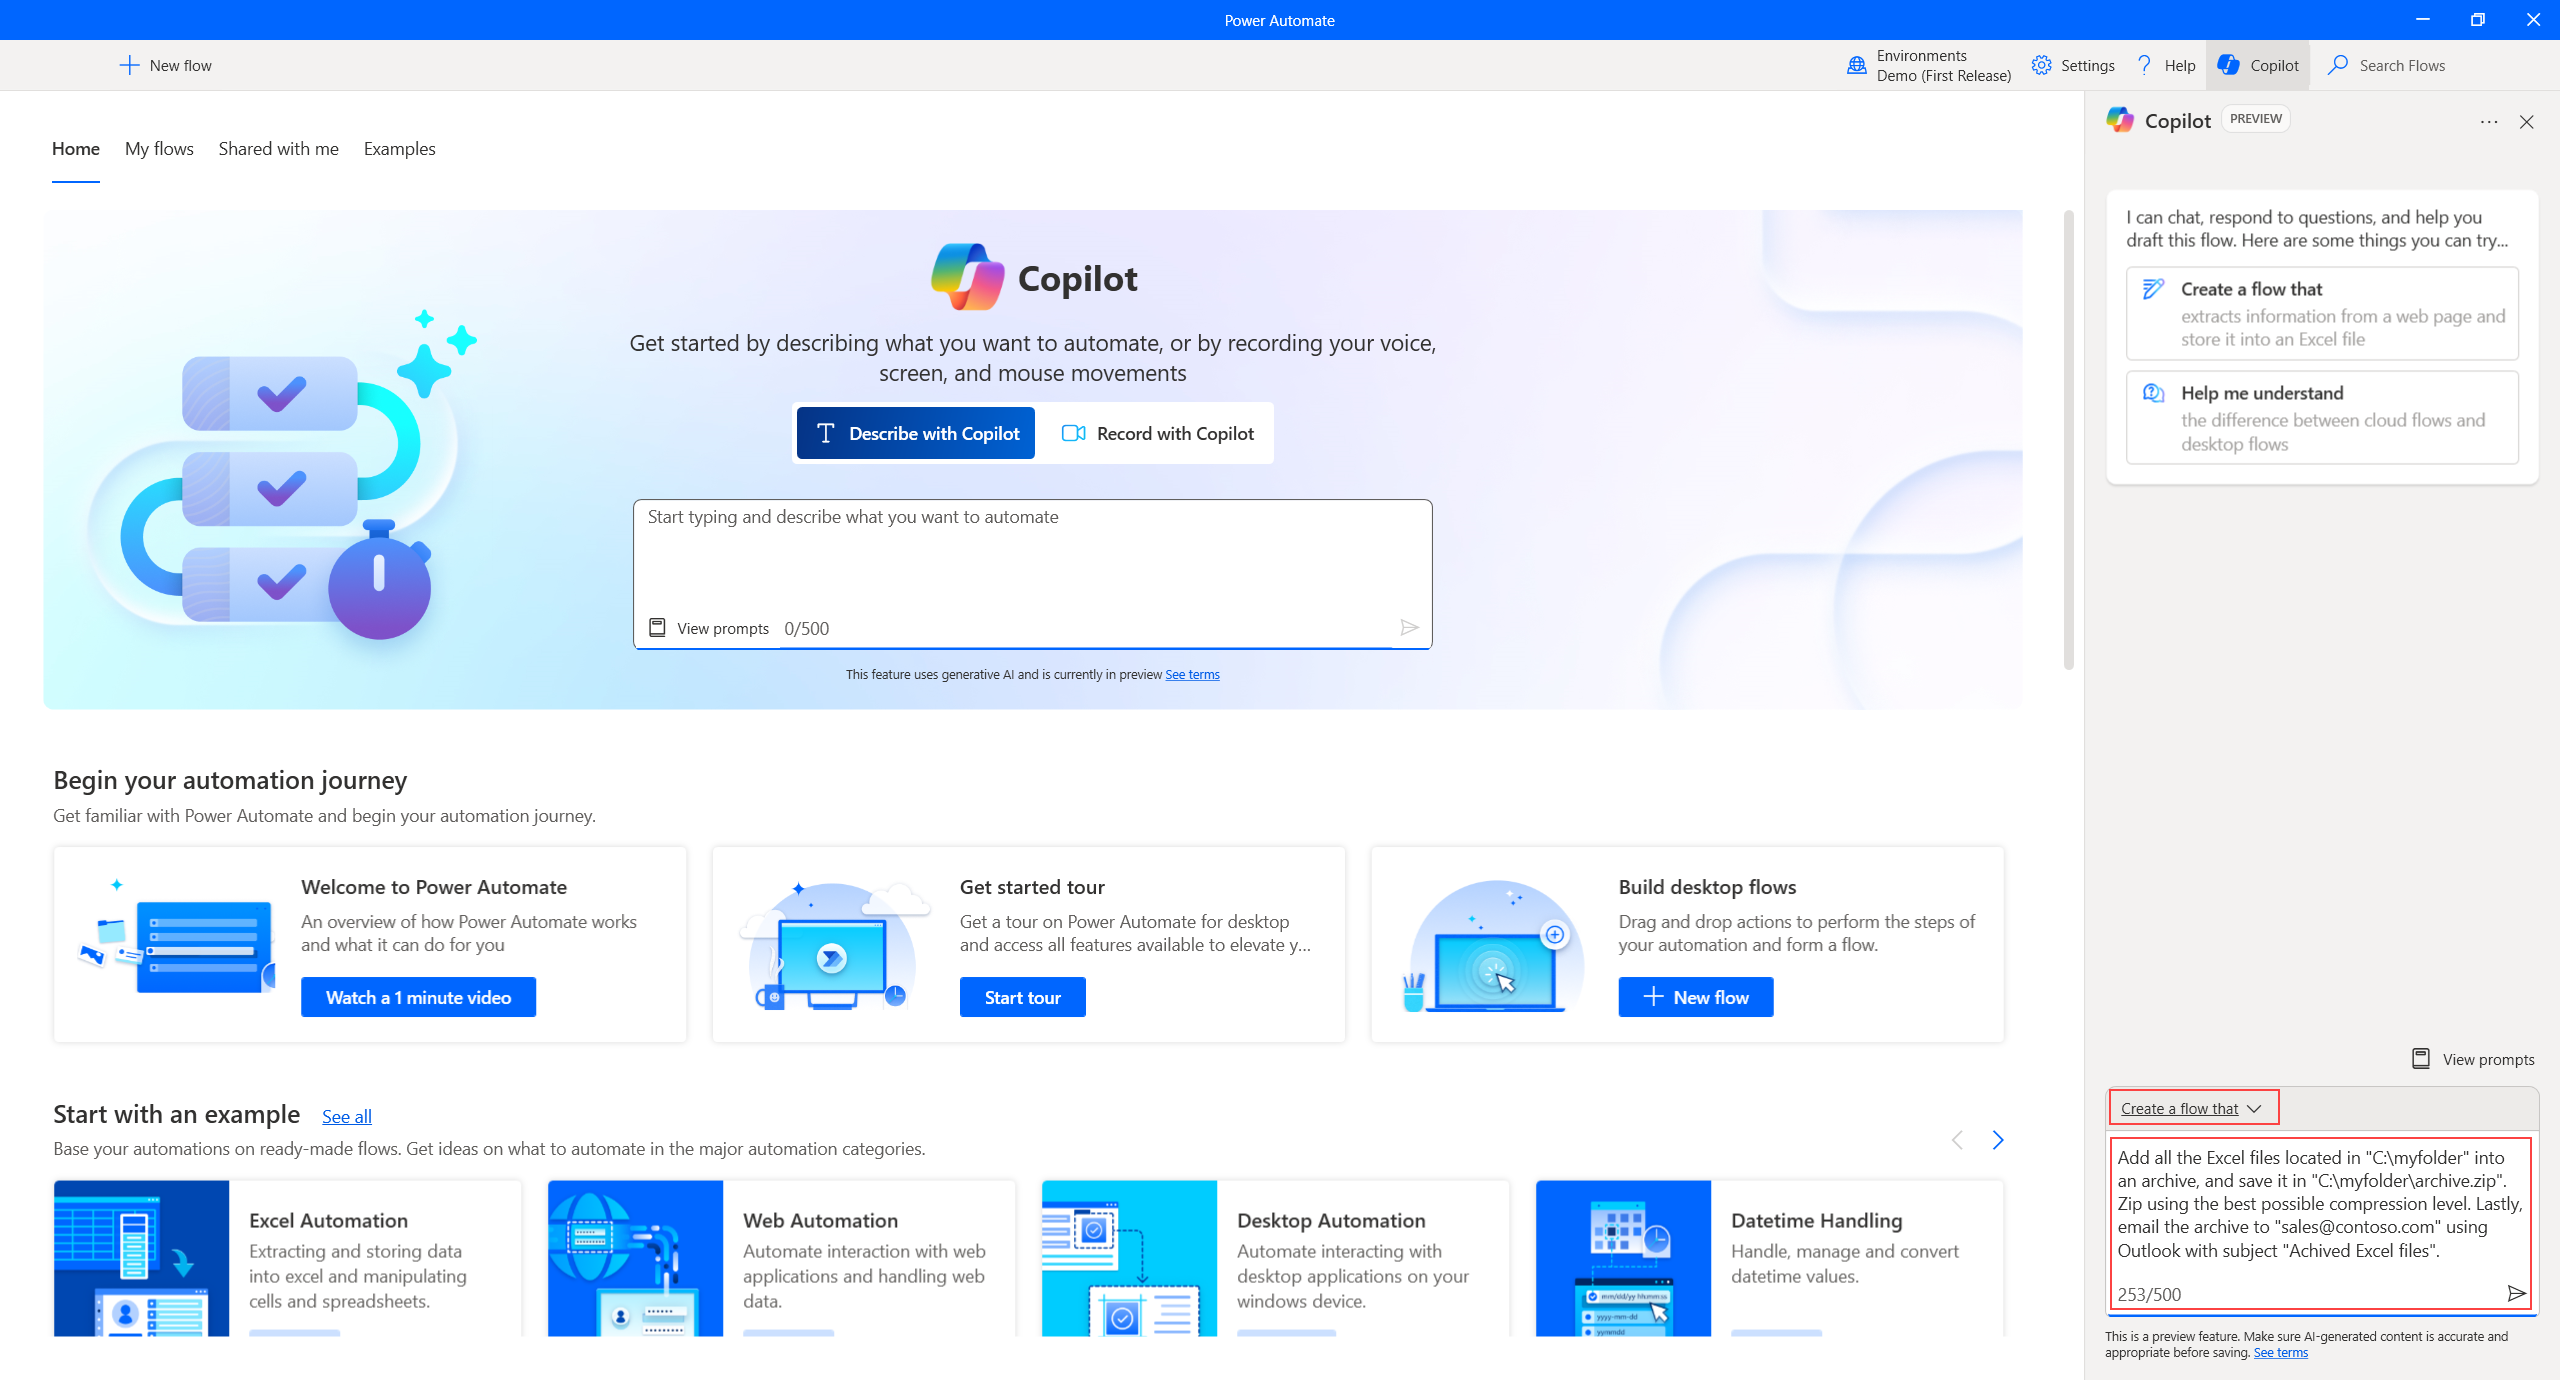
To create a flow from the Copilot side panel, open the Copilot chat panel by selecting the Copilot button on the top right corner of the console and type your prompt. Make sure the flow creation mode is selected from the drop-down menu:
Alternatively, you can also access the generative answers capability from the designer’s vertical menu on the right side.
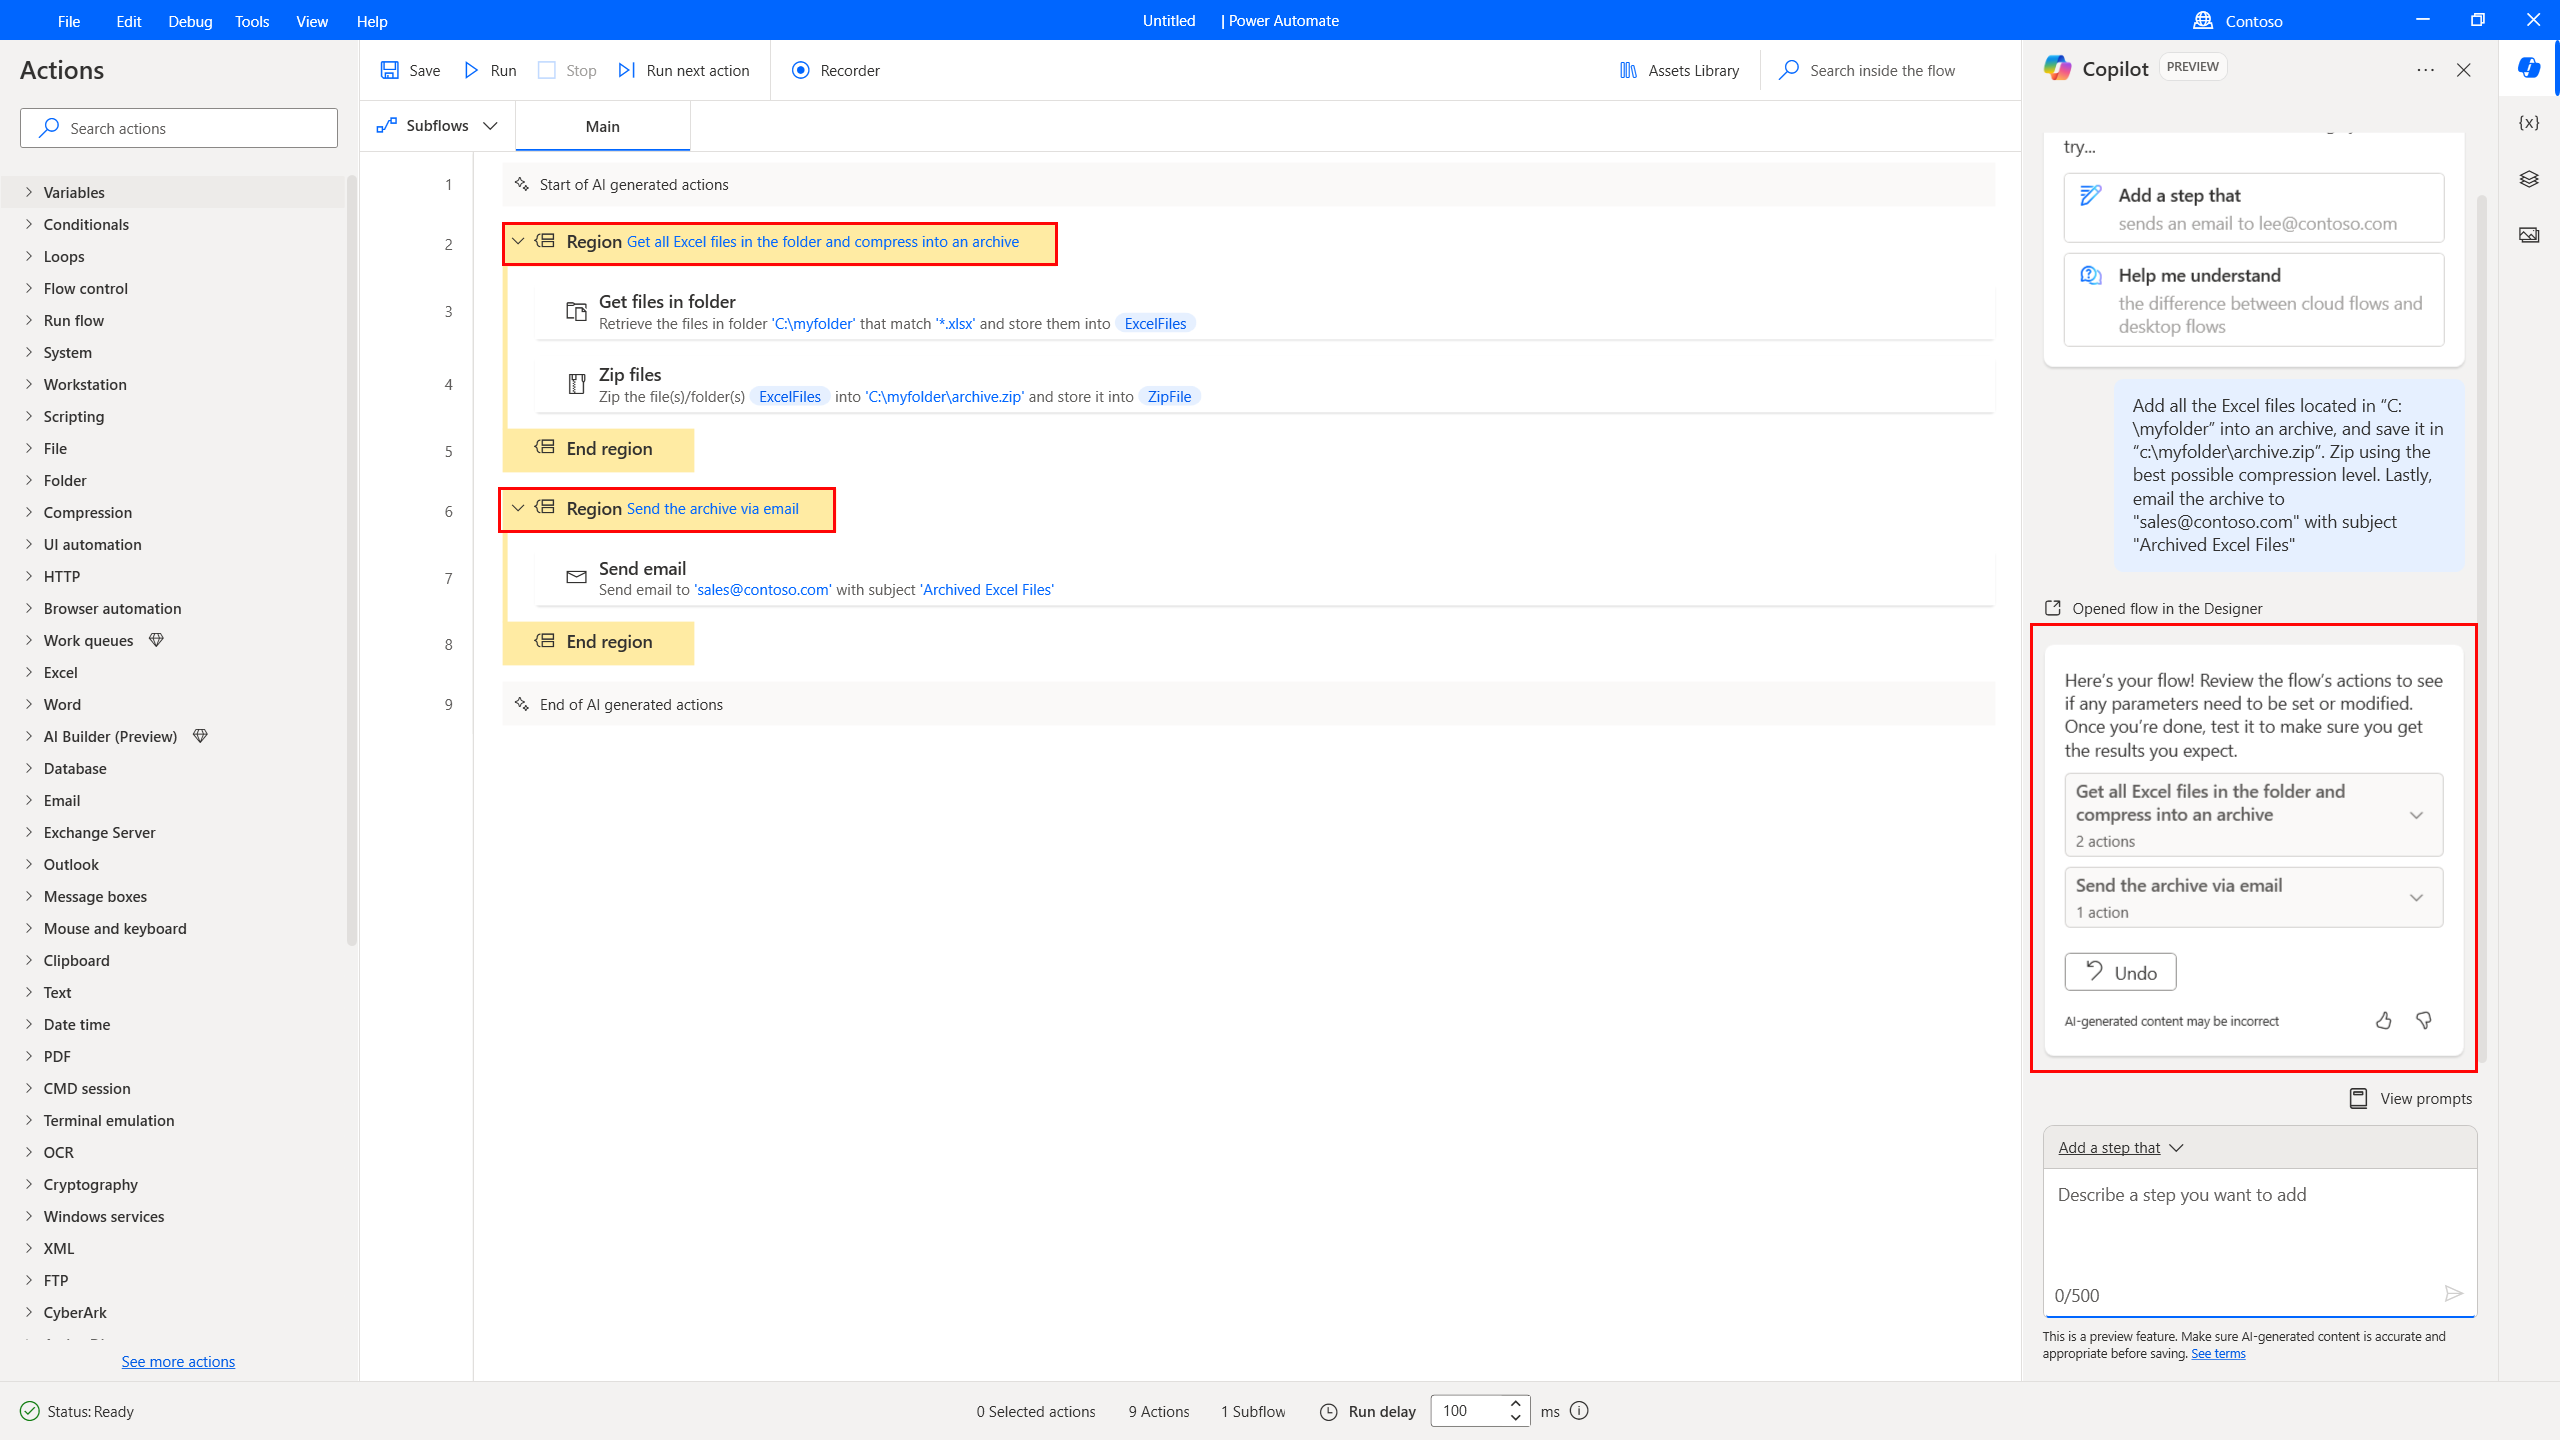
Once you submit your prompt, Copilot processes it and launches the designer with the newly generated flow for you to review. In the designer’s Copilot side panel, you can view a list of the actions that were generated. The actions are assigned in groups based on their functionality. You can view the actions contained in each group by expanding it. Lastly, these groups are translated to regions in the main designer’s panel.
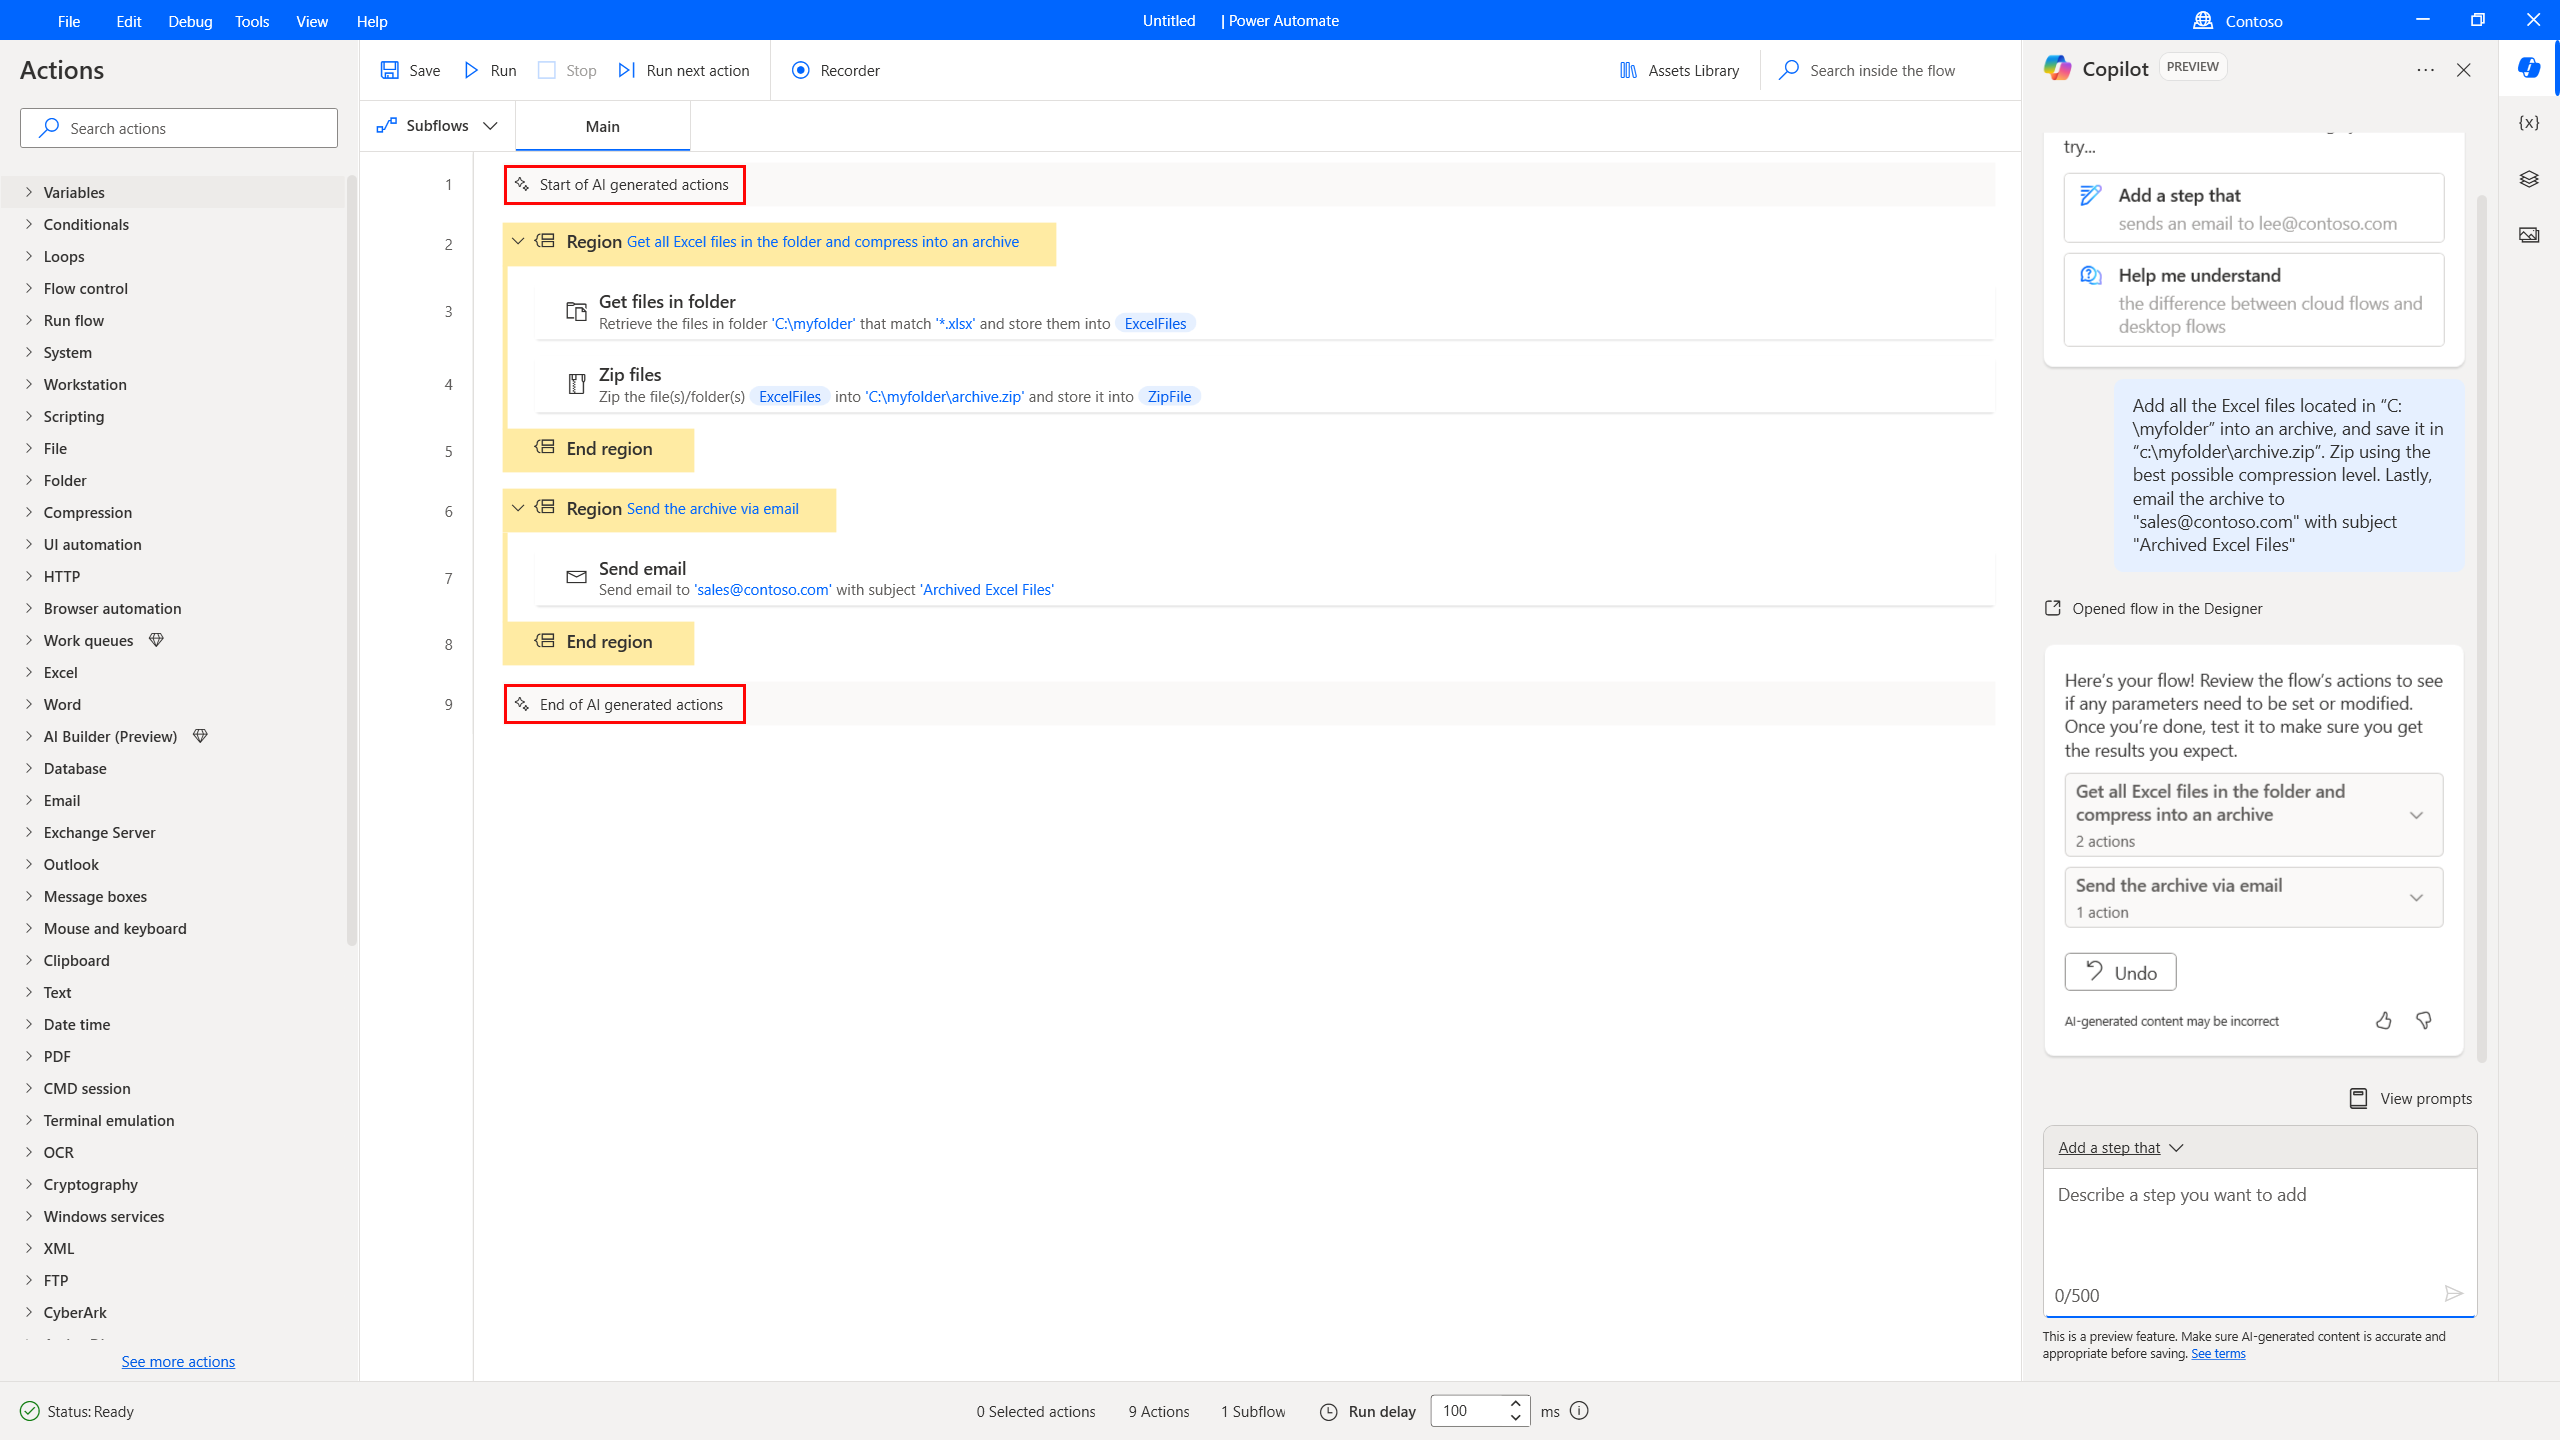
In the designer's main area, Copilot-generated actions are marked with two comments: one at the beginning to indicate the start and another at the end to signal the conclusion. This separation is designed to make it easier to locate and review these actions.
If Copilot identifies an intention to automate browser or UI tasks, it inserts an action placeholder. This placeholder serves as a starting point for you to initiate the recorder and capture the user actions. After you complete this step, the action placeholder is automatically replaced with the actions created by the recorder. You can also delete the action and add the necessary UI actions manually.

Note
The recording action produces a design time error. This is to remind you that a significant part of the flow is still missing and needs to be created. To resolve this, you can either launch the recorder and perform the recording or delete / disable it.
Add actions to an existing flow using Copilot (preview)
You can easily enhance an existing flow by instructing Copilot to add more functionality. Just navigate to the Power Automate for desktop’s designer and describe your desired outcome in the Copilot side panel. Copilot adds the appropriate actions either at the end of your flow or beneath a selected action. Make sure the appropriate Copilot skill is enabled before typing your prompt by either selecting the Add a step that button on the top of the Copilot side panel or by selecting it from the drop-down menu at the bottom.
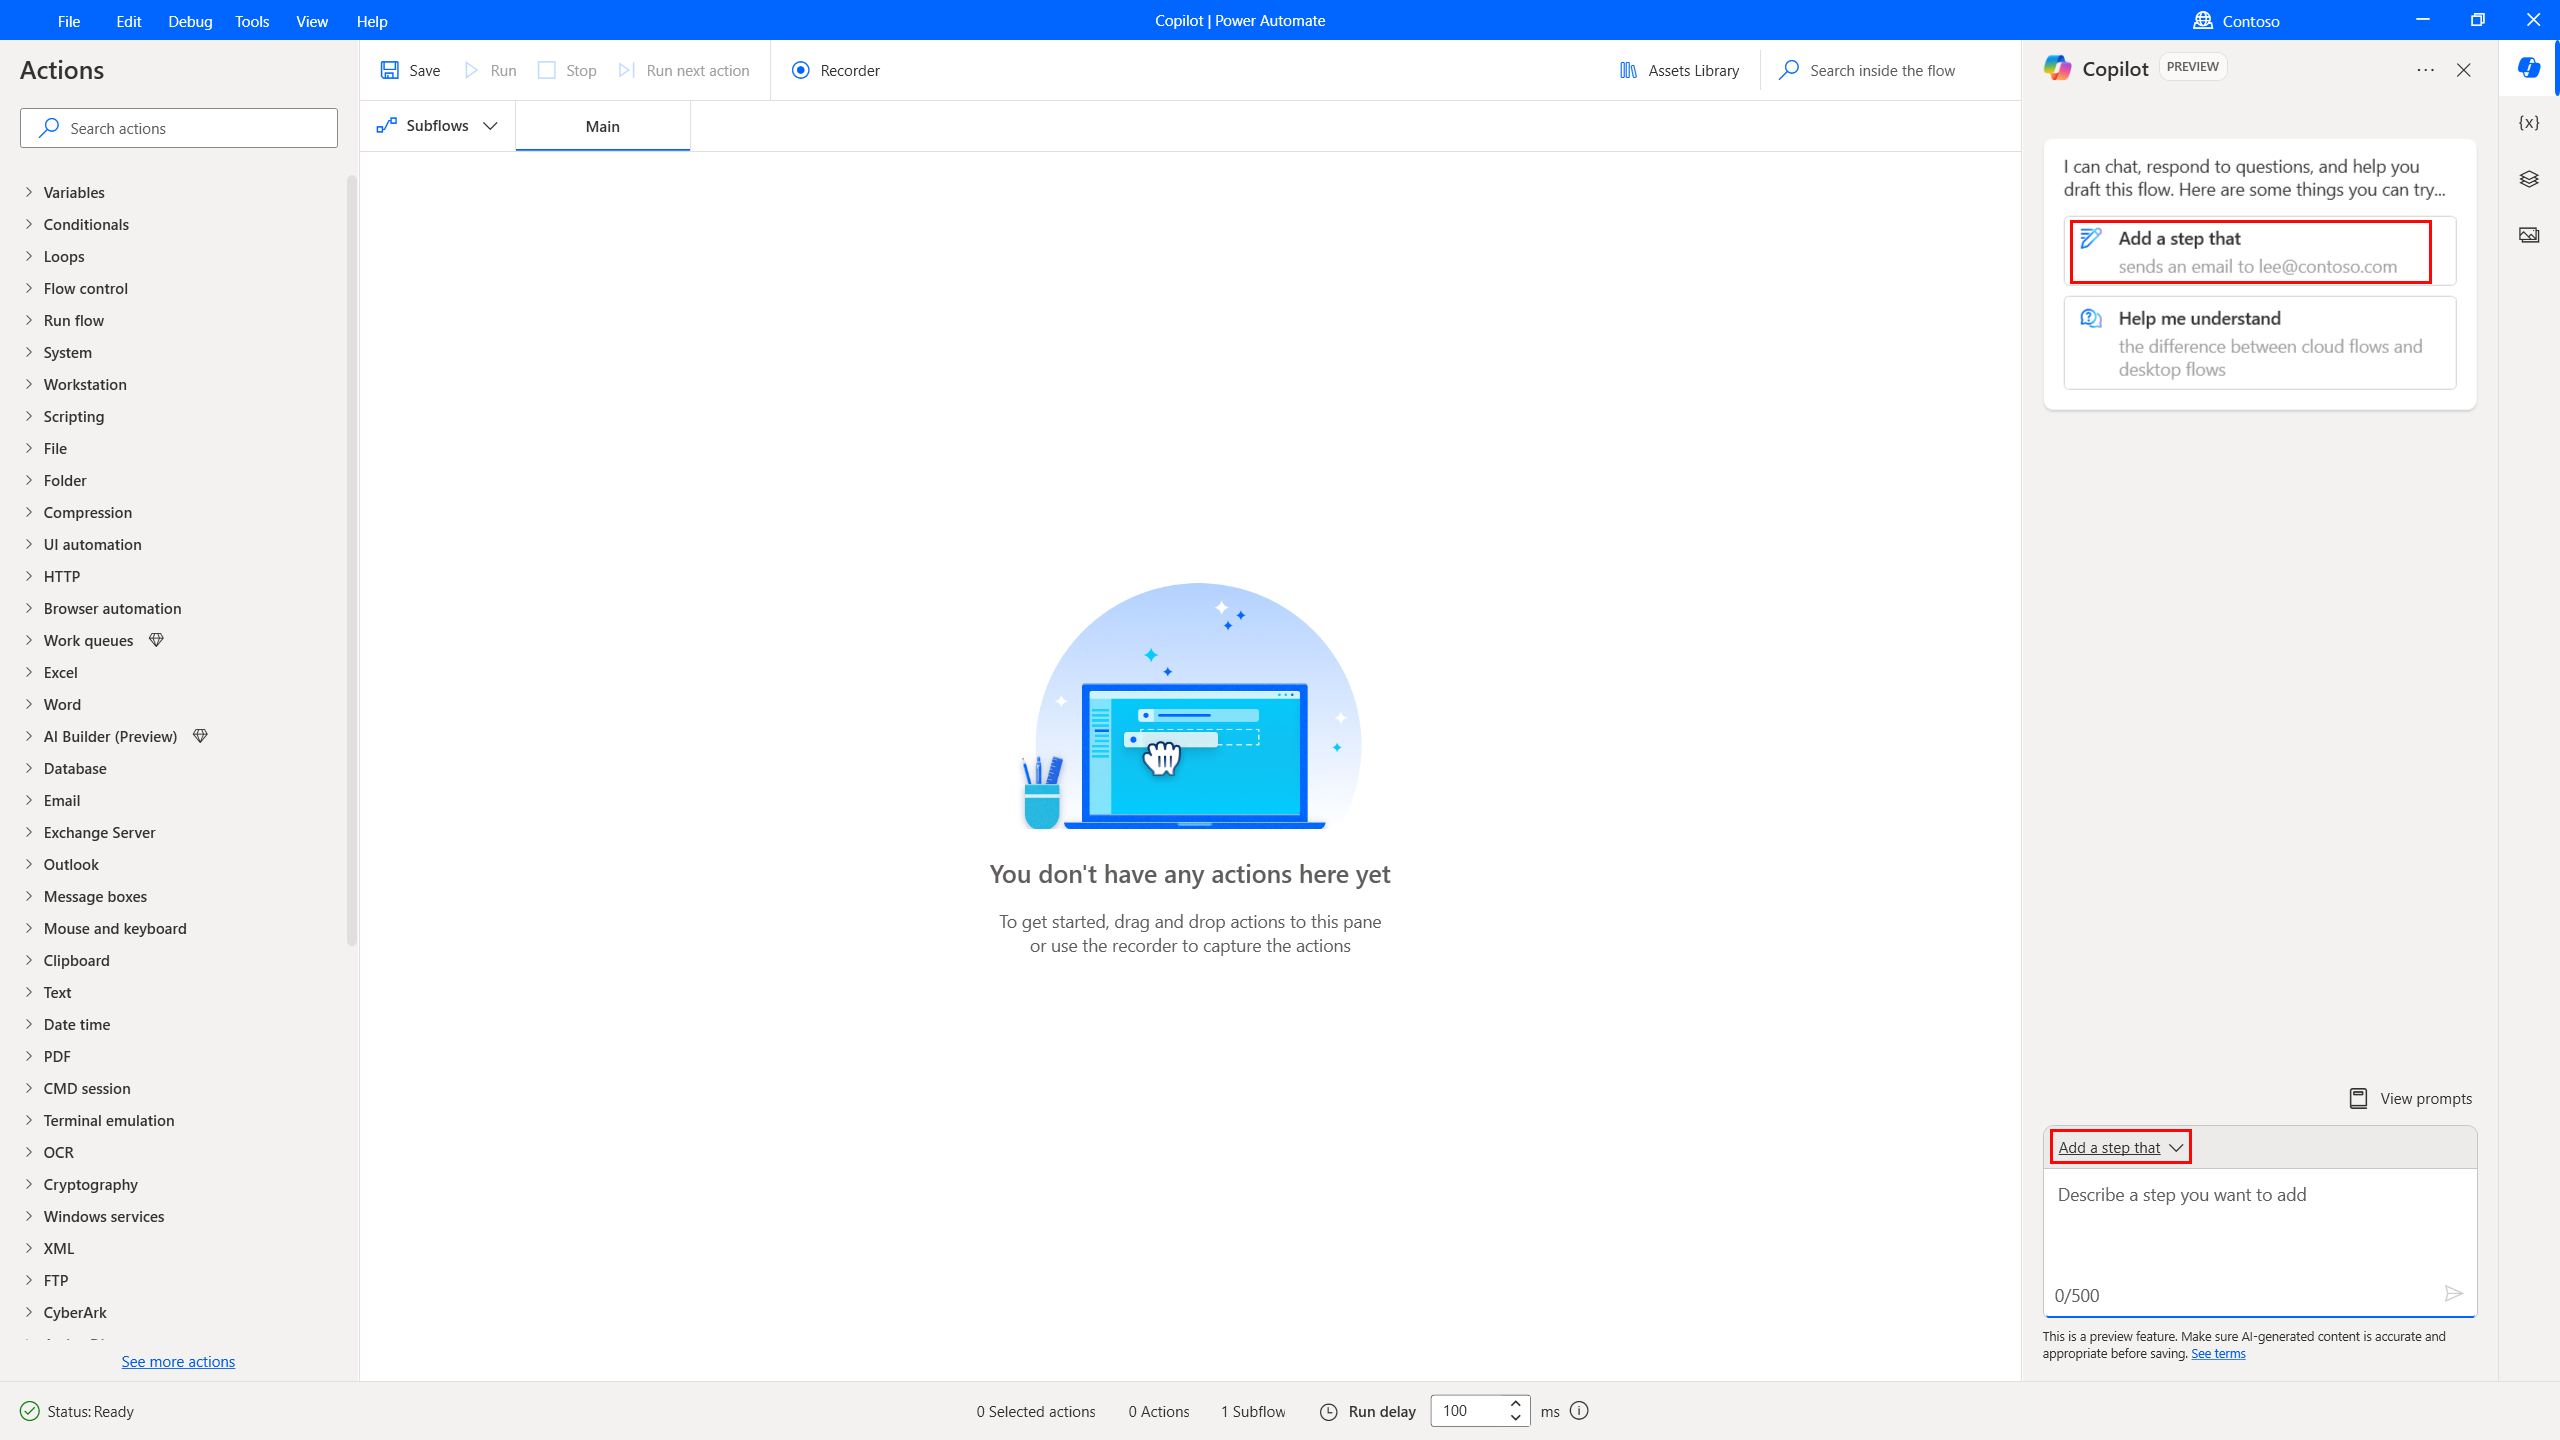
How to write a good prompt
Crafting effective prompts involves more than just being specific with your request or specifying how you want your results displayed. If the initial results aren't what you're looking for, try adjusting your prompt and running it again.
- Be as specific as possible. Instead of a generic prompt like, Email an Excel file, try the following prompt instead:
- Send an email to sales@contoso.com from the account accounting@contoso.com with subject "Contoso sales data" and attach the Excel file in "C:\contoso\contoso.xlsx"
- Try tweaking your prompt to further fine tune.
- Learn more about writing prompts with generative AI at The art of the prompt: How to get the best out of generative AI.
Use Copilot to get answers to product-related questions (preview)
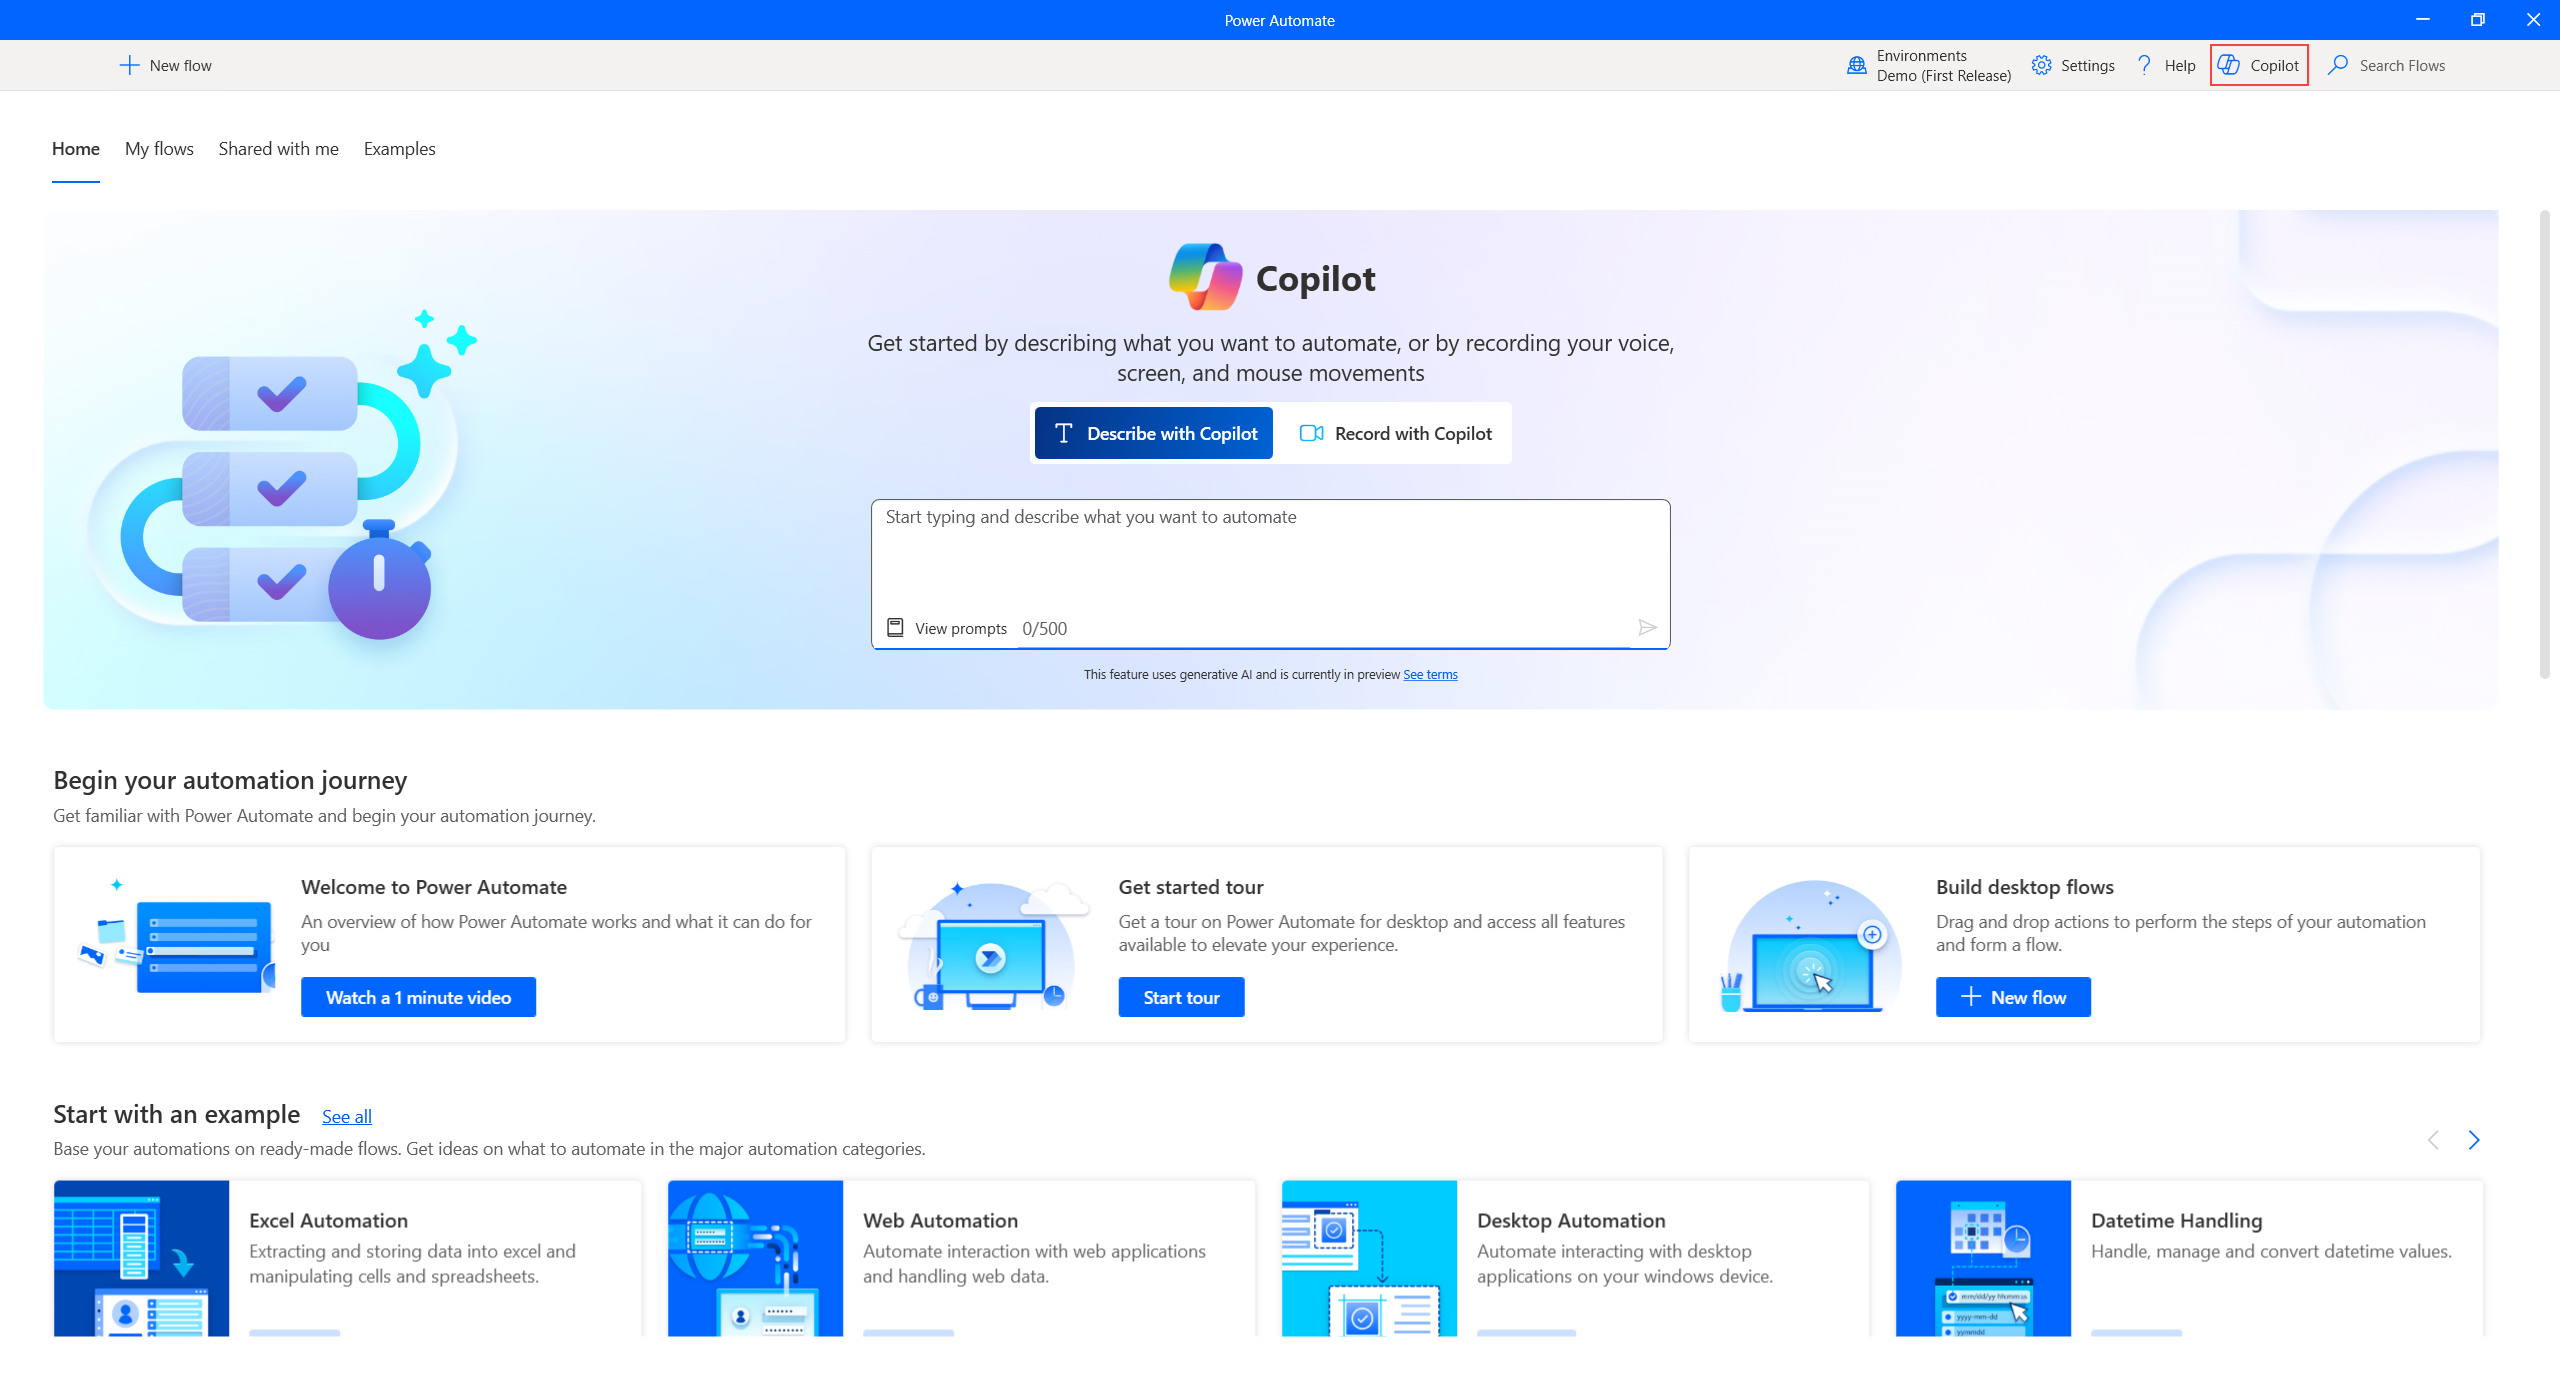
Access the generative answers capability from the console by selecting the Copilot icon located on the top right corner of the console window.
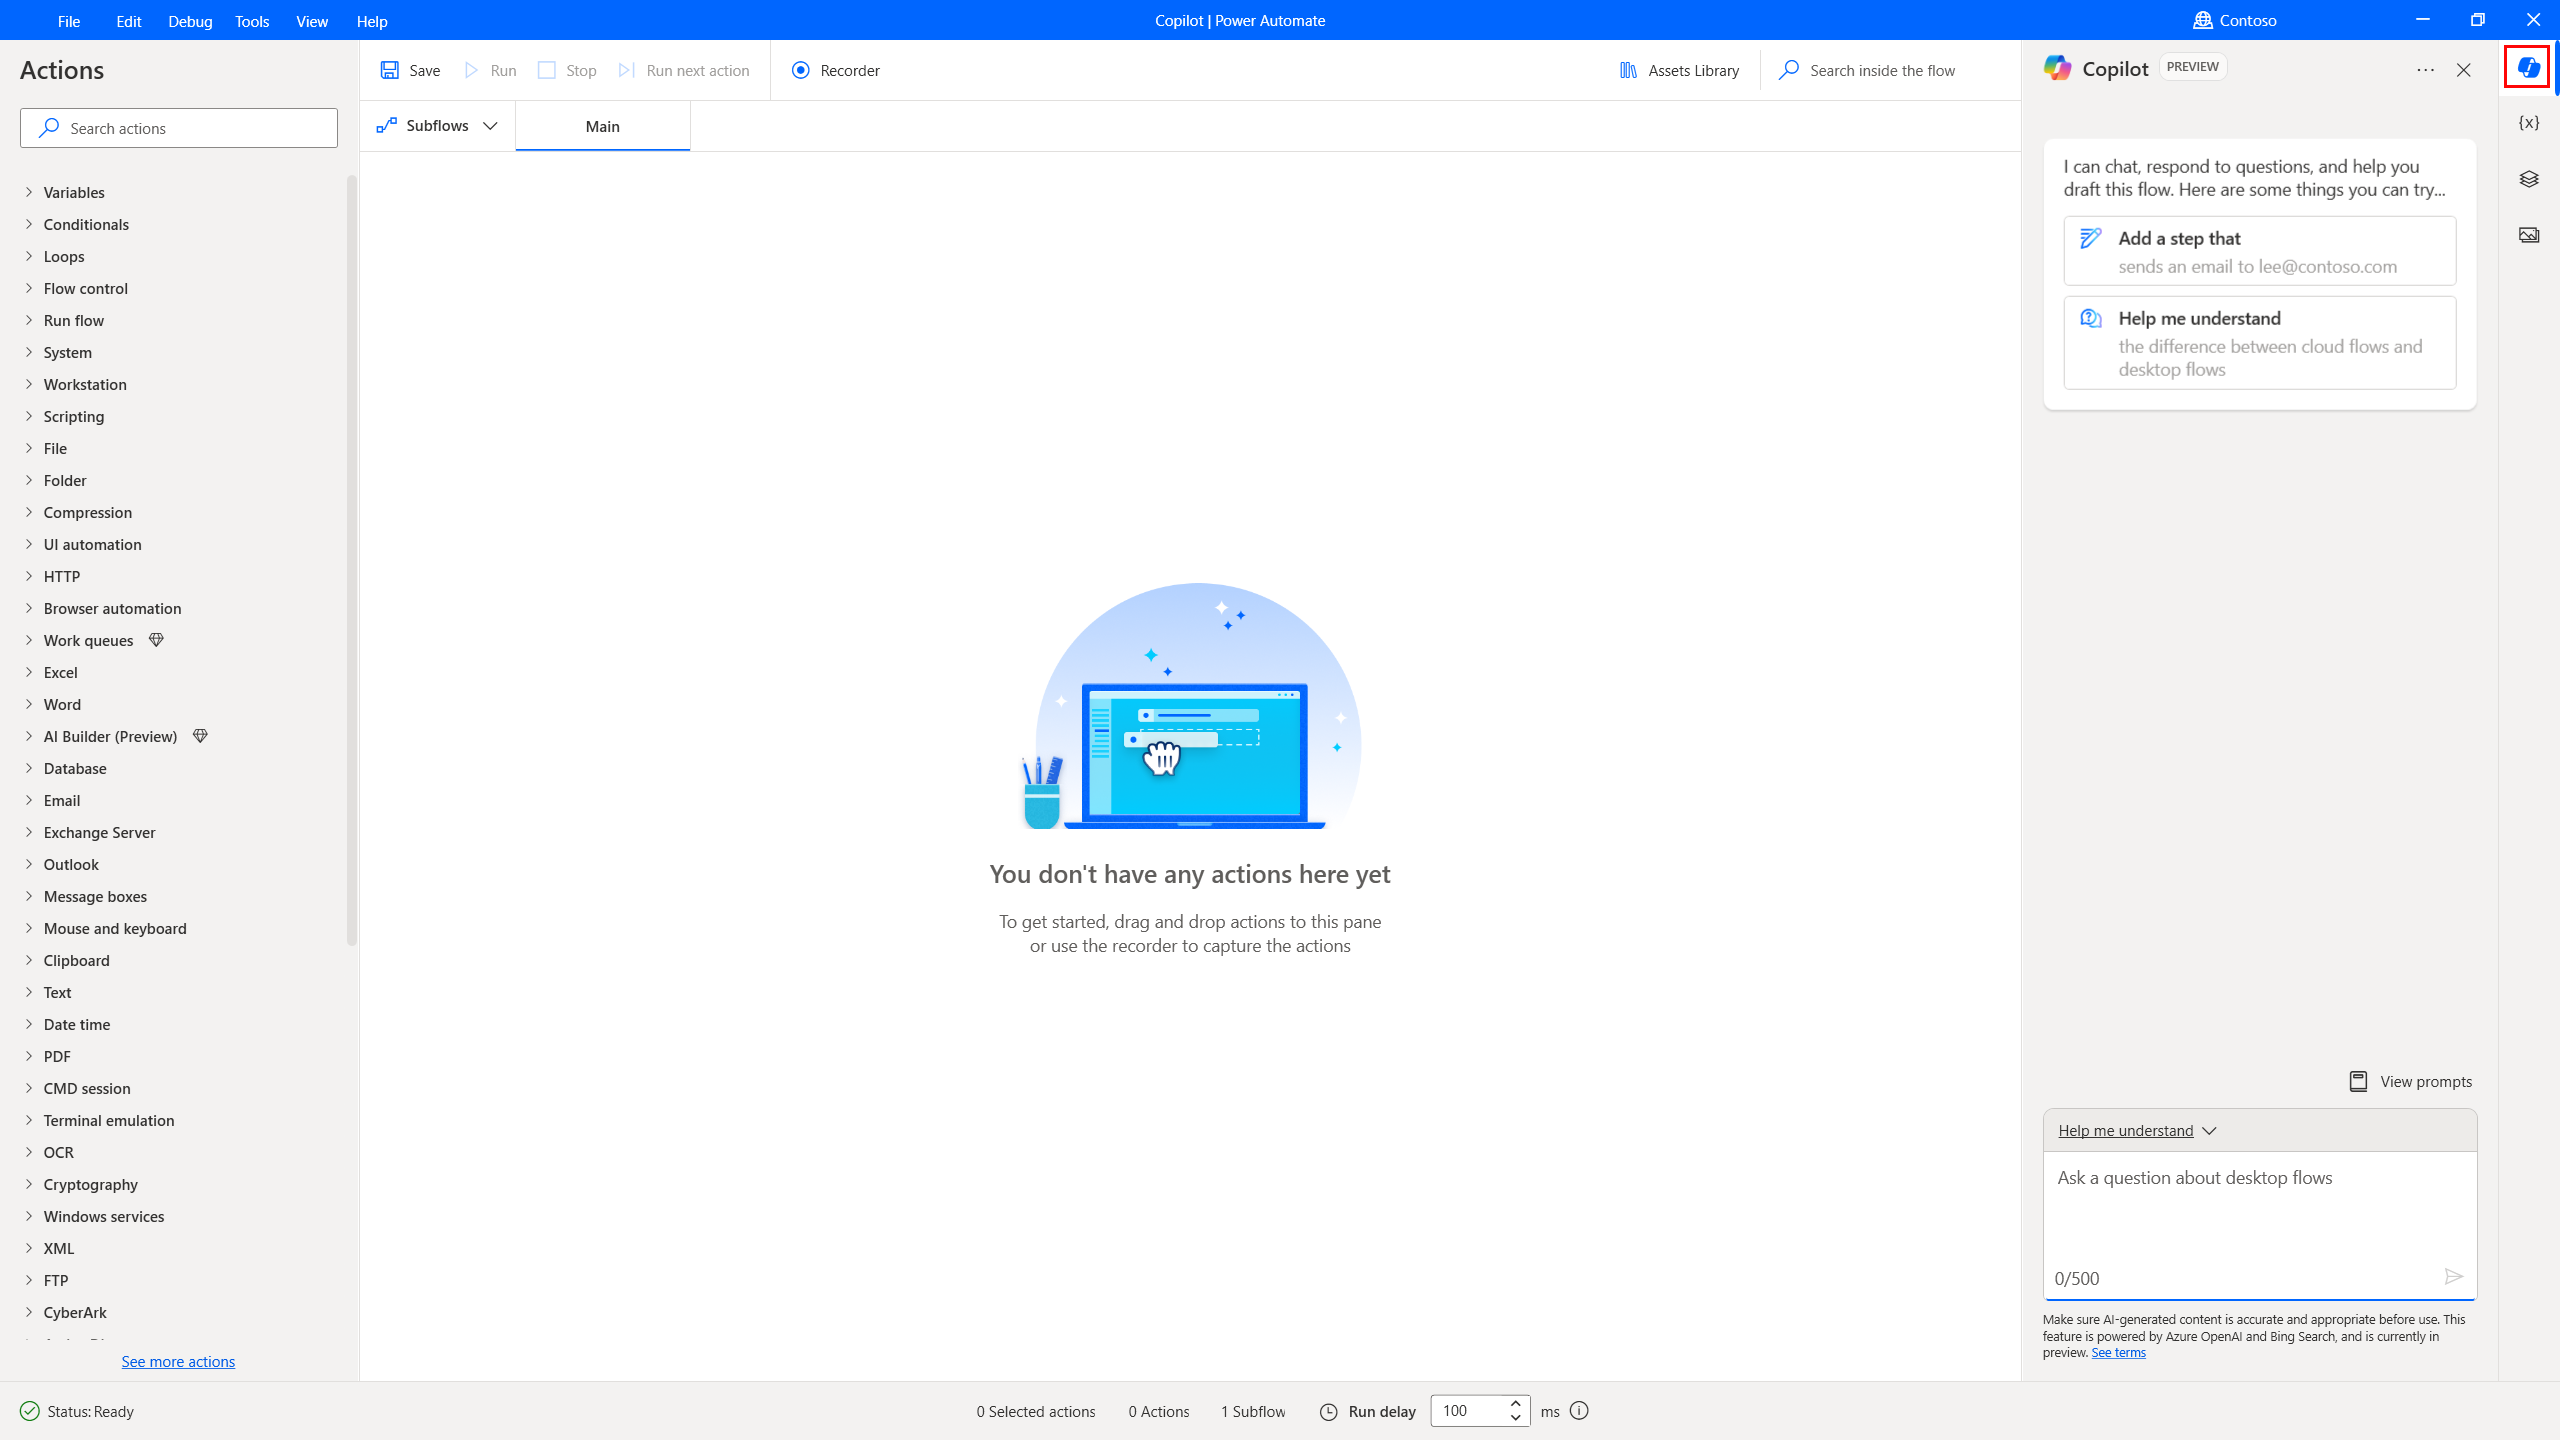
Alternatively, you can also access the generative answers capability from the right side of the screen in the designer’s vertical menu.
From Copilot’s side panel, make sure the generative answers skill is selected by either selecting the Help me understand button on the top or the drop-down menu at the bottom.
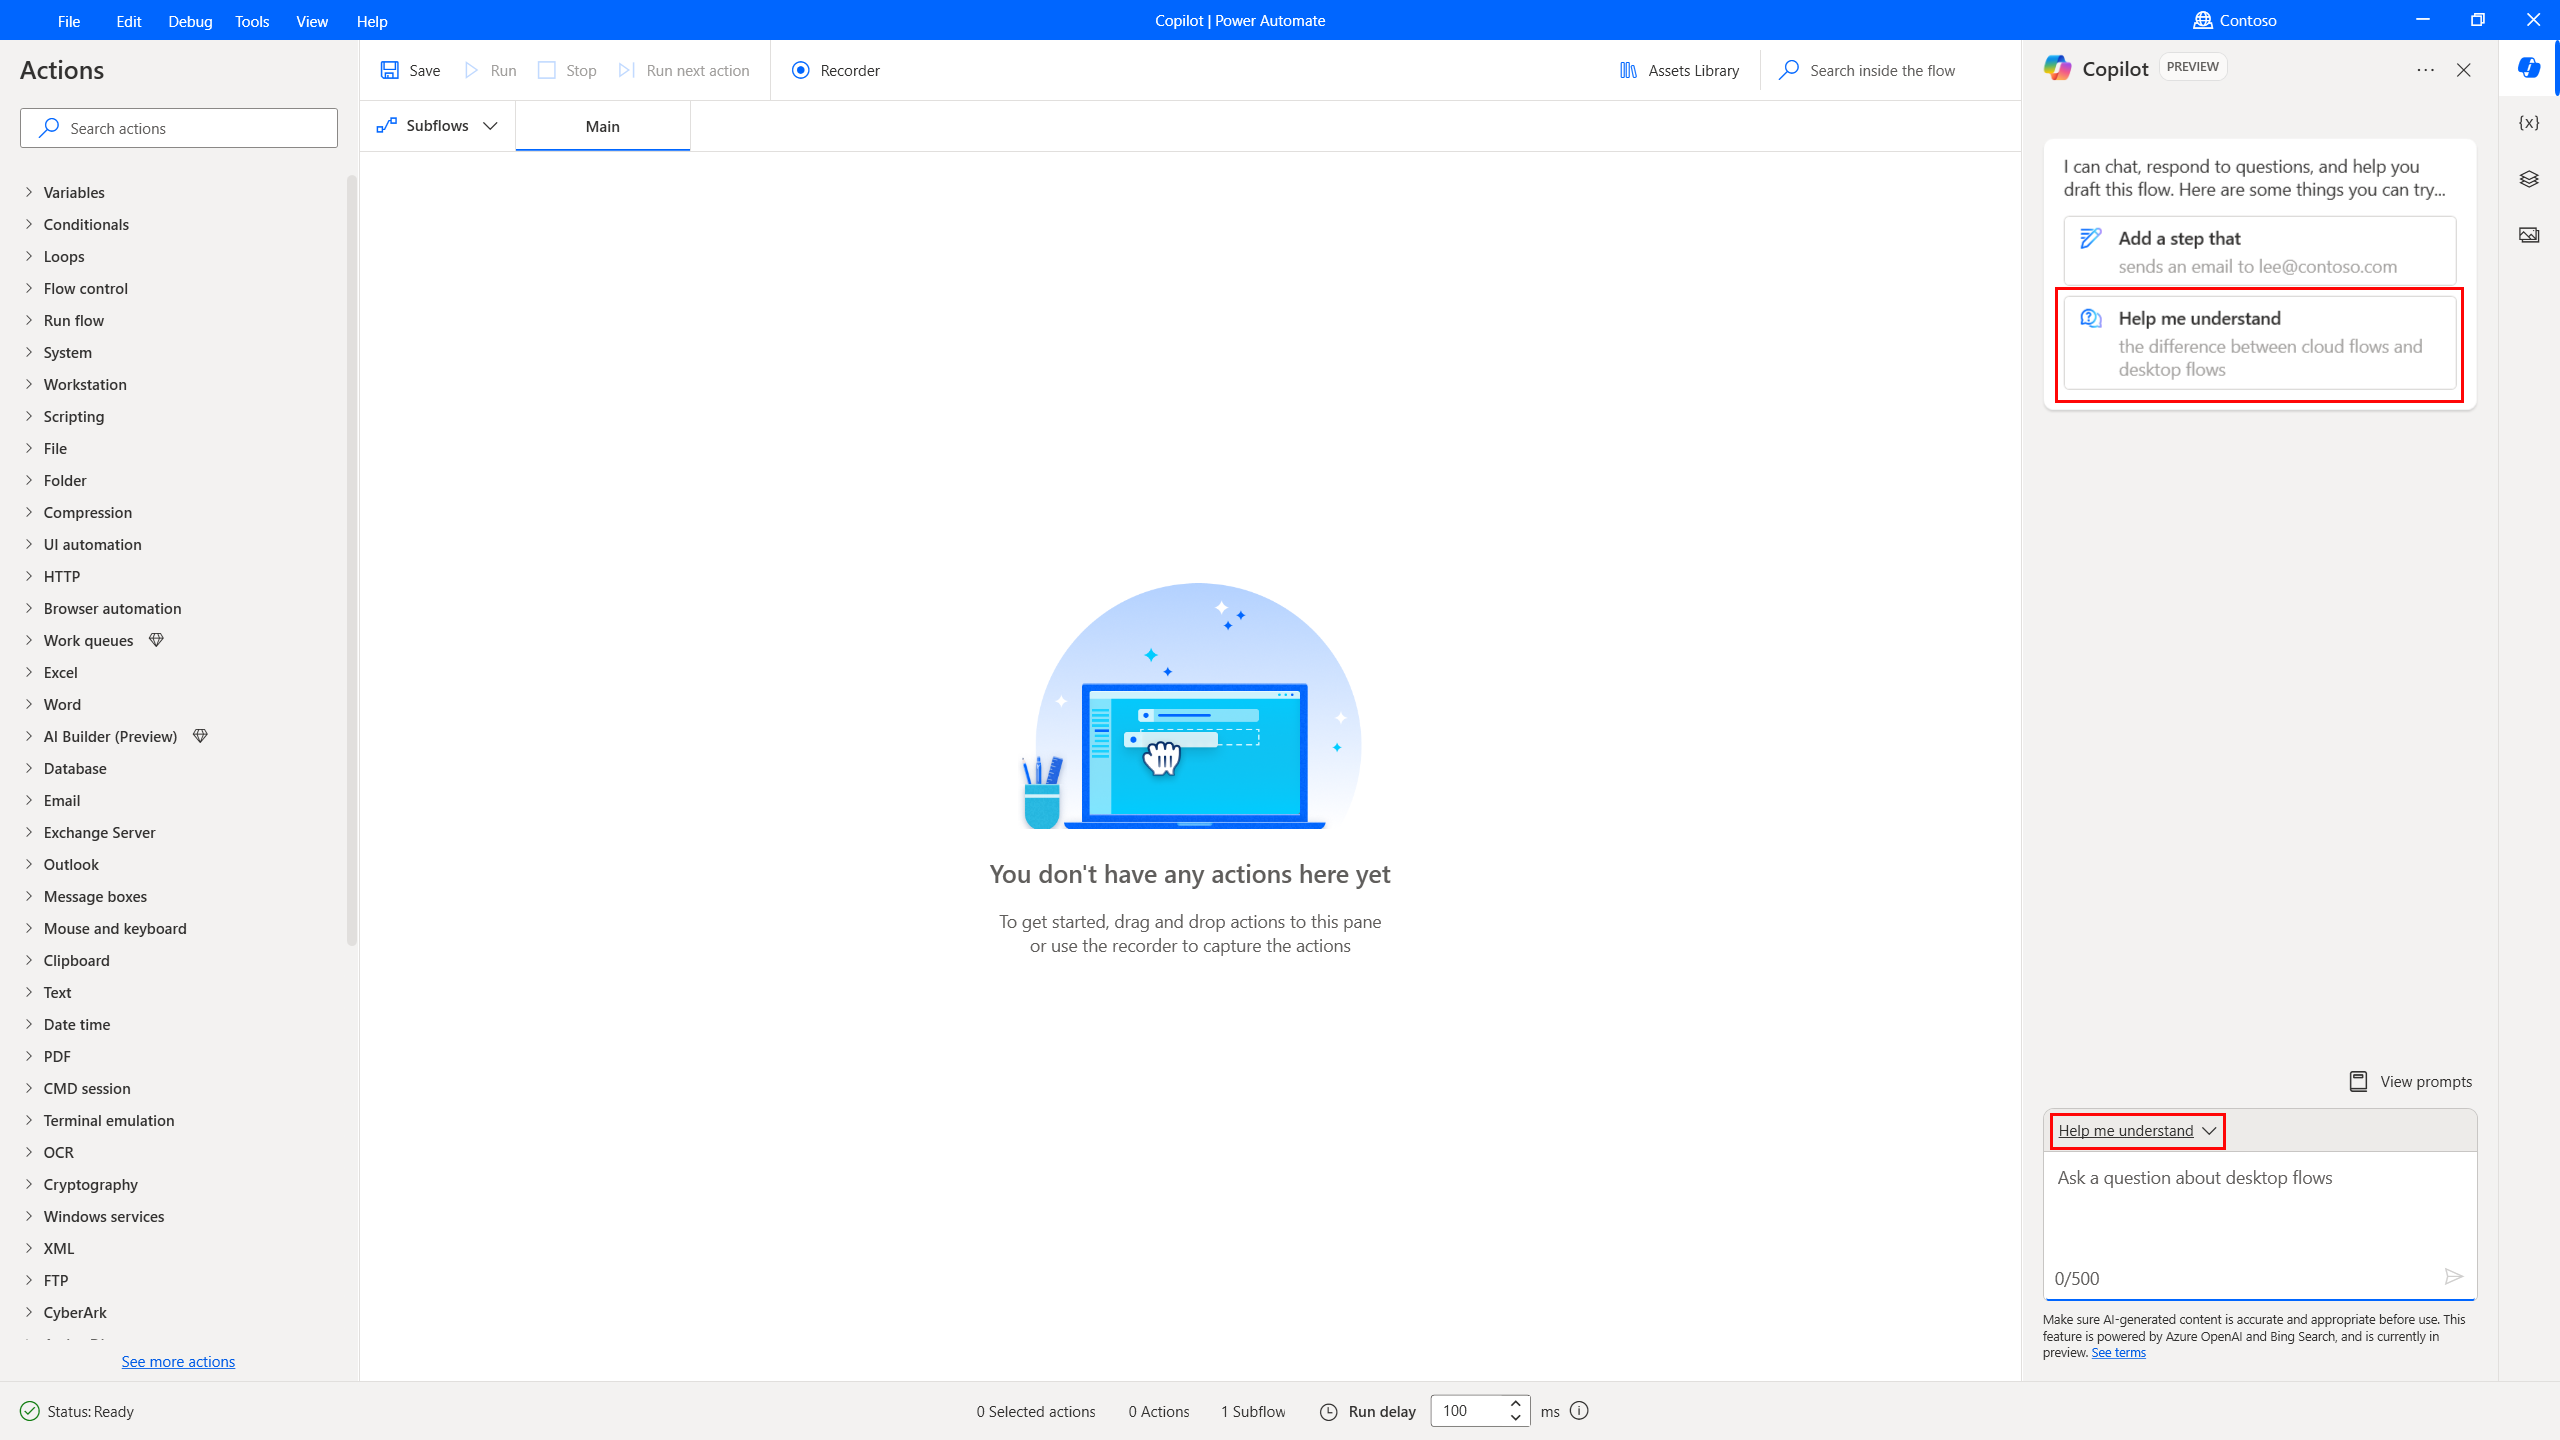
In the Copilot pane, ask any product related questions or use one of the proposed prompts to get you started. The answer generated contains a link to the documentation page to refer you to additional information. Make sure you always review AI-generated content.
Use Copilot to summarize actions and subflows (preview)
The Summarize actions & subflows Copilot skill helps you quickly understand desktop flows by generating concise summaries for specific actions, multiple actions, or entire subflows. This skill lets you troubleshoot and maintain flows more efficiently, saving time and simplifying the process of understanding and optimizing your automation.
Key features
This skill lets you generate summaries for individual actions, multiple actions, or entire subflows within your desktop flow. You can reference specific line numbers or subflow names to request descriptions, such as "Summarize action in line 4" or "Summarize subflow 'main'." You can also customize the level of detail in the summaries by specifying your preferences, like requesting a high-level overview in a couple of sentences or a more detailed explanation. For example, you can say "Summarize subflow <subflow_name> in a couple of sentences".
How to use
To use the "Summarize actions & subflows" skill, select it from the Copilot skill picker drop-down menu in the Power Automate for desktop flows designer. Then, type your prompt in natural language to generate a summary.
Help us improve Copilot
To send feedback, select the thumbs up or thumbs down icon under the AI-generated content. A feedback dialog appears, allowing you to submit feedback to Microsoft. Learn more about how this data is used and your rights at Microsoft feedback for your organization.
Note
If you can't see the feedback dialog, check if your tenant admin turned it off.
Turn off user feedback functionality
As a Power Platform admin, prevent users from sending Copilot feedback to Microsoft by using the "Copilot feedback" tenant setting.
Data subject rights requests on user feedback
Tenant administrators can view, export, and delete feedback from users by signing in to the Microsoft 365 admin center and selecting Health > Product feedback.
Frequently asked questions (FAQ)
Use this section to find answers to frequently asked questions.
How can I prevent users from using Copilot?
- To prevent your users from using any of Copilot's capabilities, contact Microsoft Support.
- To prevent users from using Copilot’s generative answers capability, Power Platform administrators can turn off the Copilot help assistance in Power Automate via Bing setting in the Power Platform admin center.
What are the limitations of Copilot in Power Automate for desktop?
- Copilot only supports a subset of the available actions in Power Automate for desktop. Specifically, only the following actions are supported for flow creation or when adding steps in an existing flow:
- Clipboard
- CMD session
- Compression
- Conditionals
- Database
- Date Time
- Excel
- File
- Flow Control
- Folder
- HTTP
- Loops
- Message Boxes
- Mouse and Keyboard
- Outlook
- Scripting
- System
- Text
- Variables
- Word
- XML
- You can’t use Copilot in Power Automate for desktop if you’re using a personal Microsoft account. For example, you can’t use
someone@live.com. Use a work or school account likesomeone@contoso.cominstead. - Only environments located in the United States have access to Copilot.
- Copilot supports English language only.
Why are some of the generated actions marked as erroneous when I create a flow or add actions to an existing flow using Copilot?
Copilot generates actions based on your prompt. If the prompt doesn't include the mandatory parameters of an action, its left empty when generated and is marked as erroneous. You can try providing a more detailed prompt to avoid having actions with empty parameters. For example, a prompt such as Open an excel file and read all data results in a design time error, as the Excel file path is a mandatory parameter of the Launch Excel action. If the instruction is to Open the Excel file located at "c:\contoso\myExcel.xlsx" and read all data, then the Launch Excel action is prefilled with the file path, ensuring no design time errors occur.
What are some example prompts I can use to create flows?
- Check if the folder c:\contoso exists. If it does, search for all Excel files. Add every Excel file found into an archive c:\Contoso\archivedExcels.zip using the best compression level.
- Search in the Excel file c:\contoso\employees_list.xlsx for the string "Foo" in any of the cells. If there's a match, send an email using Outlook from the account sales@contoso.com to accounting@contoso.com with Subject "Here is your Excel file" and attach the Excel file.
- Read the text from the file c:\contoso\sample_text.txt. Replace any occurrences of
<telephone number>with 514-555-0100 and any occurrences of<email address>with sales@contoso.com. Lastly, display the whole text in a dialog and email the text file to accounting@contoso.com with subject: "Here's the text that I parsed." Put in the email body the text of the file and also attach the file. - Add a PowerShell script that performs an API call to https://contoso.com/api_endpoint and passes the "employee_details" variable. Then create a new Excel file and write the employee_details variable to it. Lastly, save the Excel file to c:\contoso\employees.xlsx
- *Add an action that compresses the following folder "C:\Users\contoso\Desktop\Invoices" and save it on my desktop.
- Open the following Excel file "C:\Users\contoso\Desktop\data.xlsx" and delete column B from the first sheet. Then save the Excel file and close it.*
- Connect to my email account sales@contoso.com, search for the last email sent by accounting@contoso.com and display in a message the order number from that email's subject.
- Create a flow that prompts the user for the name of an application and then searches for that application to check if it's running. If not, use run application to launch it by first locating its exe from program files.
- Find all png files in c:\temp and to compress them in a new file with name pngs.zip.
- Connect to the SQL Database "Server=server-name;Database=database-name;User Id=username;Password=password;" and get the row count of the table car_entries.