Check user access to a row
To perform an action on a row, a user needs to have the required privilege assigned through a security role or the user must be a member of a team that has a security role with assigned privileges.
To perform actions on a row, the system checks your privileges and if the privilege check passes, then the system performs an access check. The access check verifies that you have the required rights to perform actions on a row such as read, write, create, delete, append, append to, share, and assign.
You can have access rights to perform an action on a row through ownership, role access, shared access, or hierarchy access.
| Access type | Description |
|---|---|
| Ownership | User owns the row or belongs to a team that owns the row. |
| Role access | User has access to perform an action on a row because of their security role. |
| Shared access | The row is shared with a user, team, or organization by a user that has appropriate share rights. |
| Hierarchy access | Hierarchy access only takes place if hierarchy security management is turned on for the organization and the table. The user also needs to be a manager. |
For more information on how privileges and access checks work, go to How access to a row is determined.
Check your access to a row
Select a row.
Select Check Access on the command bar.
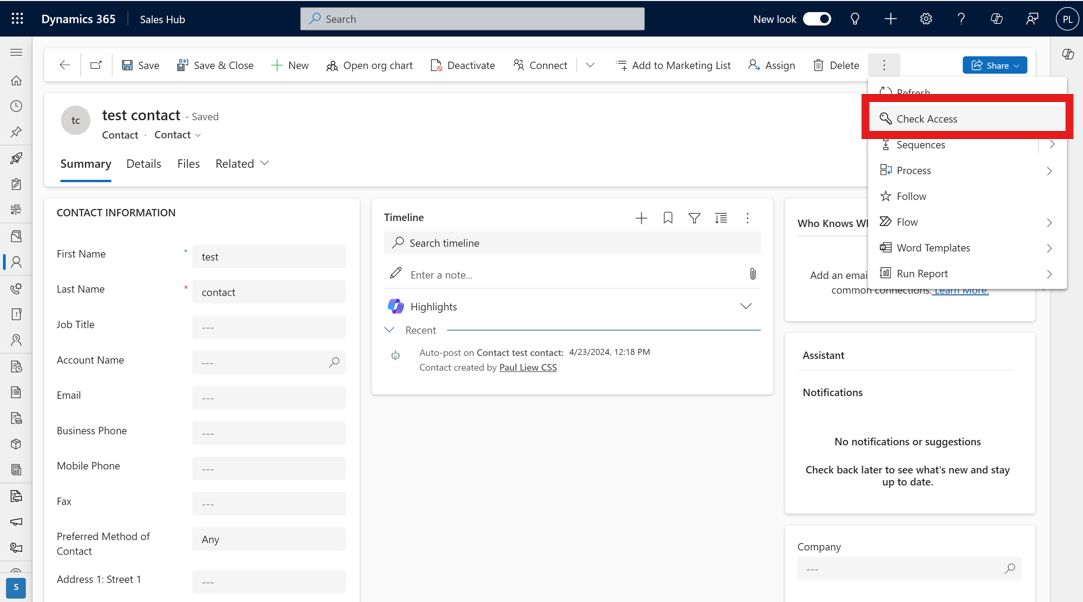
The Check Access window displays your access information.
Contact your administrator if you don't have the required access. Only an administrator can edit your security role and privileges. To find your administrator, go to Find your administrator or support person.
Check another user's access to a row
If you're an administrator, you can check the access another user has to a row.
- Select a row.
- Select Check Access on the command bar.
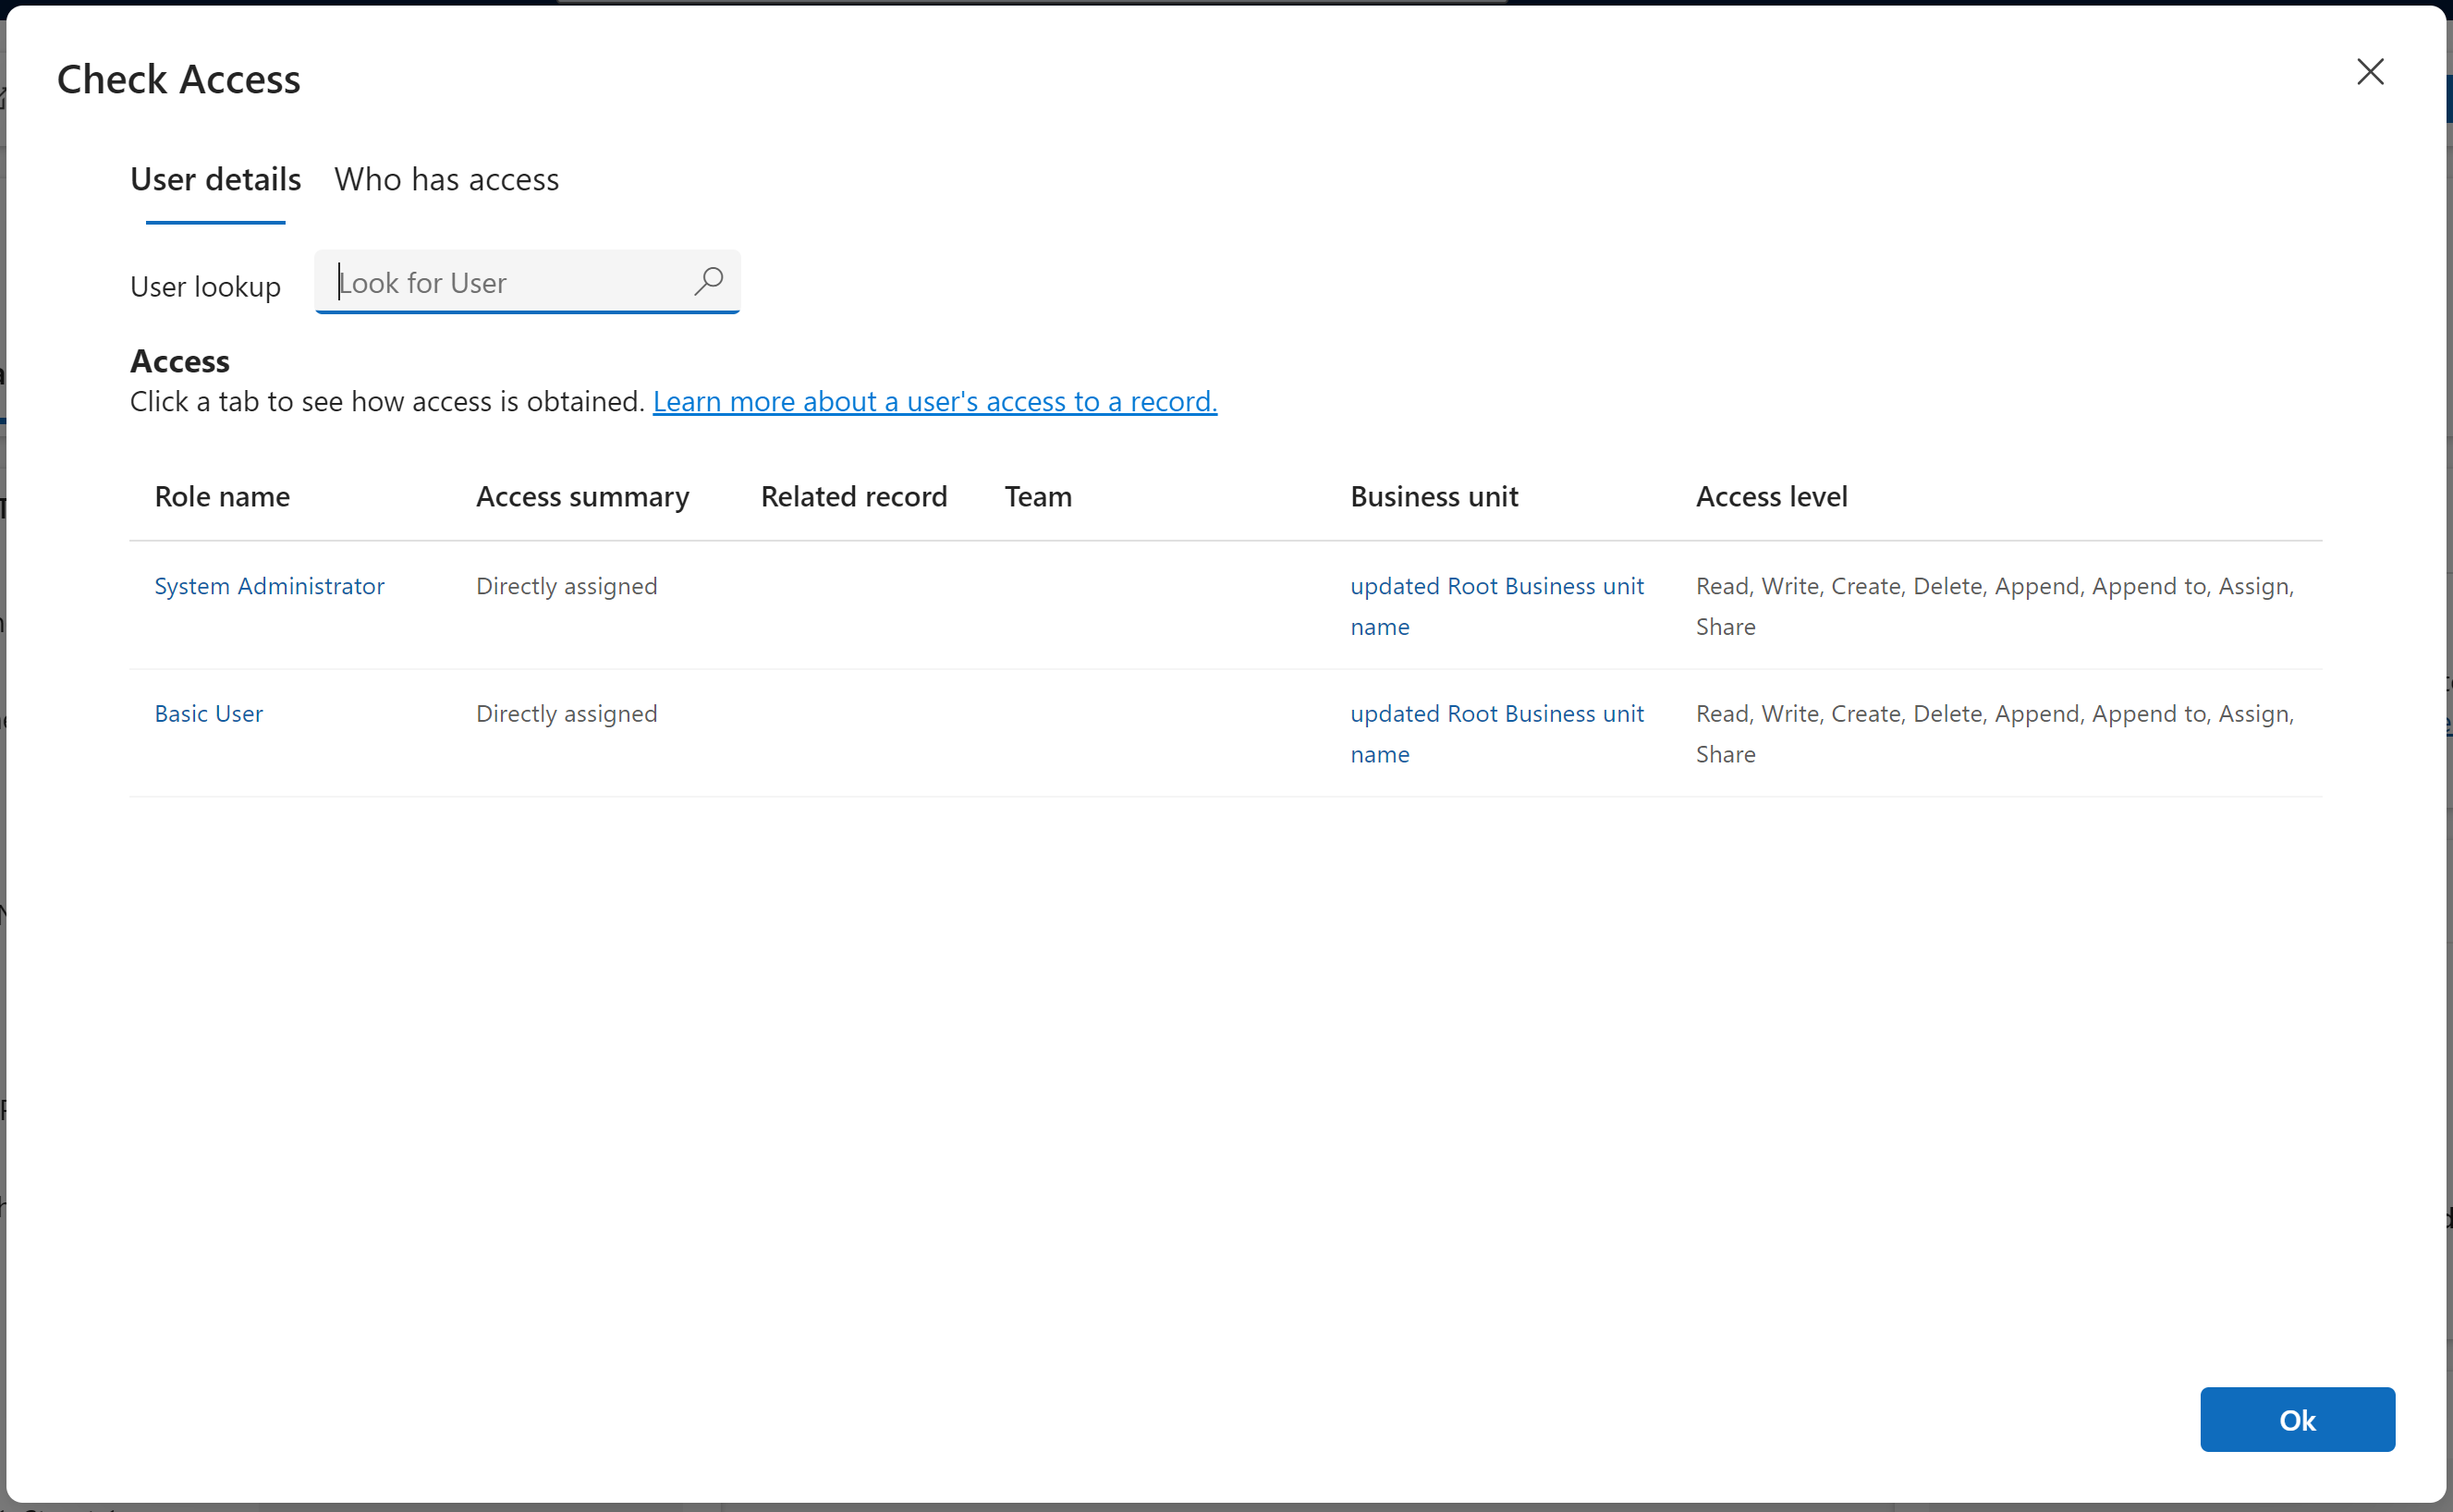
- In the User Lookup field, select or enter a user name to search for the user.
- The Check Access window displays the user's access information.
Check all users who have access to a row
The admin, owner of the record, or users who have access to a row can share the row with other users for collaboration.
To see who has access to a row and their respective access level, complete the following steps.
Note
There are two database settings for each environment that enable the Who has access feature. System adminstrators can Install the OrganizationSettingsEditor tool and set the following options to true:
- IsAccessCheckerAllUsersEnabled: This allows the admin to see who has access to the row.
- IsAccessCheckerNonAdminAllUsersEnabled: This allows the admin, owner of the record, and users who have access to the row to see who has access.
Select a row.
Select Check Access on the command bar.
In the Check Access window, select Who has access.
Note
The manager list from heirarchy and position security is not shown under Who has access as this list can be long.
If you select a user who doesn't have access to the record, the page returns with a blank screen.
Check who has access results
The user's record privileges are displayed. You can tab to each of these privileges to see who has this privilege on the record.
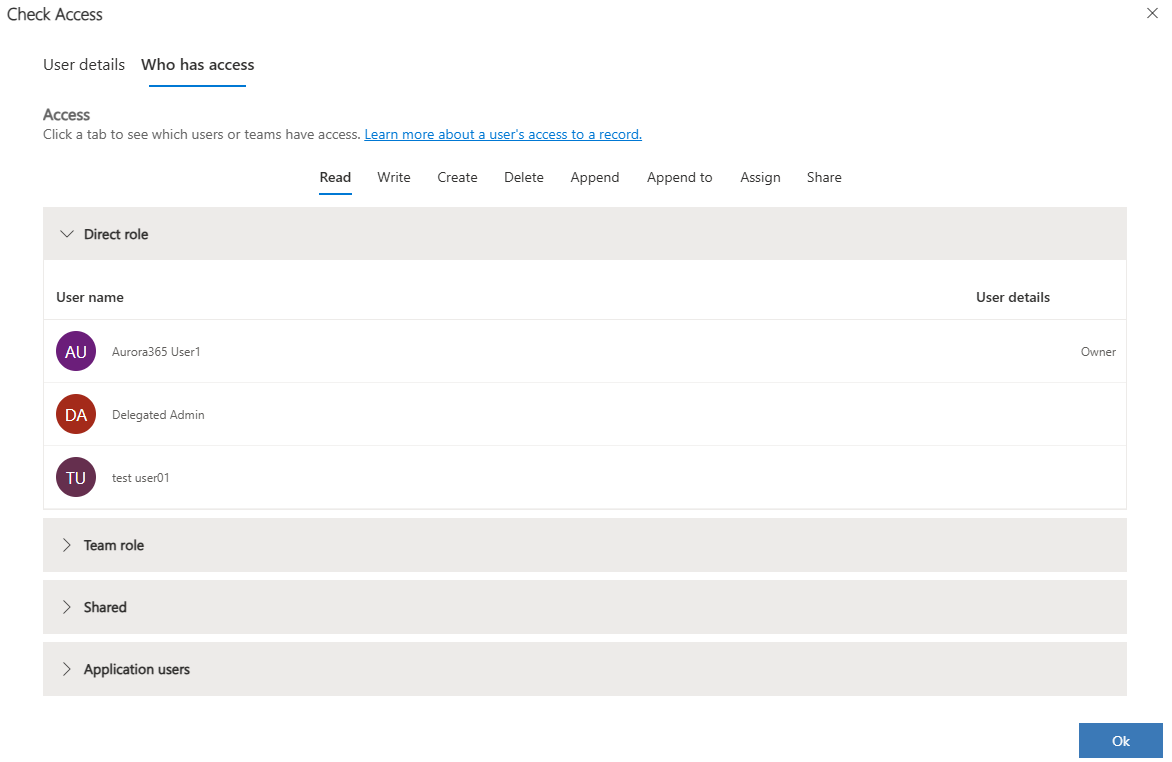
A user can have access to a record through one or more of these categories.
- Direct role - The record access is granted to a security role that is assigned to the user. Learn more at Role access.
- Team role - The record access is granted to a security role that is assigned to the team, and the user is a member of the team. Learn more at Role access.
- Shared - The record access is shared with the user or team who the user is a member of. Learn more at Shared access.
- Application users - Dataverse's application users who have access to the record because they're assigned to a security role that has privilege to the record.