Map table columns
You can map columns, also known as attributes, between tables that have a one-to-many or many-to-one table relationship. Column mapping lets you set default values for a row that is created in the context of another row.
Let’s say that people want to add a new contact row for a person who is an employee for a specific account. They can do this in two different ways:
- The hard way is people can just navigate in the app to create a new contact row from scratch. But then they need to set the parent account and enter several items of information, such as address and phone information, which are probably the same as the parent account it can be time consuming and introduce opportunities for error.
- The easier way is to start with the account table and, using the Contacts subgrid on the form, and then select + to add a contact. The interface first guides people to look up any existing related contacts so they don’t accidentally create a duplicate row. If they don’t find an existing row, they can select New and create a new contact row. The new contact row form then includes any of the mapped attribute values from the account, such as address and phone information, as the default values. People can edit these values before they save the row.
When you map table columns for a 1:N table relationship, certain items of data from the primary table row will be copied into the new related table form to set default values that people can edit before saving.
Note
- These mappings only set default values to a row before it's saved. People can edit the values before saving. The data that is transferred is the data at that point in time. The data isn’t synchronized if the source data later changes.
- These mappings aren’t applied to related rows created using a workflow or dialog process. They aren’t automatically applied to new rows created using code, although developers can use a special message called
InitializeFrom(InitializeFrom Function or InitializeFromRequest Class) to create a new row using available mappings. - These mappings aren't applied for new related table forms that are opened when an app doesn't have an active network connection to Microsoft Dataverse, except for parent lookup columns.
- Column mapping between tables isn’t supported when you’re using an app in offline mode. For more information, see the limitations listed in Mobile offline limitations for model-driven apps.
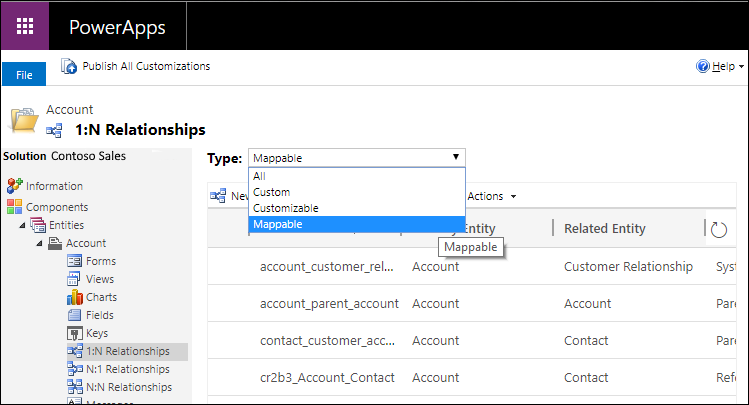
View mappable columns
Mapping columns is done in the context of a 1:N or N:1 table relationship, so first you need to view 1:N or N:1 table relationships.
The only way to view and map table columns is to use the classic solution explorer.
- Sign in to Power Apps, and then select the environment you want.
- Select Solutions on the left pane and then open the solution you want.
- Select Switch to classic on the command bar. The solution opens in the classic solution explorer.
- Expand Entities, expand the table you want, and then expand the relationship type, either 1:N Relationships or N:1 Relationships, and then open the relationship where you want to view or edit column mappings.
- Column mappings aren’t actually defined within the table relationships, but they're exposed in the classic solution explorer relationship user interface. Not every 1:N table relationship has them. In the Type dropdown list, select Mappable to display only relationships with columns that can be mapped.
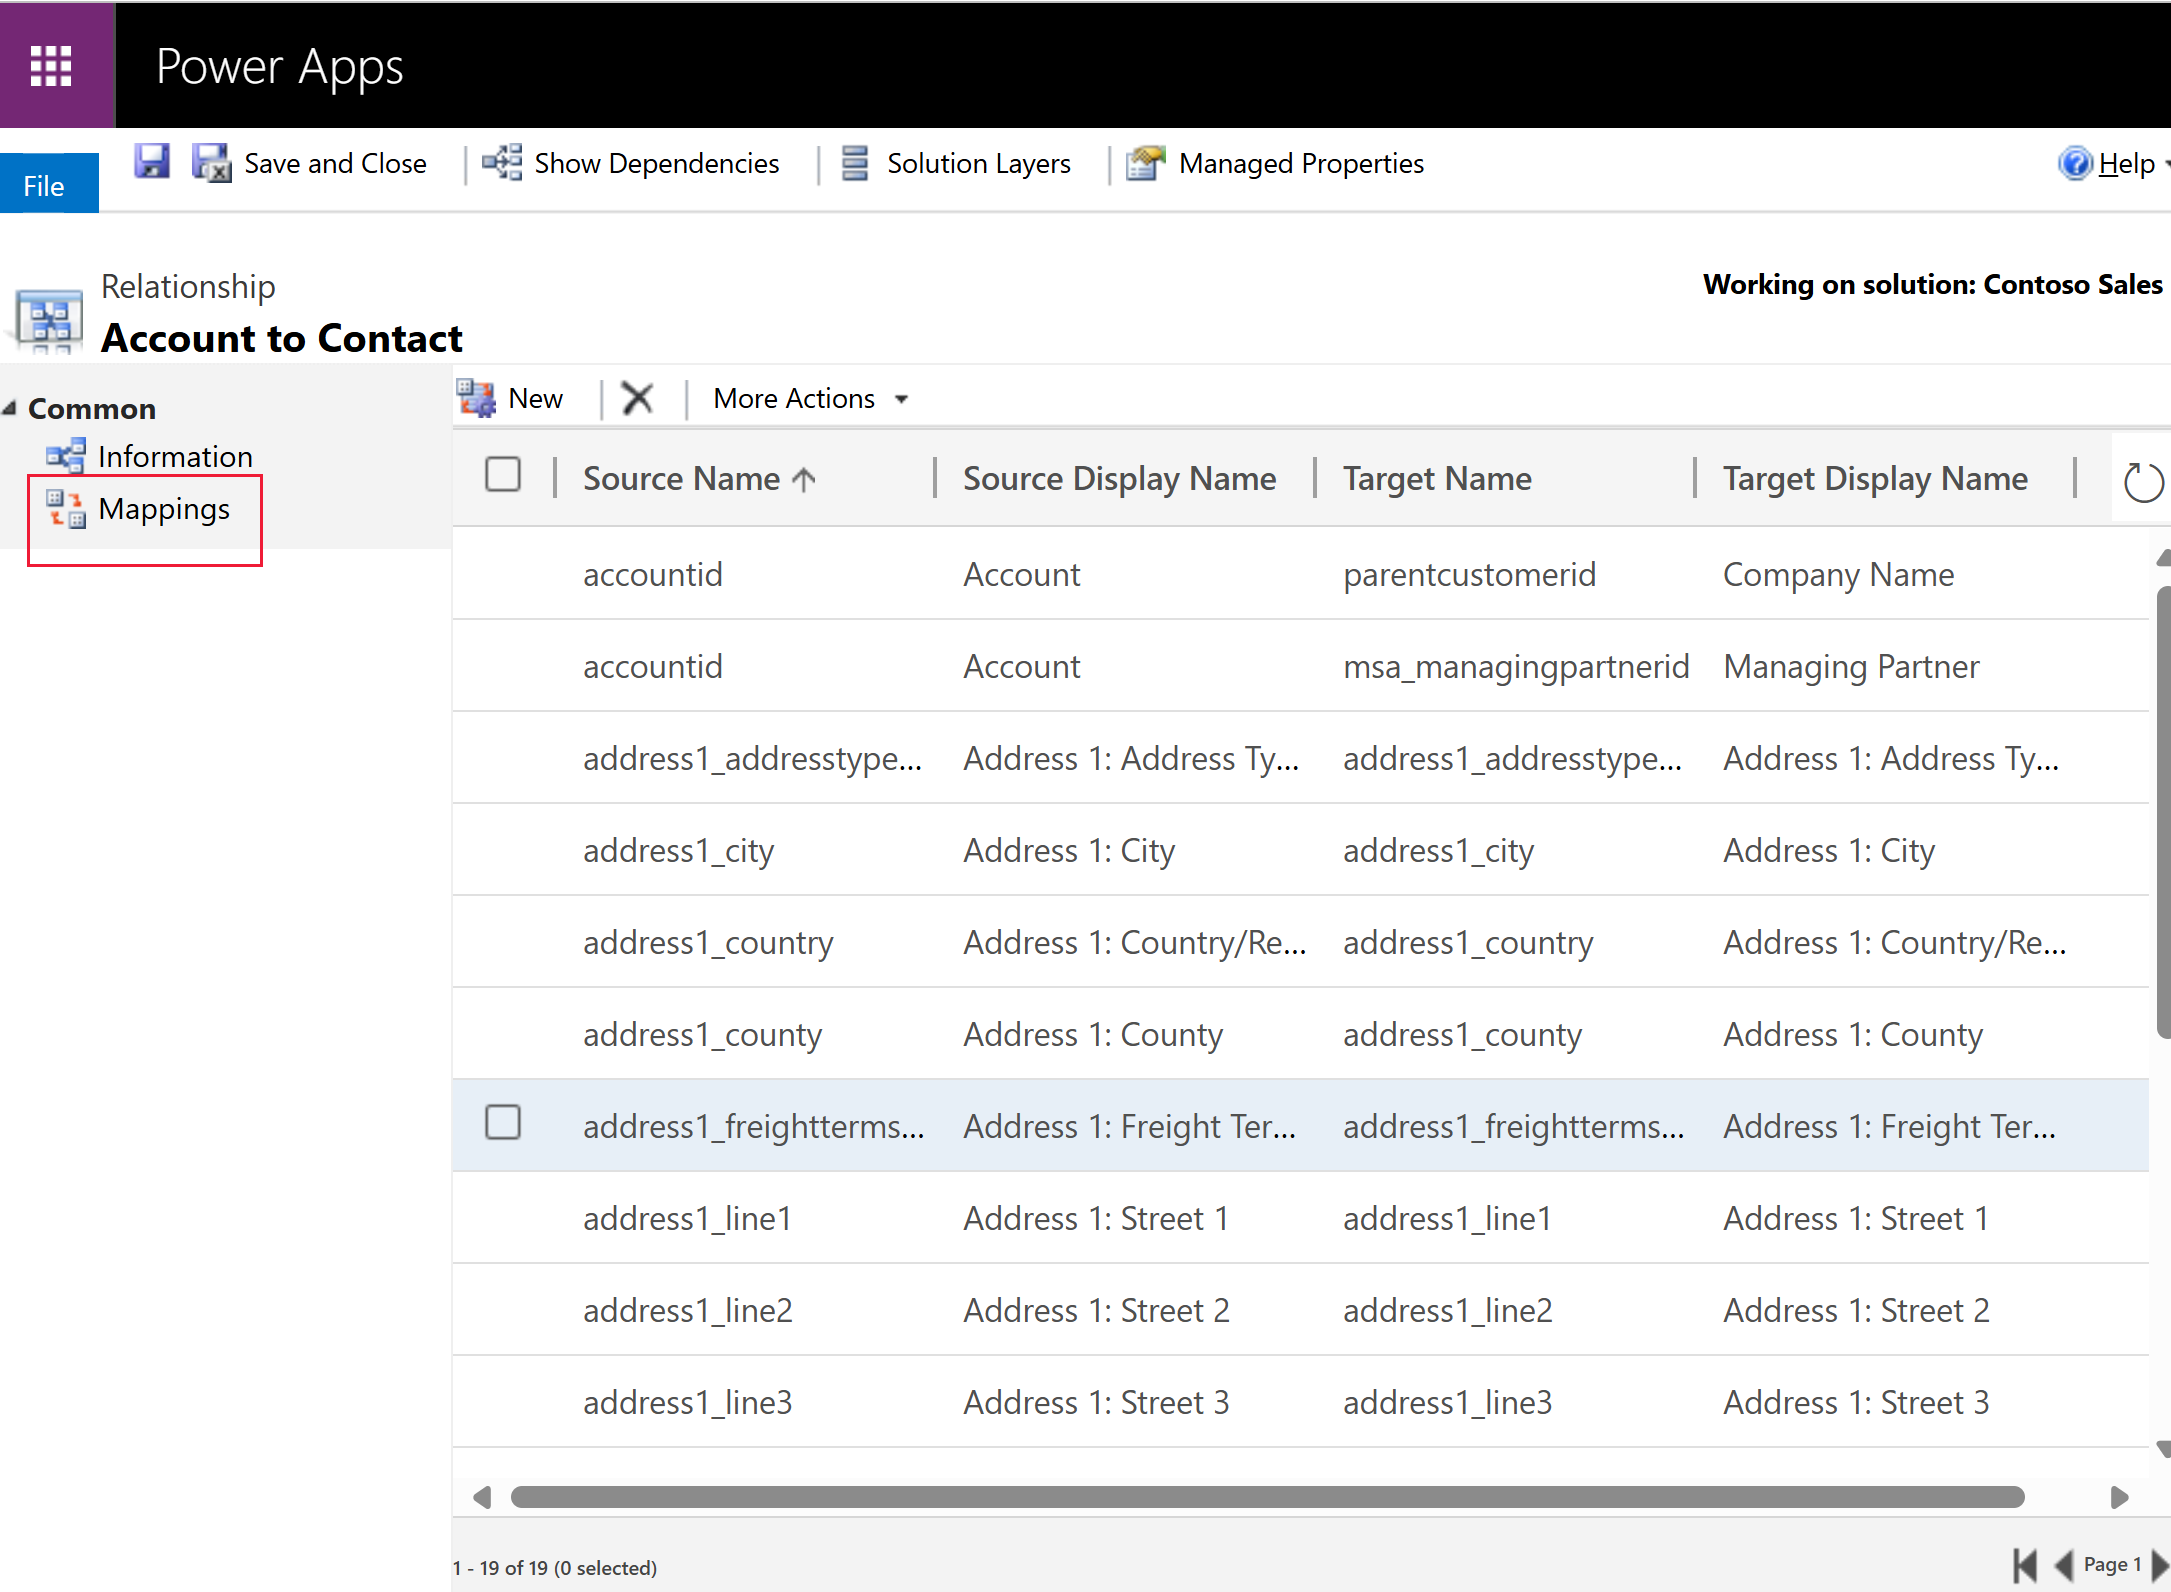
- Double-click the relationship where you want to view or edit column mappings. A browser page opens to display the relationship properties.
- Select the Mappings tab on the left navigation. The mappings for the relationship are displayed.
Add new mappings
- While viewing mappable columns,
select New on the command bar. The Create Field Mapping dialog is displayed.
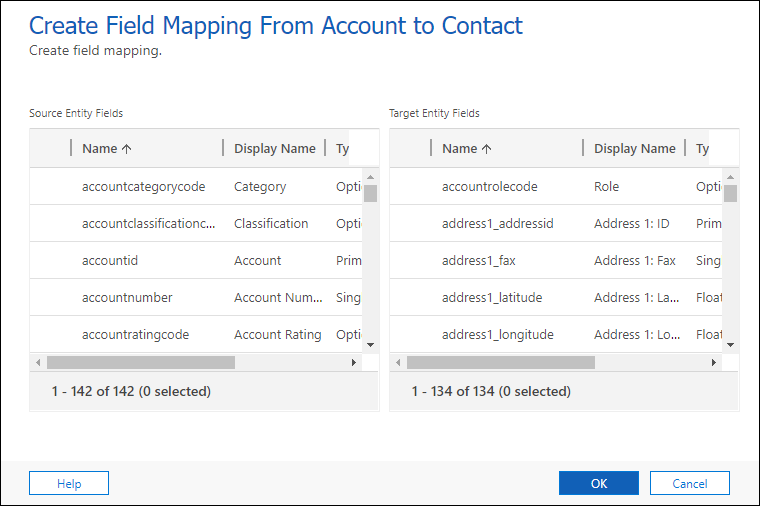
- Select one source table column and one target table columns with values you want to map, such as address1_city for the account to contact table relationship.

- Select OK to close the dialog.
- Because column mappings aren't metadata, you must publish them before changes take effect.
Automatically generate column mappings
You can also generate mappings automatically by selecting Generate Mappings from the More Actions menu.
Use Generate Mappings when you create custom tables and want to leverage mapping. However, use care when generating mappings automatically with system tables as you might introduce problems because you're replacing the default mappings.
Warning
Generating mappings automatically using Generate Mappings removes any existing mappings and replaces them with suggested mappings that are based only on the columns that have similar names and data types. If you use this on a system table, you could lose some expected mappings. For custom tables, it helps save time because you can more easily delete any mappings you don’t want and add any others that the generate mappings action didn’t create.
Kinds of data and rules for mapping
The following rules show what kinds of data can be mapped:
- Both columns must be of the same type and the same format.
- The length of the target column must be equal to or greater than the length of the source column.
- The target column can’t be mapped to another column already.
- The source column must be visible on the form.
- The target column must be a column that a user can enter data into.
- Address ID values or columns of type
partylistcan’t be mapped. - If you map to or from a column that isn’t displayed on a form, the mapping won't be done until the column is added to a form.
- If the columns are choices, the integer values for each option should be identical.
Note
If you need to map choice columns, we recommend you configure both columns to use the same global choice. Otherwise, it can be difficult to keep two separate sets of options synchronized manually. If the integer values for each option aren’t mapped correctly you can introduce problems in your data. More information: Create and edit global choices for Microsoft Dataverse (picklists)
Delete mappings
If there are any mappings that you don't want to apply, you can select them and then select  .
.
See also
Create and edit 1:N (one-to-many) or N:1 (many-to-one) table relationships using solution explorer
Developer Documentation: Customize table and attribute mappings
Developer Documentation: Web API Create a new table from another table