Configure a row summary for a model-driven app main form (preview)
[This topic is pre-release documentation and is subject to change.]
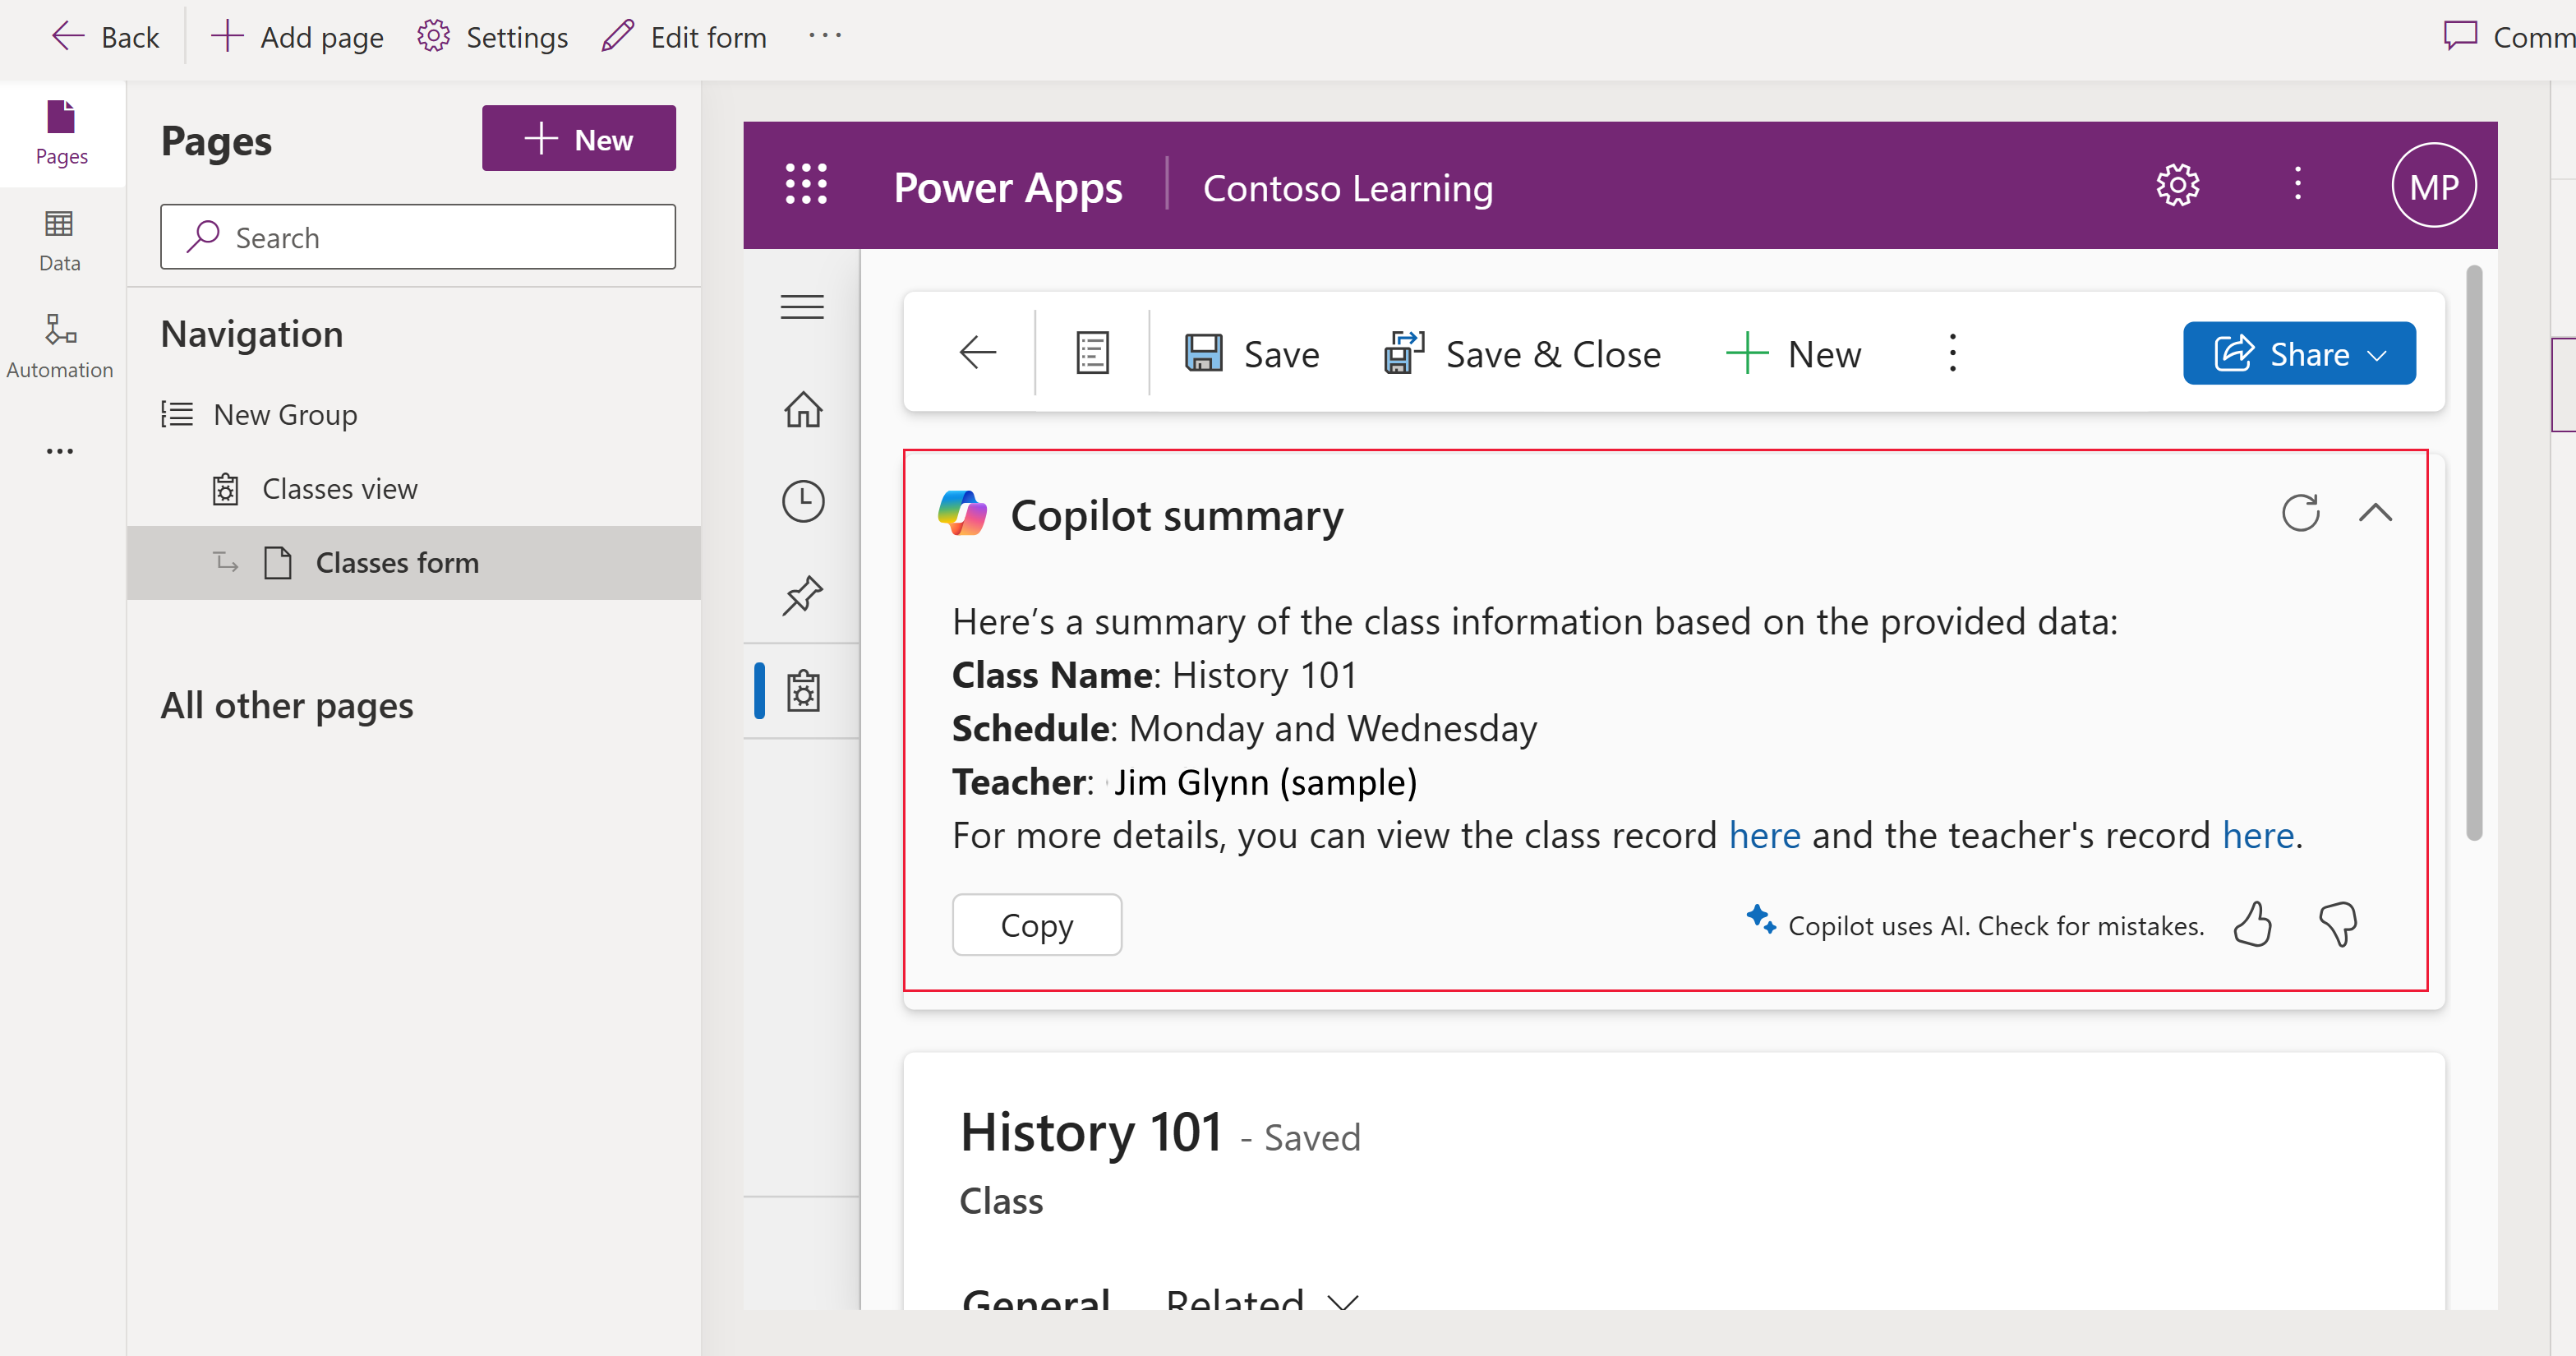
Write a custom prompt to specify columns that you want to be included in a summary generated by Copilot that appears above a form in a model-driven app. Forms can contain dozens and dozens of columns scattered throughout a handful of tabs, and sections, all of which make it time consuming for a user to parse the information.
The collapsible summary bar at the top of a model-driven app form can be customized by makers to give users the most important information at-a-glance in table rows (records). When generated, the row summary can also include hyperlinks to related information, making it easy to copy-and-paste summaries to colleagues using tools like Microsoft Teams.

Important
- This is a preview feature.
- Preview features aren’t meant for production use and may have restricted functionality. These features are available before an official release so that customers can get early access and provide feedback.
Prerequisite for configuring a row summary
To enable and use this feature, the following criterion is required:
- A Power Platform administrator has enabled the AI insight cards environment setting. More information: Manage feature settings
Create a row summary
Row summaries can be configured for table main forms.
Note
When you configure the row summary, it applies to all main forms for the table.
- Sign in to Power Apps (make.powerapps.com) select Tables on the left navigation pane, and then open the table where you want to configure a row summary. If the item isn’t in the side panel pane, select …More and then select the item you want.
- Under Customizations, select Row summary.
- In the Prompt box, add the columns that you want included in the summary by selecting Add or by typing /. You can also specify formatting for the summary, such as make it a bulleted list or a paragraph. More information: Write a good prompt for the row summary

- Select Test prompt to display a preview of the summary. The most recently edited row in the table is used to generate a test response.
- Once you're satisfied with the columns and response from the test, select Apply to main forms.
Determine which main forms include a row summary
After you apply a row summary, the summary displays on all main forms for the table. To view the forms that include a row summary, in Power Apps, select Tables on the left navigation pane, and then under Data experiences select Forms.
All forms with the row summary applied have a form AI icon next to the form name. Hovering over the icon displays "The row summary is applied to all main from for the table name table, and appears in every model-driven app that uses this form."

Write a good prompt for the row summary
Writing a custom prompt gives you the ability to instruct the generative pretrained transformer (GPT) model to perform a specific task. By carefully crafting a prompt, you can generate a response that suits your specific business need. Here are some tips to consider when writing a prompt:
- Provide a list of the columns you want to include in the summary. Alternatively, you might wish to provide a list of columns that you want to exclude from the summary.
- Specify any formatting preferences, such as write the summary as a bulleted list.
- For information about how to craft effective prompts, download the AI Builder prompt engineering guide.
Prompt example for a row summary
Here are examples to use when building a main form row summary.
Summarize Account record in a way that is easy to understand for a sales manager. Make sure to include all important information, including main ideas and important details, while keeping the order of the content logical. Remove any repetitive elements to make the summary as concise as possible without losing the original text’s integrity. If the original text is too short to condense, present it as the summary.
Don't include the title in the summary. Create the summary in two paragraphs. For the first paragraph, use the instructions under the header Data. For the second paragraph, use the data under the header Activity. Leave a blank line between the two paragraphs. Don't include the titles Data & Activity in the paragraphs.
Data:
Show the below values as bullet points using markdown text and bold the values. Make the primary contact a navigation link to the contact record. The link must not include query string parameters in it.
Account.Annual Revenue, Account.Category, Account.Industry, Account.Ownership
Activity:
Generate a summary paragraph using the following customer communication fields identifying top 2 key information and top 2 important actions to take.
Account.Regarding (Phone Call).Subject, Account.Regarding (Email).Subject
Edit a row summary
To edit a row summary for a main form, open the table, and then under Customizations select Row summary (applied). Follow the steps similar in Create a row summary to make and apply changes.
Hide row summary for all main forms
- In Power Apps, select Tables on the left navigation pane, and open the table where you want to edit a row summary.
- Under Data experiences, select Forms.
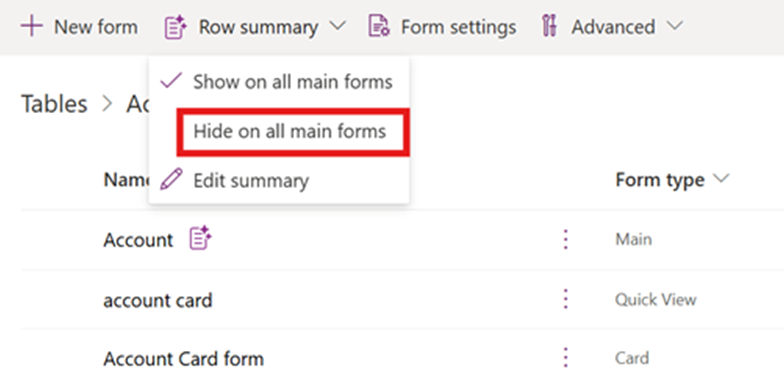
- On the command bar, select Row summary > Hide on all main forms.
