Connect to SharePoint from a canvas app

There are different ways to connect to SharePoint in a canvas app:
- Connect to a SharePoint site to generate an app automatically from a list.
- Create a SharePoint connection before you add data to a new or existing app.
Note
When you create or view a list in SharePoint, you're automatically redirected to Microsoft Lists. The list can always be found in both Microsoft Lists and SharePoint. Learn more in What is a list in Microsoft 365?.
Connect SharePoint to an app by creating an app
If you have a SharePoint site with a SharePoint list, you can create an app in Power Apps through the list menu in Microsoft Lists.
The Integrate > Power Apps > Create an app menu in Microsoft Lists takes you to Power Apps and builds an app using your list as a data source.
Learn more in Create a canvas app with data from Microsoft Lists.
Create a SharePoint connection
If you build a new app or have an existing app, you can connect to SharePoint through the Data menu in Power Apps.
Select More > Connections in the left navigation bar.

Select + New connection and choose SharePoint. A popup appears.
Choose either the cloud-services or on-premises option:
To connect to SharePoint Online, select Connect directly (cloud services) and then Create. Provide credentials (if prompted).

The connection is created, and you can add data to an existing app or build an app from scratch.
To connect to an on-premises site, select Connect using on-premises data gateway.
Choose Windows as the authentication type and add your credentials. If your credentials include a domain name, specify it as
domain\alias.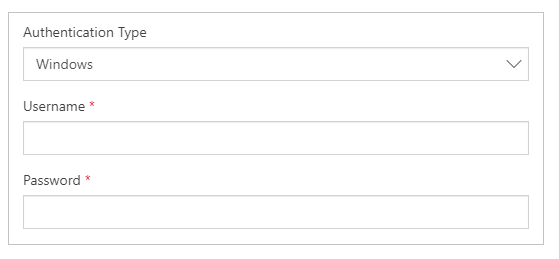
Under Choose a gateway, select the gateway that you want to use, and then select Create.
Note
If you don't have an on-premises data gateway installed, install one, and then select the refresh icon for a list of gateways.
The connection is created. You can add data to an existing app or build an app from scratch.
Add data to an existing app
In Power Apps Studio, open the app that you want to update, select Data on the left-pane.
Select Add data > Connectors > SharePoint.
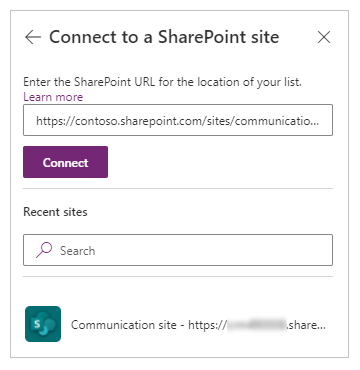
A side panel opens. Under Connect to a SharePoint site, select an entry in the Recent sites list (or add your own URL), and then select Connect.
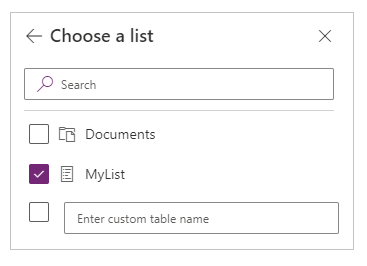
Under Choose a list, select the check box for one or more lists, then select Connect:
Note
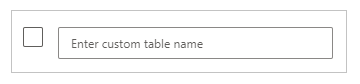
Power Apps supports lists, not template-based lists. If you don't see your list, type the list name in Enter custom table name box.
You see a confirmation banner that your data source was added to your app.
Power Apps data type mappings
| Power Apps | SharePoint |
|---|---|
Boolean |
Yes/No (checkbox) |
DateTime |
Date and Time |
Image |
Hyperlink or Picture, Image |
Complex |
Choice, Lookup, Person, Group, Task Outcome, External Data, Managed Metadata |
Number |
Number, Currency, ID |
Text |
Single line of text, Multiple lines of text, Calculated |
Note
SharePoint types that map to Power Apps as complex often have subfields that map to basic types such as text and number.
Power Apps delegable functions and operations for SharePoint
The following Power Apps operations, for a given data type, may be delegated to SharePoint for processing (rather than processing locally within Power Apps).
| Operation/Function [1] | Number | Text | Boolean | DateTime | Complex [2] |
|---|---|---|---|---|---|
<, <=,<>, >, >= |
Yes [3] | No | No | Yes | Yes |
= |
Yes | Yes | Yes | Yes | Yes |
Filter |
Yes | Yes | Yes | Yes | Yes |
IsBlank |
- | No [4] | - | - | No |
Lookup |
Yes | Yes | Yes | Yes | Yes |
Sort |
Yes | Yes | Yes | Yes | No |
SortByColumns |
Yes | Yes | Yes | Yes | No |
StartsWith |
- | Yes | - | - | Yes |
UpdateIf/RemoveIf [5] |
Yes | No | - | - | No |
Notes
- Expressions that are joined with And or Or are delegable to SharePoint. Not won't delegate. SharePoint system fields don't generally delegate. These fields include:
- Identifier
- IsFolder
- Thumbnail
- Link
- Name
- FilenameWithExtension
- Path
- FullPath
- ModerationStatus
- ModerationComment
- ContentType
- IsCheckedOut
- VersionNumber
- TriggerWindowStartToken
- TriggerWindowEndToken
- SharePoint supports delegation of complex types by deferring the decision for delegation to the subfield involved. Check the type of the subfield being used on the complex type and then check this table for delegation capabilities. Only Email and DisplayName are delegable in the Person data type.
- SharePoint ID fields are shown as a number field in Power Apps. However, the underlying type is actually Text. SharePoint only supports the equal ('=') operation for delegation on an ID field. Relational operations such as
<, <=,<>, >, >=won't work on a SharePoint ID field. - A formula such as Filter(..., IsBlank(CustomerId)) won't delegate to SharePoint. However, that formula is semantically close to Filter(..., CustomerId = Blank()), will delegate to SharePoint. These formulas aren't equivalent because the second formula won't treat the empty string ("") as empty. However, the second formula might work for your purposes. On SharePoint, this approach works for the 'equals' operator ("=") but not the operator for 'not equals' ("<>").
- UpdateIf and RemoveIf work locally but simulate delegation to a limit of 500/2000 records. They successively bring down records beyond the non-delegation 500/2000 record limit. Records that meet the If condition are collected. Generally, a maximum of 500/2000 records are collected separately and then changed per execution. However, more records may be updated if the existing local data cache is large as the function may have access to more records for evaluation.
Related information
- Learn more about working with lists in Power Apps in Integrate SharePoint Online into Power Apps overview
- Move SharePoint Custom Forms with Power Apps (white paper)