Tutorial: Create custom functions in Excel
Custom functions enable you to add new functions to Excel by defining those functions in JavaScript as part of an add-in. Users within Excel can access custom functions as they would any native function in Excel, such as SUM(). You can create custom functions that perform simple tasks like calculations or more complex tasks such as streaming real-time data from the web into a worksheet.
In this tutorial, you will:
- Create a custom function add-in using the Yeoman generator for Office Add-ins.
- Use a prebuilt custom function to perform a simple calculation.
- Create a custom function that gets data from the web.
- Create a custom function that streams real-time data from the web.
Prerequisites
Node.js (the latest LTS version). Visit the Node.js site to download and install the right version for your operating system.
The latest version of Yeoman and the Yeoman generator for Office Add-ins. To install these tools globally, run the following command via the command prompt.
npm install -g yo generator-officeNote
Even if you've previously installed the Yeoman generator, we recommend you update your package to the latest version from npm.
Office connected to a Microsoft 365 subscription (including Office on the web).
Note
If you don't already have Office, you might qualify for a Microsoft 365 E5 developer subscription through the Microsoft 365 Developer Program; for details, see the FAQ. Alternatively, you can sign up for a 1-month free trial or purchase a Microsoft 365 plan.
Create a custom functions project
To start, create the code project to build your custom function add-in. The Yeoman generator for Office Add-ins will set up your project with some prebuilt custom functions that you can try out. If you've already run the custom functions quick start and generated a project, continue to use that project and skip to this step instead.
Note
If you recreate the Yo Office project, you may get an error because the Office cache already has an instance of a function with the same name. You can prevent this by clearing the Office cache before running npm run start.
Run the following command to create an add-in project using the Yeoman generator. A folder that contains the project will be added to the current directory.
yo officeNote
When you run the
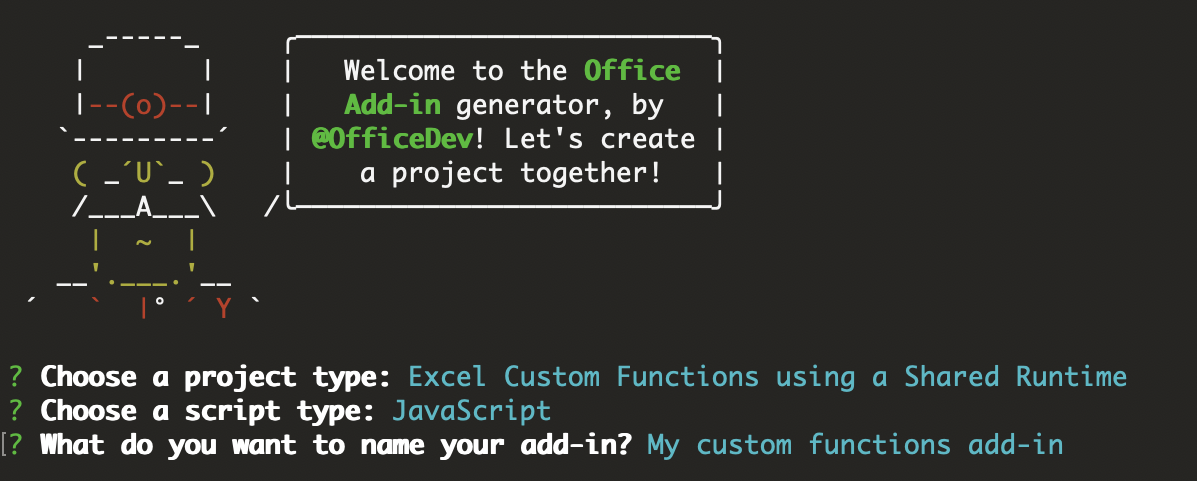
yo officecommand, you may receive prompts about the data collection policies of Yeoman and the Office Add-in CLI tools. Use the information that's provided to respond to the prompts as you see fit.When prompted, provide the following information to create your add-in project.
- Choose a project type:
Excel Custom Functions using a Shared Runtime - Choose a script type:
JavaScript - What do you want to name your add-in?
My custom functions add-in

The Yeoman generator will create the project files and install supporting Node components.
- Choose a project type:
Navigate to the root folder of the project.
cd "My custom functions add-in"Build the project.
npm run buildNote
Office Add-ins should use HTTPS, not HTTP, even when you are developing. If you are prompted to install a certificate after you run
npm run build, accept the prompt to install the certificate that the Yeoman generator provides.Start the local web server, which runs in Node.js. You can try out the custom function add-in in Excel.
The command to test your add-in in Excel on Windows or Mac depends on when the project was created. If the "scripts" section of the project's package.json file has a "start:desktop" script, then run npm run start:desktop; otherwise, run the command npm run start. The local web server will start and Excel will open with your add-in loaded.
Note
Office Add-ins should use HTTPS, not HTTP, even while you're developing. If you're prompted to install a certificate after you run one of the following commands, accept the prompt to install the certificate that the Yeoman generator provides. You may also have to run your command prompt or terminal as an administrator for the changes to be made.
If this is your first time developing an Office Add-in on your machine, you may be prompted in the command line to grant Microsoft Edge WebView a loopback exemption ("Allow localhost loopback for Microsoft Edge WebView?"). When prompted, enter
Yto allow the exemption. Note that you'll need administrator privileges to allow the exemption. Once allowed, you shouldn't be prompted for an exemption when you sideload Office Add-ins in the future (unless you remove the exemption from your machine). To learn more, see "We can't open this add-in from localhost" when loading an Office Add-in or using Fiddler.
Try out a prebuilt custom function
The custom functions project that you created contains some prebuilt custom functions, defined within the ./src/functions/functions.js file. The ./manifest.xml file specifies that all custom functions belong to the CONTOSO namespace. You'll use the CONTOSO namespace to access the custom functions in Excel.
Next, try out the ADD custom function by completing the following steps.
In Excel, go to any cell and enter
=CONTOSO. Notice that the autocomplete menu shows the list of all functions in theCONTOSOnamespace.Run the
CONTOSO.ADDfunction, with numbers10and200as input parameters, by typing the value=CONTOSO.ADD(10,200)in the cell and pressing Enter.
The ADD custom function computes the sum of the two numbers that you provided and returns the result of 210.
If the CONTOSO namespace isn't available in the autocomplete menu, take the following steps to register the add-in in Excel.
Select Home > Add-ins, then select More Settings.
On the Office Add-ins dialog, select Upload My Add-in.
Choose Browse... and navigate to the root directory of the project that the Yeoman generator created.
Select the file manifest.xml and choose Open, then choose Upload.
Try out the new function. In cell B1, type the text =CONTOSO.GETSTARCOUNT("OfficeDev", "Excel-Custom-Functions") and press Enter. You should see that the result in cell B1 is the current number of stars given to the Excel-Custom-Functions Github repository.
Note
See the Troubleshooting section of this article if you encounter errors when sideloading the add-in.
Create a custom function that requests data from the web
Integrating data from the Web is a great way to extend Excel through custom functions. Next you'll create a custom function named getStarCount that shows how many stars a given Github repository possesses.
In the My custom functions add-in project, find the file ./src/functions/functions.js and open it in your code editor.
In function.js, add the following code.
/**
  * Gets the star count for a given Github repository.
  * @customfunction
  * @param {string} userName string name of Github user or organization.
  * @param {string} repoName string name of the Github repository.
  * @return {number} number of stars given to a Github repository.
  */
  async function getStarCount(userName, repoName) {
    try {
      //You can change this URL to any web request you want to work with.
      const url = "https://api.github.com/repos/" + userName + "/" + repoName;
      const response = await fetch(url);
      //Expect that status code is in 200-299 range
      if (!response.ok) {
        throw new Error(response.statusText)
      }
        const jsonResponse = await response.json();
        return jsonResponse.watchers_count;
    }
    catch (error) {
      return error;
    }
  }
Run the following command to rebuild the project.
npm run buildComplete the following steps (for Excel on the web, Windows, or Mac) to re-register the add-in in Excel. You must complete these steps before the new function will be available.
Close Excel and then reopen Excel.
In the Excel ribbon, select Home > Add-ins.
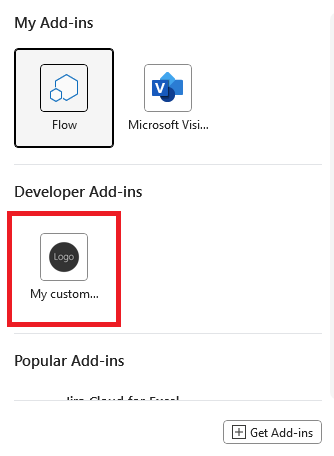
Under the Developer Add-ins section, select My custom functions add-in to register it.

Try out the new function. In cell B1, type the text =CONTOSO.GETSTARCOUNT("OfficeDev", "Office-Add-in-Samples") and press Enter. You should see that the result in cell B1 is the current number of stars given to the Office-Add-in-Samples repository.
Note
See the Troubleshooting section of this article if you encounter errors when sideloading the add-in.
Create a streaming asynchronous custom function
The getStarCount function returns the number of stars a repository has at a specific moment in time. Custom functions also return data that is continuously changing. These functions are called streaming functions. They must include an invocation parameter which refers to the cell that called the function. The invocation parameter is used to update the contents of the cell at any time.
In the following code sample, notice that there are two functions, currentTime and clock. The currentTime function is a static function that doesn't use streaming. It returns the date as a string. The clock function uses the currentTime function to provide the new time every second to a cell in Excel. It uses invocation.setResult to deliver the time to the Excel cell and invocation.onCanceled to handle function cancellation.
The My custom functions add-in project already contains the following two functions in the ./src/functions/functions.js file.
/**
 * Returns the current time
 * @returns {string} String with the current time formatted for the current locale.
 */
function currentTime() {
  return new Date().toLocaleTimeString();
}

/**
 * Displays the current time once a second
 * @customfunction
 * @param {CustomFunctions.StreamingInvocation<string>} invocation Custom function invocation
 */
function clock(invocation) {
  const timer = setInterval(() => {
    const time = currentTime();
    invocation.setResult(time);
  }, 1000);

  invocation.onCanceled = () => {
    clearInterval(timer);
  };
}
To try out the functions, type the text =CONTOSO.CLOCK() in cell C1 and press Enter. You should see the current date, which streams an update every second. While this clock is just a timer on a loop, you can use the same idea of setting a timer on more complex functions that make web requests for real-time data.
Troubleshooting
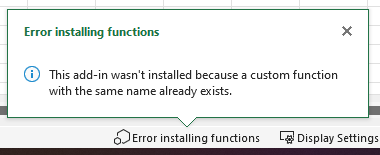
You may encounter issues if you run the tutorial multiple times. If the Office cache already has an instance of a function with the same name, your add-in gets an error when it sideloads.
You can prevent this conflict by clearing the Office cache before running npm run start. If your npm process is already running, enter npm stop, clear the Office cache, and then restart npm.

Next steps
Congratulations! You've created a new custom functions project, tried out a prebuilt function, created a custom function that requests data from the web, and created a custom function that streams data. Next, learn how to Share custom function data with the task pane.
Office Add-ins