Publish an add-in that requires admin consent for Microsoft Graph scopes
In this article you'll learn how to publish updates to an Office Add-in to use Microsoft Graph scopes and require admin consent. This is a common scenario if you have moved your Outlook add-in from legacy Exchange Online tokens to using the Microsoft authentication library (MSAL) with nested app authentication (NAA) and Entra ID tokens with Microsoft Graph APIs.
To publish updates there are three things to consider.
- How to deploy changes made in the add-in code to your web server.
- How to obtain admin consent to the Microsoft Graph scopes.
- How to deploy updates in your manifest.
Deploy updates to your add-in code
Once you've updated and tested your add-in code, you'll need to deploy them to your web server. Follow your own update process (such as staging and production). Once deployed, all users of your add-in will see the changes and start using the updated add-in code. There is no need for admins or users to take any actions to see the updates.
Any Microsoft Graph scopes used by your add-in require consent from either the user or the admin of a tenant. If the admin doesn't consent, the user will be prompted to provide consent when your add-in requests an access token through MSAL. For the best user experience, avoid prompting users for consent at all. Instead, ask your admin to provide consent for the entire tenant.
There are two ways to get admin consent: use an admin consent URI or use the unified manifest.
Get admin consent via admin consent URI
You can get admin consent by providing an admin consent URI. It provides a link that an admin can select. A dialog box prompts them to sign in with admin credentials, and consent to the Microsoft Graph scopes your add-in requires.
To construct the admin URI, use the following pattern.
https://login.microsoftonline.com/organizations/v2.0/adminconsent?client_id={client_id}&scope={scopes}&redirect_uri={redirect_uri}
where:
client_id: The ID of your app registration.scope: Each scope (such as Microsoft Graph scopes) requires admin consent using the space as delimiter. Because the Microsoft authentication library (MSAL) always requests an ID and refresh token, you should always include theopenid,profile, andoffline_accessscopes. These are requested by default by MSAL even if your add-in does not request them.redirect_uri: A redirect page for when consent is completed. The Microsoft identity platform will redirect to this page after an admin consents. The redirect page is sent a success or fail JSON message as specified in Admin consent on the Microsoft identity platform. On the page you can indicate the consent status to the admin as well as provide more information or next steps about your add-in.
Important
The redirect page must be added to the list of single-page application (SPA) redirects in your app registration along with the brk-multihub redirect or the admin consent URI will fail.
The following admin URI example shows how to specify the openid, profile, offline_access, user.read and files.read scopes and redirect to a page on your web server named consentRedirect.html.
https://login.microsoftonline.com/organizations/v2.0/adminconsent?client_id=63e62b68-c5c7-48f9-82bf-8c41d5637b49&scope=offline_access openid profile user.read files.read&redirect_uri=https://localhost:3000/consentRedirect.html
Note
If the resource identifier is omitted in the scope parameter, the resource is assumed to be Microsoft Graph. For example, User.Read is equivalent to https://graph.microsoft.com/User.Read.
Get admin consent via the unified manifest
You can also get admin consent as an automatic part of the deployment workflow when your add-in is deployed. To do this, add the webApplicationInfo property to your unified manifest. Then the admin deploys the updated manifest, either through central deployment, or from an update through Microsoft AppSource. When the admin deploys the updated manifest, they are automatically prompted to consent to the scopes required by the add-in. If they don't consent, the updated add-in will not deploy.
Add Graph scopes to app registration
When the admin deploys the updated manifest of your add-in, the consent process will read your app registration for which scopes to require the admin for consent. Be sure to add all permissions your add-in requires using the following steps.
Sign in to the Azure Portal and open your app registration.
From the left pane, select API permissions.
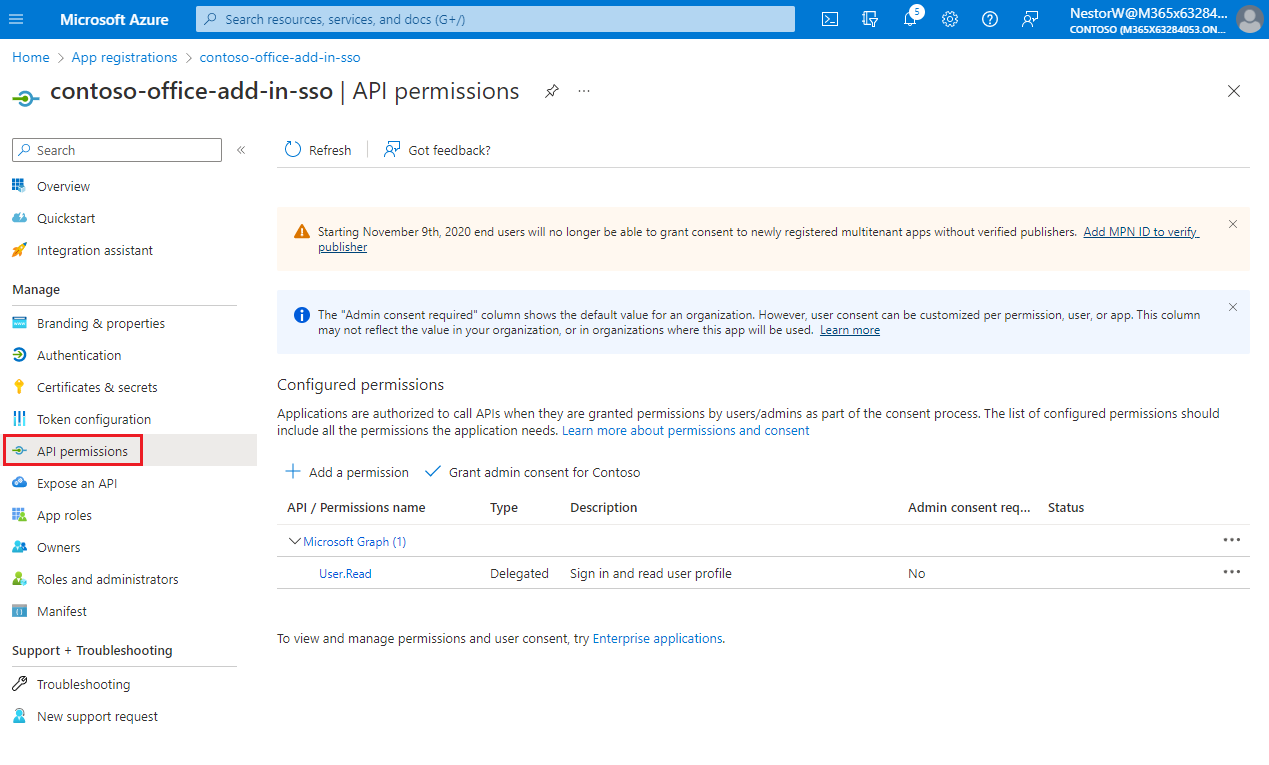
The API permissions pane opens.
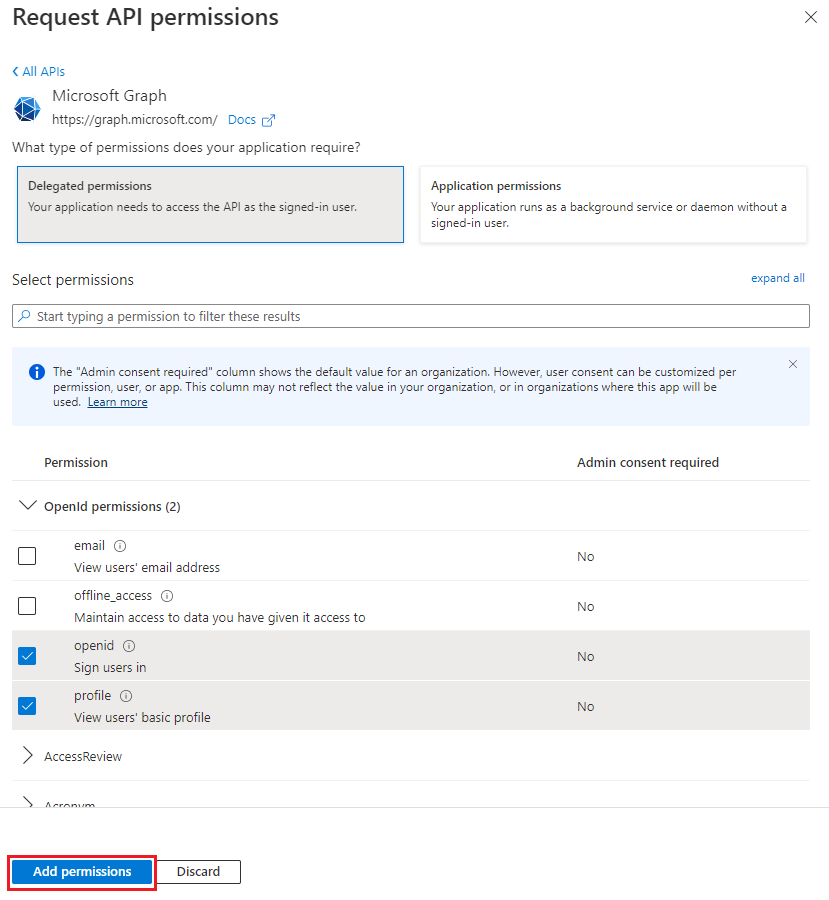
Select Add a permission.
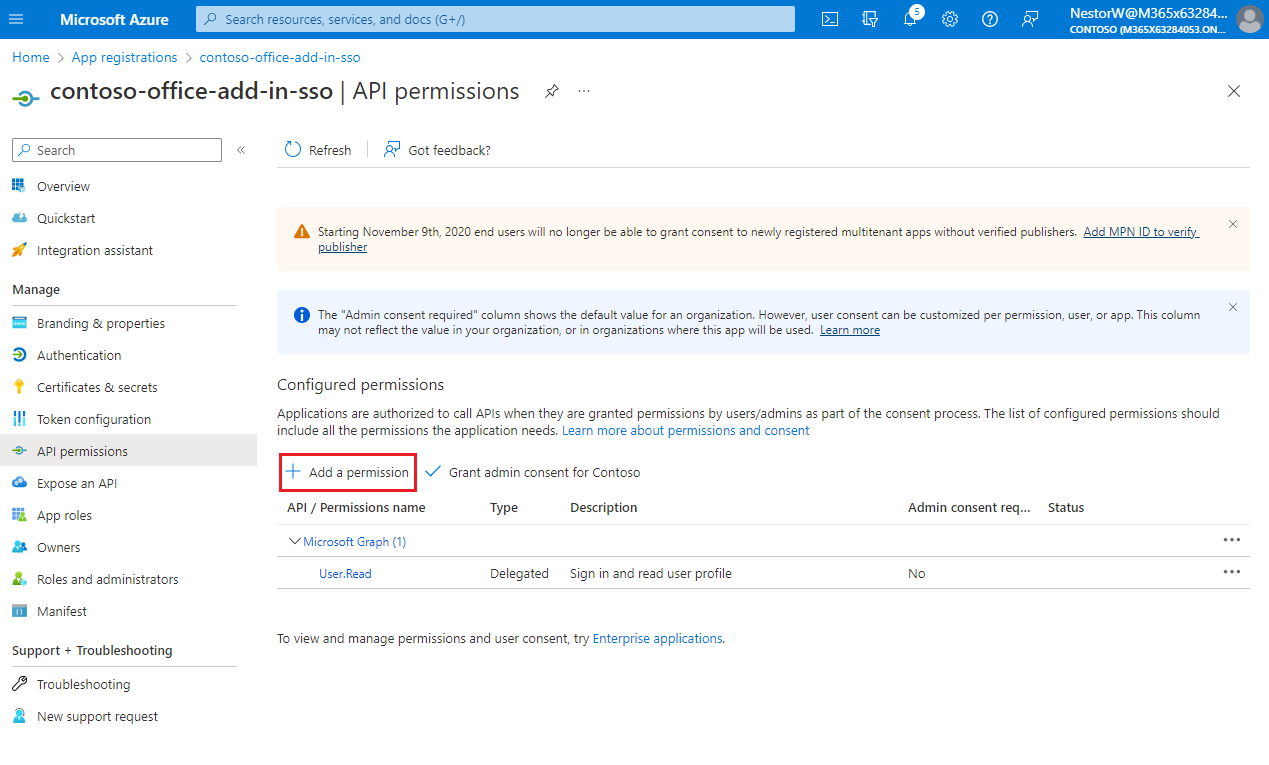
The Request API permissions pane opens.
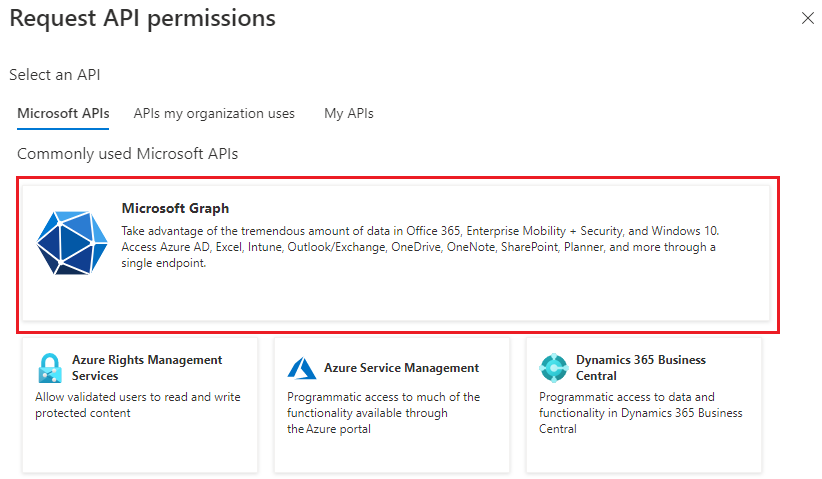
Select Microsoft Graph.
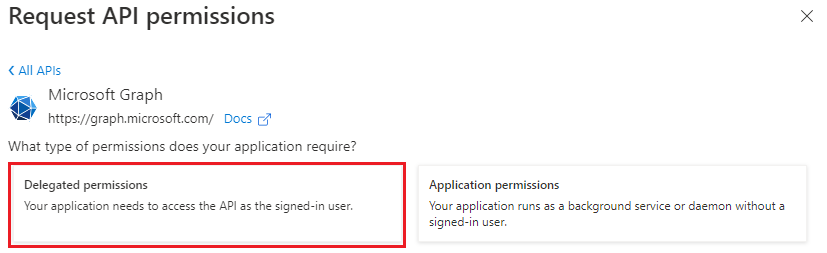
Select Delegated permissions.
In the Select permissions search box, search for the permissions your add-in needs. For example, for an Outlook add-in, you might use
profile,openid,Files.ReadWrite, andMail.Read.Select the checkbox for each permission as it appears. Note that the permissions will not remain visible in the list as you select each one. After selecting the permissions that your add-in needs, select Add permissions.
Add the webApplicationInfo property
To get admin consent as part of the deployment workflow, add the webApplicationInfo property to your unified manifest. Set the id property to your app registration ID. Set the resource property to the value of your domain. The following example shows the webApplicationInfo property for an app registration for contoso.com.
    "webApplicationInfo": {
        "id": "a92ace55-9daf-47bc-84e9-065e9a6e70e3",
        "resource": "https://contoso.com"
    },
Deploy the updated manifest
If you deployed your add-in through Microsoft AppSource, you'll need to submit your updated unified manifest for approval. For more information, see Microsoft AppSource submission FAQ.
If you deployed your add-in by providing the manifest to admins for central deployment, you'll need to provide admins with an updated app package that contains the updated manifest.
Related content
Office Add-ins