Build notification bot with JavaScript
The notification bot proactively sends messages in Teams channel or group chat or personal chat. You can trigger the notification bot with an HTTP request, such as cards or texts.
In this tutorial, you learn:
- How to create a new notification bot with Teams Toolkit.
- About the directory structure of your app.
- How to send multiple notifications.
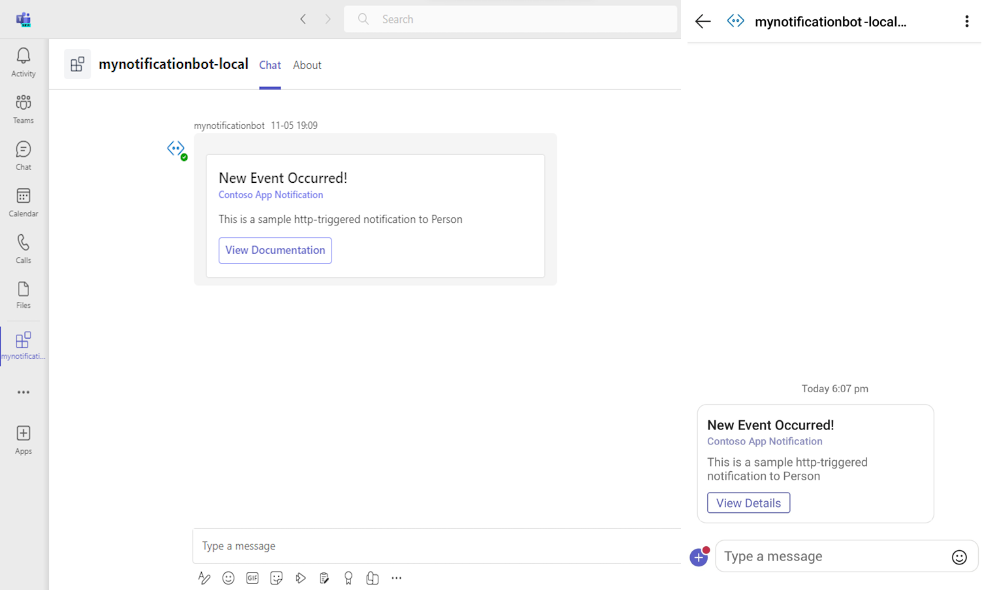
This step-by-step guide helps you to build notification bot with Teams Toolkit. You can see the following output:
Prerequisites
Here's a list of tools you need for building and deploying your apps.
| Install | For using | |
|---|---|---|
| Visual Studio Code | JavaScript, or TypeScript, build environments. Use the latest version. | |
| Teams Toolkit | Microsoft Visual Studio Code extension that creates a project scaffolding for your app. Use the latest version. | |
| Node.js | Back-end JavaScript runtime environment. For more information, see Node.js version compatibility table for project type. | |
| Microsoft Teams | Microsoft Teams to collaborate with everyone you work with through apps for chat, meetings, and call all in one place. | |
| Microsoft Edge (recommended) or Google Chrome | A browser with developer tools. | |
| Microsoft 365 | Access to Teams account with the appropriate permissions to install an app. |
Note
The guide is tested on Teams Toolkit latest version and Nodejs version 18 and 20. The steps in this guide may work with other versions, but that hasn't been tested.
Prepare development environment
After you install the required tools, set up the development environment.
Install Teams Toolkit
Microsoft Teams Toolkit helps simplify the development process with tools to provision and deploy cloud resources for your app and publish to the Teams Store.
You can use Teams Toolkit with Visual Studio Code or a command-line interface called TeamsFx CLI.
Open Visual Studio Code and select Extensions (Ctrl+Shift+X or View > Extensions).
In the search box, enter Teams Toolkit.
Select Install.

The Teams Toolkit
 icon appears in the Visual Studio Code Activity Bar.
You can also install Teams Toolkit from the Visual Studio Code Marketplace.
Set up your Teams development tenant
A tenant is a space or a container for your organization in Teams, where you chat, share files, and run meetings. This space is also where you upload and test your app. Let's verify if you're ready to develop with the tenant.
Check for upload an app option
After creating your custom app, you must upload your app to Teams with the Upload a custom app option. Sign in to your Microsoft 365 account to check if this option is enabled.
The following steps help you verify if you can upload apps in Teams:
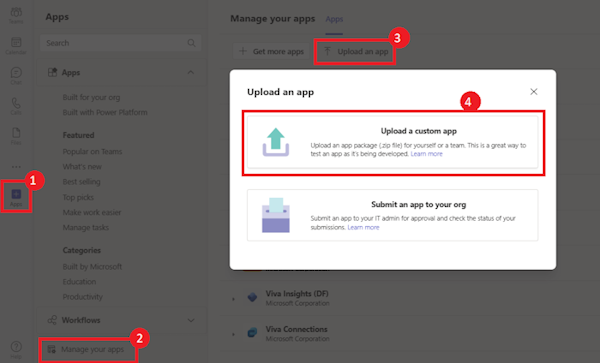
In the Teams client, select the Apps icon.
Select Manage your apps.
Select Upload an app.
Look for the option to Upload a custom app. If the option is visible, you can upload custom apps.
Note
If you don't find the option to upload a custom app, contact your Teams administrator.
Create a free Teams developer tenant (optional)
If you don't have a Teams developer account, join the Microsoft 365 developer program.
Go to the Microsoft 365 developer program.
Select Join Now and follow the onscreen instructions.
In the welcome screen, select Set up E5 subscription.
Set up your administrator account. After you finish, the following screen appears:
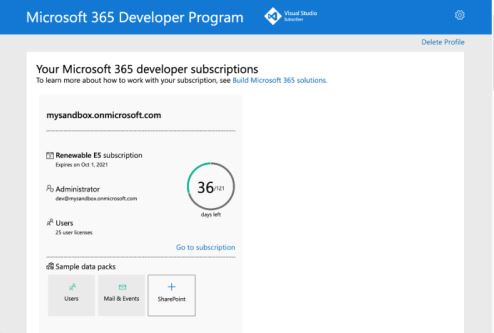
Sign in to Teams using the administrator account you just set up. Verify that you have the Upload a custom app option in Teams.
Build notification bot
To build notification bot using Visual Studio Code
Open Visual Studio Code.
Select the Teams Toolkit
 icon in the Visual Studio Code Activity Bar.
Select Create a New App.
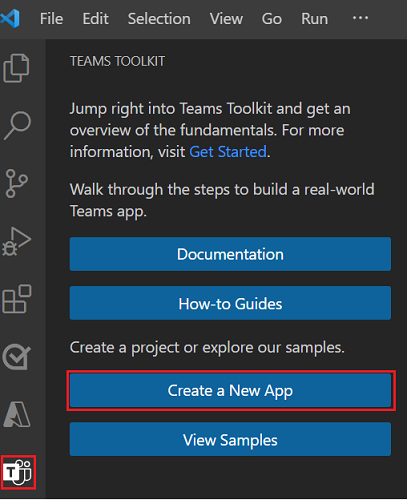
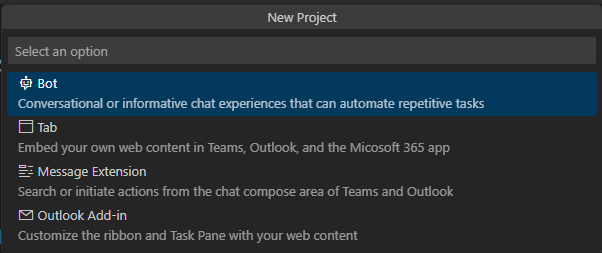
Select Bot to create a new bot project.
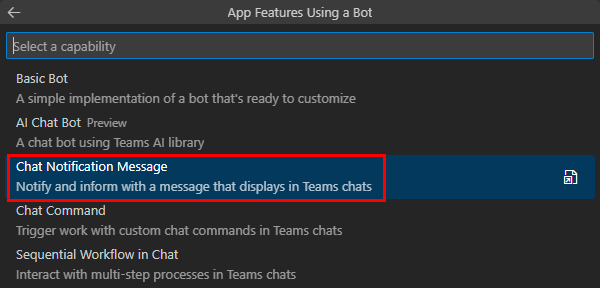
Ensure that Chat Notification Message is selected as the App feature that you want to build in your app.
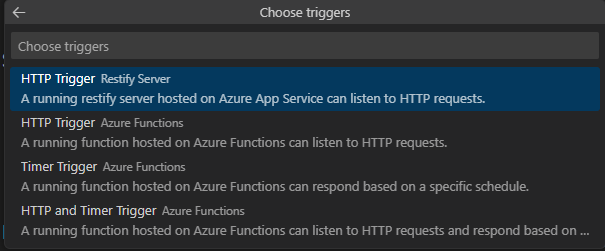
Select HTTP Trigger Express Server as the trigger.
Select JavaScript as the programming language.

Select Default folder to store your project root folder in default location.

You can also change the default location by the following steps:
Select Browse.

Select the location for project workspace.
Select the Select Folder.
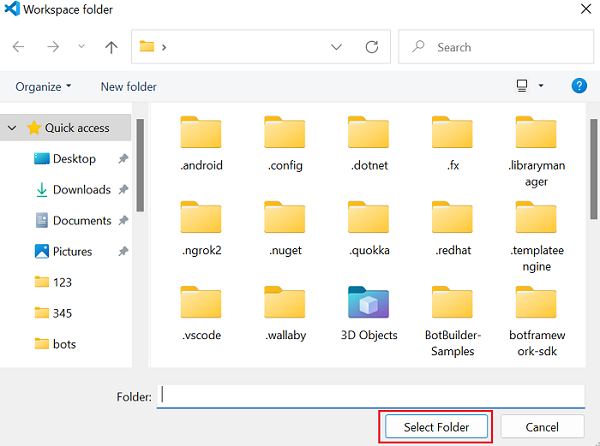
Enter a suitable name for your app.
Select Enter.

After your app is created, the Teams Toolkit displays the following message:

The notification bot app is created in a few seconds.
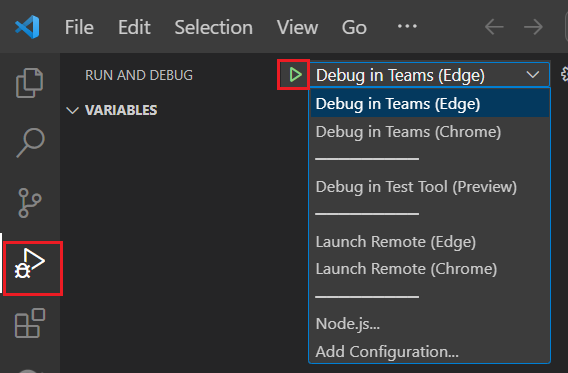
Select Run and Debug
 icon from the Visual Studio Code Activity Bar.
Select Debug in Teams (Edge) or Debug in Teams (Chrome) from the dropdown list.
Select Start Debugging button.
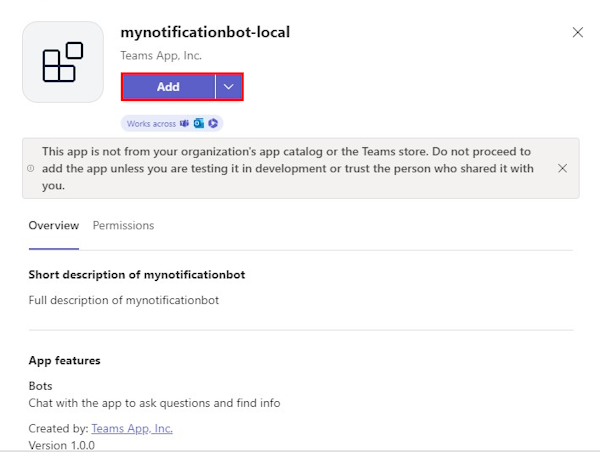
Select Add.
Select Open to open the app in personal scope.
Alternatively, you can either search and select the required scope or select a channel, chat, or meeting from the list, and move through the dialog to select Go.
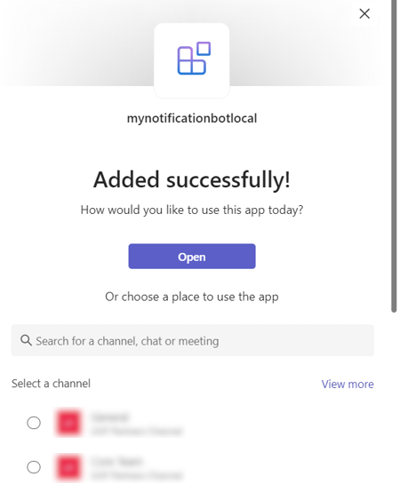
Your notification bot app is uploaded into Teams client.
In real time, events are triggered by an external source, such as a third party API that cause the notification bot to send the user a notification. To emulate an event trigger, you can send an event manually using powershell or terminal.
To invoke an event to trigger a notification, use one of the following ways:
If you use Windows, follow the steps:
If you don't use Windows, follow the steps:
- In Visual Studio Code, go to Terminal > New Terminal to open another terminal.
- Run the
curl -X POST http://localhost:3978/api/notificationcommand.
You'll get the following output in Teams:
Note
If you want to extend your app to Outlook and Microsoft 365, you can choose to debug your app with Outlook and Microsoft 365 from RUN AND DEBUG dropdown in Visual Studio Code.
Take tour of source code
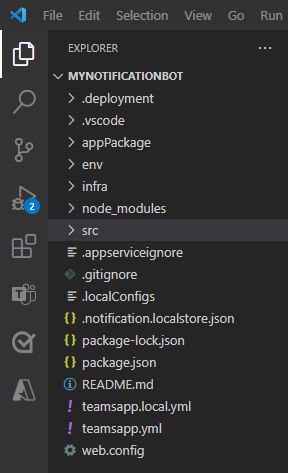
Teams Toolkit provides components for building an app. After creating the project, you can view the project folders and files in the Explorer area of Visual Studio Code.
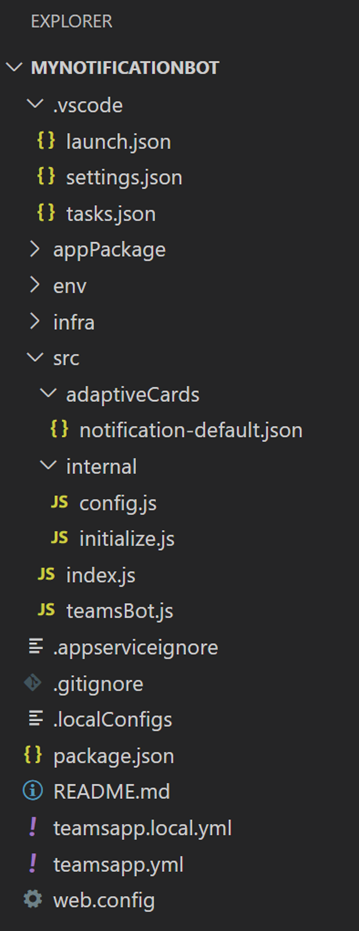
The new project folder contains following content:
| Folder/file name | Contents |
|---|---|
.vscode |
VSCode files for debugging. |
appPackage |
Templates for the app manifest (previously called Teams app manifest). |
env |
Name / value pairs are stored in environment files and used by teamsapp.yml to customize the provisioning and deployment rules. |
infra |
Templates for provisioning Azure resources. |
src\ |
The source code for the notification Teams application. |
src\index.js |
Application entry point and restify handlers for notifications. |
src\teamsbot.js |
An empty teams activity handler for bot customization. |
src\adaptiveCards\notification-default.json |
A generated Adaptive Card that is sent to Teams. |
teamsapp.yml |
Main project file describes your application configuration and defines the set of actions to run in each lifecycle stages. |
teamsapp.local.yml |
This overrides teamsapp.yml with actions that enable local execution and debugging. |
Send notification to Teams channel
To send notification to Teams channel
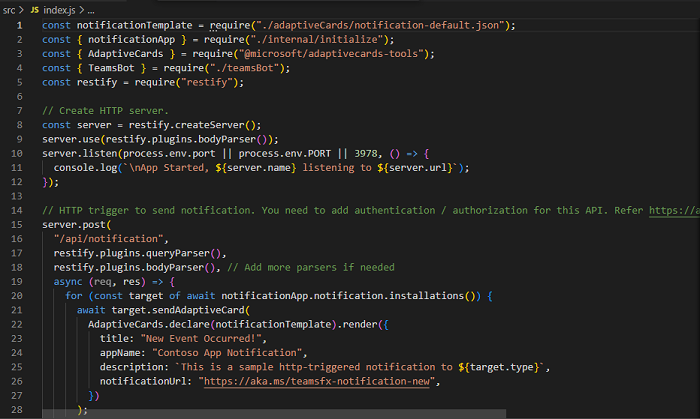
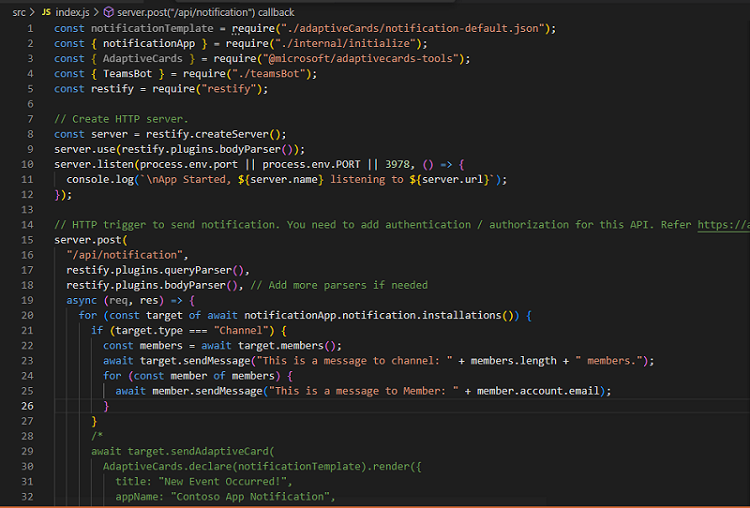
In Visual Studio Code, under EXPLORER, select MYNOTIFICATIONBOT> src> index.js.
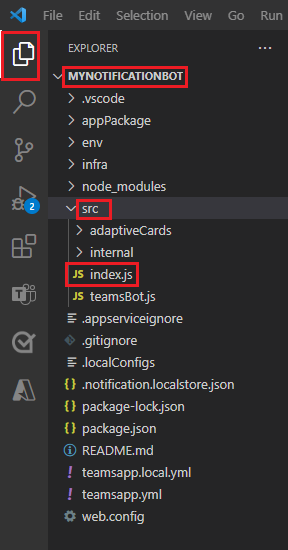
You can see the following page:
Use the following code after
for (const target of await bot.notification.installations()) {in Visual Studio Code.if (target.type === "Channel") { const members = await target.members(); await target.sendMessage("This is a message to channel: " + members.length + " members."); for (const member of members) { await member.sendMessage("This is a message to Member: " + member.account.email); } } /*To customize storage (Optional):
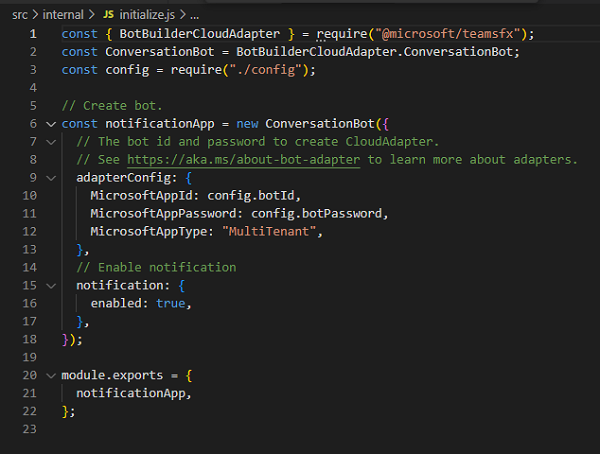
In Visual Studio Code, under EXPLORER, select MYNOTIFICATIONBOT> src> internal> initialize.js.
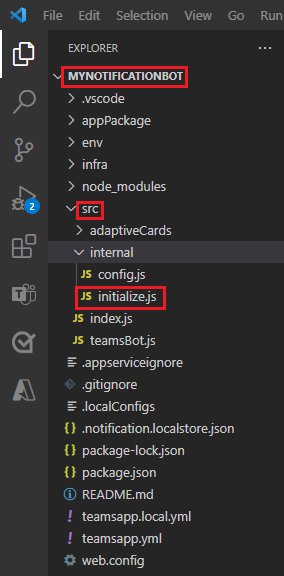
You can see the following page:
Update the following code in initialize.js file to customize the storage.
const myStorage = new MyStorage(...);

// initialize ConversationBot with notification enabled and customized storage
const bot = new ConversationBot({
    // The bot id and password to create BotFrameworkAdapter.
    // See https://aka.ms/about-bot-adapter to learn more about adapters.
    adapterConfig: {
        appId: process.env.BOT_ID,
        appPassword: process.env.BOT_PASSWORD,
    },
    // Enable notification
    notification: {
        enabled: true,
        storage: myStorage,
    },
 });
Use your own storage location instead of MyStorage.
Note
It's required to use your own storage for production environment. If storage isn't provided, default local file storage is considered.
Select Run and Debug
 icon from the Visual Studio Code sidebar.
Select Debug in Teams (Edge) or Debug in Teams (Chrome) from the dropdown list.
Select Start Debugging button.

A dialog appears in Teams to upload the app.
Select Add.

Select Open to open the app in personal scope.
Alternatively, you can either search and select the required scope or select a channel from the list, and move through the dialog to select Go.

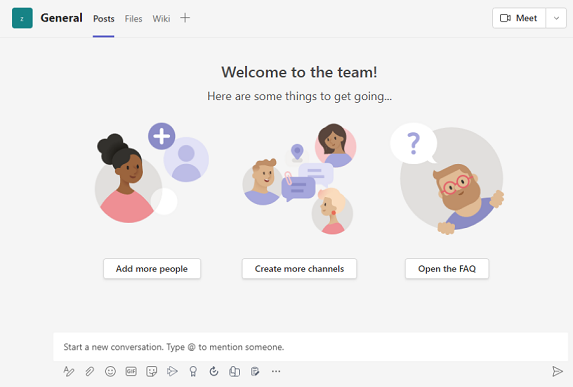
The following screen appears:
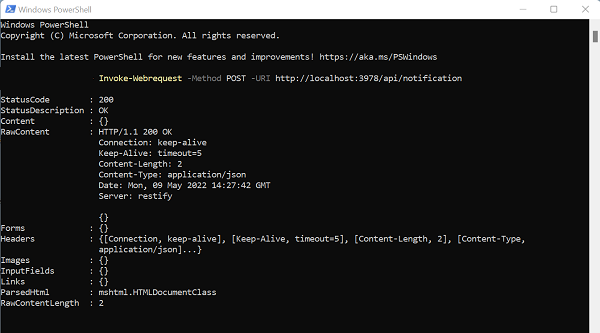
Open Windows PowerShell.
Run the
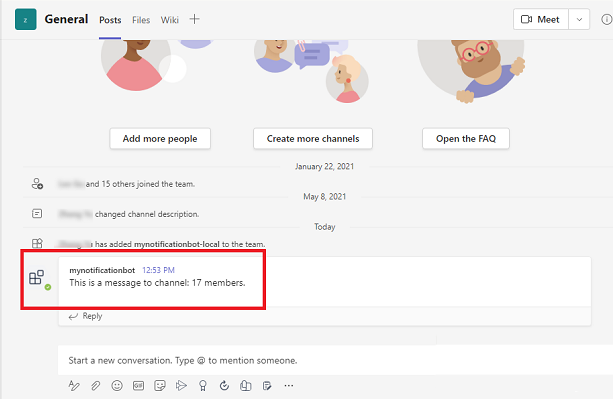
Invoke-Webrequest -Method POST -URI http://localhost:3978/api/notificationcommand.You get the notification in the Teams channel:
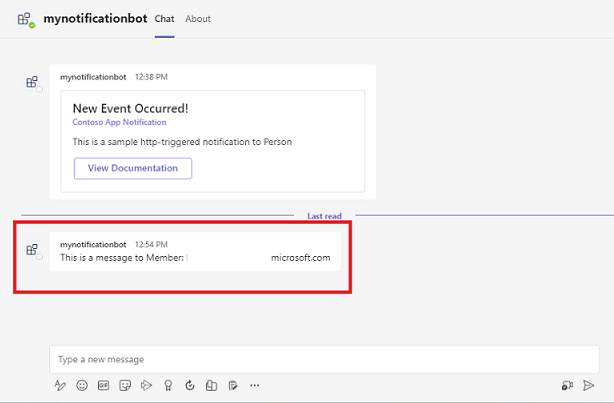
You get the notification in the personal chat:
Deploy your first Teams app
You've learned to build and run Teams app with notification bot capability. The final step is to deploy your app to Azure.
Let's deploy the first app with notification bot capability on Azure using Teams Toolkit.
Sign in to your Azure account
Use your account to access the Microsoft Azure portal and to provide provision new cloud resources to support your app.
Open Visual Studio Code.
Open the project folder where you created the notification bot app.
Select the Teams Toolkit
 icon in the sidebar.
Select Sign in to Azure using your credentials.
Tip
If you have the AZURE ACCOUNT extension installed and are using the same account, you can skip this step.
Your default web browser opens to let you sign in to the account.
Close the browser when prompted and return to Visual Studio Code.
The ACCOUNTS section of the sidebar shows the two accounts separately. It also lists the number of usable Azure subscriptions available to you. Ensure you have at least one usable Azure subscription available. If not, sign out and use a different account.
Congratulations, you have created a Teams app! Now let's go ahead and learn how to deploy one of the apps to Azure using the Teams Toolkit.
Deploy your app to Azure
Under DEPLOYMENT, you can provision for necessary cloud resources and your app's code is copied into the created cloud resources.
Select the Teams Toolkit
 icon in the Visual Studio Code sidebar.
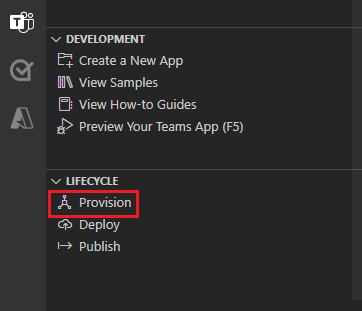
Select Provision under LIFECYCLE.
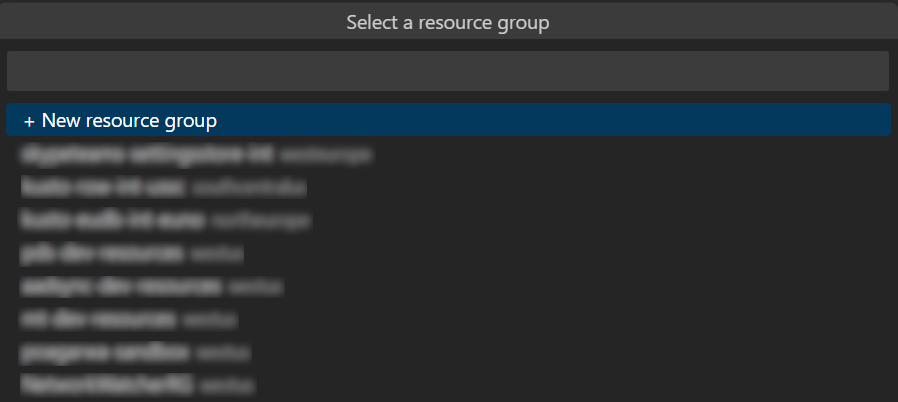
Select an existing resource group or create new resource group. For more information, see Create resource group.
Select anyone of the existing subscription.
Select an existing or create new resource group.
Note
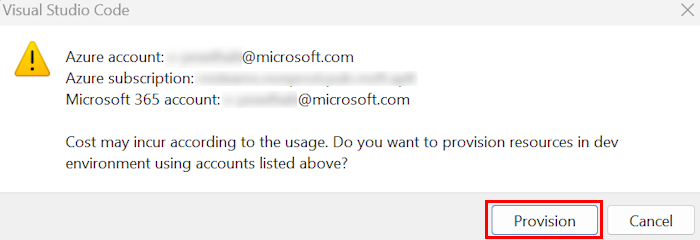
A dialog appears mentioning that costs may be incurred when running resources in Azure.
Select Provision.
The provisioning process creates resources in Azure cloud. You can monitor the progress by observing the dialogs in the lower-right corner.

You see the option to view the provisioned resources. For this tutorial, you don't need to view resources.
Select Deploy under LIFECYCLE after provisioning is complete.
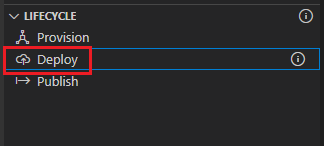
Select Deploy.

Deployment takes some time. You can monitor the progress in the dialogs in lower-right corner.

Complete challenge
Did you come up with something like this?

Congratulations!
You've completed the tutorial to build a notification bot. You can extend your notification bot to add the command response and workflow features.
Have an issue with this section? If so, please give us some feedback so we can improve this section.
Platform Docs
