API-Based message extension for beginners
Note
- API-based message extensions only support search commands.
- Teams Toolkit supports OpenAPI Specification version 2.0 and 3.0.x.
Message extensions built using an API (API-based) significantly enhance the functionality of your Teams apps by allowing them to interact with external services. It helps streamline workflows by reducing the need to switch between different applications.
You can use API message extension to integrate external services that are commonly used in the business workflow. For example, a business that frequently uses a CRM system for customer management could use a Messaging Extension to fetch and display customer data directly from Teams. By reducing the need to switch between different applications, the user saves time and improves. API-based message extension is supported on Teams desktop, web, and mobile clients.
Prerequisites
Here's a list of tools you need for building and deploying your apps.
| Install | For using... |
|---|---|
| Teams Toolkit | A Microsoft Visual Studio Code extension that creates a project scaffolding for your app. Use the latest version. |
| Microsoft Teams | Microsoft Teams to collaborate with everyone you work with through apps for chat, meetings, and call all in one place. |
| Node.js | Back-end JavaScript runtime environment. For more information, see Node.js version compatibility table for project type. |
| Microsoft Edge (recommended) or Google Chrome | A browser with developer tools. |
| Visual Studio Code | JavaScript, TypeScript, or SharePoint Framework (SPFx) build environments. Use version 1.55 or later. |
| Microsoft 365 developer account | Access to Teams account with the appropriate permissions to install an app. |
| Developer Portal for Teams | Web-based portal to configure, manage, and publish your Teams app to your organization or the Microsoft Teams Store. |
| OpenAPI Description (OAD) document | A document that describes the capabilities of your API. For more information, see OpenAPI Description. |
Prepare development environment
After you install the required tools, set up the development environment.
Install the Teams Toolkit
The Teams Toolkit helps simplify the development process with tools to provision and deploy cloud resources for your app, publish to the Teams Store, and more.
You can use the toolkit with Visual Studio Code, or CLI (command-line interface), called Teamsapp.
Open Visual Studio Code and select the Extensions view (Ctrl+Shift+X / ⌘⇧-X or View > Extensions).
In the search box, enter Teams Toolkit.
Select Install next to the Teams Toolkit.
The Teams Toolkit icon appears in the Visual Studio Code Activity Bar.
![]()
You can also find the Teams Toolkit on the Visual Studio Code Marketplace.
Note
The latest version of Teams Toolkit is v5.
Set up your Teams development tenant
A tenant is like a space, or a container for your organization in Teams, where you chat, share files, and run meetings. This space is also where your upload and test your custom app. Let's verify if you're ready to develop with the tenant.
Check for custom app upload option
After creating the app, you must load your app in Teams without distributing it. This process is known as custom app upload. Sign in to your Microsoft 365 account to view this option.
Note
Custom app upload is necessary for previewing and testing apps in Teams local environment. If it isn't enabled, you can't preview and test your app in Teams local environment.
Do you already have a tenant, and do you have the admin access? Let's check if you really do!
Verify if you can upload a custom app in Teams:
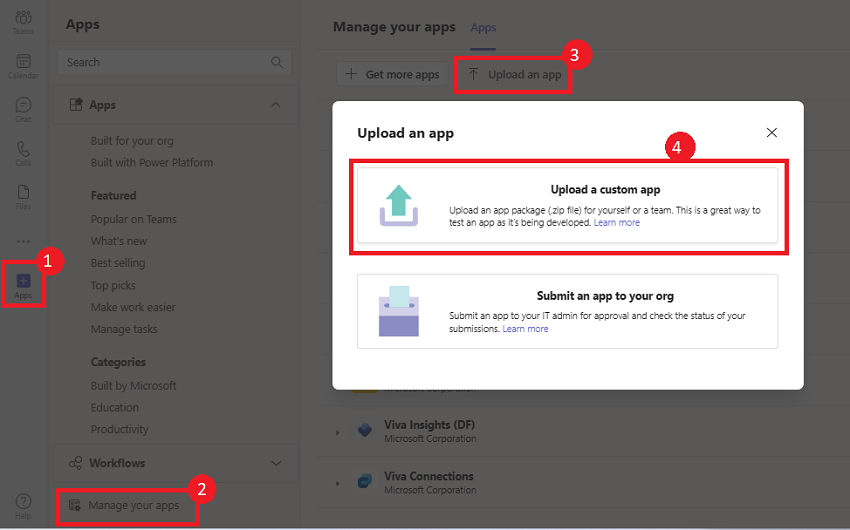
In the Teams client, select the Apps icon.
Select Manage your apps.
Select Upload an app.
Look for the option to Upload a custom app. If you see the option, custom app upload is enabled.
Note
Contact your Teams administrator, if you don't find the option to upload a custom app.
Create a free Teams developer tenant (optional)
If you don't have a Teams developer account, you can get it free. Join the Microsoft 365 developer program!
Go to the Microsoft 365 developer program.
Select Join Now and follow the onscreen instructions.
In the welcome screen, select Set up E5 subscription.
Set up your administrator account. After you finish, the following screen appears.
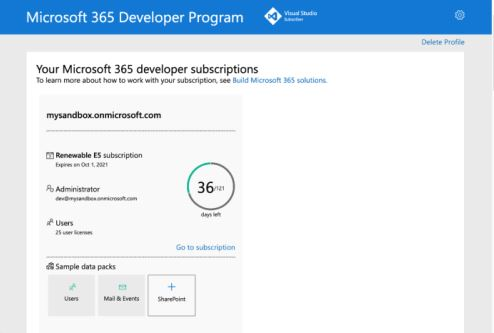
Sign in to Teams using the administrator account you just set up. Verify that you have the Upload a custom app option in Teams.
Get a free Azure account
If you want to host your app or access resources in Azure, you must have an Azure subscription. Create a free account before you begin.
Now you have all the tools to set up your account. Next, let's set up your development environment and start building! Select the app you want to build first.
Build an API based message extension
After you set up your project workspace with Teams Toolkit, build your bot project. Ensure that you're signed in to your Microsoft 365 account.
Sign in to your Microsoft 365 account
Use this account to sign in to Teams. If you're using a Microsoft 365 developer program tenant, the admin account you set up while registering is your Microsoft 365 account.
Open Visual Studio Code.
Select the Teams Toolkit
 icon in the sidebar.
Select Sign in to M365.
Your default web browser opens to let you sign in to the account.
Sign in to your Microsoft 365 account using your credentials.
Close the browser when prompted and return to Visual Studio Code.
Return to Teams Toolkit within Visual Studio Code.
Use this account to sign in to Teams. If you're using a Microsoft 365 developer program tenant, the admin account you set up while registering is your Microsoft 365 account.
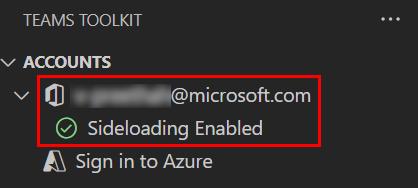
Now you're ready to build the app and run it locally!
Create OpenAPI Description document
OpenAPI Description (OAD) is the industry-standard specification that outlines how OpenAPI files are structured and outlined. It's a language-agnostic, human-readable format for describing APIs. It's easy for both humans and machines to read and write. The schema is machine-readable and represented in either YAML or JSON.
You must have an OpenAPI Description (OAD) document before you create an API-based message extension. The API spec must meet the following criteria:
- The
authproperty must not be specified. - JSON and YAML are the supported formats.
- OpenAPI Versions 2.0 and 3.0.x are supported.
- Teams doesn't support the oneOf, anyOf, allOf, and not (swagger.io) constructs.
- Constructing arrays for the request isn't supported, however, nested objects within a JSON request body are supported.
- The request body, if present, must be application/Json to ensure compatibility with a wide range of APIs.
- Define an HTTPS protocol server URL for the
servers.urlproperty. - Only single parameter search is supported.
- Only one required parameter without a default value is allowed.
- Only POST and GET HTTP methods are supported.
- The OpenAPI Description document must have an
operationId. - The operation must not have a required Header or Cookie parameters without default values.
- A command must have exactly one parameter.
- Ensure that there are no remote references in the OpenAPI Description document.
- A required parameter with a default value is considered optional.
We used the following OpenAPI Description as an example for this tutorial:
OpenAPI Description document
openapi: 3.0.1
info:
  title: OpenTools Plugin
  description: A plugin that allows the user to find the most appropriate AI tools for their use cases, with their pricing information.
  version: 'v1'
servers:
- url: https://gptplugin.opentools.ai
paths:
  /tools:
    get:
      operationId: searchTools
      summary: Search for AI Tools
      parameters:
        - in: query
          name: search
          required: true
          schema:
            type: string
          description: Used to search for AI tools by their category based on the keywords. For example, search="tool to create music" gives tools that can create music.
      responses:
        "200":
          description: OK
          content:
            application/json:
              schema:
                $ref: '#/components/schemas/searchToolsResponse'
        "400":
          description: Search Error
          content:
            application/json:
              schema:
                $ref: '#/components/schemas/searchToolsError'
components:
  schemas:
    searchToolsResponse:
      required:
        - search
      type: object
      properties:
        tools:
          type: array
          items:
            type: object
            properties:
              name:
                type: string
                description: The name of the tool.
              opentools_url:
                type: string
                description: The URL to access the tool.
              main_summary:
                type: string
                description: A summary of what the tool is.
              pricing_summary:
                type: string
                description: A summary of the pricing of the tool.
              categories:
                type: array
                items:
                  type: string
                  description: The categories assigned to the tool.
              platforms:
                type: array
                items:
                  type: string
                  description: The platforms that this tool is available on.
          description: The list of AI tools.
    searchToolsError:
      type: object
      properties:
        message:
          type: string
          description: Message of the error.
Note
Teams Toolkit supports OpenAPI Specification version 2.0 and 3.0.x.
Now that you have your OpenAPI Description document, it also requires a response rendering template for the app to respond to the GET or POST requests. The response rendering template consists of an Adaptive Card template, Preview card template, and metadata. If your building an app using Teams Toolkit or Developer portal for Teams, the response rendering template is extracted from the OpenAPI Description document automatically.
The following code is an example of the response rendering template:
Response rendering template
   {
   "version": "1.0.0",
   "jsonPath": "tools",
   "responseLayout": "list",
   "responseCardTemplate": {
       "type": "AdaptiveCard",
       "version": "1.4",
       "body": [
       {
           "type": "TextBlock",
           "text": "${if(name, name, 'N/A')}",
           "size": "Large",
           "weight": "Bolder",
           "wrap": true
       },
       {
           "type": "TextBlock",
           "text": "Categories: ${join(categories, ', ')}",
           "size": "Small",
           "isSubtle": true,
           "wrap": true
       },
       {
           "type": "TextBlock",
           "text": "${if(main_summary, main_summary, 'N/A')}",
           "size": "Medium",
           "wrap": true
       },
       {
           "type": "TextBlock",
           "text": "Supported Platforms: ${join(platforms, ', ')}",
           "size": "Small",
           "isSubtle": true,
           "wrap": true
       },
       {
           "type": "TextBlock",
           "text": "Pricing Summary:",
           "size": "Medium",
           "weight": "Bolder",
           "wrap": true
       },
       {
           "type": "TextBlock",
           "text": "${if(pricing_summary, pricing_summary, 'N/A')}",
           "size": "Small",
           "wrap": true
       }
       ],
       "actions": [
       {
           "type": "Action.OpenUrl",
           "title": "Learn More",
           "url": "${opentools_url}",
           "$when": "${opentools_url != null}"
       },
       {
           "type": "Action.OpenUrl",
           "title": "Chat with Chatbot",
           "url": "${chatbot_short_url}",
           "$when": "${chatbot_short_url != null}"
       }
       ],
       "$schema": "http://adaptivecards.io/schemas/adaptive-card.json"
   },
   "previewCardTemplate": {
       "title": "${if(name, name, 'N/A')}"
   }
   }
You can now create a message extension that uses the OpenAPI Description document. To create am message extension using the OpenAPI Description document, follow these steps:
Open Visual Studio Code.
Select the Teams Toolkit
 icon in the Visual Studio Code Activity Bar.
Select Create a New App.

Select Message Extension.
Select Custom Search Results
Select Start with an OpenAPI Description Document.
Select Browse and select the OpenAPI Description document you saved earlier. A list of APIs available in the document appears.
Select the APIs from the list and select OK.
Select Default folder to store your project root folder in default location.

You can also change the default location by the following steps:
Select Browse.

Select the location for project workspace.
Select the Select Folder.
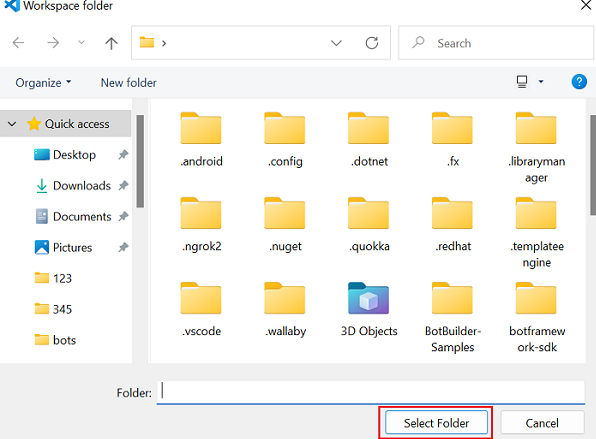
Enter a suitable name for your app and then select Enter.

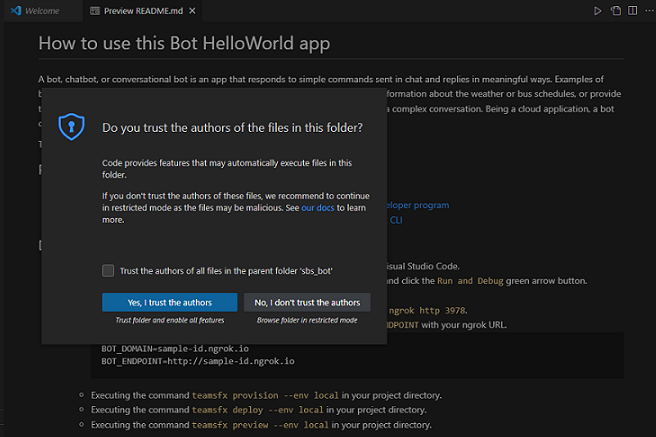
A dialog appears. Select Yes, I trust the authors or No, I don’t trust the authors based on your requirement.
Your Teams app with a API-based message extension capability is created in few seconds.
After your app is created, the Teams Toolkit displays the following message:

Select Local debug to preview your project.
After scaffolding is done, view the project directories and files under Explorer in Visual Studio Code.
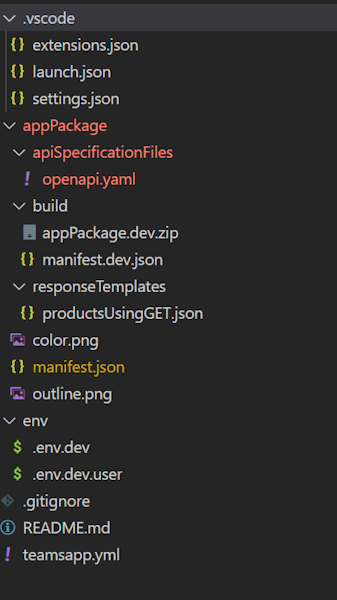
| Folder name | Contents |
|---|---|
env/.env.dev.user |
Configuration file for local environment used by teamsapp.yml to customize the provisioning and deployment rules. |
appPackage |
App manifest template files and app icons (color.png and outline.png). |
appPackage/manifest.json |
App manifest for running the app in local and remote environment. |
appPackage/apiSpecificationFiles/openapi.yml |
A description file that contains the structure and syntax of an API in the OpenAPI Description. |
appPackage/responseTemplates |
The response rendering template, which consists of the Adaptive Card template, preview card template, and metadata. |
teamsapp.yml |
This is the main Teams Toolkit project that defines properties and configuration stage definitions. |
Tip
Familiarize yourself with bots outside Teams before you integrate your first bot within Teams.
Provision you app
To provision your app on Azure:
Go to Teams Toolkit and from the left pane, select Run and Debug (Ctrl+Shift+D).
Select Launch Remote in Teams (Edge) from the launch configuration dropdown.
The Teams Toolkit provisions your app on Azure and deploys it to Teams.
Note
The first time you provision your app, it takes a few minutes to complete. Subsequent provisions are faster.
Go to a chat message and select the Actions and apps icon. In the flyout menu, search for your app.
Select the app from the list and trigger your search commands from compose message area.
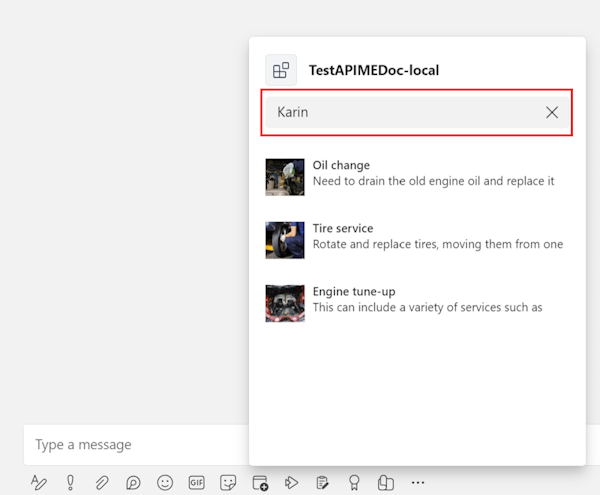
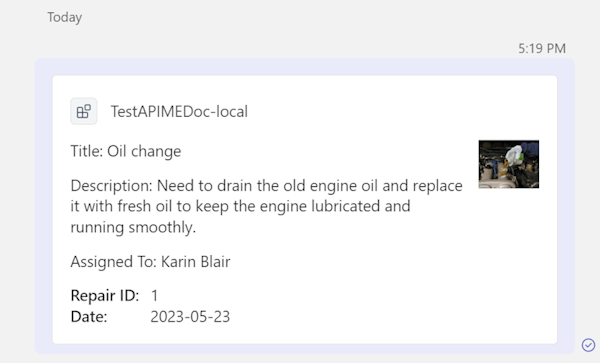
Teams sends the search result as an Adaptive Card in the chat message.
Complete challenge
Did you come up with something like this?

Congratulations!
You did it! You created an API based message extension.
Have an issue with this section? If so, please give us some feedback so we can improve this section.
Platform Docs

