Mesh 201 Tutorial Chapter 3: Load a local shared HTML file into a WebSlate
In the previous chapter of this tutorial, you enabled a button to load a local non-shared HTML file into a WebSlate. In this chapter, we'll also set up an HTML page to load, but this time it will be shared and therefore can be viewed by all attendees in the experience.
Navigate to the buttons
In the Scene window, change your view so that you're looking at Station 2, pictured below.
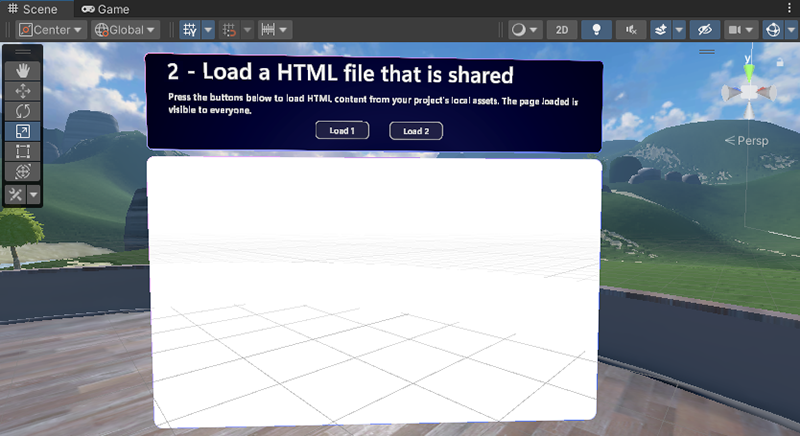
Just as in the previous chapter, there's already a GameObject in place with some descriptive text but this time there are two buttons: Load 1 and Load 2. There's also a WebSlate already in place. We'll complete the Station by updating a script graph that's attached to one of the buttons. When an attendee clicks either button, a web page will load and all the other attendees in the experience can share in viewing the new page. Each button at this Station loads a slightly different type of content.
In the Hierarchy, collapse the GameObject named 1 - LocalWebslate.
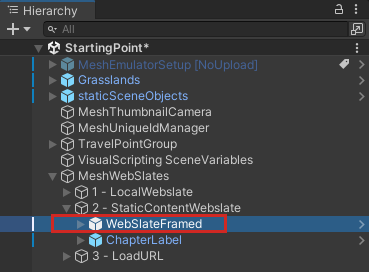
Expand 2 - StaticContentWebslate. A WebSlateFramed object has been pre-loaded and is located here.
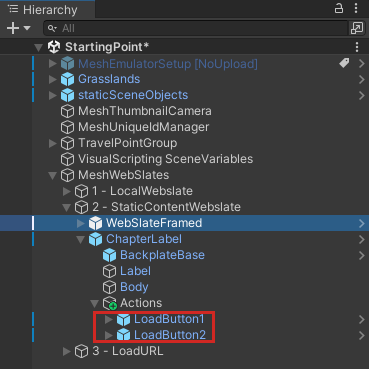
Expand ChapterLabel and its child object Actions. The buttons we'll be working with, LoadButton1 and LoadButton2, are located here.
Edit the script graph
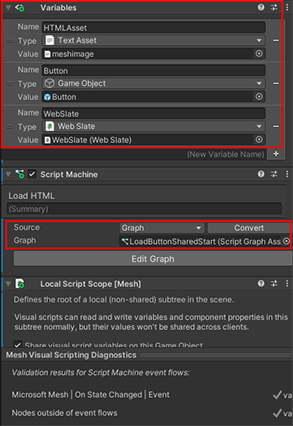
In the Hierarchy, select LoadButton1. In the Inspector, note that LoadButton1 has a Script Machine component with a script attached named LoadButtonSharedStart. It also has several Object Variables attached that are used in the script graph.
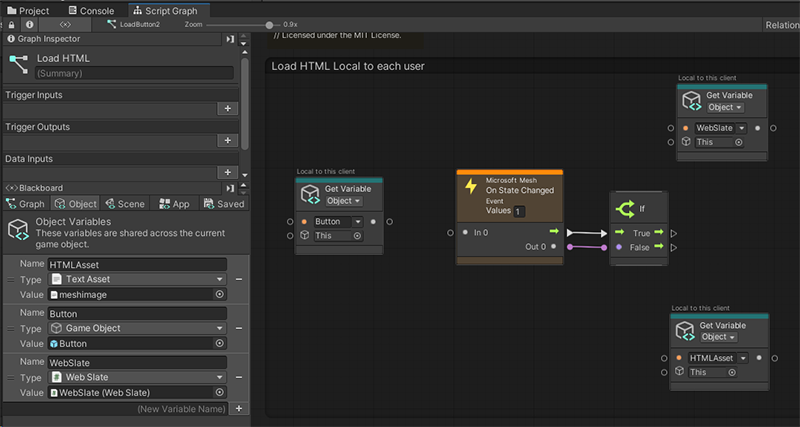
When you selected LoadButton1, the script in its Script Machine component automatically loaded into the Script Graph window. As in the previous chapter, the script graph has already been started for you.
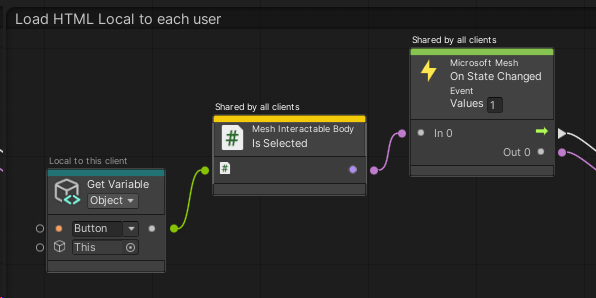
Add the Mesh Interactable Body: Is Selected node
Our first task is to add a Mesh Interactable Body: Is Selected node. As discussed in the previous chapter, you have a choice of two "Mesh Interactable Body" nodes: Is Selected Locally or Is Selected. The text above each node can help you to confirm the behavior.
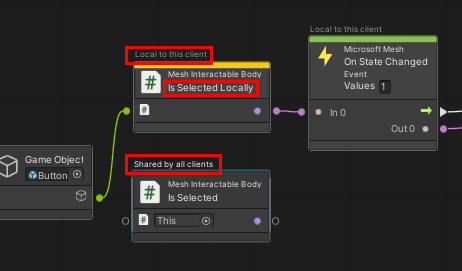
For Station 1, we wanted only the person triggering the event to experience it, so the script contained the node that says "Is Selected Locally". This time, we want all attendees to experience the event, so we'll select the other node for this--the one that simply says "Is Selected".
Click the Data Output port of the Game Object node and then drag to the right. This opens the Fuzzy Finder. WARNING: Once you open the Fuzzy Finder, don't click anywhere outside of the Unity interface. This closes the Fuzzy Finder and causes unpredictable behavior in the Script Graph.
In the Fuzzy Finder, search for "Mesh Interactable Body: Is Selected" and then select it.
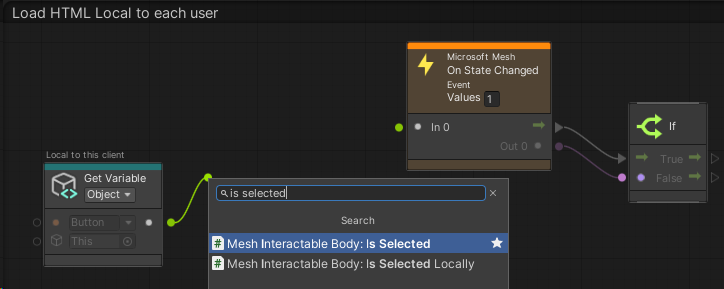
This adds the node to the graph.
Drag a connector from the Data Output port of the Mesh Interactable Body: Is Selected node and then connect it to the Data Input port of the Microsoft Mesh: On State Changed node.
Add the Web Slate: Load HTML Content (HTML Asset) node
The script graph already contains the two Object Variable nodes we need, so we can move forward and add the final node we need.
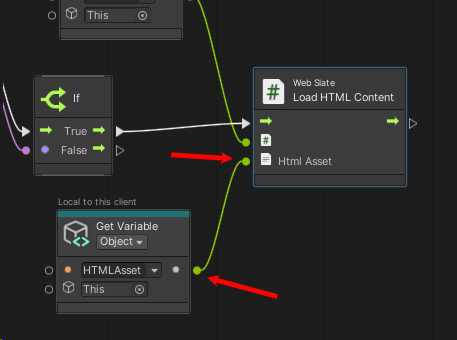
Drag a connector from the Control Output port of the If node and then create a new Web Slate: Load HTML Content (HTML Asset) node. As discussed in the previous chapter, keep in mind that there are two nodes with very similar names.
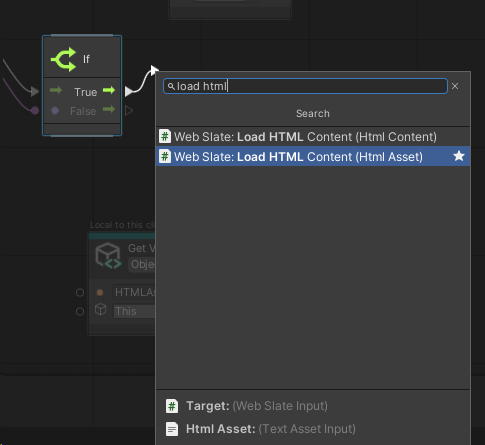
You want the one that says "HTML Asset", not "HTML Content".
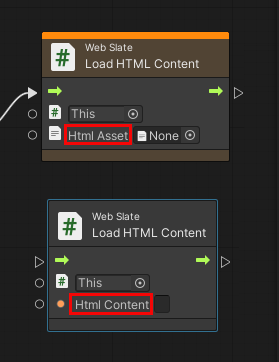
Drag a connector from the Data Output port of the Get Object Variable node with the value "WebSlate" and then connect it to the first Data Input port of the Web Slate: Load HTML Content node.
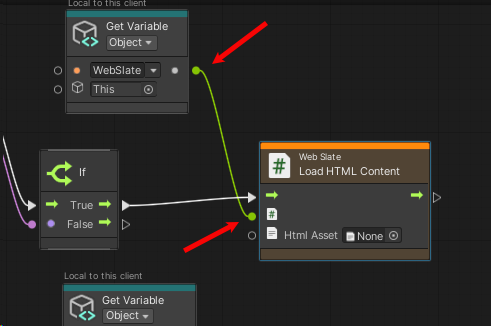
The web page we want to load is in the other Get Object Variable node. Drag a connector from the Data Output port of the that node and then connect it to the second Data Input port of the Web Slate: Load HTML Content node.
Test your work
In Unity, save the project and then press the Unity Editor Play button.
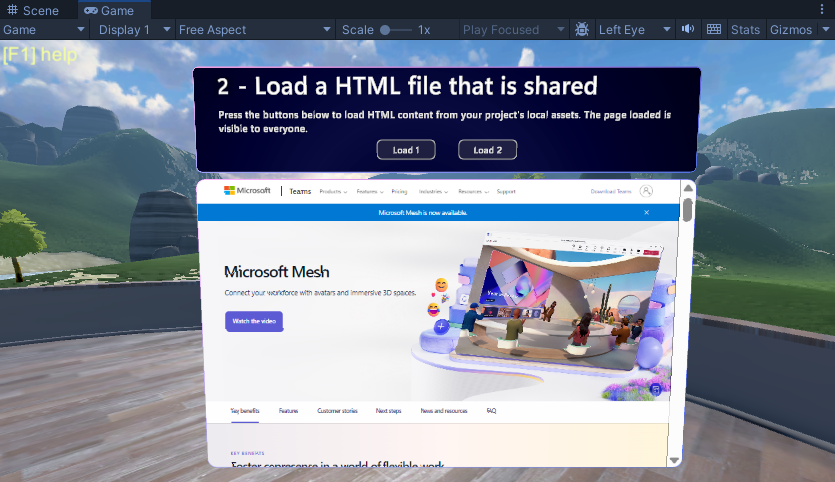
Position yourself in front of Station 2. As in the previous chapter, the WebSlate is displaying some information about Microsoft because the default URL in the WebSlate component is set to the Microsoft home page.
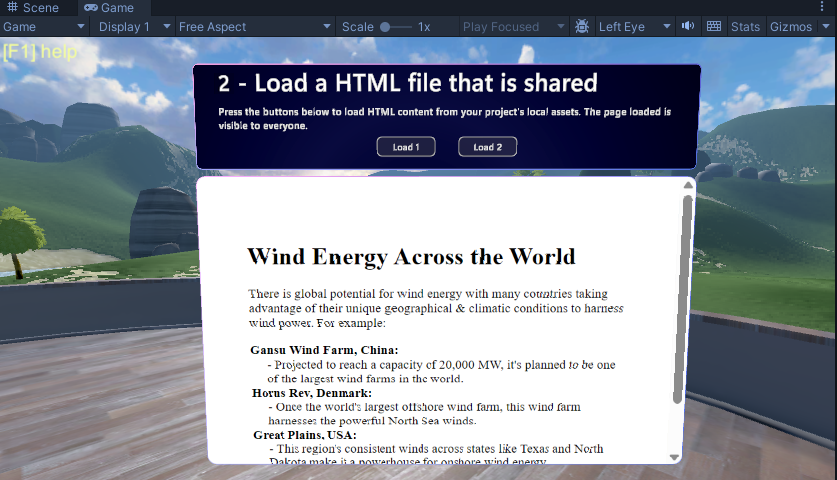
Click the Load 1 button. The WebSlate loads and displays a page with the title "Wind Energy Across the World". Note that the WebSlate is interactive--you can click the arrows above and below the scroll bar or an empty space in the scroll bar to move the slider and change the view of the page. (You can't drag the slider itself.)
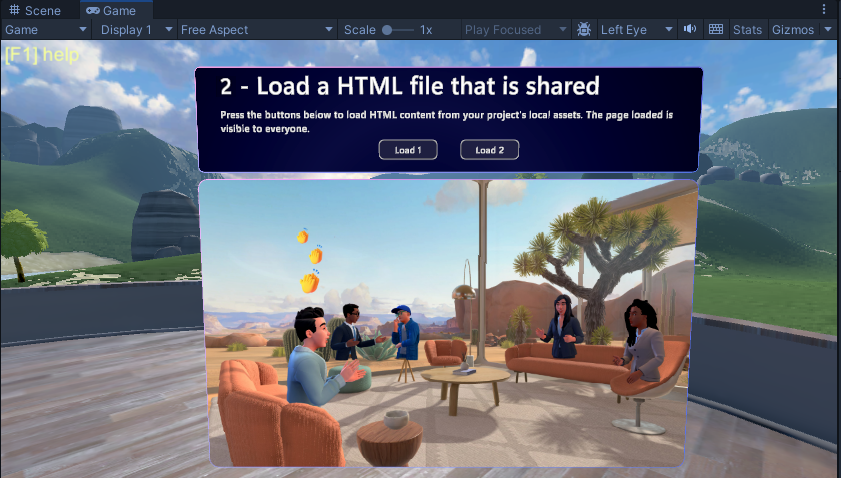
Click the Load 2 button and note that an image loads into the WebSlate.
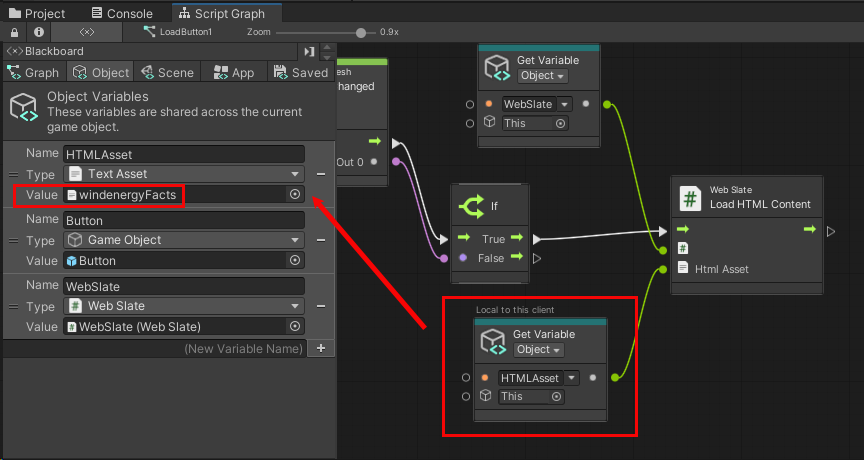
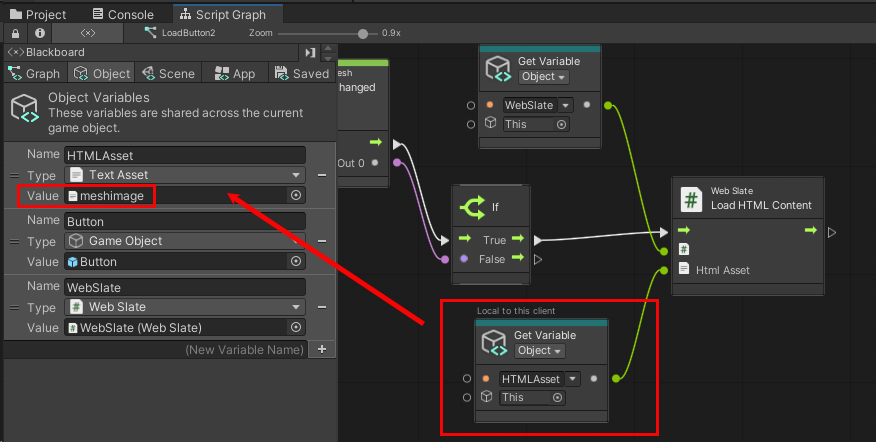
This works because we already have a complete script set up for the Load 2 button and it has exactly the same node structure as the script for the Load 1 button. The only difference is the variable for each script. For the Load 1 button, the value for its HTMLAsset variable is the HTML file "windenergyfacts".
For the Load 2 button, the value for its HTMLAsset variable is the HTML file "meshimage".
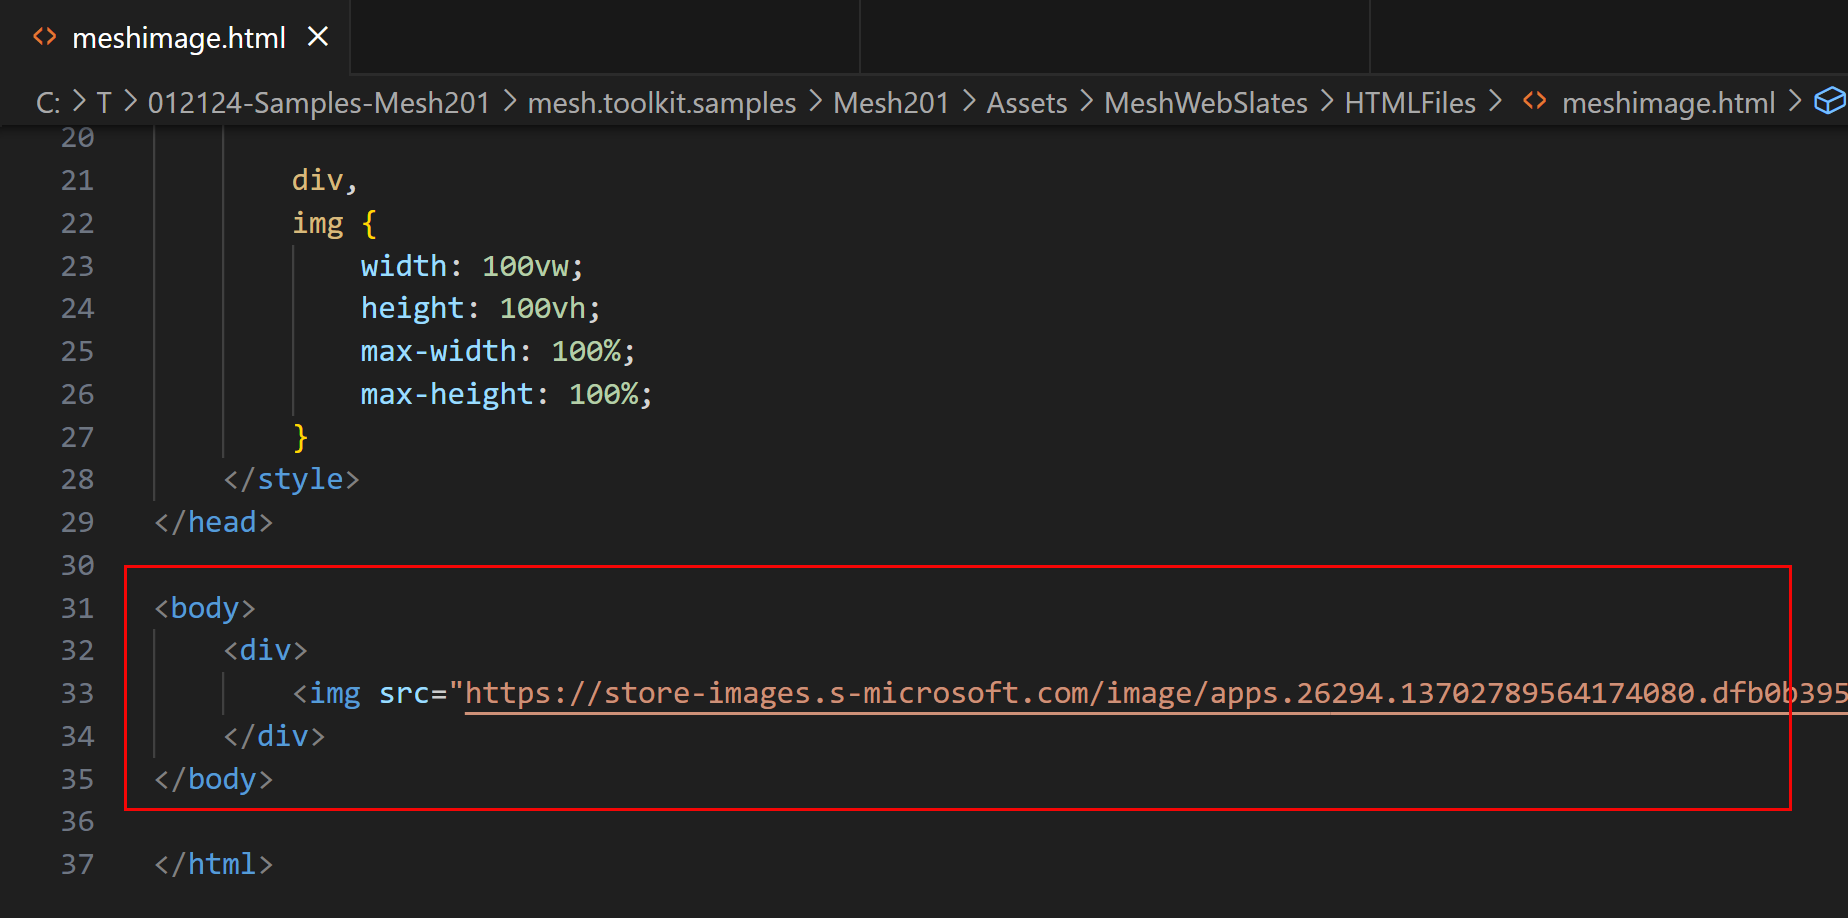
If you're curious about the meshimage.html file, open it and take a look. It's located in the project's Assets > MeshWebSlates > HTMLFiles folder.
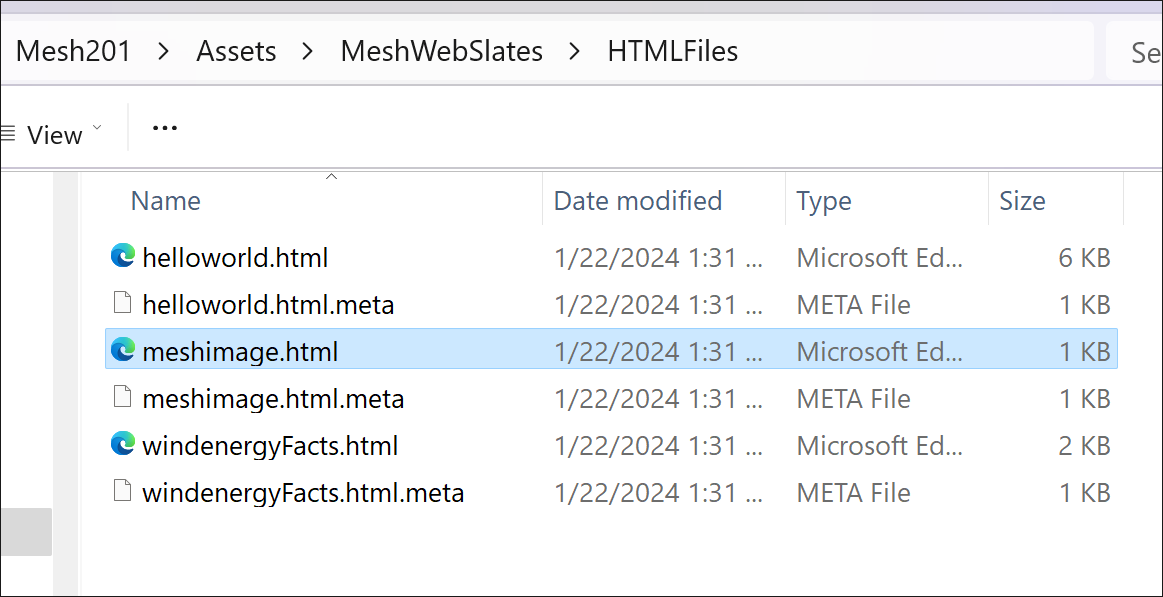
The sole content in the file is a link to the image that you saw when you clicked the Load 2 button.
