Create a new Intelligent Recommendations account
This article walks you through how to create and manage Azure resources for Intelligent Recommendations via the Intelligent Recommendations Azure Resource Manager (ARM) portal.
Learn how to use the Azure portal with ARM templates to deploy your Azure resources. To manage your resources, see Manage Azure resources by using the Azure portal.
You'll create three resources:
- Account: Parent resource
- Serving: Child resource
- Modeling: Child resource
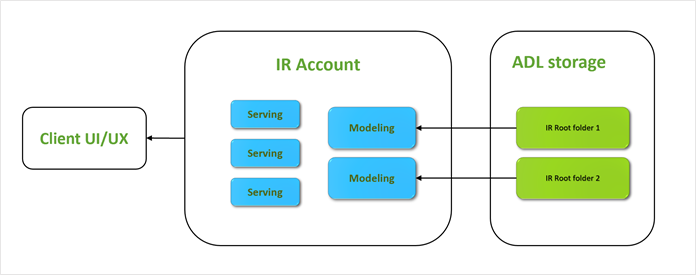
Each Intelligent Recommendations account can have several Serving and Modeling components. Each Serving component can access every Modeling component within the Intelligent Resources account.
You can organize your Intelligent Recommendations accounts and their related resource components in multiple ways to allow data separation, scalability, optimized pricing, scenario support, and experimentation.
The following schematic diagram illustrates the high-level resource relationship and architecture:
Prerequisite reminder
Intelligent Recommendations supports standard Microsoft Entra ID authentication. Service principals, users, and managed identities can authenticate and call the secure Intelligent Recommendations endpoint.
Before provisioning a new account (environment), you may want to prepare the following components:
Configure a Data Lake Storage account and populate it with valid data for Intelligent Recommendations to consume. To learn about Data Lake Storage configuration and data contracts, see Set up Azure Data Lake Storage and Data contract overview.
Consider which Microsoft Entra ID entities can call the endpoint and prepare their IDs. To learn about user IDs and service principal IDs, see Prepare data.
Both prerequisites are nice to have, but they aren't mandatory. You can add or modify them at a later date.
Important
If customers terminate Intelligent Recommendations, they have 90 days to claim their data before it's deleted. Within 90 days, customers can request to have their data copied to a specified business Data Lake Storage location. A copy of their data will be transferred to that location.
Create the service account
First, you'll need to create a service account.
Sign into Azure portal and search for Intelligent Recommendations. You can also directly access the Azure portal by using the Intelligent Recommendations deep link. This portal is where you'll manage all your Intelligent Recommendations resources.
Create a new account by selecting Create.
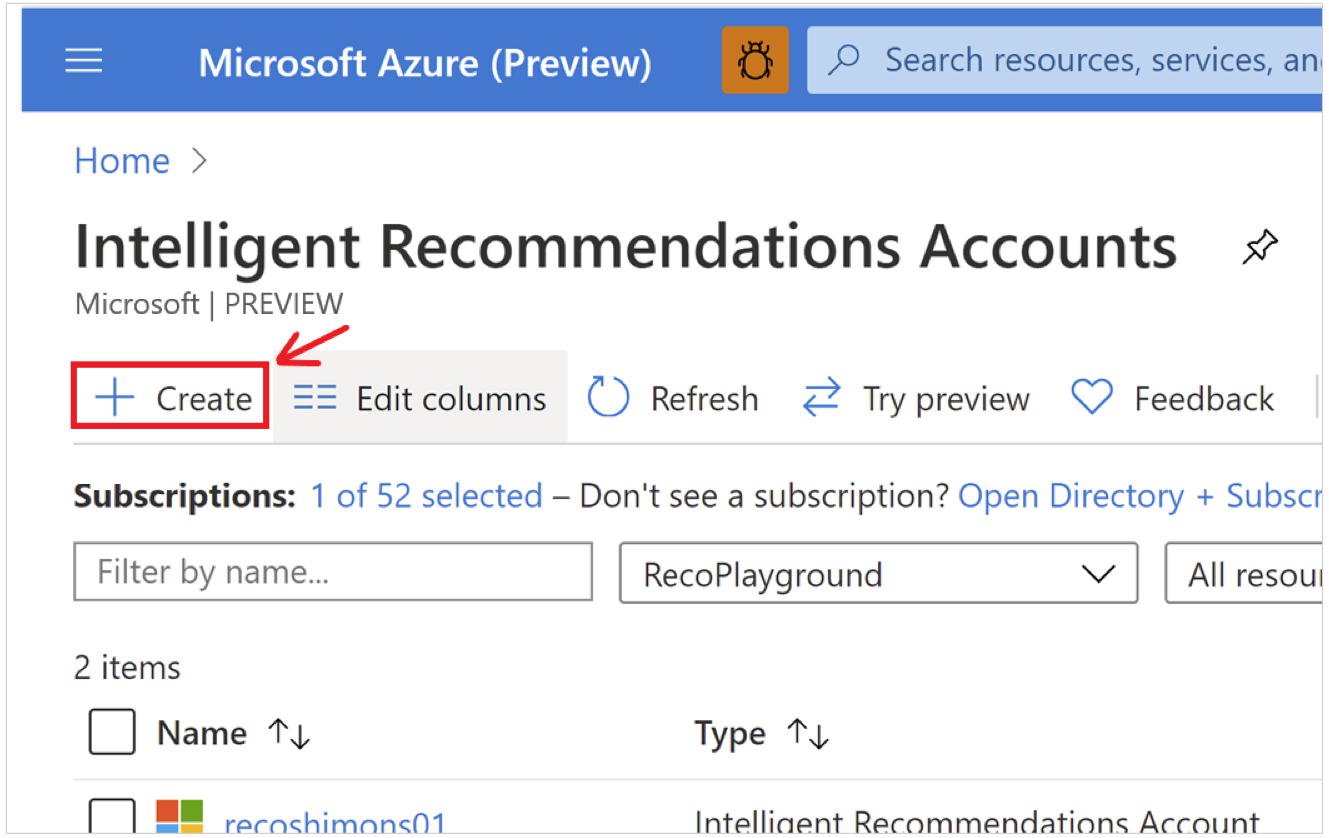
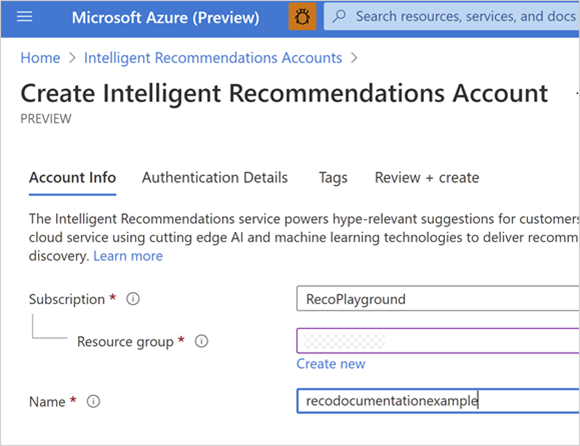
In the Account Info tab, enter Subscription, Resource Group, and Name.
If you don't have an Azure subscription, you can create a free account here.
The Name is important since it will appear in the Intelligent Recommendations endpoint DNS name. It should be globally unique (across Azure), alphanumeric, and case insensitive.
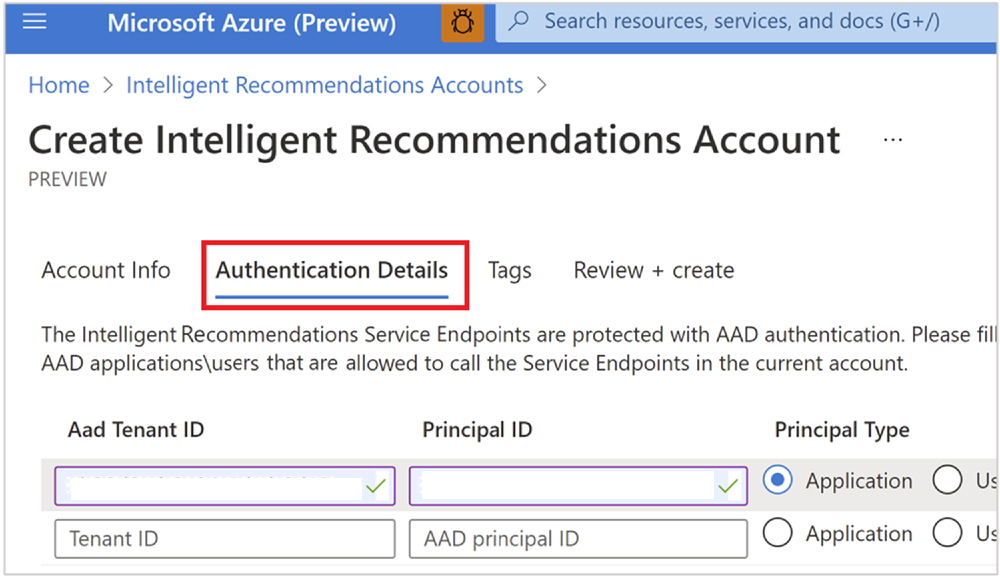
On Authentication Details tab, add all AD Users or AD service principals (caller app IDs) allowed to call this account:
Note
Before viewing recommendations results, you may want to consider adding yourself as an authenticated user. Add a new row with type = User, enter the tenant ID, and your Microsoft Entra ID user ID. The tenant ID is located on the Microsoft Entra ID Home portal. You can find your user ID by searching for your user in Microsoft Entra ID and copying the ObjectID.
Review and create the parent account resource. After deployment, select the resource group link or the Go to Resource button.
Now that you've created an account, you must create the modeling and serving component resources.
Add modeling and serving components
On the account page, you'll now see details about the new entity resource you created. Start by adding a serving endpoint resource.
Select your new account, and under the settings panel, locate the Components section.
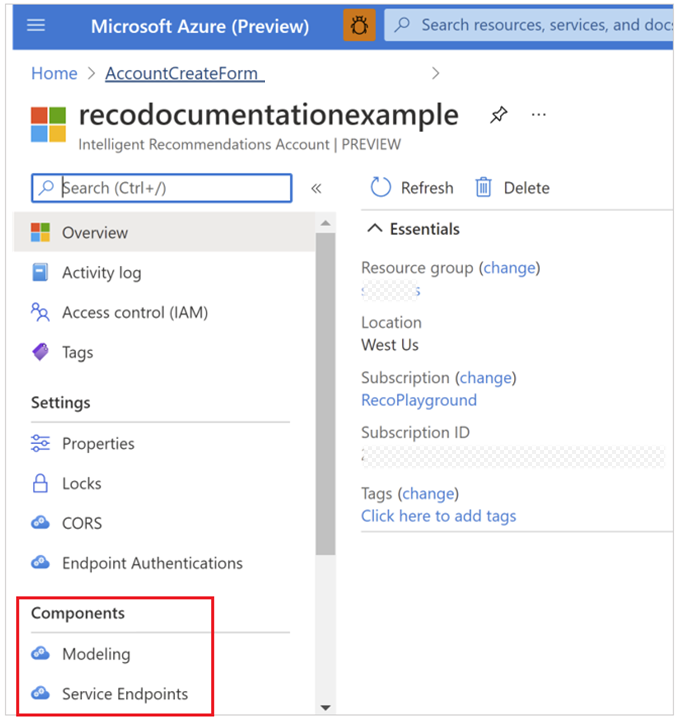
Select Serving Endpoint, and then select Create.
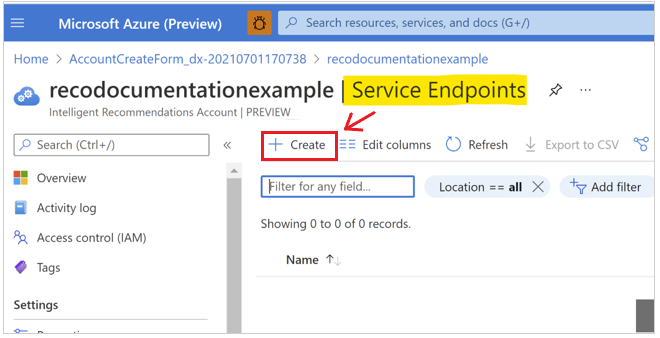
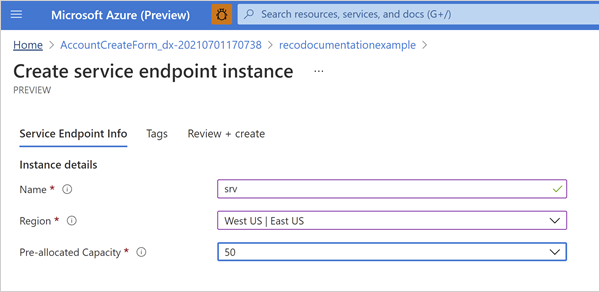
On the endpoint creation screen, there are three things to configure:
- Name: Should be unique only within your Intelligent Recommendations account. This string will also be a part of the service DNS name.
- Region: The Azure region where the serving will be deployed. The service runs an active-active architecture across paired regions for scalability and failover. If you don't see a specific region listed, open a support request through your Azure Resource Manager portal account.
- Pre-allocated capacity: The number of requests (transactions) per second (RPS).
On the Review and create tab, select Create, and wait for the deployment to complete. This process only takes a few seconds.
Return to the parent resource for this account.
Next, you'll create a modeling component:
Similar to the service endpoint process, select Modeling, and then select Create.
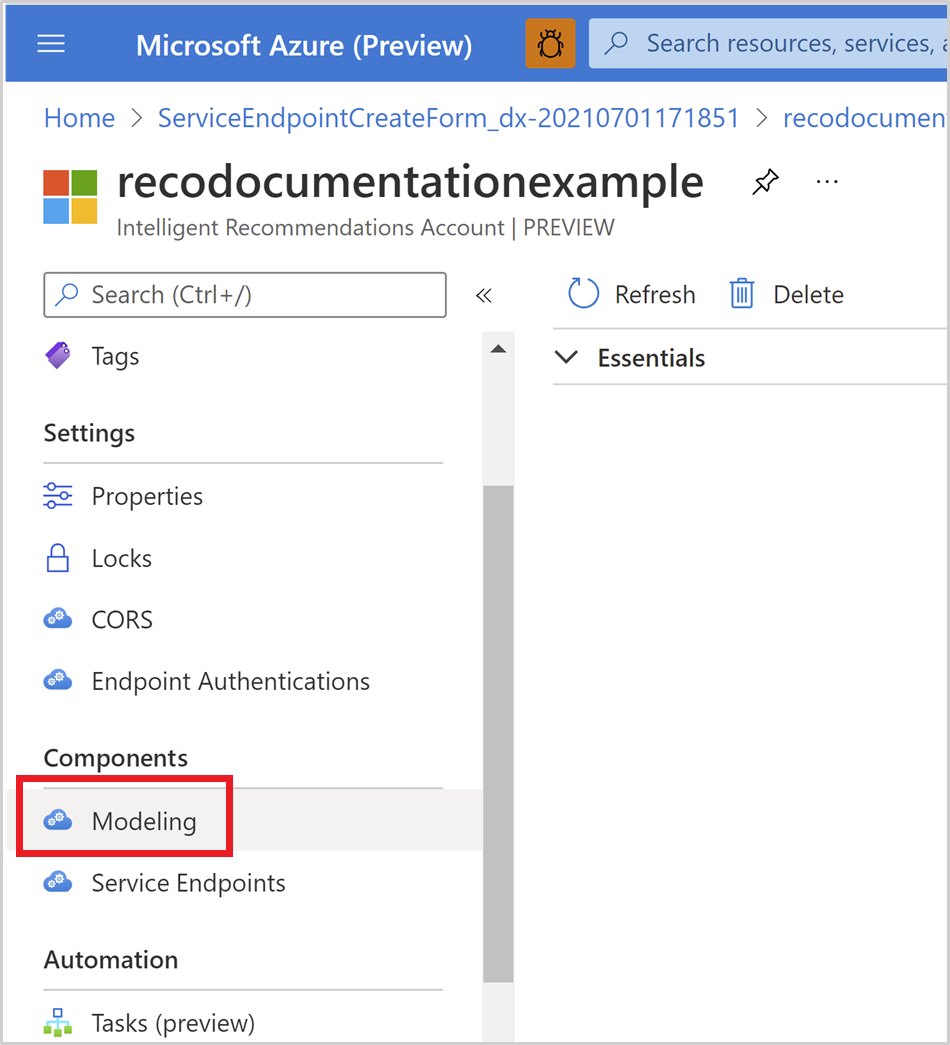
Enter values for the following properties on the Modeling creation page:
- Name: Ensure that the name you select for the modeling instance is unique within the Intelligent Recommendations account.
- Region: Select the Azure region where the processing of your data occurs. You might want to review your organization's data policy to set this field to the correct value. Modeling and service endpoints don't have to be in the same Azure region. If a specific region you're searching for isn't listed, open a support ticket through your Azure account.
- Feature set: Select the Recommendations package you want.
- Connection String: Paste the URL you copied from the Data Lake Storage account container properties. This link will connect the full Data Lake Storage to the root folder where the sample model.json file is saved. Modeling will fail if the data isn't properly arranged and shared on Data Lake Storage. If you're using the pre-configured sample file, you won't need to worry about the modeling resource failing.
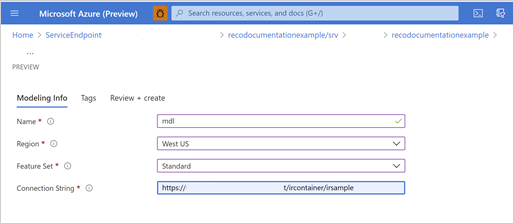
On the Review and create tab, select Create, and wait for the deployment to complete.
At this point, if the data is properly formatted and shared, the cooking and modeling process will kick off. After the process starts, Intelligent Recommendations API will start serving your Intelligent Recommendations scenarios.
Configure CORS (optional)
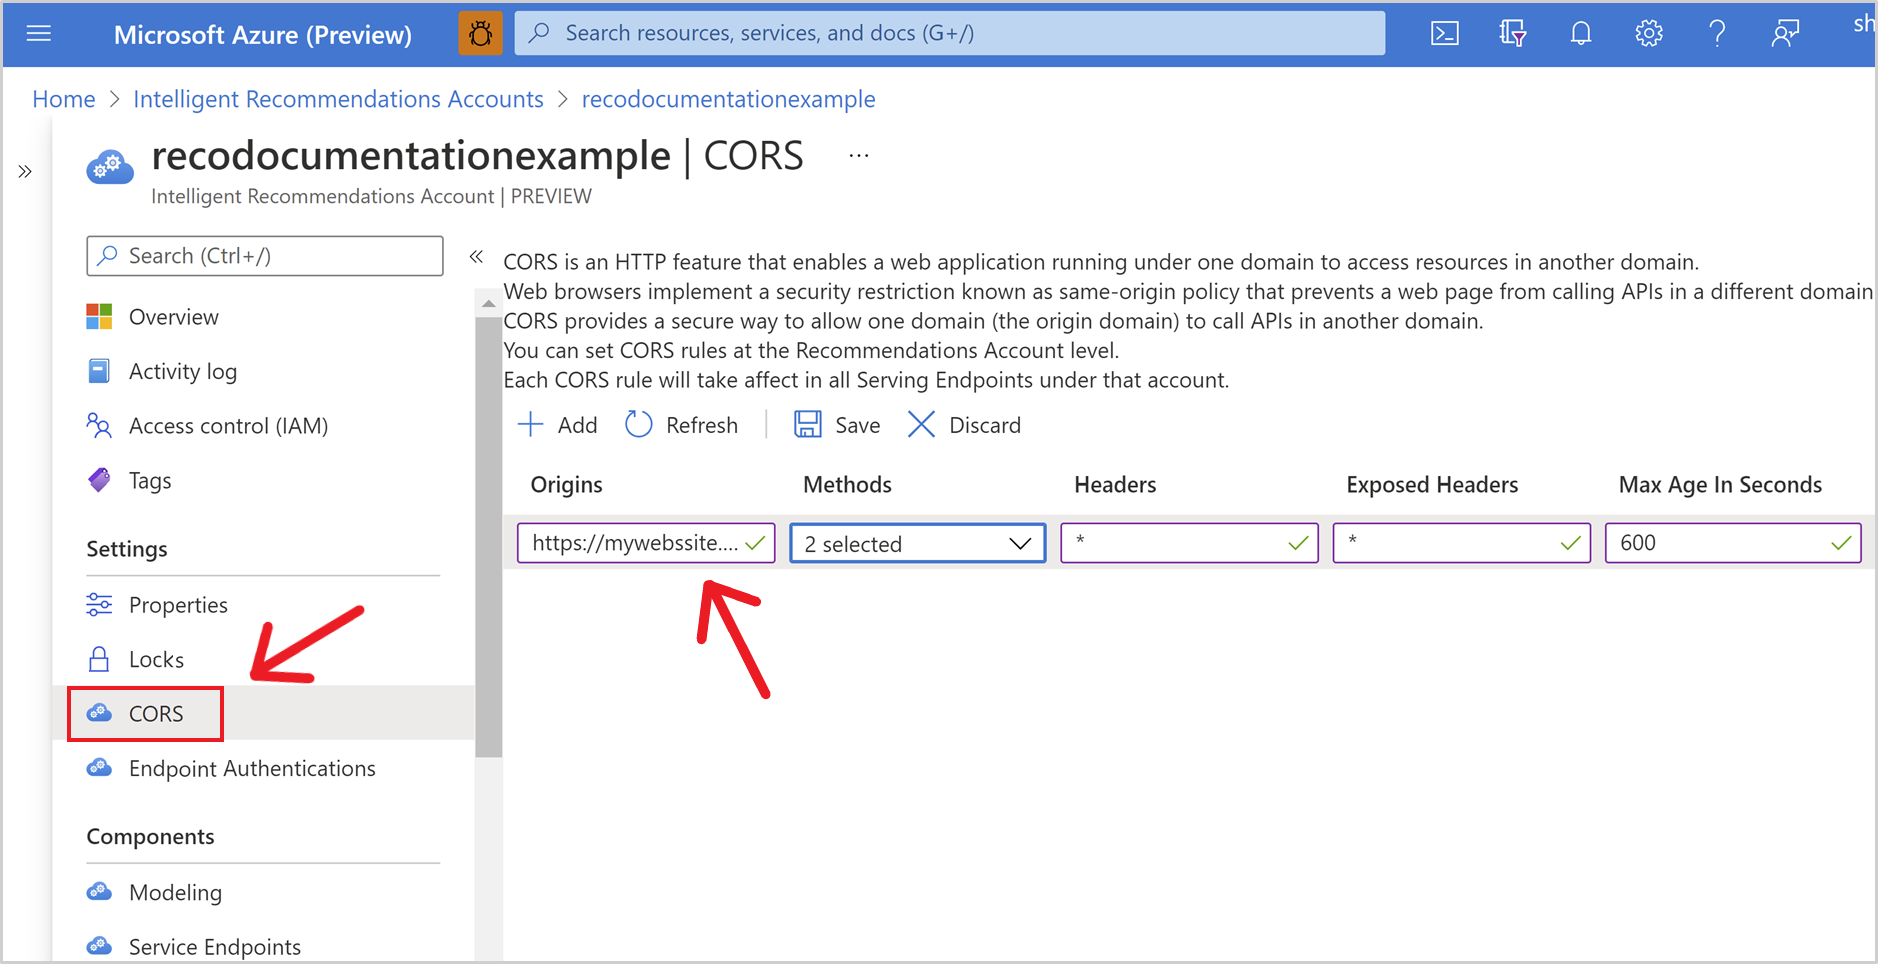
Cross-Origin Resource Sharing (CORS) is an HTTP feature that enables a web application running under one domain to access resources in another domain. If you plan to call the Intelligent Recommendations service endpoint API from a browser (client side), you need to add CORS for your website’s relevant domain.
In the CORS tab in your Intelligent Recommendations account, select the Add button.
Enter the properties of the caller site:
- In the Origins text box, enter the full URL of the page in the website that calls the Intelligent Recommendations service.
- Complete the rest of the values as appropriate for your calling pattern or as follows:
Note
Origins supports masks for domain or subdomain. For example, * in *.mysite.com.
See also
Deployment overview
Set up Azure Data Lake Storage
Use data contracts to share data