Eventstream CI/CD - Git Integration and Deployment Pipeline
This article explains how Git integration and deployment pipelines work for Eventstream in Fabric. Learn how to sync a workspace to your Git repository, commit your Eventstream items to Git, and deploy them across different workspaces.
Fabric platform offers Git integration and Deployment pipelines for different scenarios:
- Use Git integration to sync a workspace to a git repo, and manage incremental change, team collaboration, commit history in Eventstream items.
- Use Deployment pipelines to deploy a workspace (with Eventstream items) to different development, test, and production environments.
Prerequisites
To access the CI/CD features for Eventstream, you need to meet the following requirements:
- A Fabric capacity to use all supported Fabric items. If you don't have one yet, sign up for a free trial.
- Git integration must be enabled from the Admin portal: Users can synchronize workspace items with their Git repositories.
- Access to an existing repository from Azure DevOps or GitHub.
- You're an admin of a Fabric workspace.
Connect a workspace to a Git repo
Only a workspace admin can connect a workspace to a repository, but once connected, anyone with permission can work in the workspace. If you're not an admin, ask your admin for help with connecting.
To connect a workspace to an Azure or GitHub Repo, follow these steps:
- Sign into Fabric and navigate to the workspace you want to connect with.
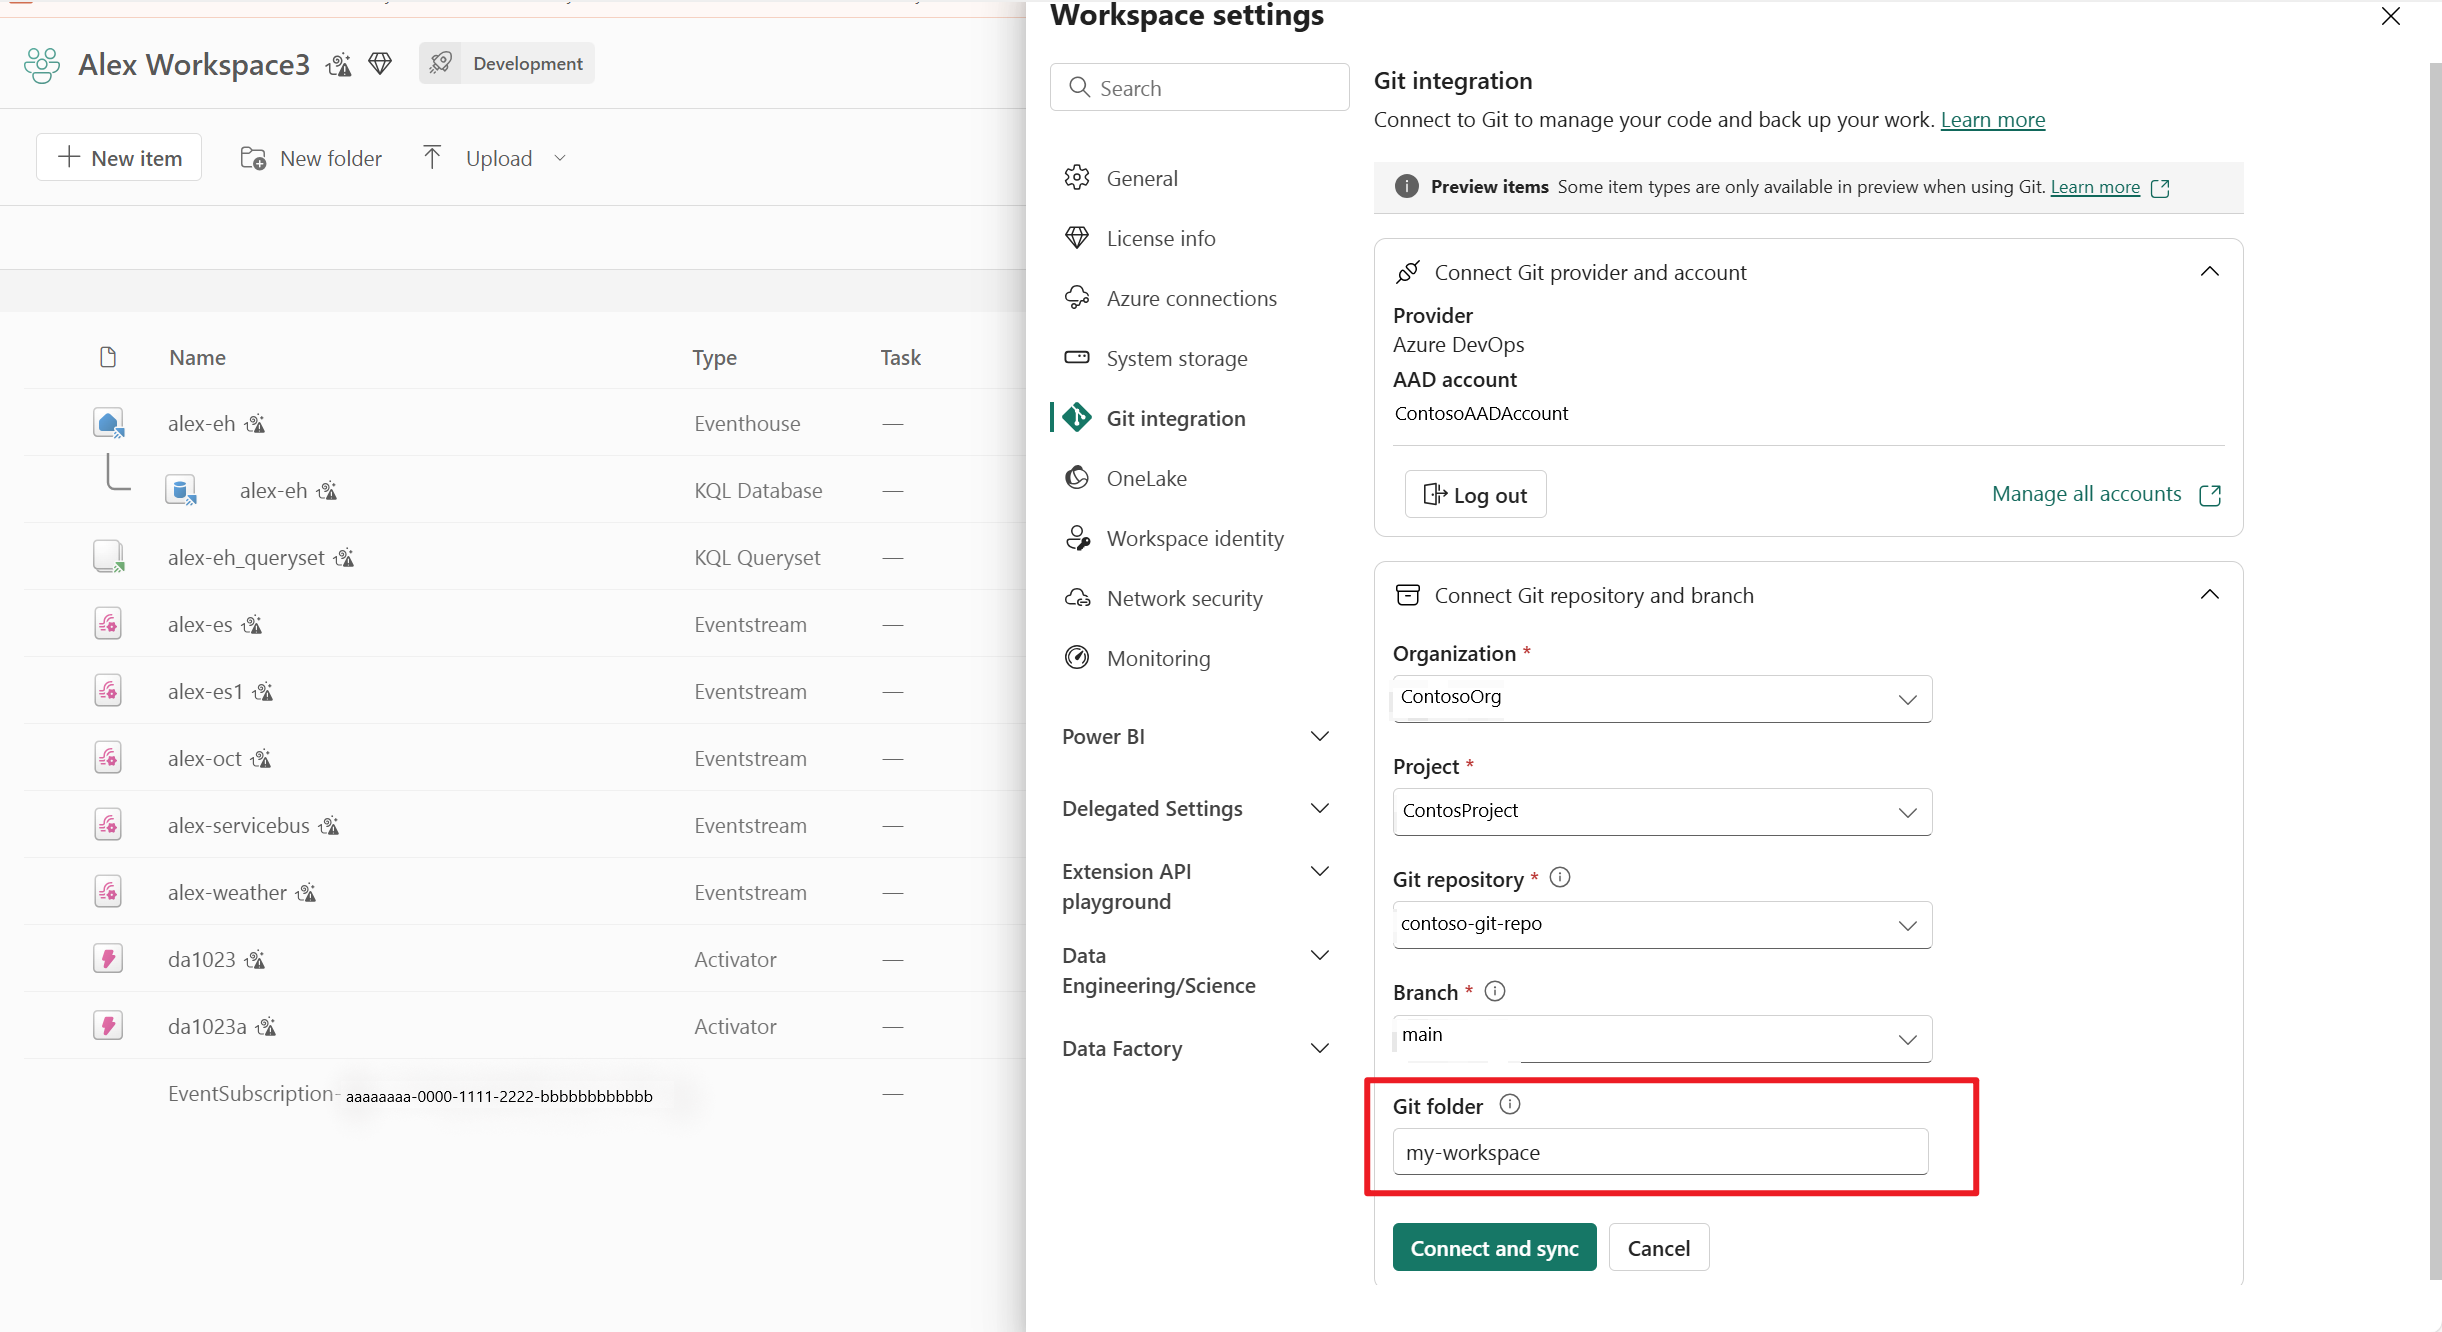
- Go to Workspace settings and select Git integration
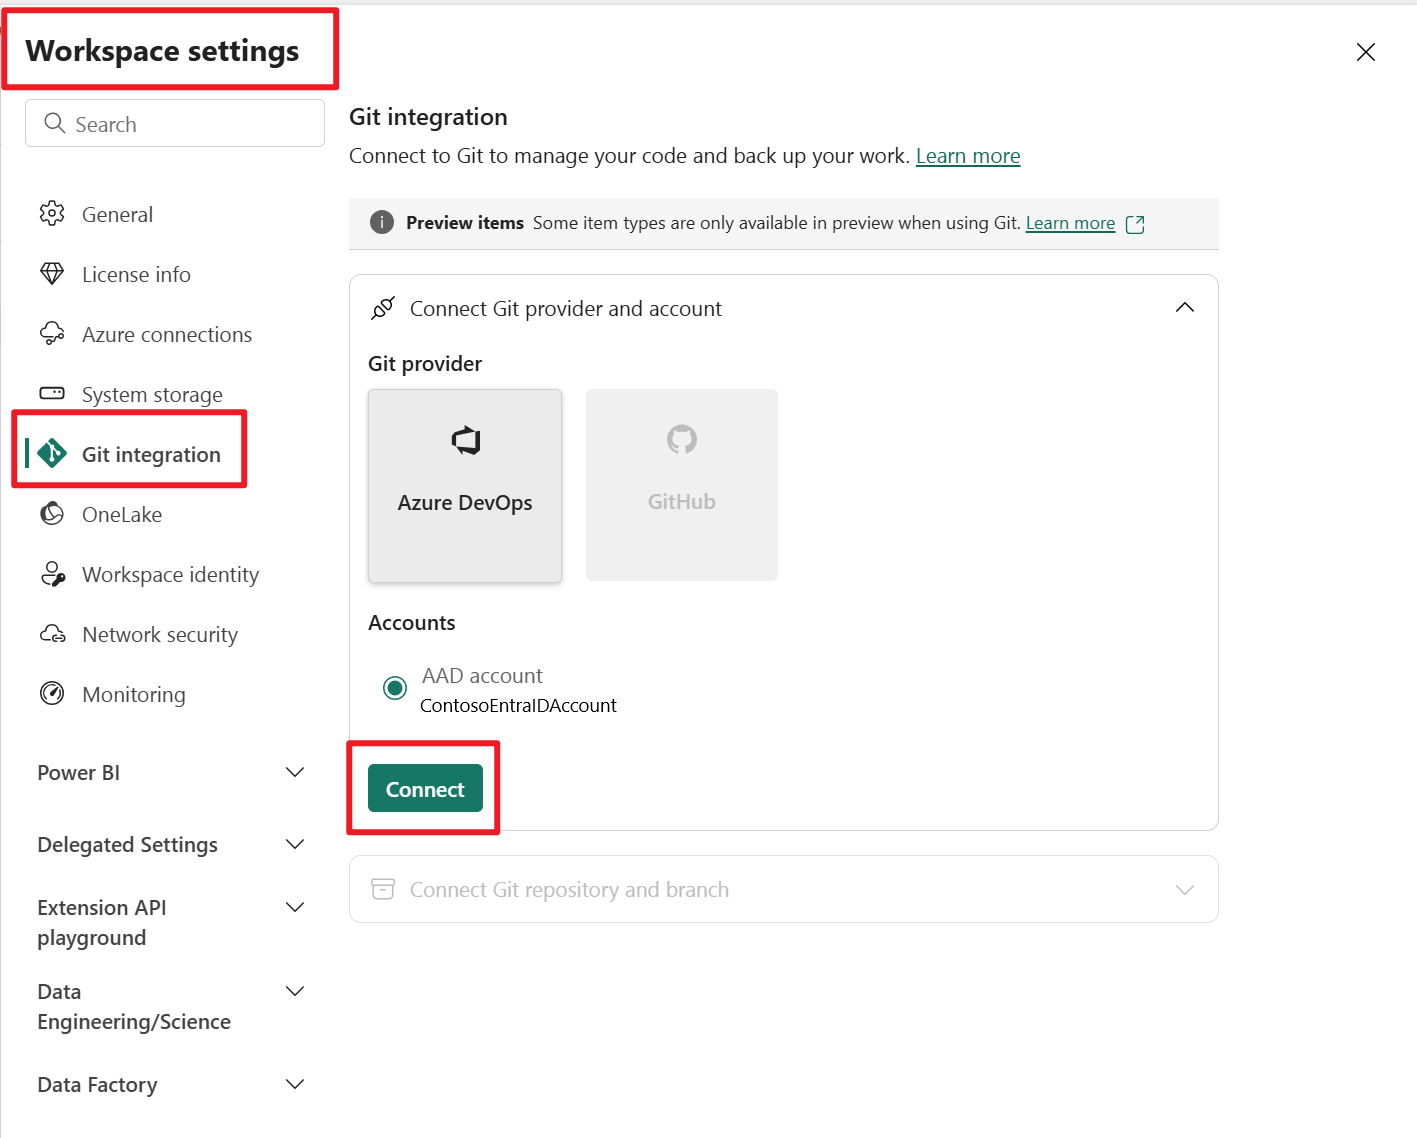
- Choose a git repository and enter a git folder. One workspace is synced to a git folder.
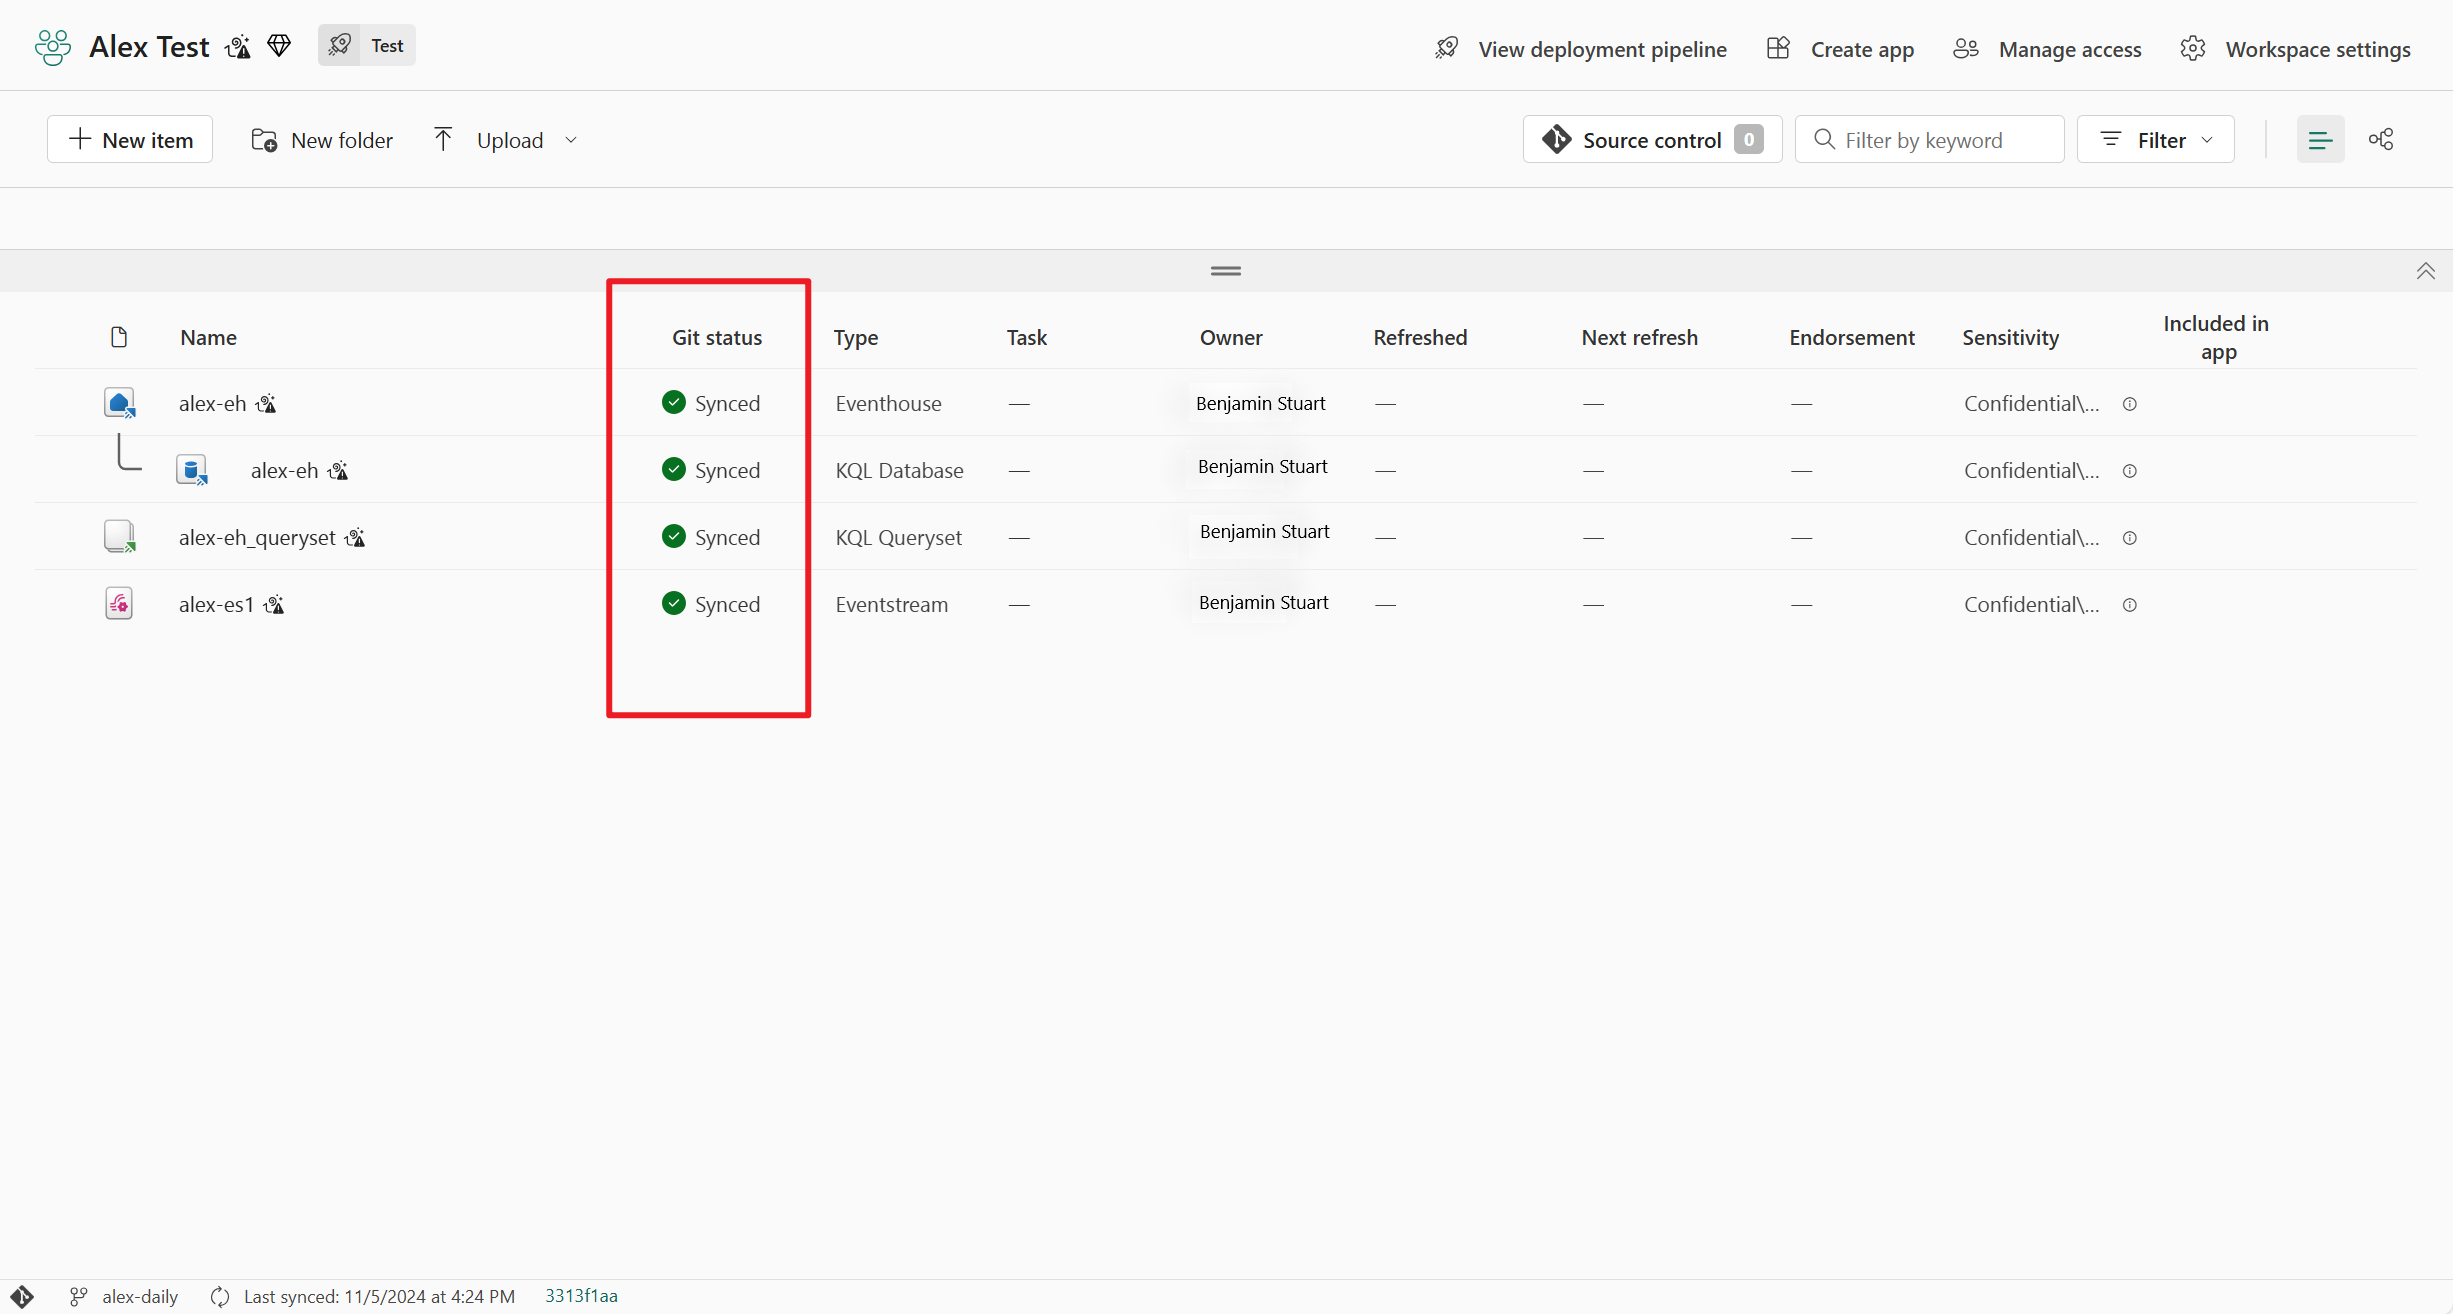
- From your workspace view, you see the status of the Eventstream item as Synced.
Commit Eventstream changes to git
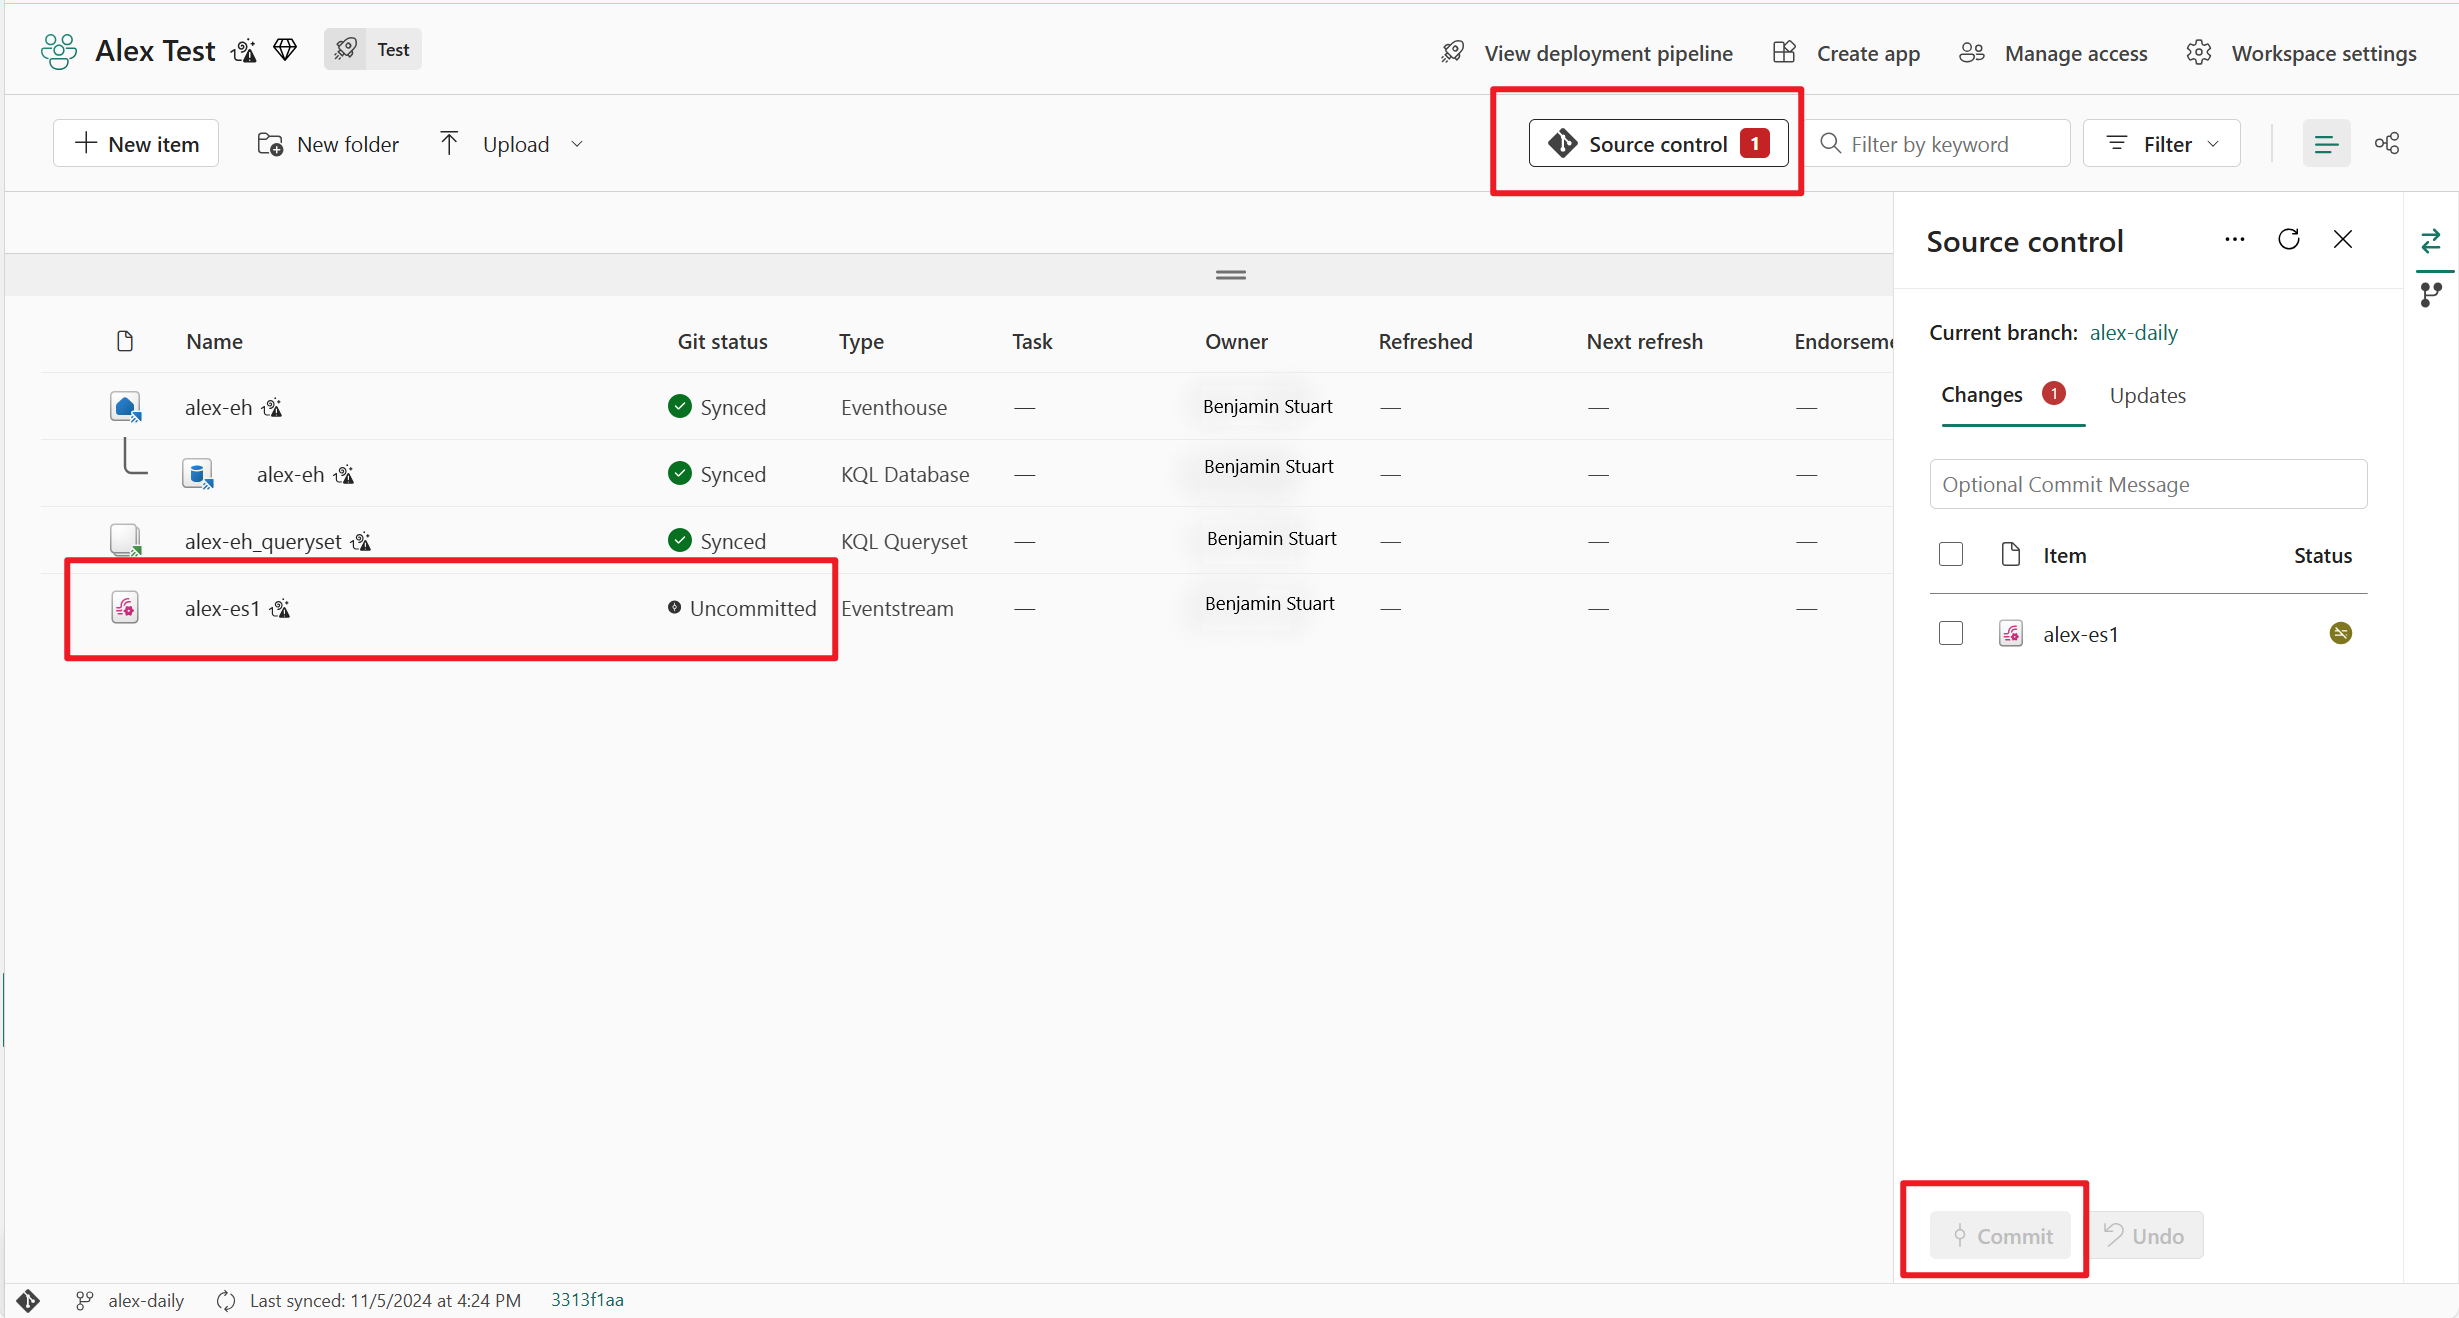
After making changes to your Eventstream item, you see an Uncommitted git status beside your Eventstream item in the workspace view. Select the Source control button at the top of the view and choose the Eventstream item to be committed.
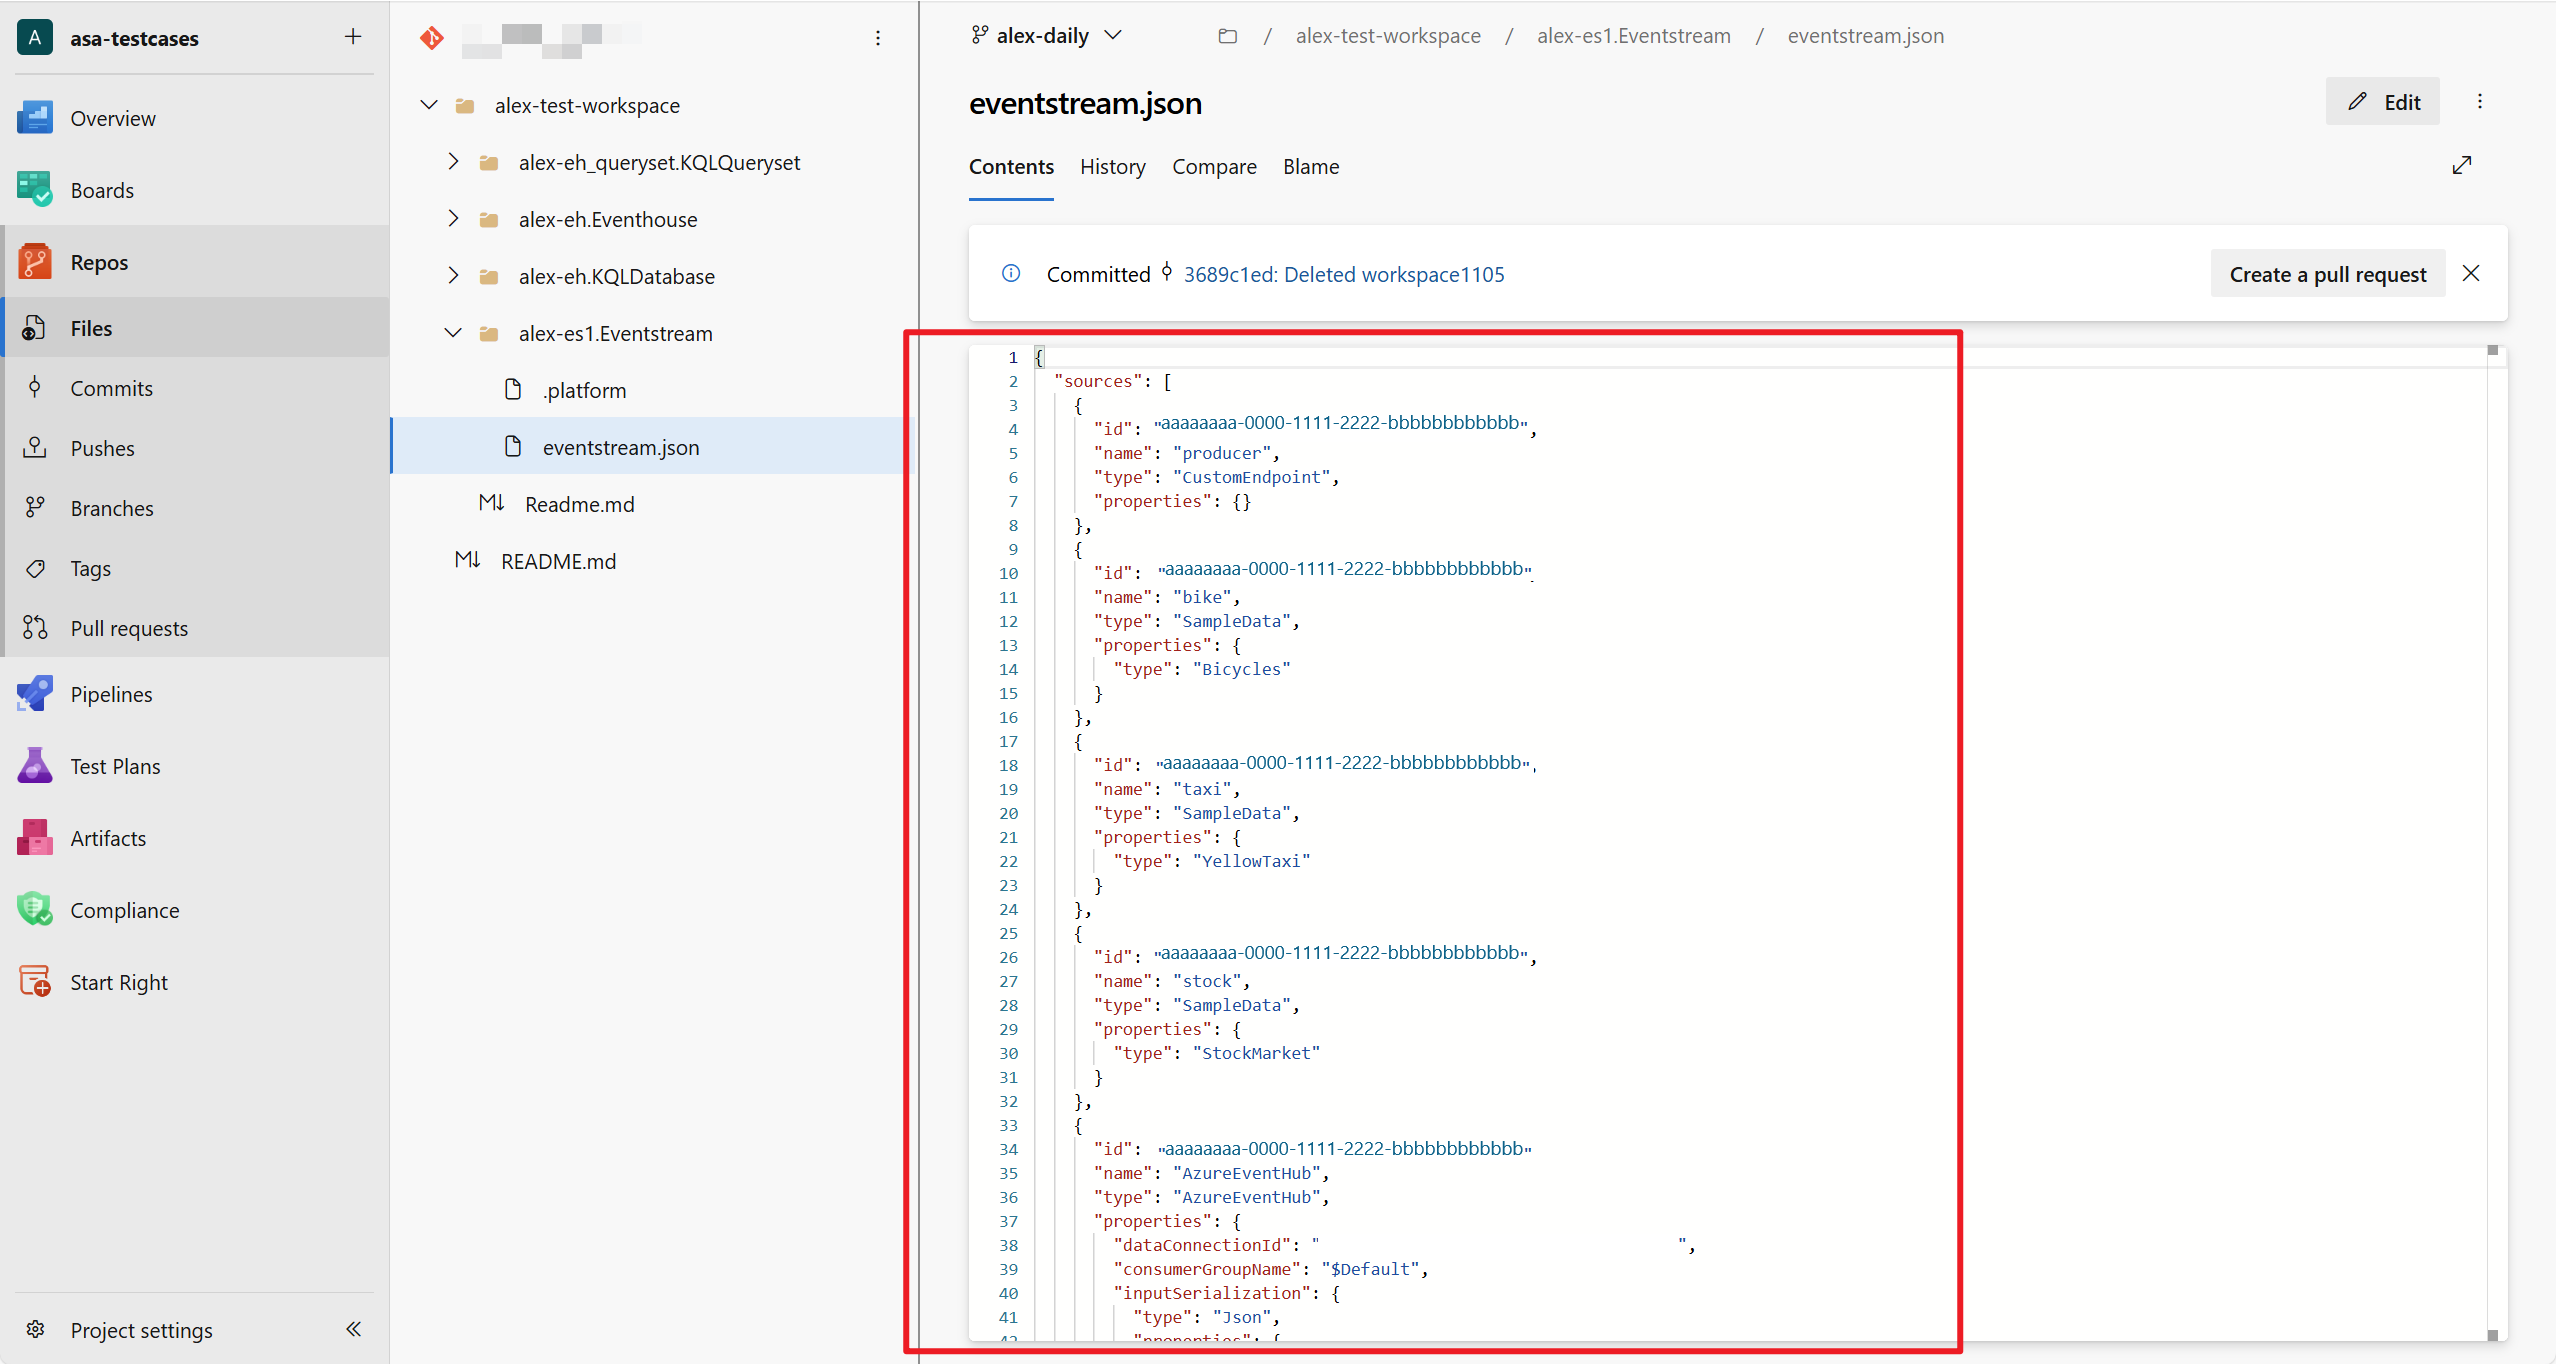
Once the Eventstream item is synced, you can view the latest Eventstream change in your git repository.
Update Eventstream items from Git
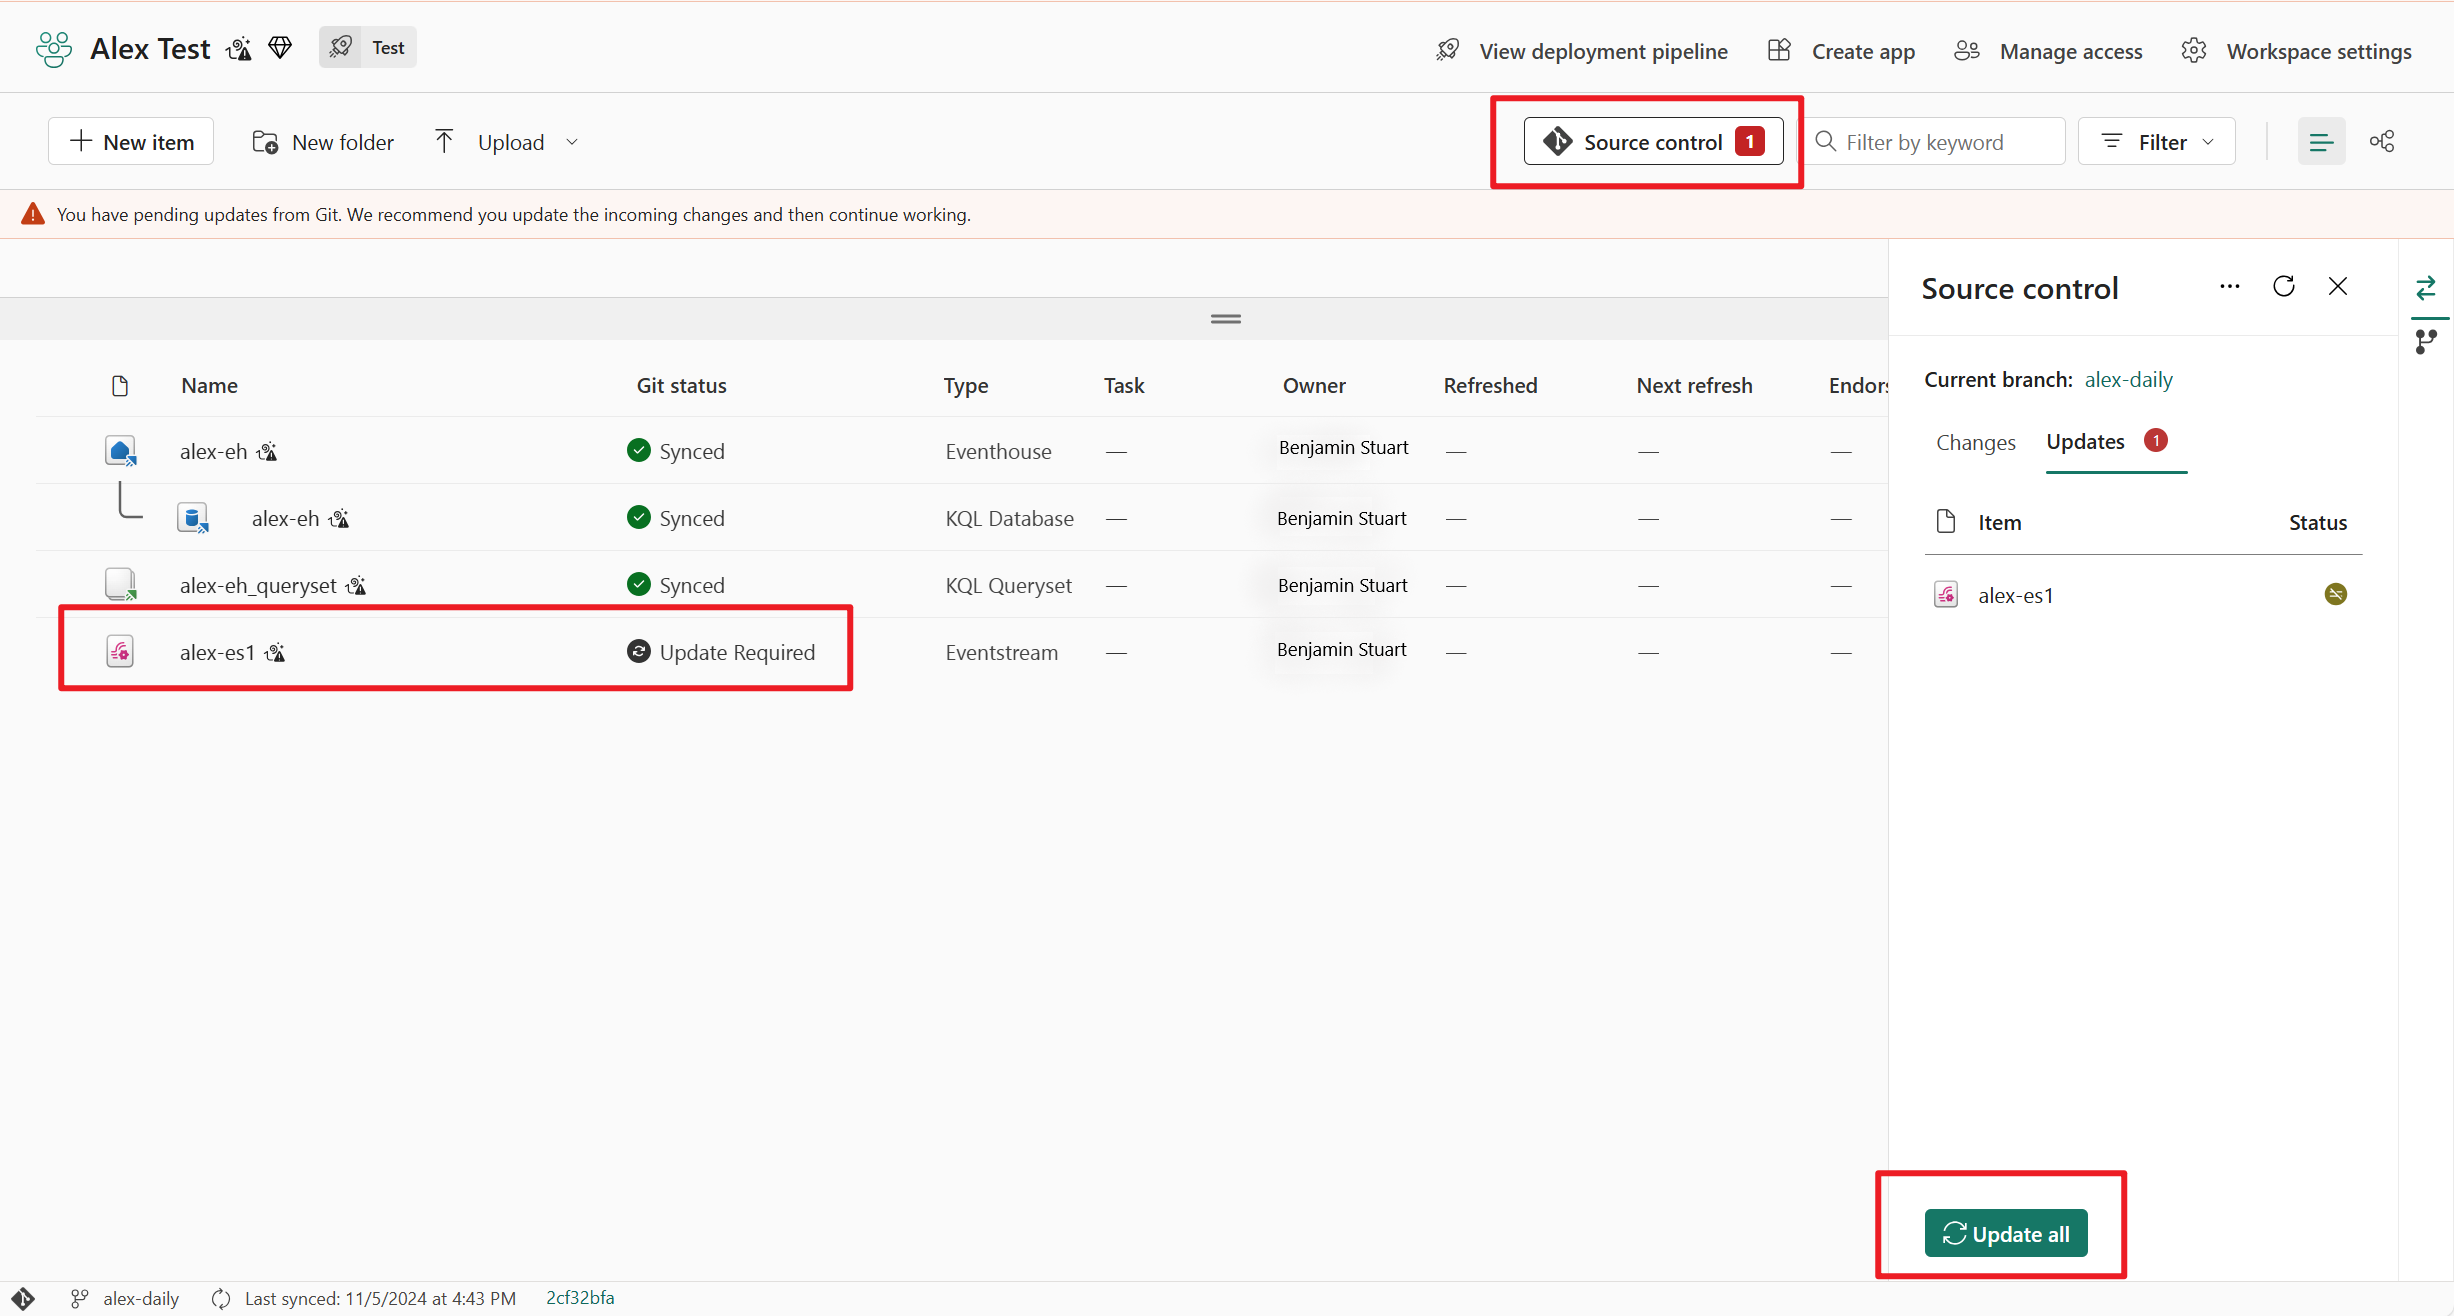
If you make changes to your Eventstream item in the git repository, you see an Update Required git status beside your Eventstream item in the workspace view. Select the Source control button at the top of the view and select Update all to merge the latest Eventstream changes.
Deploy Eventstream items from one stage to another
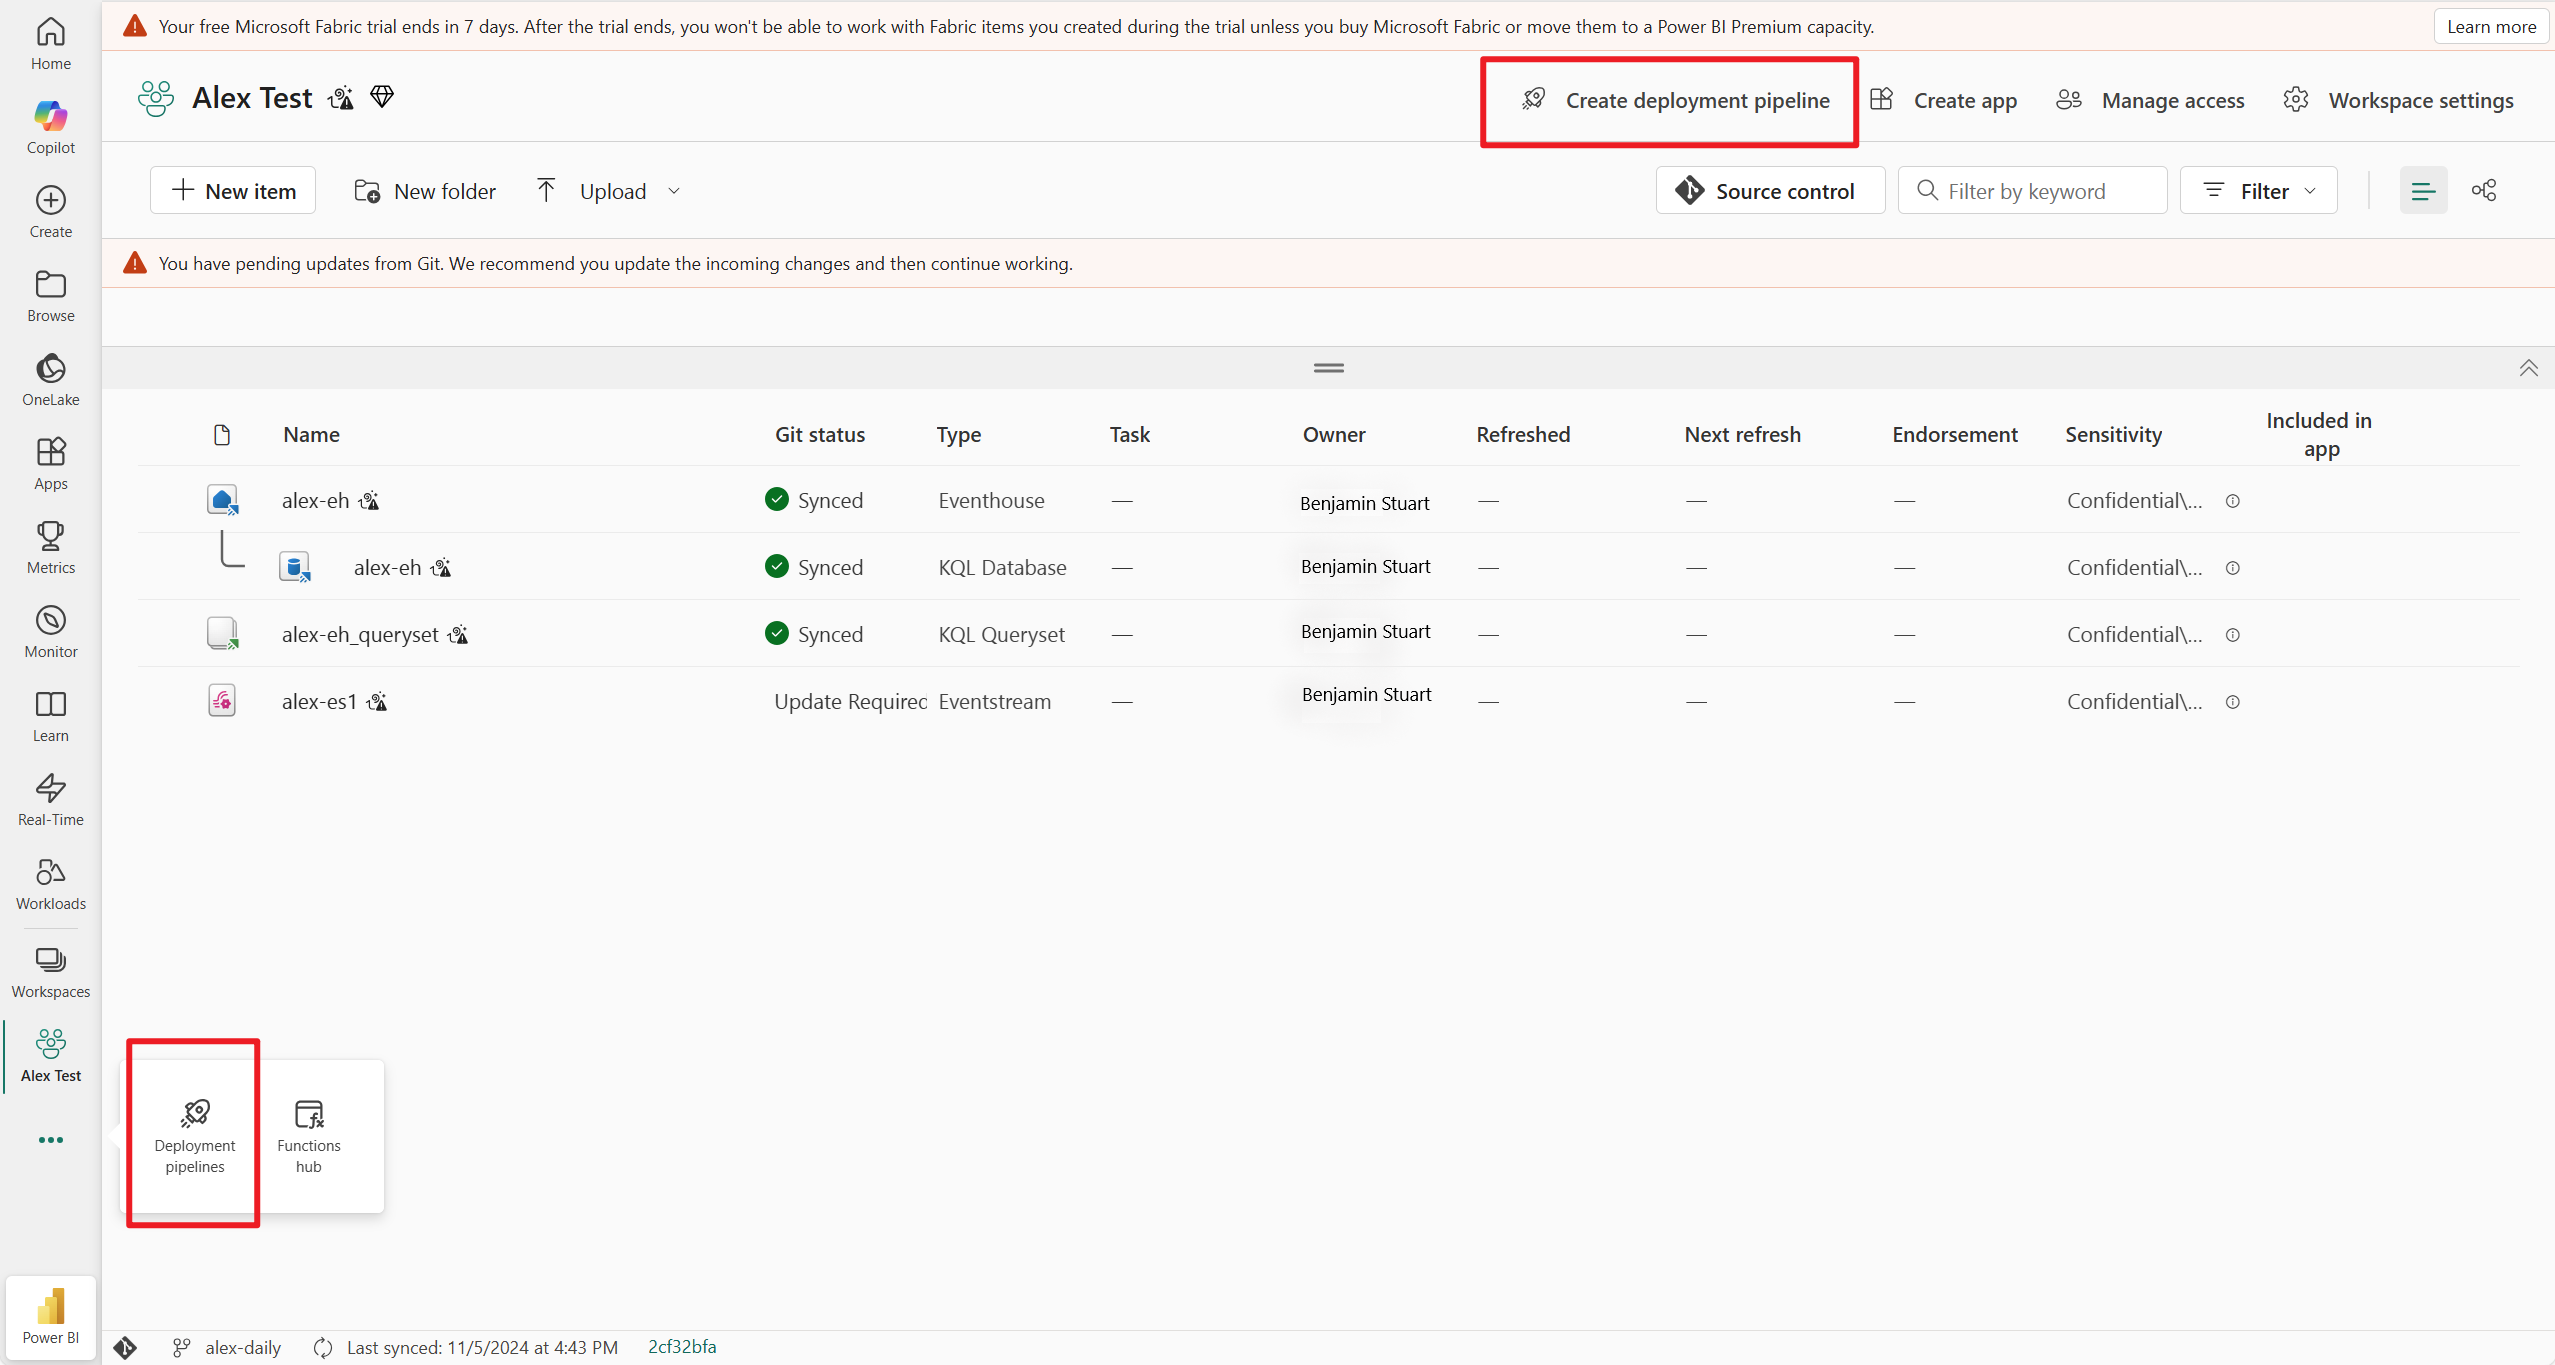
- In the workspace view, select Create deployment pipeline. You can also create a pipeline from the deployment pipelines entry point in Fabric (at the bottom of the workspace list).
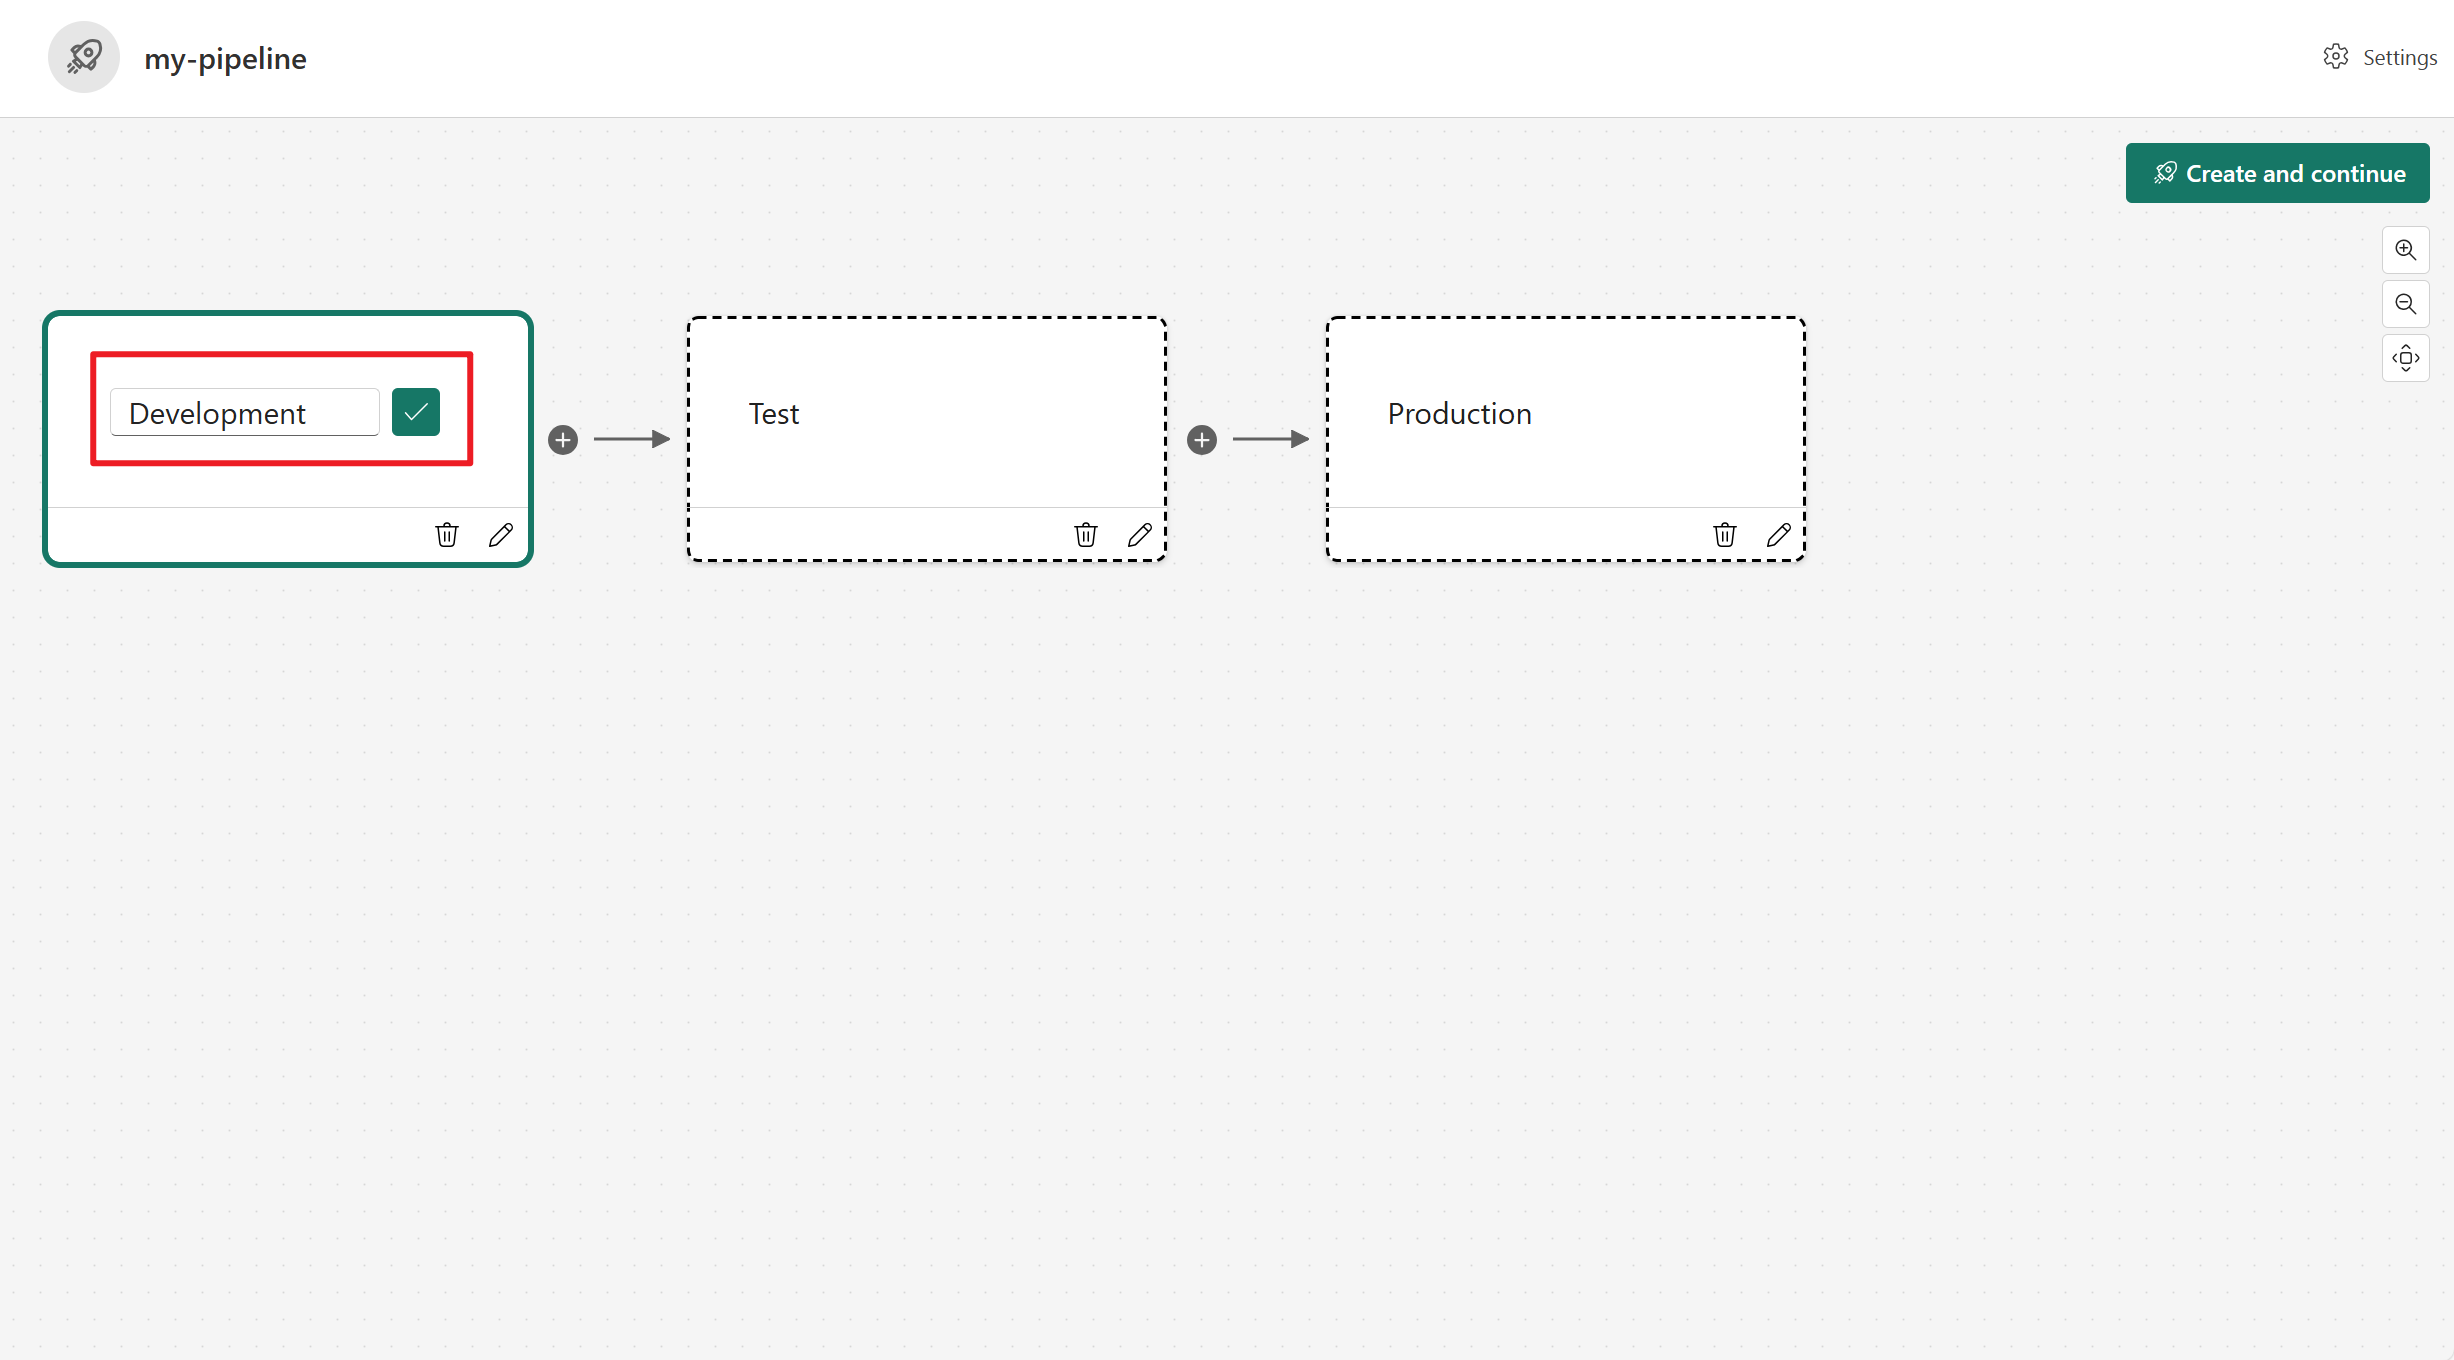
- You can define how many stages it should have and what they should be called. The number of stages are permanent and can't be changed after the pipeline is created.
- Give a name to your pipeline. The default pipeline has three stages named Development, Test, and Production. You can rename the stages and have anywhere between 2-10 stages in a pipeline. Then select Create and continue.
- After creating a pipeline, you can assign a workspace to each stage.

- Once you have content in a pipeline stage, you can select the items and Deploy it to the next stage, even if the next stage workspace has content. Paired items are overwritten.
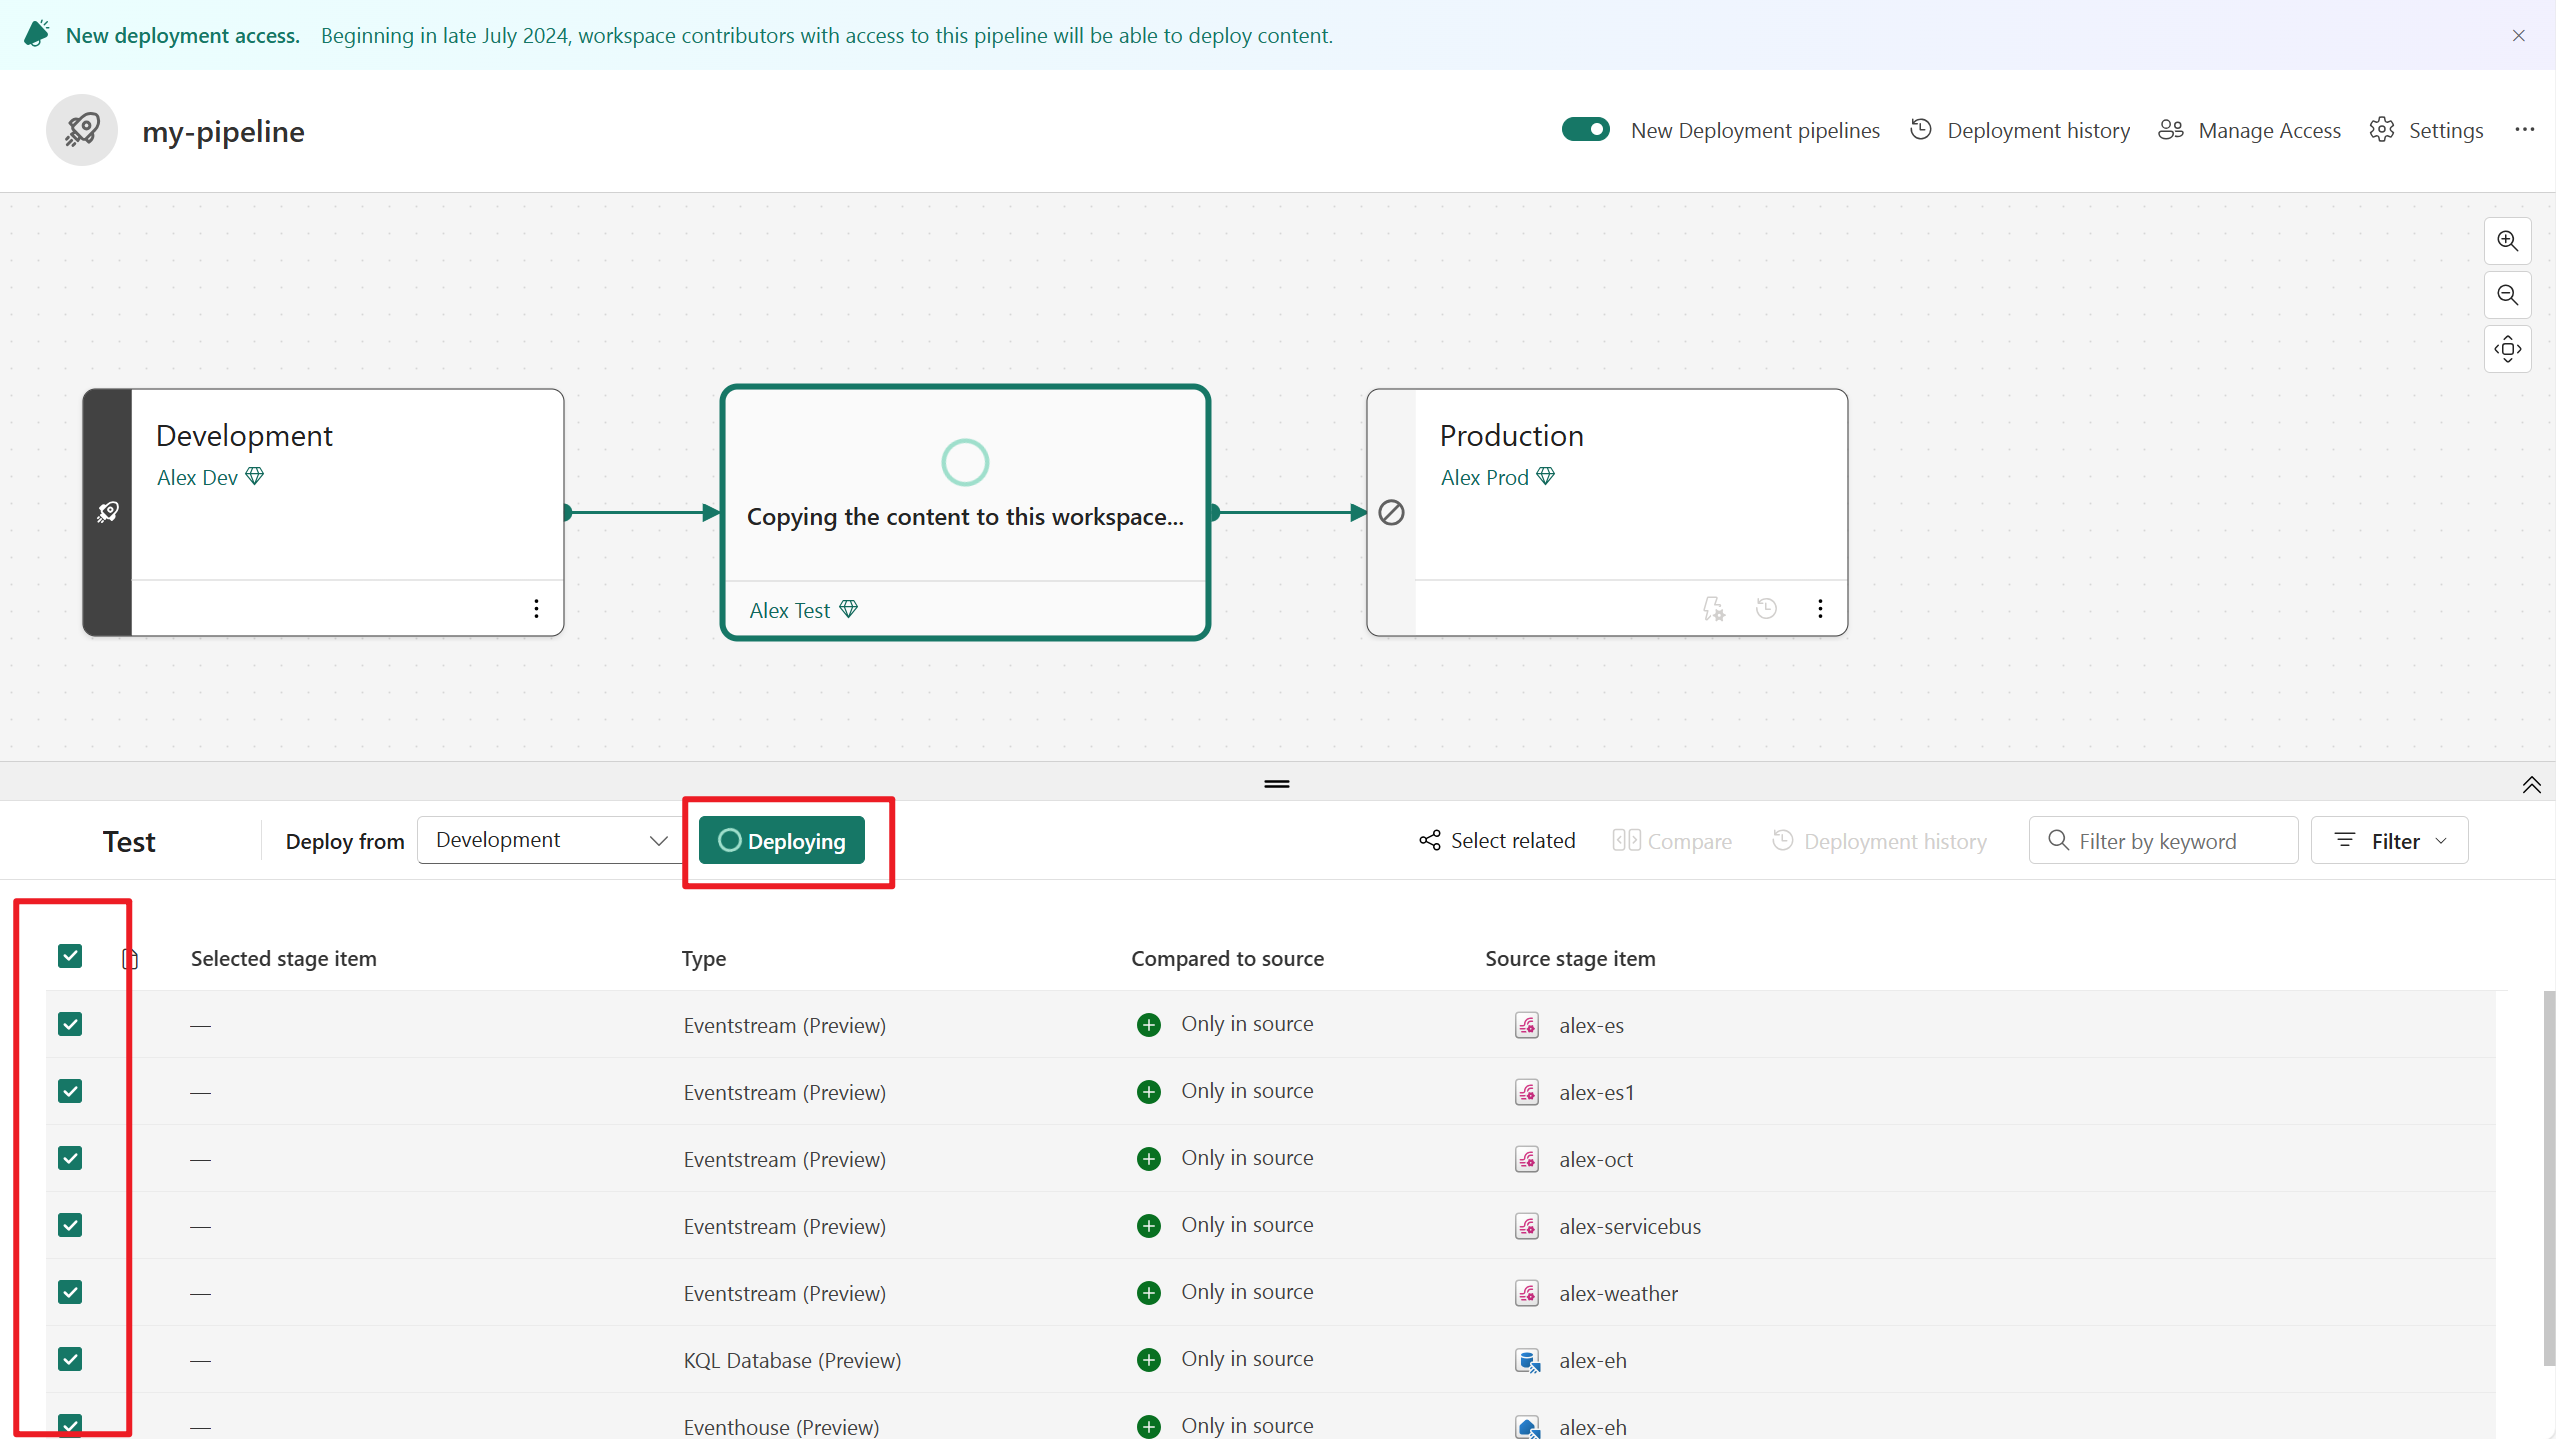
You can review the deployment history to see the last time content was deployed to each stage. Deployment history is useful for establishing when a stage was last updated. It can also be helpful if you want to track time between deployments.
To learn more about deployment pipeline, visit Get started with deployment pipelines
