Add Azure Event Hubs source to an eventstream
This article shows you how to add an Azure Event Hubs source to an eventstream.
Note
Enhanced capabilities are enabled by default when you create eventstreams now. If you have eventstreams that were created using standard capabilities, those eventstreams will continue to work. You can still edit and use them as usual. We recommend that you create a new eventstream to replace standard eventstreams so that you can take advantage of additional capabilities and benefits of enhanced eventstreams.
Prerequisites
Before you start, you must complete the following prerequisites:
- Access to a workspace in the Fabric capacity license mode (or) the Trial license mode with Contributor or higher permissions.
- You need to have appropriate permission to get event hub's access keys. If your event hub is within a protected network, connect to it using a managed private endpoint. Otherwise, ensure the event hub is publicly accessible and not behind a firewall.
- If you don't have an eventstream, create an eventstream.
Launch the Select a data source wizard
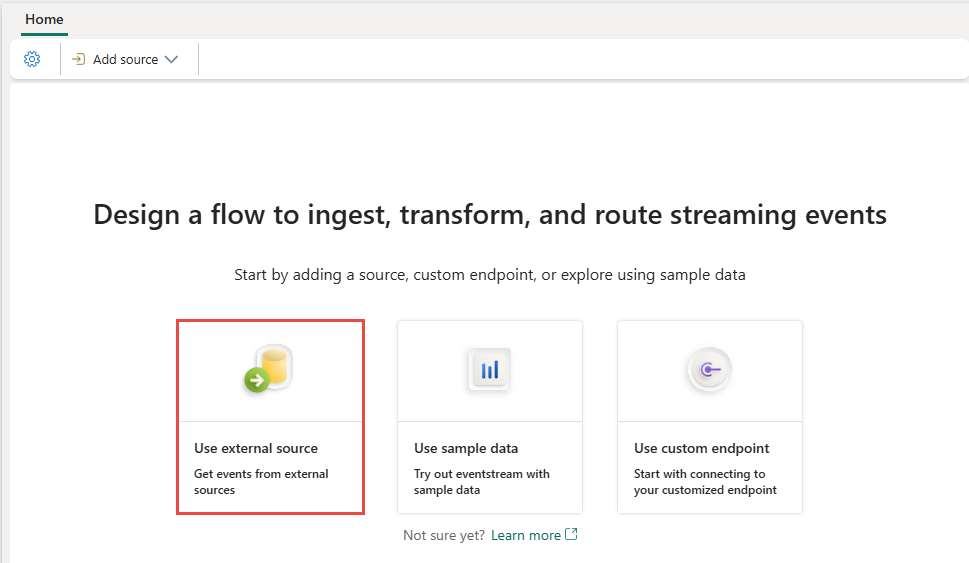
If you haven't added any source to your eventstream yet, select Use external source tile.
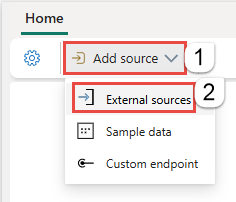
If you're adding the source to an already published eventstream, switch to Edit mode, select Add source on the ribbon, and then select External sources.
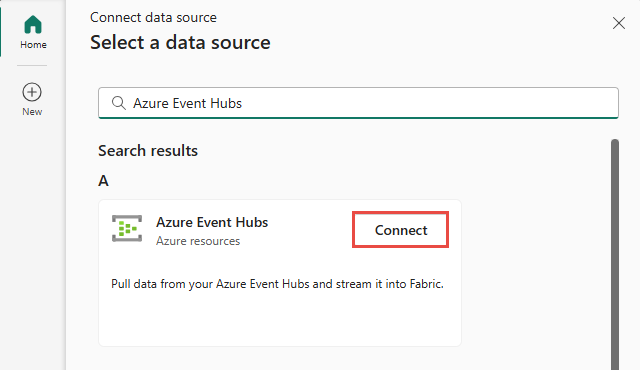
On the Select a data source page, search for and select Connect on the Azure Event Hubs tile.
Configure Azure Event Hubs connector
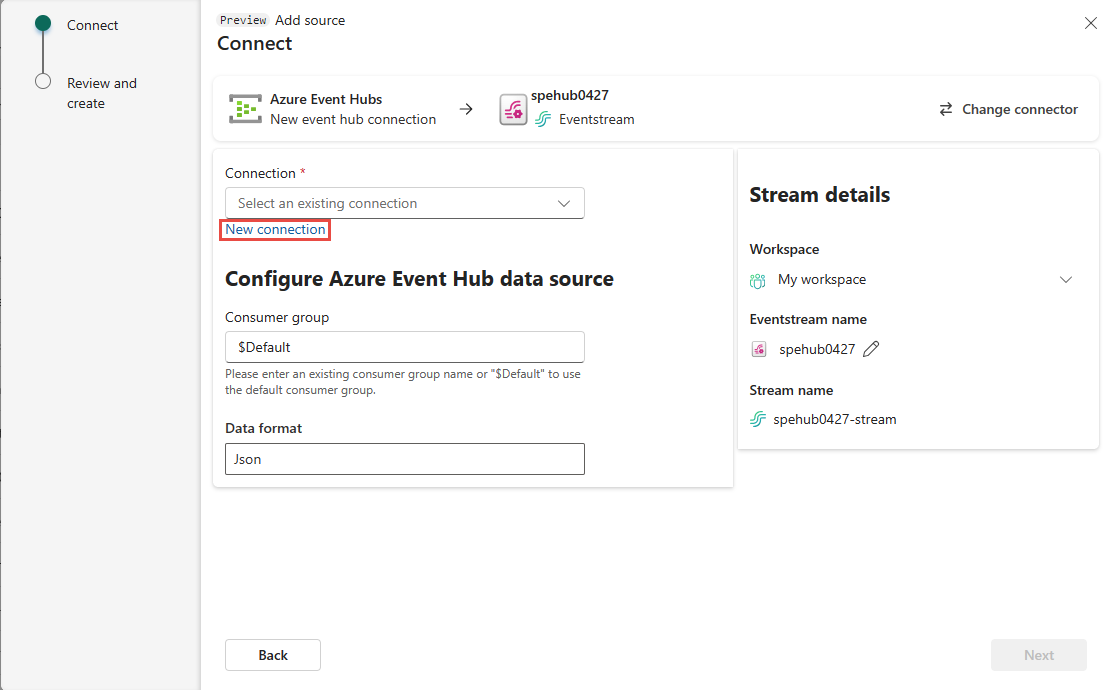
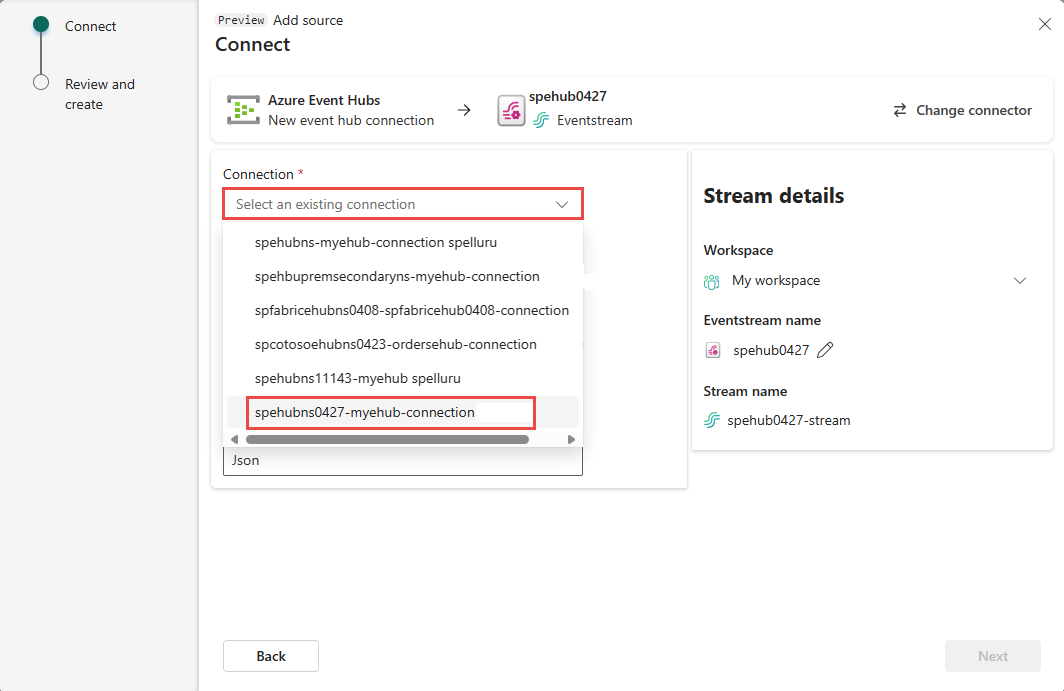
On the Connect page, select New connection.
If there's an existing connection to your Azure event hub, you select that existing connection as shown in the following image, and then move on to the step to configure Data format in the following steps.
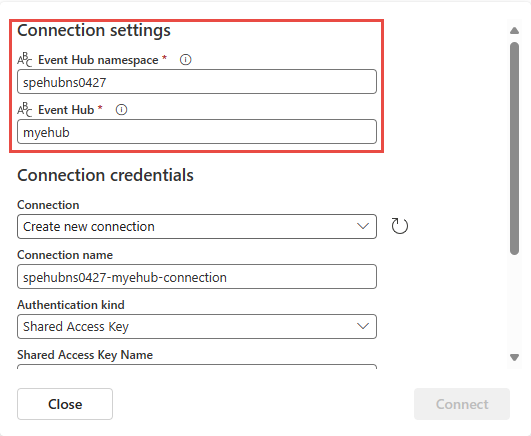
In the Connection settings section, do these steps:
In the Connection credentials section, do these steps:
For Connection name, enter a name for the connection to the event hub.
For Authentication kind, confirm that Shared Access Key is selected.
For Shared Access Key Name, enter the name of the shared access key.
For Shared Access Key, enter the value of the shared access key.
Select Connect at the bottom of the page.
To get the access key name and value, follow these steps:
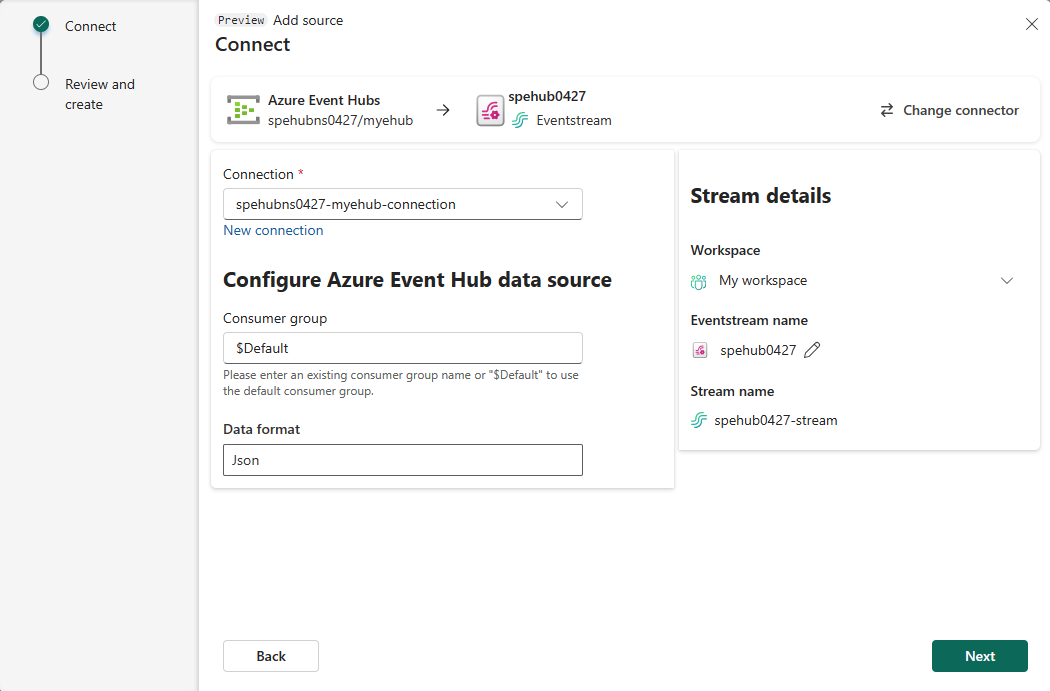
Now, on the Connect page of wizard, for Consumer group, enter the name of the consumer group. By default,
$Defaultis selected, which is the default consumer group for the event hub.For Data format, select a data format of the incoming real-time events that you want to get from your Azure event hub. You can select from JSON, Avro, and CSV (with header) data formats.
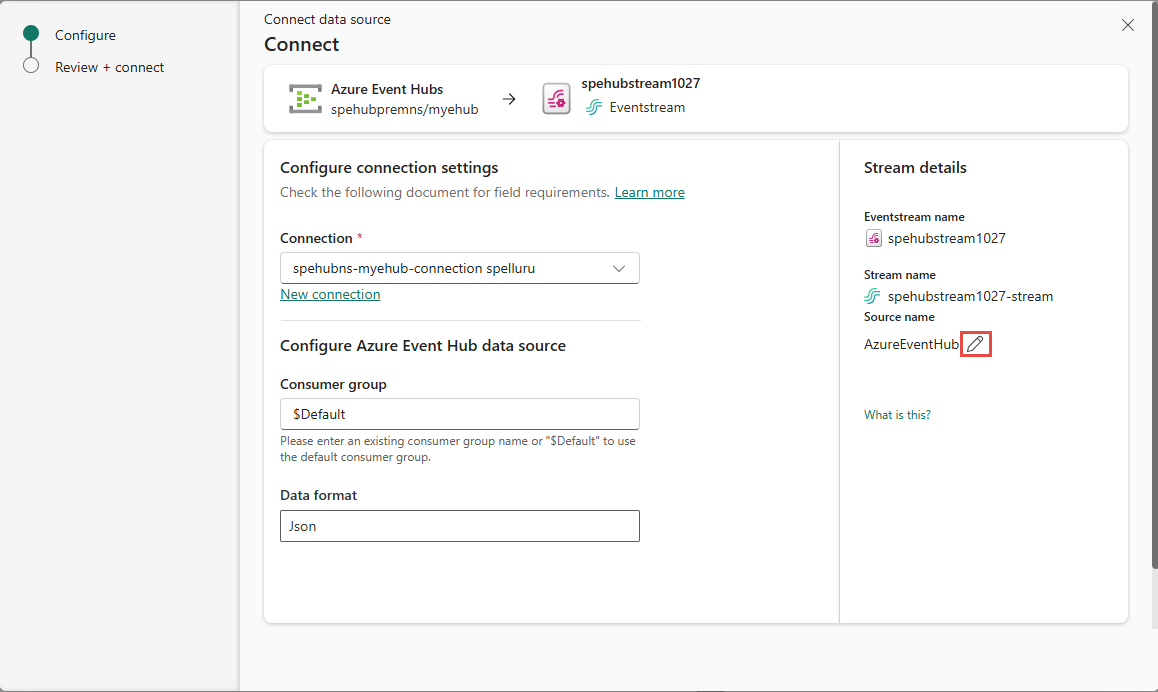
In the Stream details pane to the right, select Pencil icon next to the source name, and enter a name for the source. This step is optional.
Select Next at the bottom of the page.
On the Review and create page, review settings, and select Add.
Note
The maximum number of sources and destinations for one eventstream is 11.
View updated eventstream
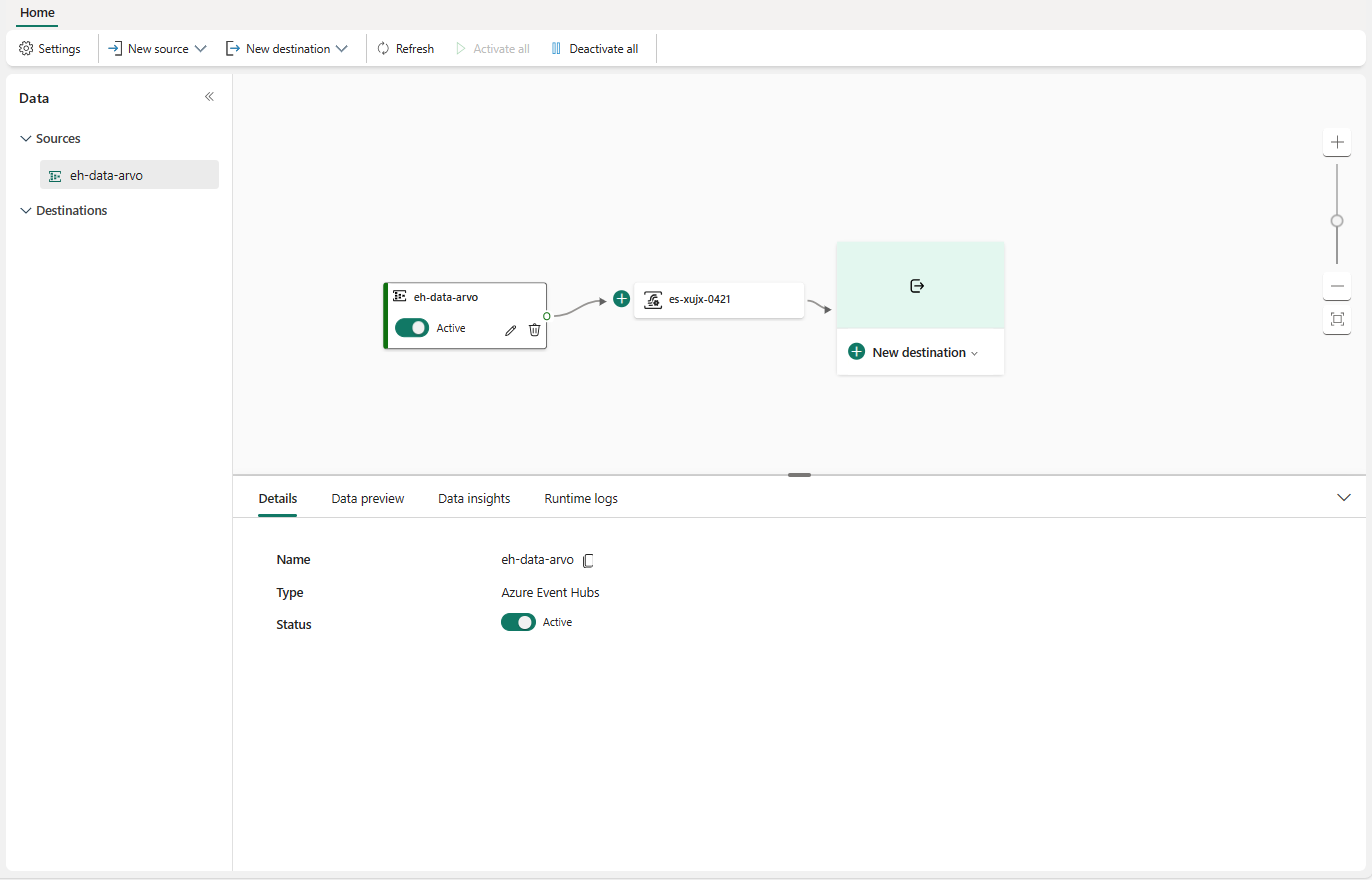
You see that the Event Hubs source is added to your eventstream on the canvas in the Edit mode. Select Refresh in the bottom pane, which shows you preview of the data in the event hub. To implement this newly added Azure event hub, select Publish on the ribbon.

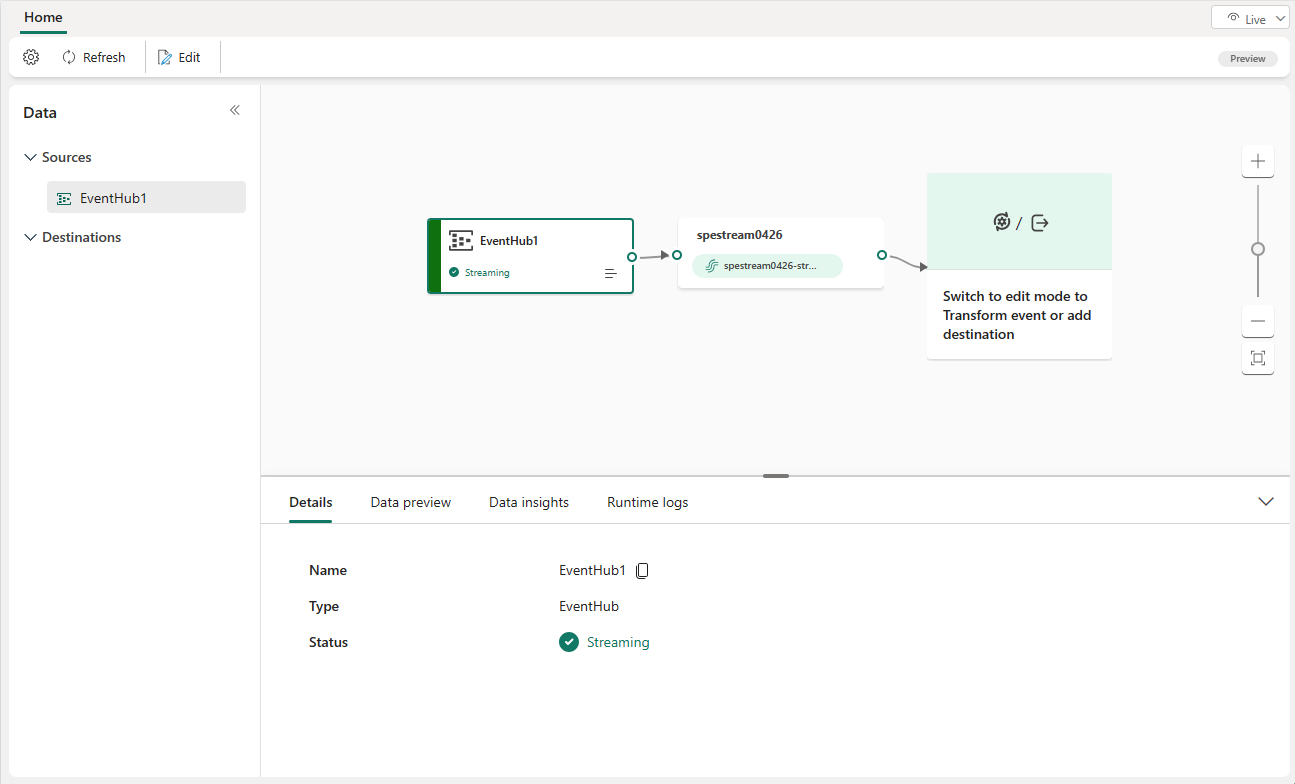
After you complete these steps, the Azure event hub is available for visualization in the Live view. Select the Event hub tile in the diagram to see the page similar to the following one.
Related content
For a list of supported sources, see Add an event source in an eventstream
Prerequisites
Before you start, you must complete the following prerequisites:
- Access to a workspace in the Fabric capacity license mode (or) the Trial license mode with Contributor or higher permissions.
- You need to have appropriate permission to get event hub's access keys. The event hub must be publicly accessible and not behind a firewall or secured in a virtual network.
Note
The maximum number of sources and destinations for one eventstream is 11.
Add an Azure event hub as a source
If you have an Azure event hub created with streaming data, follow these steps to add an Azure event hub as your eventstream source:
Select New source on the ribbon or "+" in the main editor canvas and then Azure Event Hubs.
Enter a source name for the new source and select a cloud connection to your Azure event hub.
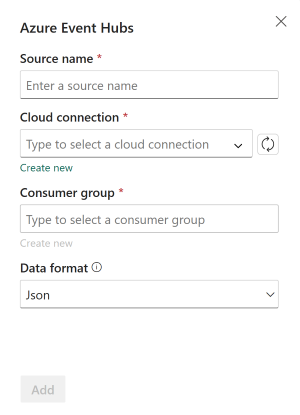
If you don’t have a cloud connection, select Create new connection to create one. To create a new connection, fill in the Connection settings and Connection credentials of your Azure event hub, and then select Create.
Event Hub namespace: Enter the name of your Azure event hub namespace.
Event Hub: Enter the name of your Azure event hub in the Azure portal.
Connection name: Enter a name for the cloud connection.
Shared access key name and Shared access key: Go to your Azure event hub and create a policy with
ManageorListenpermission under Share access policies. Then use policy name and primary key as the Shared Access Key Name and Shared Access Key.
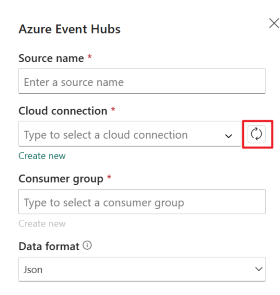
After you create a cloud connection, select the refresh button, and then select the cloud connection you created.
Select a Data format of the incoming real-time events that you want to get from your Azure event hub.
Note
The eventstreams feature supports the ingestion of events from Azure Event Hubs in JSON, Avro, and CSV (with header) data formats.
Select a Consumer group that can read the event data from your Azure event hub and then select Add.
After you create the event hub source, you see it added to your eventstream on the canvas.
Related content
To learn how to add other sources to an eventstream, see the following articles:
