Billing model for Face Check with Microsoft Entra Verified ID
Face Check with Microsoft Entra Verified ID pricing is based on unique Face Check verifications performed by the verifying authority during the billing cycle. There are two options to enable Face Check add-on on a workforce tenant:
Enable as a Microsoft Entra Suite trial or paid subscriber. The Microsoft Entra Suite license includes eight Face Check verifications per license per month.
Or enable in pay-as-you-go where your Azure subscription received charges per each individual Face Check verification performed from your tenant.
In this article, learn about the Face Check billing model and linking your Verified ID authority to an Azure subscription.
Important
This article provides information on how the Verified ID service emits billing services on Face Check usage. For the latest information on pricing, see Microsoft Entra pricing.
What do I need to do?
To take advantage of the consumptive billing, your Verified ID authority must be linked to an Azure subscription.
| If your Verified ID authority is: | You need to: |
|---|---|
| A Verified ID authority not yet linked to a subscription | Link your Verified ID authority to an Azure subscription to activate consumptive billing. |
| A Verified ID authority linked to a subscription | Do nothing. You're automatically billed monthly for Face Check verifications. |
About monthly Face Check verifications billing
In your Microsoft Verified ID, you can verify credentials from issuer authorities that you trust. In addition with Face Check, your organization can perform high-assurance verifications securely, simply, and at scale by performing facial matching between a user’s real-time selfie and a photo.
Verified ID generates individual billing events for each unique verification performed by the platform. Whether that verification succeeds or fails. The following matrix provides further clarity on Face Check verification scenarios that are billed:
| Face Check Verification scenario | Emits billing event (yes/no) |
|---|---|
| Verification request fails after reading QR Code | No |
| Verification request returns service error: The Verified ID service is unable to process the verification request | No |
| Verification request returns failed face matching: Processing the face matching between the biometric data and the credential data failed | Yes |
| Verification request returns a face matching score | Yes |
Link your Verified ID authority to a subscription
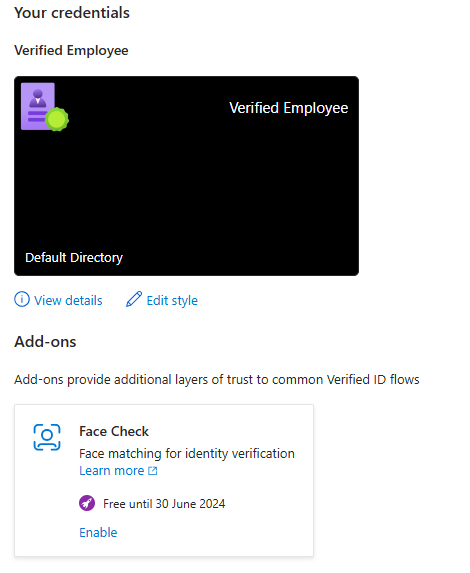
Go to the Verified ID overview page. Scroll down to the new Add-ons section and
Enablethe Face Check add-on
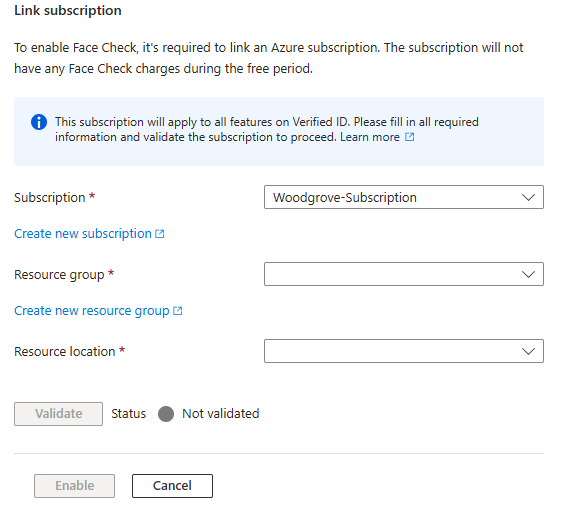
In the Link a subscription section, select a Subscription, a Resource group, and the Resource location. Then select
Validate. If there are no subscriptions listed, see What if I can't find a subscription?
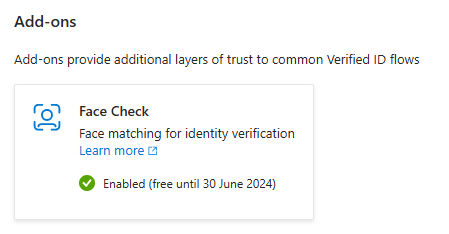
Enablethe add-on once the information is validated
What if I can't find a subscription?
If no subscriptions are available in the Link a subscription pane, here are some possible reasons:
You don't have the appropriate permissions. Be sure to sign in with an Azure account that is assigned at least the Contributor role within the subscription or a resource group within the subscription.
A subscription exists, but it isn't associated with your directory yet. You can associate an existing subscription to your tenant and then repeat the steps for linking it to your tenant.
No subscription exists. In the Link a subscription pane, you can create a subscription by selecting the link if you don't already have a subscription you might create one here. After you create a new subscription, you'll need to create a resource group in the new subscription, and then repeat the steps for linking it to your tenant.
Next steps
For the latest pricing information, see Microsoft Entra pricing.