Introduction to the agent interface in Omnichannel for Customer Service
Omnichannel for Customer Service offers a suite of capabilities that extend the power of Dynamics 365 Customer Service Enterprise to enable organizations to instantly connect and engage with their customers across digital messaging channels. An additional license is required to access Omnichannel for Customer Service. For more information, see the Dynamics 365 Customer Service pricing overview and Dynamics 365 Customer Service pricing plan pages.
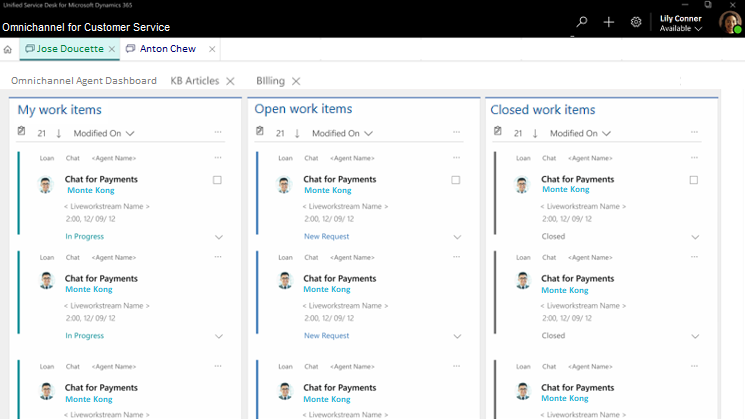
When you sign in to Omnichannel for Customer Service through Unified Service Desk, the Omnichannel for Customer Service interface has the following components:
Omnichannel toolbar
Session management toolbar
Application management toolbar

Default global toolbar
The Omnichannel toolbar also called as default global toolbar as the components are
Search
Create
Settings
Presence

Search
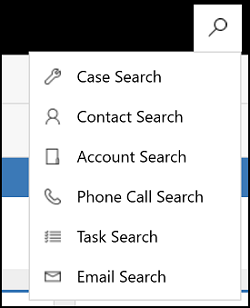
The Search button lets you search for records and open them in a new active session. You can use the Search button to search for the following types of records:
Case
Contact
Account
Phone call
Task Email

Create
The Create button provides a list of related options (entities) so that you can access existing entities and create new entities.
Settings
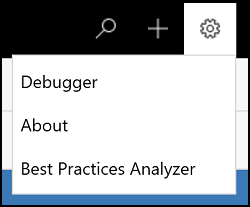
The Settings menu has Debugger and About options. These options provide insight into code runs and Unified Service Desk, respectively. There is also an option that opens the Best Practices Analyzer.

Debugger
Use the Debugger option to gain insight into the process and code runs in the agent application.
About
Use the About option to view information about the user (agent), the agent's email ID, Microsoft Dataverse, Shell Version, and much more.
Best Practices Analyzer
Best practices are the guidelines about system configurations, Unified Service Desk, browser settings, and Unified Service Desk configurations in Dynamics 365 instance and Dataverse. Consider these guidelines our recommended way to use Unified Service Desk and serve your customers.
Presence
Presence is the indication of your (agent) availability or status.
Presence status is updated in two ways:
Manually - You can change the status manually according to your availability.
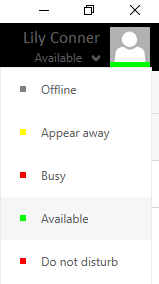
Select on the presence text to view all the presence statuses and update your status manually.
Out of the box, you see the following presence statuses:
- Offline
- Appear away
- Busy
- Available
- Do Not Disturb
Also, you may see any other additional presence statuses that your administrator configured for you.
Automatically - The status is set automatically based on the work item assignment. That is, when a conversation (work item) is assigned to you, the status is updated based on the capacity.
a. When your capacity is completely utilized the presence is set to BusyDND.
b. When your capacity is partially utilized the presence is set to Busy.
c. When your capacity is not utilized the presence is set to Available.
Session management toolbar
Each session in the Unified Service Desk client is shown on the session tab toolbar on the main page. You can identify a session by the session name that is shown on the tab. You can switch between sessions to handle cases without affecting key performance indicators (KPIs).

Application management toolbar
The application management toolbar lets you see all the related information for a session. For example, you can use this toolbar to open the Omnichannel Agent Dashboard page, search, use Customer summary, view a knowledge base (KB) article, or view case details. You can also switch between the application and session tab toolbars to effectively manage your sessions and related applications.

See also
Sign in to Unified Service Desk – Omnichannel for Customer Service
View alert and toast notifications
View customer summary and know everything about customers
View communication panel
View call scripts, take notes, and search knowledge articles
View customer summary for an incoming conversation request