Migrate sequences from one environment to another
Use the solution export and import functionality to migrate sequences from one environment to another in Dynamics 365 Sales.
Migrate sequences
Organizations use staging (non-production) environments to set up and test complex steps, such as sequences, assignment rules, and segments. Organizations then use the staging environments to test these steps to avoid any disruption in their operations, saving time and money. Also, the staging environments help in training the sellers.
Administrators and sales managers can now migrate sequences along with their dependent entities from one environment to the other. To migrate sequences, complete the following steps:
Create a solution
Let’s create a sequence solution with an example.
Let’s create a sequence solution with an example.
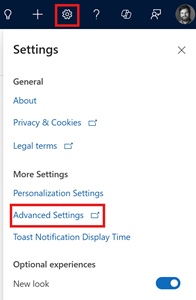
In the sales app, go to Settings > Advanced Settings.
Go to Customization > Customizations > Solutions.
On the Solutions page, select + New solution, enter the values for the following fields:
Column Description Display name Specify a meaningful name. Display name appears in the list of solutions and can be changed later. Example: Sequence APAC leads Name Specify a unique name for the solution. This field is populated using the value you enter in the Display name field. You can edit this before you save the solution, but not after. Publisher Select the default publisher or create a new publisher. We recommend that you create a publisher for your organization to use consistently across your environments where you'll use the solution. Example: CDS Default Publisher. Version Specify a version number for the solution. This version number will be included in the file name when you export the solution. 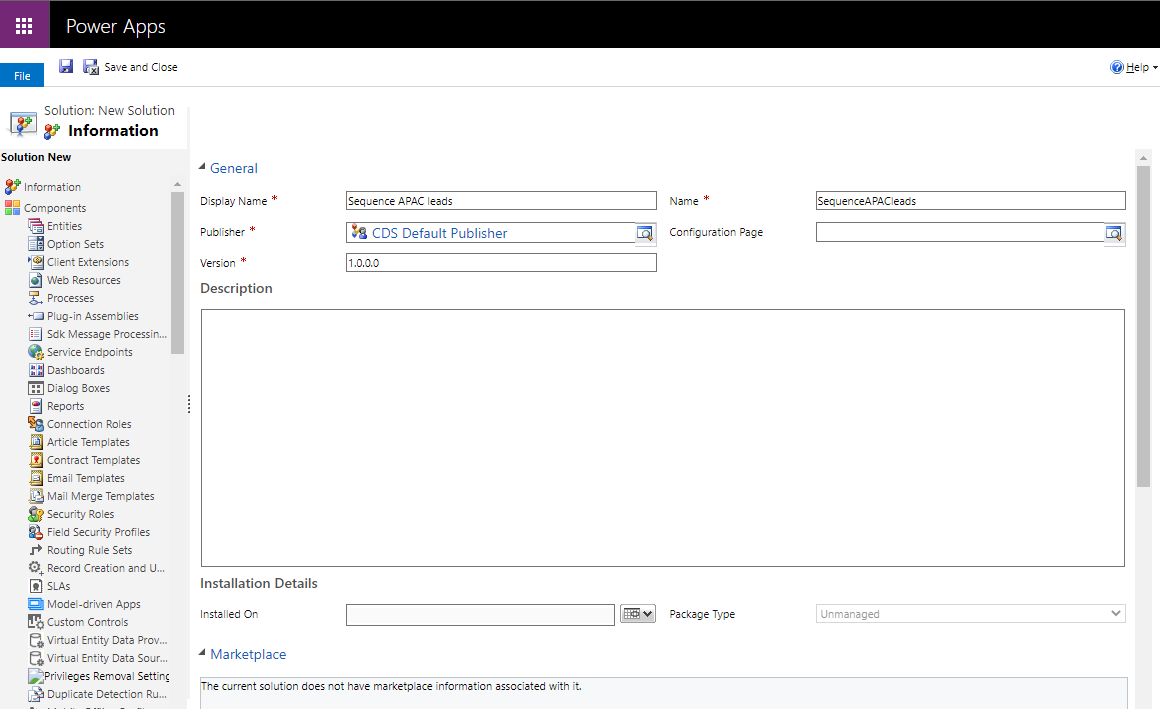
Select Create.
The solution is created and listed under solutions.
Now, let’s add the required sequences into the solution.
Add sequence to the solution
After you create the solution, add the sequences that you want to export through the solution.
Open the solution. In this example, we’re opening the Sequence APAC leads solution.
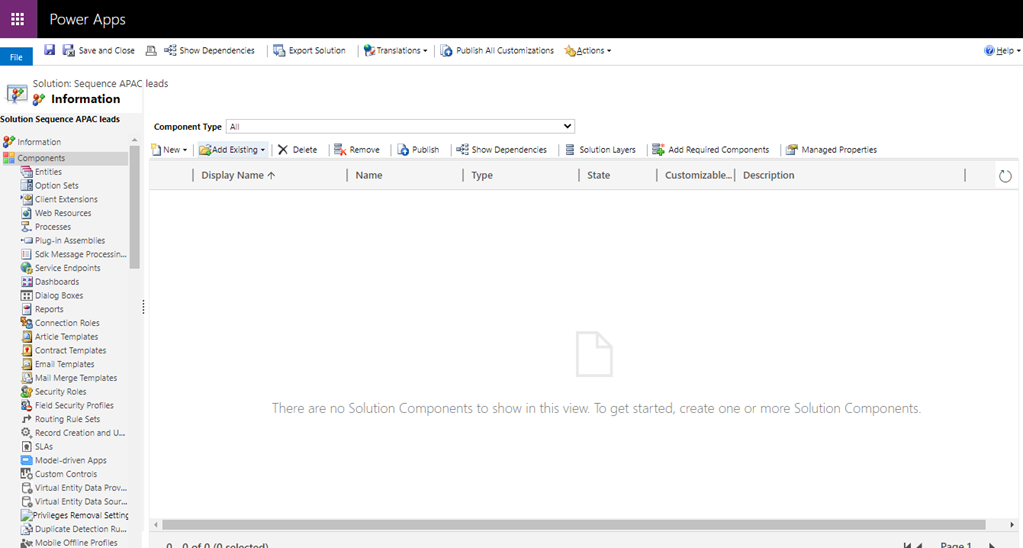
Select Add existing > More > Other > Sequence.
The Add existing sequence page opens with a list of sequences.Select and add the sequences that you want to include in this solution. In this example, we’re selecting and adding APAC Leads.
The sequence and its dependent components such as sequences, email templates, business process flows (BPF) record, sequence tags, and attributes are added to the solution.
To see other dependent entities of the added sequences, select Advanced > Show Dependencies.Note
If the sequence contains managed components, they won't be added to the solution. Therefore, when the solution is imported, the steps that are dependent on the missed components will show an error. To resolve the errors in the target organization, go to Troubleshoot solution import errors in Microsoft Dynamics 365.
Now that you've added the sequences, export the solution.
Export the solution
Always export the sequence as an unmanaged solution. The unmanaged dependent components of the sequences are automatically added to the solution package; managed components aren't added. When the solution is imported, the steps that depend on the missing components will show an error. To resolve the error, install the dependent components in the target environment. More information: Solution install fails due to missing dependencies.
Also, you can edit the sequences and their dependent components in the target environment after the import.
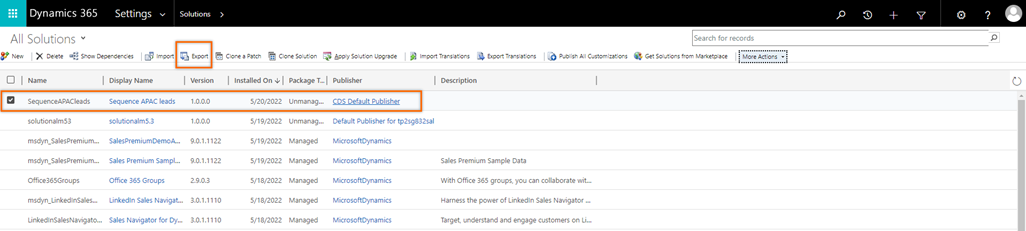
On the Solutions page, select the solution. In this example, let’s select Sequence APAC leads.
From the tool bar, select Export solution.
On the Before you export pane, select Next.
Note
After you’ve added the sequence and its dependent components to the solution and if you’ve made any changes that you would like to export, select Publish All Customizations. The updates are added to the solution.
On the Export This solution pane, select the Export as option as Unmanaged.
Select Export.
More information: Managed and unmanaged solutionsThe export can take several minutes to complete. Once finished, the exported .zip file is available for you to download and a download message is displayed on the page.
Select Download.
The zip file to your local computer. For example, SequenceAPACleads_1_0_0_1.zip.
Now, the solution is ready for import.
Import the solution
In the sales app, go to Settings > Advanced Settings.
Go to Customization > Customizations > Solutions.
On the Solutions page, select Import solution.
On the Import solution pane, select Browse and open the solution that you've downloaded.

Select Next.
On the Solution Information dialog, select Import.
The solution is imported into the target environment along with its dependent components. Also, when you delete the sequence, the dependent components remain in the imported environment, in case the components are used by other sequences or entities.
Note
If the import fails due to missing dependencies, a message is displayed on the top of the page. To troubleshoot import-related issues for solutions, go to Troubleshoot solution import errors in Microsoft Dynamics 365.
Can't find the feature in your app?
There are a few possibilities:
- You don't have the necessary license to use this feature. Check out the comparison table and the licensing guide to see which features are available with your license.
- You don't have the necessary security role to use this feature.
- To configure or setup a feature, you need to have the Administration and customization roles
- To use sales-related features, you need to have the Primary sales roles
- Some tasks require specific Functional roles.
- Your administrator hasn't turned on the feature.
- Your organization is using a custom app. Check with your administrator for exact steps. The steps described in this article are specific to the out-of-the-box Sales Hub and Sales Professional apps.