Add text message option to custom forms
Add the text messaging to phone number fields in custom forms, allowing sellers to send text messages directly from within the form.
Add text message option
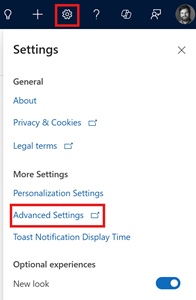
In the sales app, go to Settings > Advanced Settings.
Go to Customization > Customizations > Customize the System.
In the left pane, expand Tables and then the entity you want, and select Forms.
Note
If you are using the classic view, under Components, expand Entities, and then the entity you want, and select Forms.
From the list of forms, select the form to which you want to add the text message option.
Under the Summary section, select the phone field, such as Business phone or Mobile phone.
In the Field Properties dialog, go to the Components section and then select + Component.
In the Add Component dialog, select and add the Sales phone number control option.
The Sales phone number control option is added to the list of controls.Select the devices (Web, Tablet, and Phone) you want the control to appear on.
Save and publish the form.
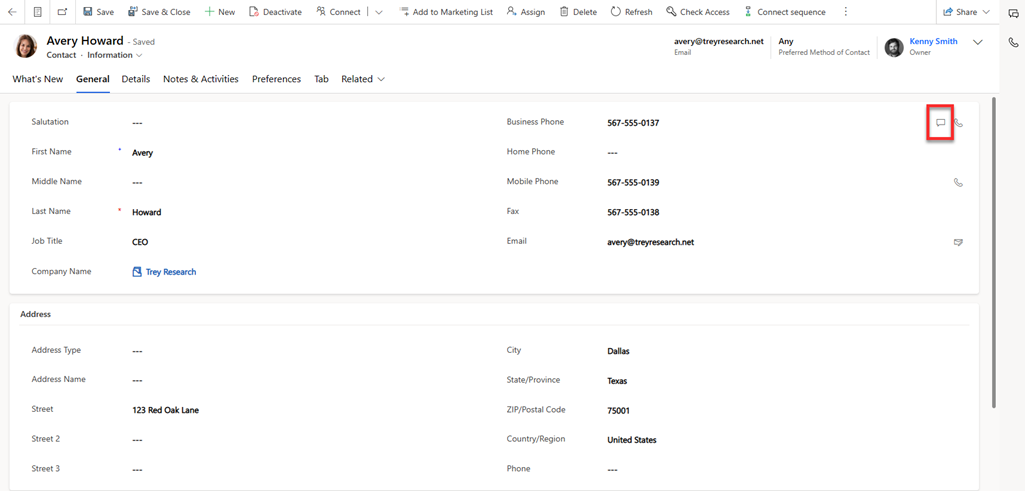
The customizations are published. The text message option is available for the phone number field you've selected in your custom form. The following image shows an example of including the text message option in the Business Phone section of the Information form for contacts.
Related information
Engage with customers through text messages
Configure SMS provider