Use synthetic relationships to expose more Business Central data in Dataverse
Important
This content is archived and is not being updated. For the latest documentation, go to What's new or changed in Business Central. For the latest release plans, go to Dynamics 365, Power Platform, and Cloud for Industry release plans.
| Enabled for | Public preview | General availability |
|---|---|---|
| Users by admins, makers, or analysts |  Mar 4, 2024
 |
 Apr 2, 2024
 |
Business value
Use virtual tables when you synchronize data between Business Central, Dataverse, and other Dynamics 365 apps to enhance the value of your Dynamics 365 investment. Virtual tables erase boundaries between Dynamics 365 apps and make your data accessible to users in their preferred app.
Feature details
There are two ways you can share data between Business Central and Dataverse, and other Dynamics 365 apps:
- Use data synchronization to copy data between Business Central and Dataverse.
- Use virtual tables, so that data resides in Business Central but can be viewed from Dataverse.
When you synchronize data between Business Central and Dataverse, you can add a synthetic relationship between synchronized data and data in virtual tables. This relationship enriches the data you've set up to synchronize from Business Central with data you haven't, without help from a developer.
A requirement for setting up synthetic relationships is to use the Enable action on the Available Virtual Tables page. To learn more, go to Use virtual tables to get more data.
When you've made virtual tables available, you can create synthetic relationships on the Dataverse Connection Setup page by choosing Virtual Tables, and then Synthetic Relations.
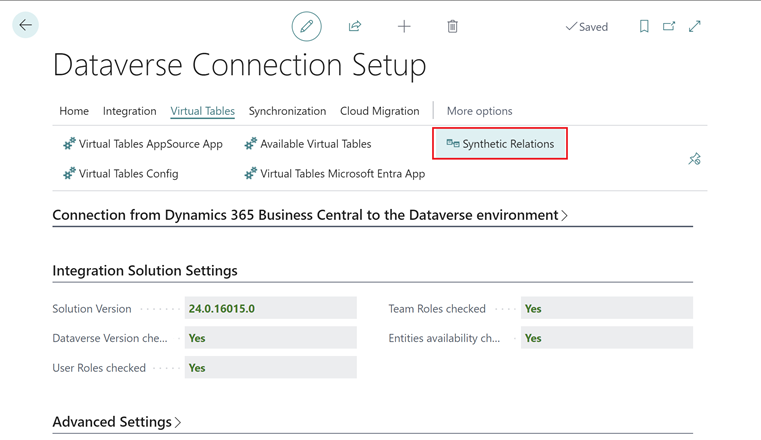
On the Synthetic Relations page, choose New to run the New Synthetic Relation assisted setup guide. The guide will help you create a new synthetic relationship.
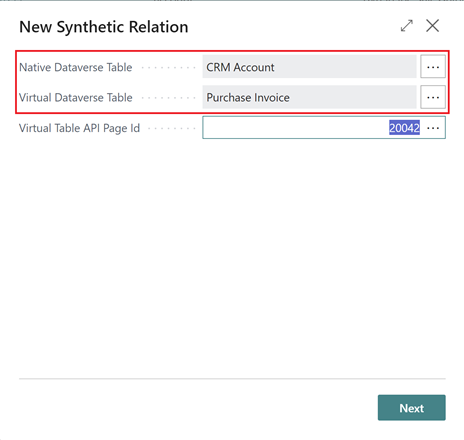
Choose the Native Dataverse Table (for example, CRM Account) that you use to synchronize data between Business Central and Dataverse. Choose the Virtual Dataverse Table (for example, Purchase Invoice) or one of the other virtual tables you enabled on the Available Virtual Tables page. Choose Next to proceed to the next step in the guide.
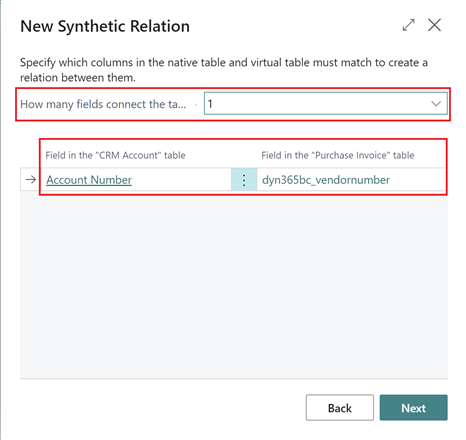
You can use up to three fields to define the relationship from the New Synthetic Relation guide. You can choose how many you plan to use in the How many fields to connect the tables field. Afterward, you can define the fields whose values should match to establish the relationship in the Field in the "(native)" table and Field in the "(virtual)" table fields. Choosing Next validates the relationship and takes you to the last step.
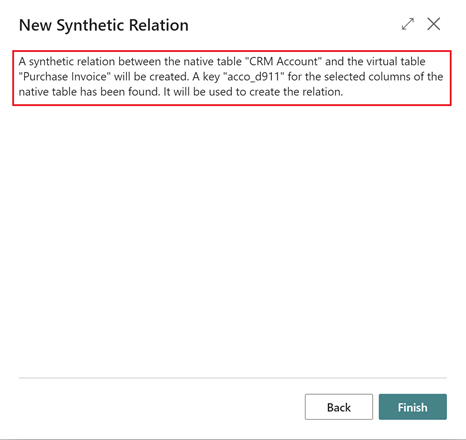
The last step in the guide informs you that the guide won't create a relationship and, if needed, keys to support that relationship. Choosing Finish will start that operation.
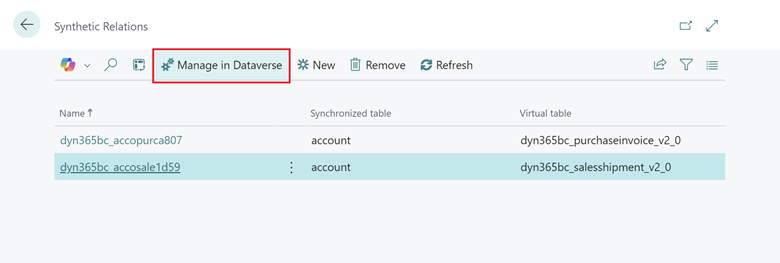
You can choose Manage in Dataverse to model more relationships between virtual tables in Dataverse.
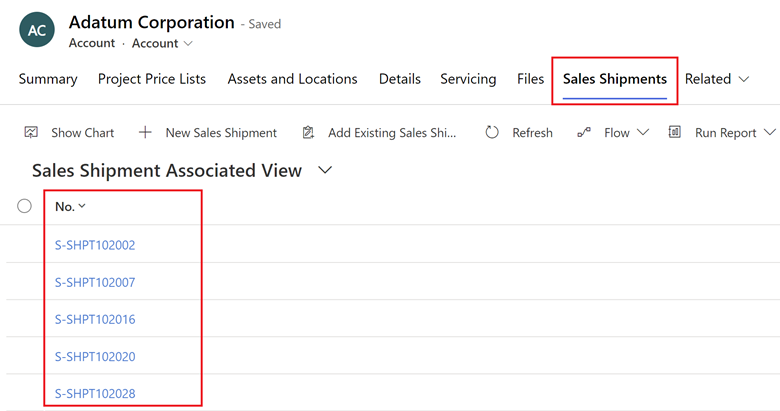
The effect of setting relationships between native (synchronized) tables and virtual tables can best be described by opening, for example, an account record that we coupled to Business Central in Sales.
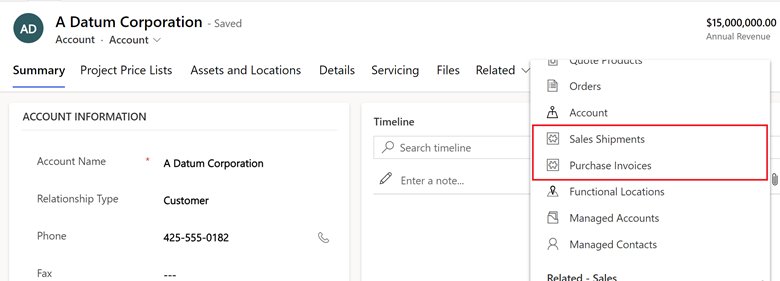
Choosing Sales Shipments in Sales shows shipments related to the selected account according to the relationship.
