Customize the Microsoft 365 integrations for Field Service
Customize the work order and booking experiences to help frontline managers and workers accomplish their tasks faster by filling in and retrieving the specific pieces of information they need, when they need it.
As an admin, you can customize the views of work orders and bookings. You can also customize the labels for work orders.
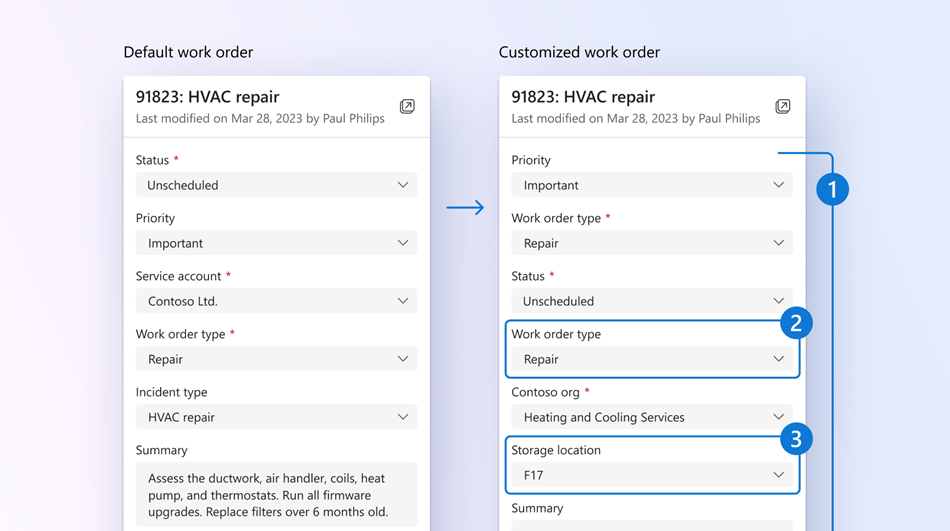
Customize the work order form with the most important information for your organization. Any fields you add to the form are readily available to your users when creating and updating a work order in Outlook or Teams. In Outlook, Copilot also attempts to populate those fields if there's relevant information provided in the email. Customize the booking experience with the key details for your organization so workers fill out that information when updating their bookings.
The Microsoft 365 integrations for Field Service use views in Power Apps to customize the forms for users creating and editing work orders and bookings. Any fields added to the view show on the forms, in the order specified in the view. Required field indicators show which fields are required in the table definition. We currently support customized views of the Work Orders and Bookable resource booking experiences.
Use views to:
- Reorder and remove fields
- Toggle required fields
- Add custom fields
The Microsoft 365 integrations for Field Service use table properties in Power Apps to customize work order labels. For example, if you prefer to call work orders jobs, you can customize these labels. We currently support customized labels for work orders.
Prerequisites
- Exchange admin permissions in the Microsoft 365 Admin Center.
- Environment is in a supported geography, region, and language.
- One of more of the Microsoft 365 integrations for Field Service is deployed.
- Field Service solution is version 8.8.98.36 or above. To update the solution, see Update Field Service.
Create or edit a custom view
The following steps use work order as an example. You can use these steps to create or edit a custom view for bookings by searching for bookable resource booking. To select from existing views, see Select a public or custom view.
From your Teams Field Service Home page, select Settings, then Customize views.
Select the environment you want to customize.
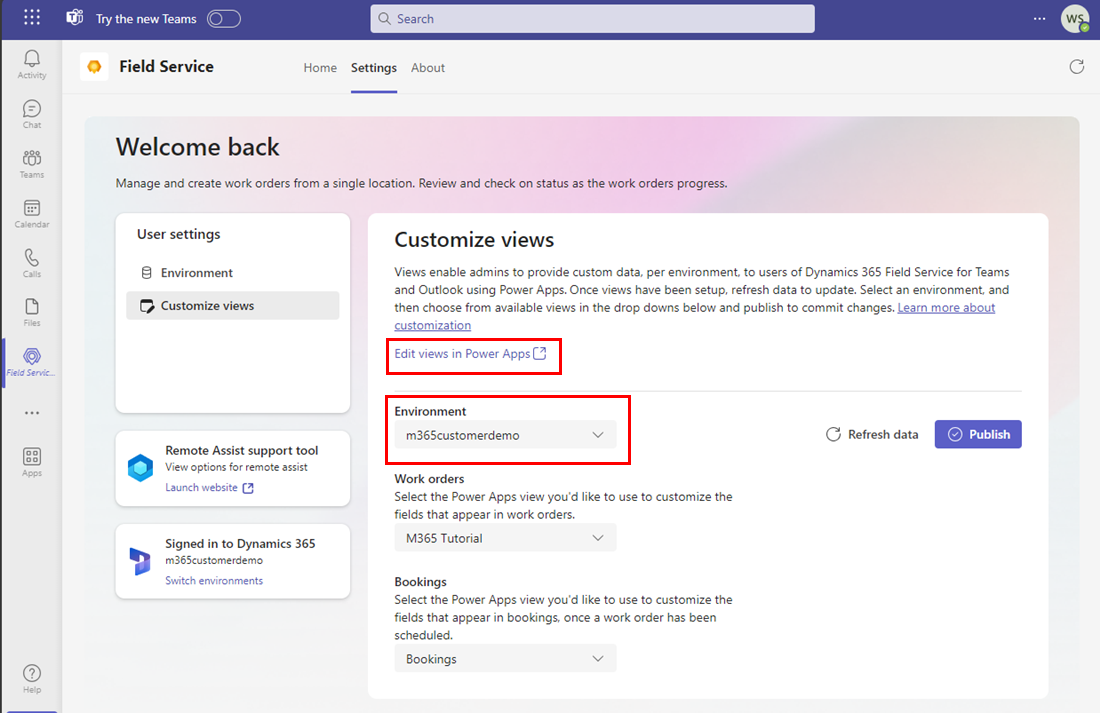
Select Edit views in Power Apps. Power Apps automatically opens to the Tables page for the specified environment.
Tip
You can also access Power Apps, select your environment, and then select Tables.
Select All and then search for work order. For bookings, search for bookable resource booking.
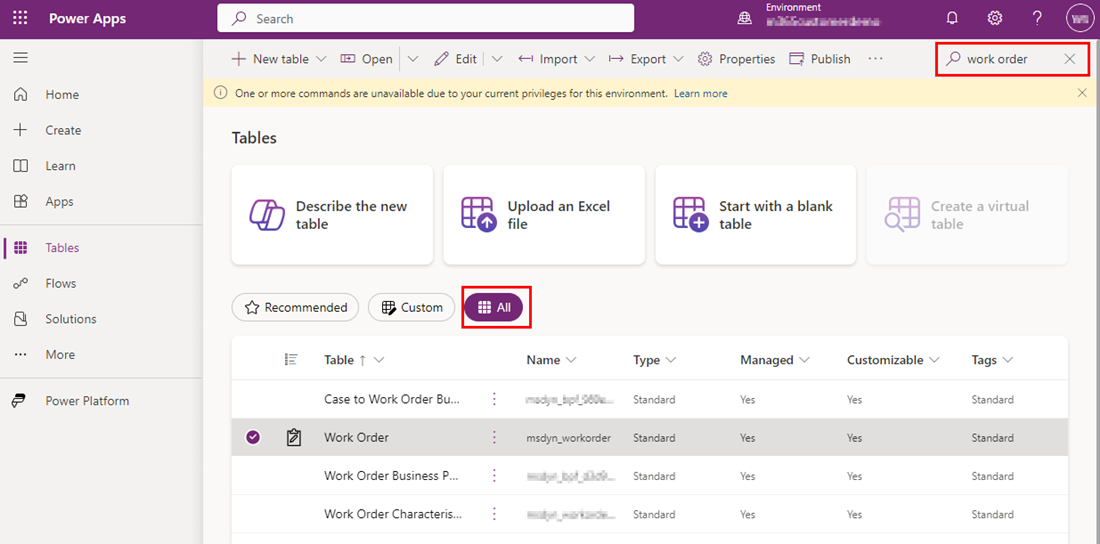
Open the Work Order table. For bookings, open the Bookable Resource Booking table.
Under Data experiences, select Views. A list of all public and customized views displays.
To edit a view, open the view.
To create a new view, select New view. Enter a name and optional description and select Create. The Work Order Number column automatically displays.
To add columns, select View column. Or select Table columns in the left navigation and drag the table columns into your view.
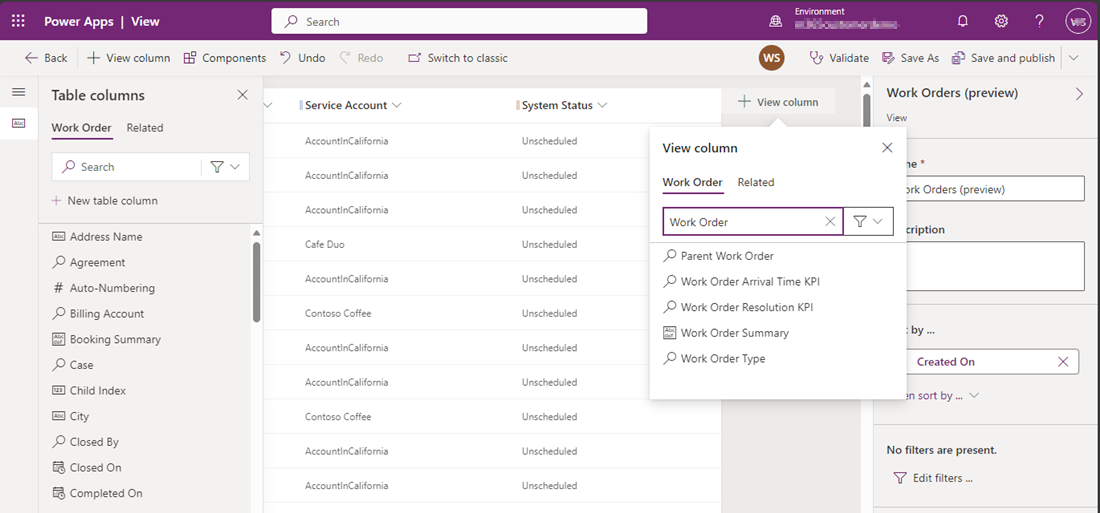
Make sure you have the following required columns and optionally add other columns. All columns added to the view can be used to filter the list of work orders. For Bookable resource booking, the Crew column isn't supported and shouldn't be used.
Work order Bookable resource booking Work Order Number Name Service Account Work Order System Status Resource Work Order Type Booking Status Work Order Summary Start Time End Time Duration Actual Arrival Time Note
The first four columns you select are the key fields shown in the list of work orders.
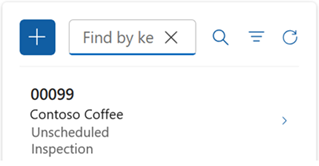
Continue to customize your view:
- To change the column filtering, select the header of the column where the filter is required, and then in the dropdown list, select Filter by.
- To change the column sorting, select the header of the column where sorting is needed, and then select Sort A-Z, Sort Z-A, Sort descending, or Sort ascending.
- Configure column width by selecting and dragging the column to the desired position.
- Reorder columns by dragging a column to the desired position.
Select Save and publish.
Return to Teams and select Refresh data. Select the new view under Work orders or Bookings and select Publish. Users now can go to Outlook or Teams and see the new view for their work order creation and management. Filtering is now dynamic based on the columns you added to the view.
Select a public or custom view
Choose the view you want to appear for your frontline managers and workers. You can select a Work orders view and a Booking view. If you don't find a view you want, create a custom view.
From your Teams Field Service Home page, select Settings, then Customize views.
Select the environment you want to customize.
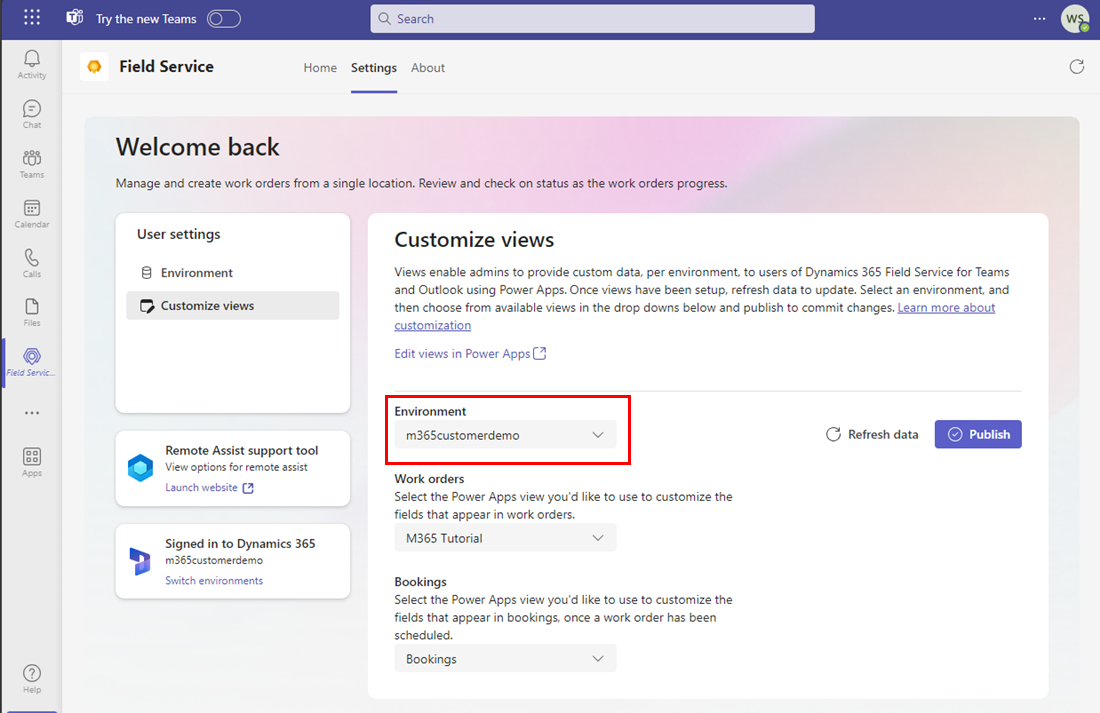
To choose a work order view, select from the drop-down list under Work orders.
To choose a booking view, select from the drop-down list under Bookings.
Select Publish. Users now can go to Outlook or Teams and see the new view for their work order creation and management.
Add or edit columns
You can modify the Field Service columns that come with Dynamics 365 Field Service. Related table columns are read-only and can't be filtered in the work order list. File type isn't supported and multi-select lookup fields aren't supported.
If a column is required but has a default that will be provided after the table is created, you might not want to include the field in the view. For example, if Price List is based on the selected Service Account, don't include Price List in the view.
Create custom labels
You can customize the labels used for work orders to better match your organization's terminology.
From your Teams Field Service Home page, select Settings, then Customize views.
Select the environment you want to customize.

Select Edit views in Power Apps. Power Apps automatically opens to the Tables page for the specified environment.
Tip
You can also access Power Apps, select your environment, and then select Tables.
Select All and then search for work order.
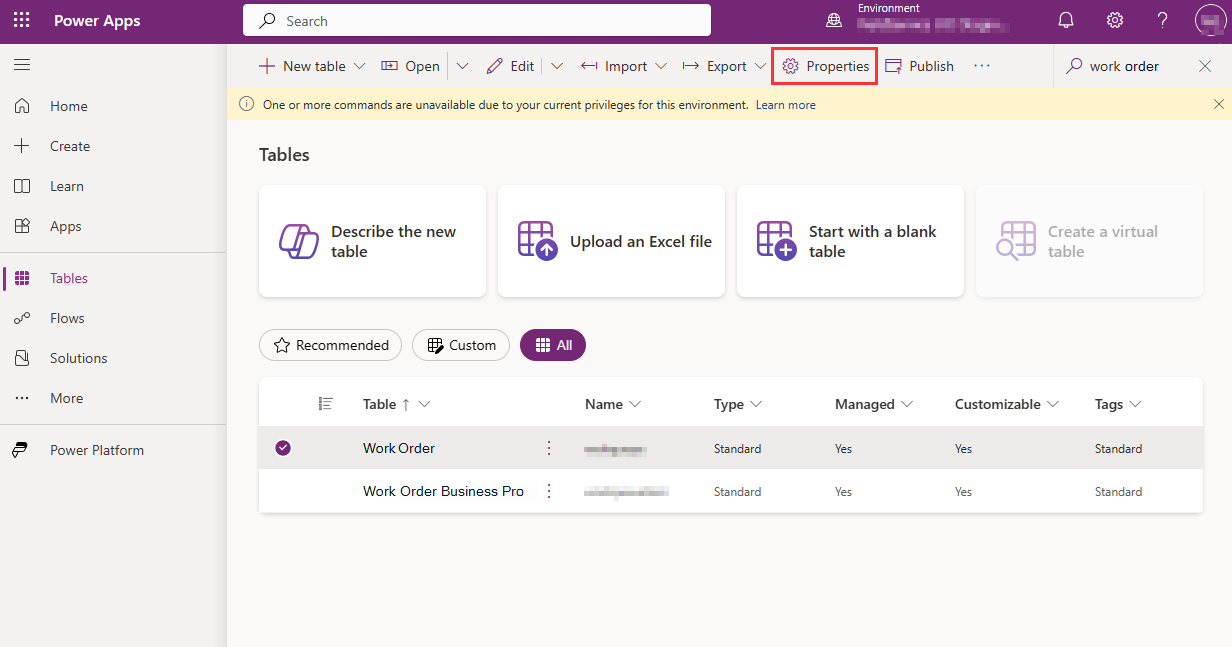
Select to the left of the Work Order table and select Properties. The Edit table pane displays.
Enter the Display name and Plural name of your choice.
Select Save and publish.