Link knowledge articles
You can associate and dissociate a knowledge article with a record.
Link knowledge articles to related entities
Create relationships between knowledge articles and other records, like incident types, products, or customer assets. When any of these records are added to a work order, the system automatically links the related knowledge articles.
In Field Service, go to Settings > Knowledge management > Knowledge articles.
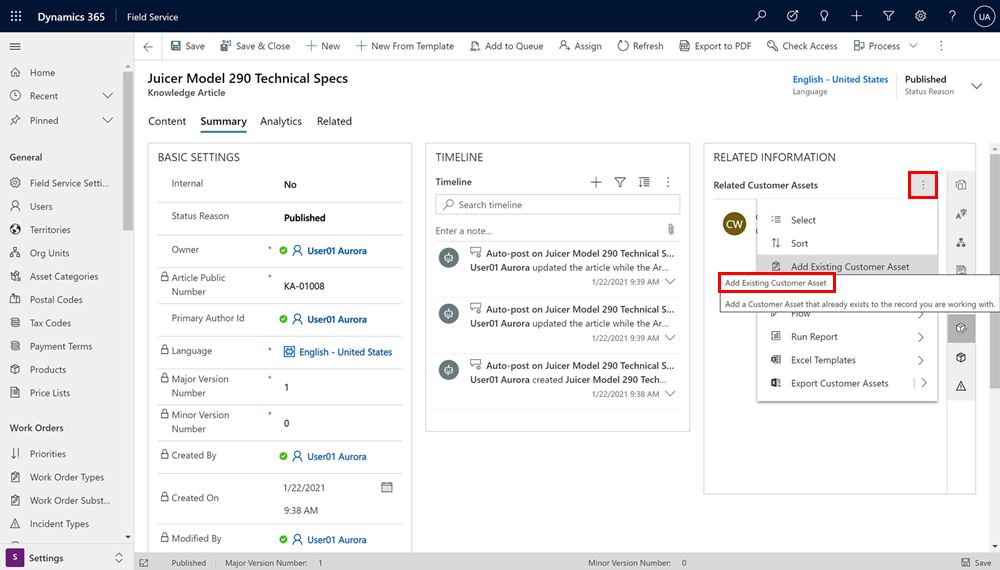
Open an article, and then select the Summary tab. In the Related Information section, select the related entity icon. For example, Customer asset.
Select the More commands (⋮) and then Add Existing Customer Asset.

Search for and select the asset to link to the article, and then select Add. To remove, select the ⋮ next to the asset and select Remove.
Select Save & Close.
Link related entities to knowledge articles
You can link knowledge articles without a configured relationship to incidents, assets, or products.
On a related entity, navigate to the Linked Articles section.
- For Customer asset, select the Summary tab.
- For Incident type, select the Details tab.
- For Product, select the Additional Details tab.
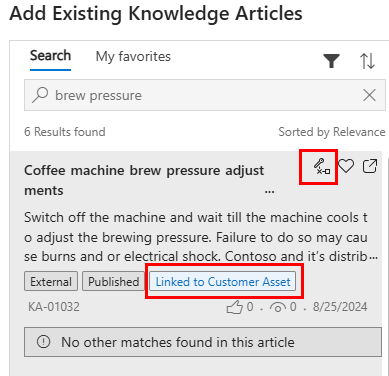
Select Add Existing Knowledge Article and search for the specific article.
Select the Link icon for the article. The icon changes and Linked to Customer Asset appears. To unlink, select the icon.

Add other articles or select Done.
Select Save & Close.
Link a knowledge article to a work order
In Field Service, go to Service > Work Orders.
Select the work order and then select the Reference tab.
To add an existing knowledge article to the work order:
- Select Add existing article and search for the specific article.
- Select the Link icon for the article. The icon changes and Linked to appears. To unlink, select the icon.
- Add other articles or select Done. The article appears on the work order's Reference tab.
To add a new knowledge article to the work order:
- Select New article and create the knowledge article.
- Select Save & Close. The article is created and linked to the work order.
Select Save & Close.