Set up sessions
The core attractions of your event offering will typically be its sessions and speakers. A simple event might have just one session, whereas a conference will typically have several sessions spread over several days.
To set up sessions, start by setting up the event, including basic settings, then go to the Agenda tab for the event. In the Agenda tab, you can use the calendar or standard grid view to add new sessions. Each session has its own settings that include information about the session, speakers, sponsors, the type of the session, and the session capacity.
Session capacity utilization: Session capacity can be allocated to sessions with limited seating by navigating to Session > Capacity > Session maximum capacity.
Important
In December 2024, a change was introduced to how the capacity of events and sessions works. In the past, you could only use either session or event capacity, but the two could not be used in conjunction. With the latest update, you can set an event capacity as well as session capacity for your events. Event capacity needs to always be equal to or higher than session capacity.
Use session-level registration
After setting the agenda, event organizers can let attendees assemble their own event schedule by choosing from all available sessions. You can enable session-level registration in the Website and Form tab. Under registration settings, enable Allow attendees to register for sessions. When session-level registration is enabled for an event, the registration form that has the session tiles in it automatically allows the attendees to select the sessions they're interested in. To ensure successful registration for an event with a custom agenda, at least one session must be published and available for selection (with seats available).
Additional settings include:
- Allow single session registration only: This changes the multi-select field on the form to a single-select field and allows attendees to register for one session only.
- Make the session registration required: This makes the session selection mandatory.
Important
The Allow attendees to register for sessions setting used to be on the Agenda tab and was called "Allow registrants to create their own agenda."
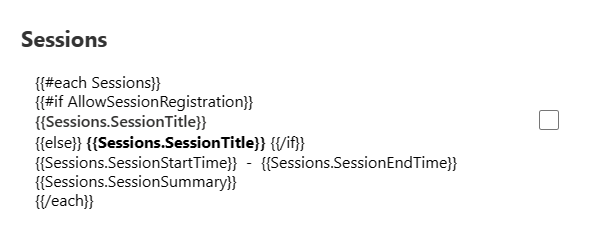
It’s important to note that session-level registration requires the registration form to include the sessions. This is done by using the Sessions element in the form editor so that attendees can see the sessions and have the option to sign up for sessions they select. We've recently updated the styling of the sessions list element to include better date and time formatting and full capacity notification. If you're using a form with sessions that's been customized, you'll have to remove the sessions element and add it back in to see the latest changes.
To access the registration form for the event, select the event, then go to Website and form and select the Registration form.

This opens a special version of the form editor that has extra elements for your event including the About, Sessions, and Speakers elements.
Note
The sessions element uses a dynamic list functionality, but it has a few limitations. At present, it's not possible to customize the date and time format of the sessions; the date and time is by default displayed in United States format. It's also not possible to change the order of the sessions; they are ordered based on the record creation date. Lastly, it's not possible to add more attributes and information about the sessions. We plan to address this limitation in the near future.
Style your default registration forms with sessions using Theme
The Theme feature is a user-friendly interface for editing CSS class definitions in the form HTML and styling your form experience. The Theme section can be opened by navigating to the registration form of your choice and selecting the brush icon in the right pane. Theme controls the style of all types of fields, buttons, and text. Once you set the theme of a field, it affects all fields of the same type in your form.
Note
Form styles are constantly being improved. Forms created in an older version of the real-time journeys form editor have limited options to change the form styling using the Theme feature. You can enable more style options by selecting the Enable button in the Theme section. This updates your form styles to the latest version compatible with the Theme feature, which is now relevant for the latest release of session-level registration improvements.
View and edit event session registrations
The method to view and edit registration details for a session-level event depends on whether you want to view all registrations for the event or view registrations for a specific session:
- To view all registrations for the event (people who registered for at least one session), open the relevant event record, go to the Registration and attendance tab, and scroll to the Event registration section. You can also add or remove registrations from here.
- To view all registrations for a specific session, open the relevant event record, go to the Agenda tab, scroll to the Sessions list, and select a session. In the open session record, go to the Registration and attendance tab and scroll to the Sessions registrations list. You can also add or remove registrations from here.
