Preview: Personalize messages, make journey decisions based on web interactions
Important
A preview feature is a feature that isn't complete, but is made available before it’s officially in a release so customers can get early access and provide feedback. Preview features aren’t meant for production use and may have limited or restricted functionality.
Microsoft doesn't provide support for this preview feature. Microsoft Dynamics 365 Technical Support won’t be able to help you with issues or questions. Preview features aren’t meant for production use, especially to process personal data or other data that are subject to legal or regulatory compliance requirements.
Note
This feature applies to known contacts or leads, such as contacts who have visited a webpage by selecting a tracking link in a Customer Insights - Journeys email.
In Customer Insights - Journeys, you can track and leverage your customers’ online behavior to deliver personalized experiences across digital channels. For example, you can boost conversions and customer loyalty by sending tailored offers after customers visit your website and show interest in a product or service. By tracking additional data about customers' online journeys, you can gain valuable insights into your customers' preferences and needs and easily measure your campaign’s effectiveness.
Web tracking helps you understand website usage by capturing:
- Website visits: Captured every time a known customer visits a page on your website.
- Website link clicks: Captured every time a known customer selects a link such as a banner on your website.
Set up web tracking
To enable web tracking, you must add JavaScript code generated by Customer Insights - Journeys to each website that you want to track. The JavaScript code uses cookies to record each page that an individual browser requests from your website. Learn more: How the real-time journeys app uses cookies.
Important
The website tracking script that's supplied by this feature attempts to set a cookie for all visitors to your site. If your site includes a feature that allows visitors to opt-out of cookies, the website tracking script still attempts to set its cookie even for visitors who have opted-out. If you want to fully respect the opt-out preference of your site visitors, you must modify the website tracking script as required so that it also works with your site's opt-out mechanism.
Tip
Many countries and regions (including the European Union) require that you get consent before setting a cookie on a user's machine. It's your organization's responsibility to be aware of, and conform to, all relevant laws and regulations in the markets where you operate, including consent to set cookies. Read more about the EU regulations: Cookies and similar technologies. Learn more about cookies in real-time journeys: How the real-time journeys app uses cookies.
To set up web tracking:
Navigate to Settings > Feature switches > Tracking > Web Tracking. You need to enable the feature (in preview).
Now, go to the Web Tracking option under the Customer Engagement section on the left menu. This is the tracking script that you must place on your website that you want to track. It's read-only.
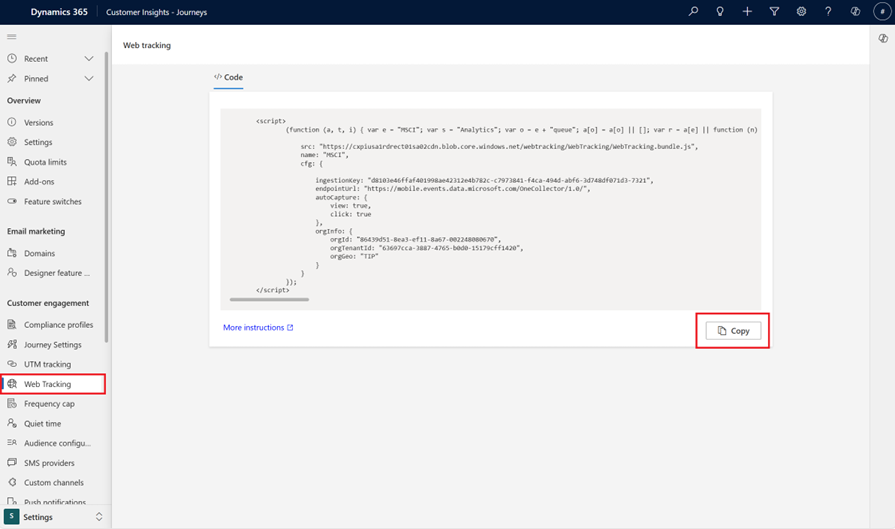
Copy the JavaScript code (be sure to select all of it) and place it in the
<head>tag of your website. Make sure you don't already have a script set up for your site.- If you're using Power Pages, go to the Portal Management app. Go to Content > Web Templates > Header, paste the Customer Insights - Journeys tracking script, and then Save.
- If you're using a tag manager such as Google Tag Manager, go to the Google Tag Manager portal. Select Add new tag > Tag configuration > Custom HTML, paste the Customer Insights - Journeys tracking script, and then Save.
- If you're using another Content Management System (CMS) such as Wordpress, your CMS provider should have an easy way to add a script to the site header. Here's an example from Wordpress: Add Code to Headers.

Personalize customer experiences based on web interaction
Web interactions can be utilized to create personalized customer experiences in the following ways:
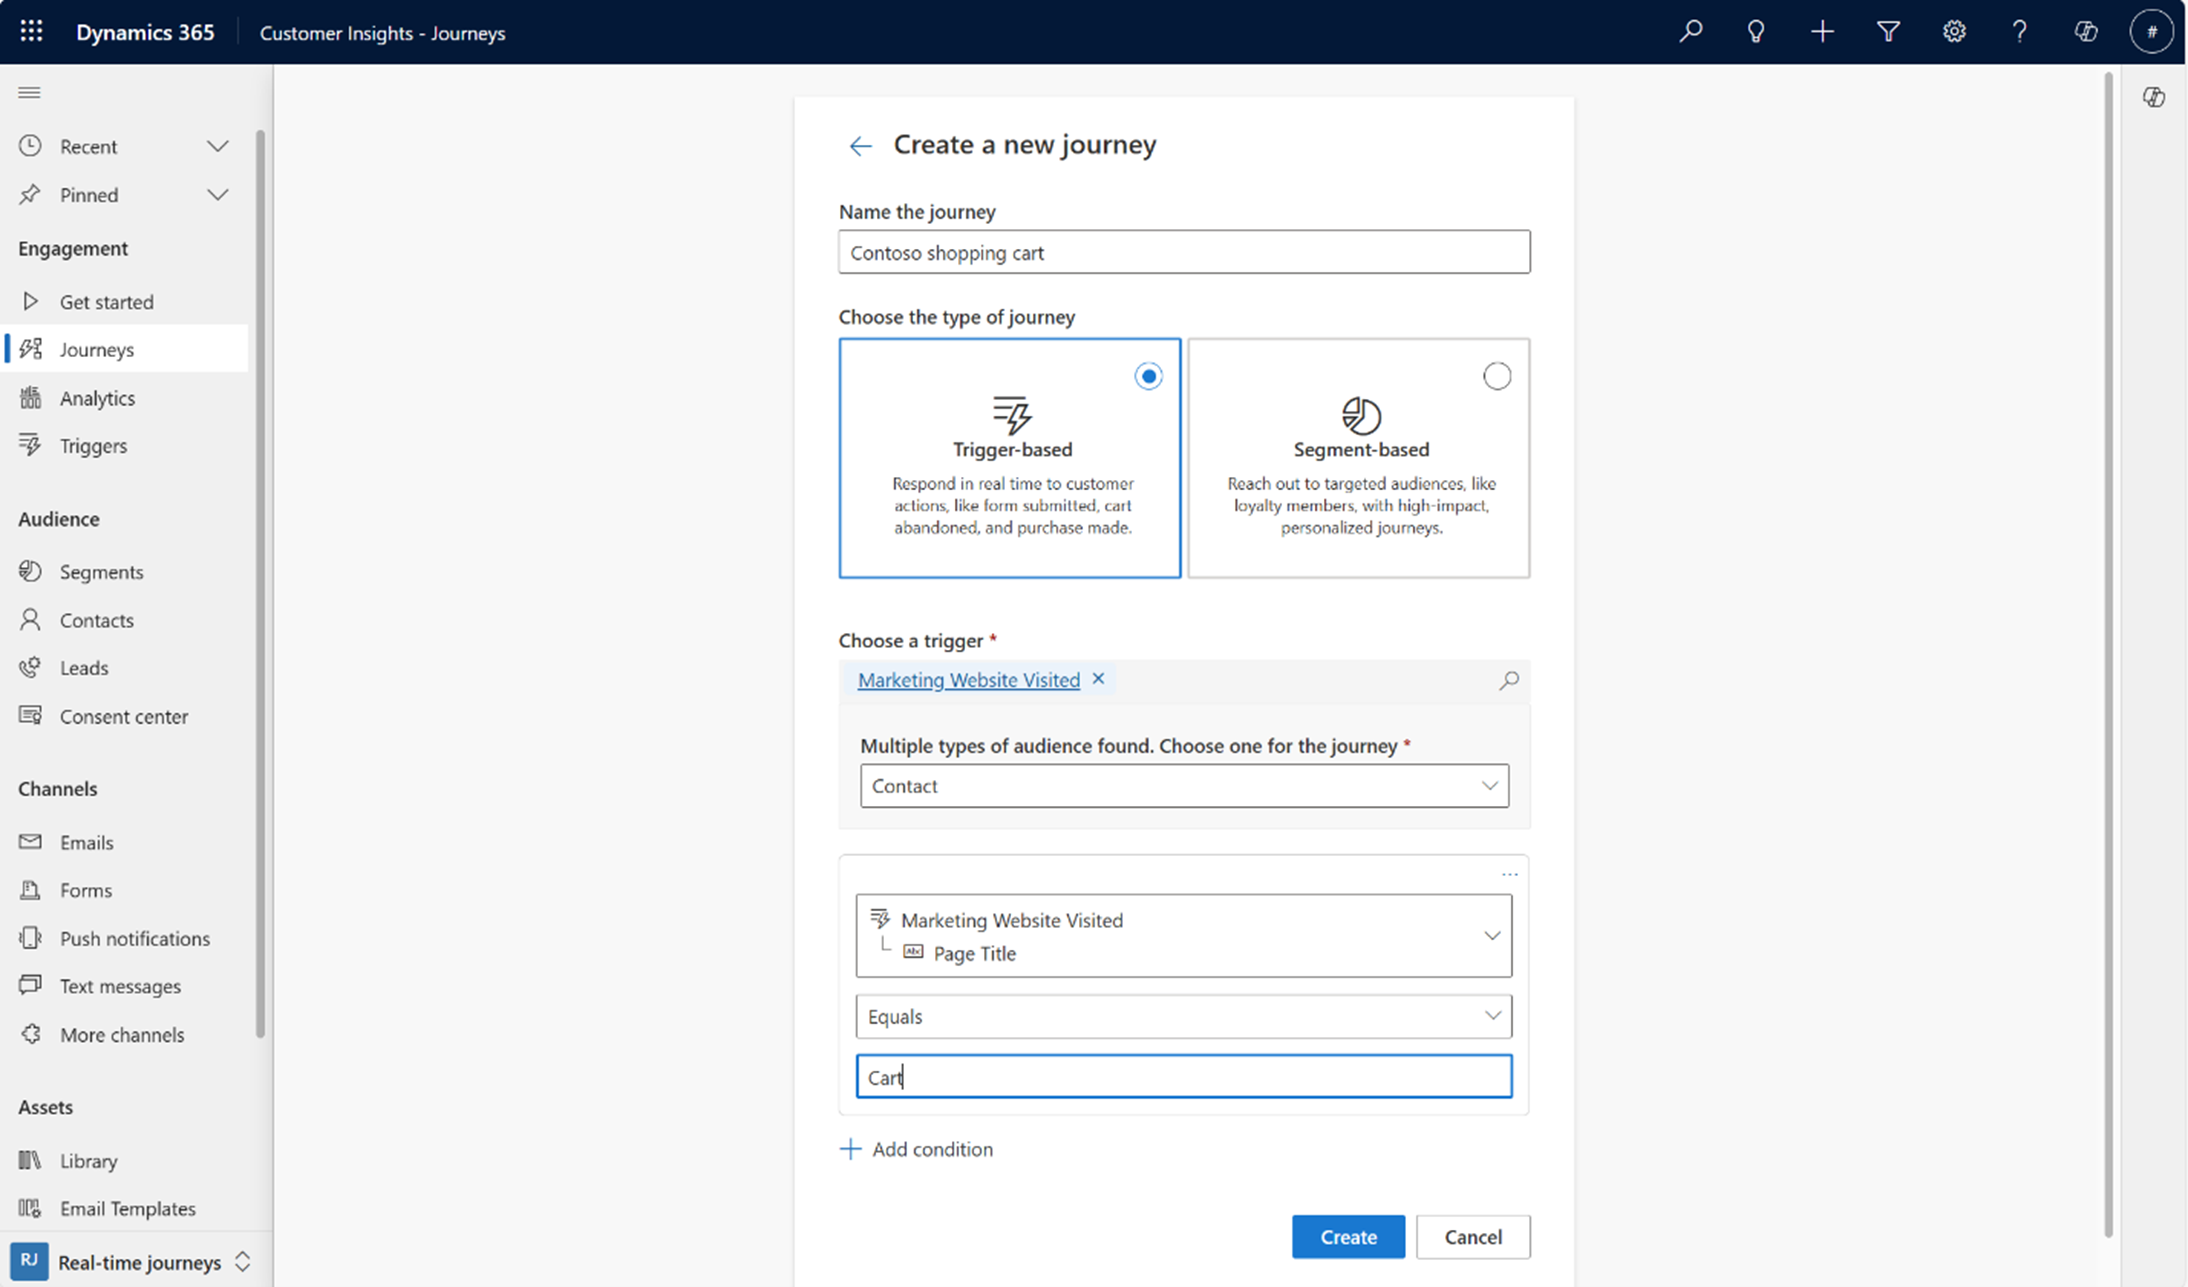
As triggers to initiate a real-time journey to known contacts or leads.
In an if/then branch to respond to your customers’ website actions.


In both instances, you can define conditions based on webpage URL, webpage title, etc., to differentiate the experience based on a specific web property or specific web action such as viewing the shopping cart. Here are some examples:
- Page URL (msdynci_viewuri): The URL of the visited page (for example, https://www.contoso.com/home).
- Page name (msdynci_viewname): The name of the visited page (for example, "home.html").
- Page title (msdynci_viewtitle): The title of the visited page (for example, "Home").
- View type (msdynci_viewtype): The type of the visited page (for example, "page").
- Previous page name (msdynci_viewpreviousviews): The URL of the previous visited page for the session (for example, https://www.contoso.com).
- Action Type (msdynci_actiontype): The type of user interaction captured during a web interaction (for example, LClick). Possible values:
- leftClick: "LClick"
- rightClick: "RClick"
- middleClick: "MClick"
- keyboardEnter: "KEnter"
- keyboardSpace: "KSpace"
- Action is outbound (msdynci_actionisoutbound): Refers to whether the user’s click leads them to a destination outside of the current domain (for example, false).
- Click coordinates (msdynci_clickcoordinates): The exact click location on the webpage (for example, 23456).