Deploy Orleans to Azure Container Apps
In this tutorial, you'll learn how to deploy an example Orleans shopping cart application to Azure Container Apps. This tutorial expands the functionality of the sample Orleans shopping cart app, introduced in Deploy Orleans to Azure App Service. The sample app adds Azure Active Directory (AAD) business-to-consumer (B2C) authentication and deploys to Azure Container Apps.
You'll learn how to deploy using GitHub Actions, the .NET and Azure CLIs, and Azure Bicep. Additionally, you'll learn how to configure the Container App's HTTP ingress.
In this tutorial, you learn how to:
- Deploy an Orleans application to Azure Container Apps
- Automate deployment using GitHub Actions and Azure Bicep
- Configure HTTP ingress
Prerequisites
- A GitHub account
- Read an introduction to Orleans
- The .NET 6 SDK
- The Azure CLI
- A .NET integrated development environment (IDE)
- Feel free to use Visual Studio or Visual Studio Code
Run the app locally
To run the app locally, fork the Azure Samples: Orleans shopping cart on Azure Container Apps repository and clone it to your local machine. Once cloned, open the solution in an IDE of your choice. If you're using Visual Studio, right-click the Orleans.ShoppingCart.Silo project and select Set As Startup Project, then run the app. Otherwise, you can run the app using the following .NET CLI command:
dotnet run --project Silo\Orleans.ShoppingCart.Silo.csproj
For more information, see dotnet run. With the app running, you're presented with a landing page that discusses the app's functionality. In the upper-right corner, you'll see a sign-in button. You can sign up for an account, or sign in if you already have an account. Once signed in, you can navigate around and you're free to test out its capabilities. All of the app's functionality when running locally relies on in-memory persistence, local clustering, and it uses the Bogus NuGet package to generate fake products. Stop the app either by selecting the Stop Debugging option in Visual Studio or by pressing Ctrl+C in the .NET CLI.
AAD B2C
While teaching the concepts of authentication are beyond the scope of this tutorial, you can learn how to Create an Azure Active Directory B2C tenant, and then you can Register a web app to consume it. In the case of this shopping cart example app, the resulting deployed Container Apps' URL will need to be registered in the B2C tenant. For more information, see ASP.NET Core Blazor authentication and authorization.
Important
After your Container App is deployed, you'll need to register the app's URL in the B2C tenant. In most production scenarios, you will only need to register the app's URL once as it shouldn't change.
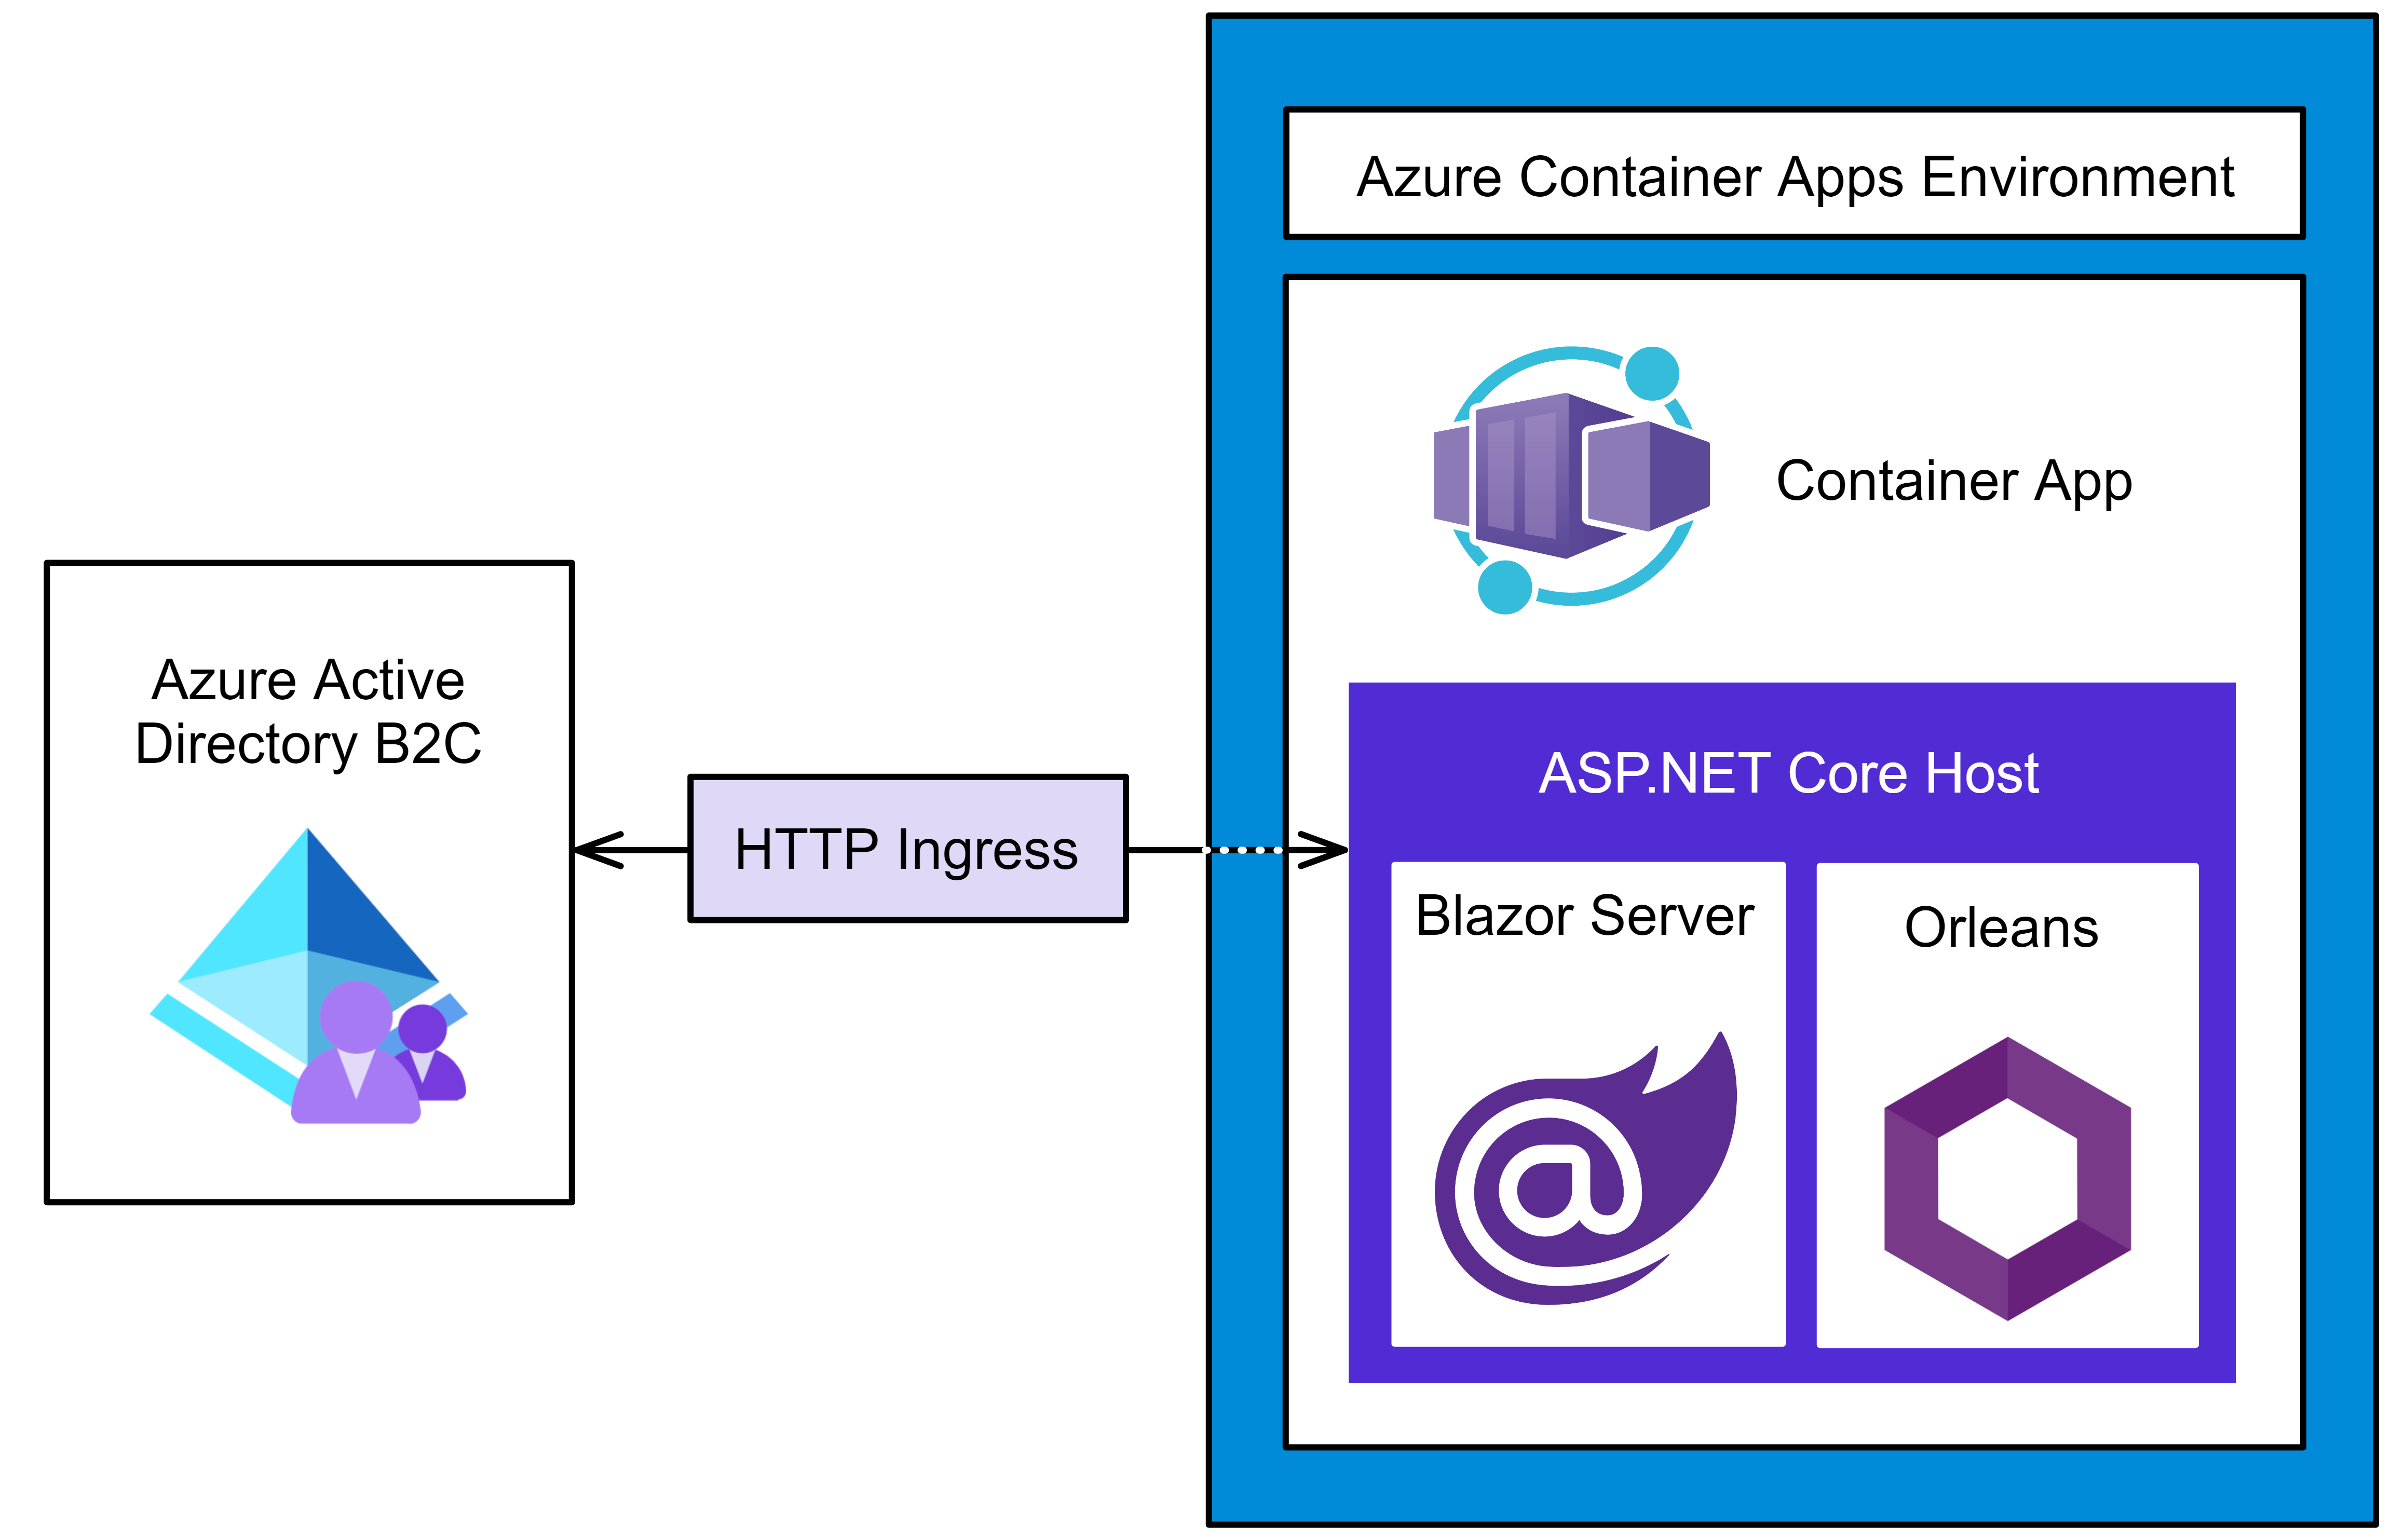
To help visualize how the app is isolated within the Azure Container Apps environment, see the following diagram:
In the preceding diagram, all inbound traffic to the app is funneled through a secured HTTP ingress. The Azure Container Apps environment contains an app instance, and the app instance contains an ASP.NET Core host, which exposes the Blazor Server and Orleans app functionality.
Deploy to Azure Container Apps
To deploy the app to Azure Container Apps, the repository makes use of GitHub Actions. Before this deployment can take place you'll need a few Azure resources and you'll need to configure the GitHub repository correctly.
Before deploying the app, you need to create an Azure Resource Group (or you could choose to use an existing one). To create a new Azure Resource Group, use one of the following articles:
Make note of the resource group name you choose, you'll need it later to deploy the app.
Create a service principal
To automate the deployment of the app, you'll need to create a service principal. This is a Microsoft account that has permission to manage Azure resources on your behalf.
az ad sp create-for-rbac --sdk-auth --role Contributor \
  --name "<display-name>"  --scopes /subscriptions/<your-subscription-id>
The JSON credentials created will look similar to the following, but with actual values for your client, subscription, and tenant:
{
  "clientId": "<your client id>",
  "clientSecret": "<your client secret>",
  "subscriptionId": "<your subscription id>",
  "tenantId": "<your tenant id>",
  "activeDirectoryEndpointUrl": "https://login.microsoftonline.com/",
  "resourceManagerEndpointUrl": "https://brazilus.management.azure.com",
  "activeDirectoryGraphResourceId": "https://graph.windows.net/",
  "sqlManagementEndpointUrl": "https://management.core.windows.net:8443/",
  "galleryEndpointUrl": "https://gallery.azure.com",
  "managementEndpointUrl": "https://management.core.windows.net"
}
Copy the output of the command into your clipboard, and continue to the next step.
Create a GitHub secret
GitHub provides a mechanism for creating encrypted secrets. The secrets that you create are available to use in GitHub Actions workflows. You're going to see how GitHub Actions can be used to automate the deployment of the app, in conjunction with Azure Bicep. Bicep is a domain-specific language (DSL) that uses a declarative syntax to deploy Azure resources. For more information, see What is Bicep. Using the output from the Create a service principal step, you'll need to create a GitHub secret named AZURE_CREDENTIALS with the JSON-formatted credentials.
Within the GitHub repository, select Settings > Secrets > Create a new secret. Enter the name AZURE_CREDENTIALS and paste the JSON credentials from the previous step into the Value field.
For more information, see GitHub: Encrypted Secrets.
Prepare for Azure deployment
The app will need to be packaged for deployment. In the Orleans.ShoppingCart.Silos project we define a Target element that runs after the Publish step. This will zip the publish directory into a silo.zip file:
<Target Name="ZipPublishOutput" AfterTargets="Publish">
    <Delete Files="$(ProjectDir)\..\silo.zip" />
    <ZipDirectory SourceDirectory="$(PublishDir)" DestinationFile="$(ProjectDir)\..\silo.zip" />
</Target>
There are many ways to deploy a .NET app to Azure Container Apps. In this tutorial, you use GitHub Actions, Azure Bicep, and the .NET and Azure CLIs. Consider the ./github/workflows/deploy.yml file in the root of the GitHub repository:
name: Deploy to Azure Container Apps

on:
  push:
    branches:
    - main

env:
  UNIQUE_APP_NAME: orleanscart
  SILO_IMAGE_NAME: orleanscart-silo
  AZURE_RESOURCE_GROUP_NAME: orleans-resourcegroup
  AZURE_RESOURCE_GROUP_LOCATION: eastus

jobs:
  build-and-deploy:
    runs-on: ubuntu-latest
    steps:
    - uses: actions/checkout@v3

    - name: Setup .NET 6.0
      uses: actions/setup-dotnet@v3
      with:
        dotnet-version: 6.0.x

    - name: .NET publish shopping cart app
      run: dotnet publish ./Silo/Orleans.ShoppingCart.Silo.csproj --configuration Release

    - name: Login to Azure
      uses: azure/login@v1
      with:
        creds: ${{ secrets.AZURE_CREDENTIALS }}

    - name: Flex ACR Bicep
      run: |
        az deployment group create \
          --resource-group ${{ env.AZURE_RESOURCE_GROUP_NAME }} \
          --template-file '.github/workflows/flex/acr.bicep' \
          --parameters location=${{ env.AZURE_RESOURCE_GROUP_LOCATION }}

    - name: Get ACR Login Server
      run: |
        ACR_NAME=$(az deployment group show -g ${{ env.AZURE_RESOURCE_GROUP_NAME }} -n acr \
        --query properties.outputs.acrName.value | tr -d '"')
        echo "ACR_NAME=$ACR_NAME" >> $GITHUB_ENV
        ACR_LOGIN_SERVER=$(az deployment group show -g ${{ env.AZURE_RESOURCE_GROUP_NAME }} -n acr \
        --query properties.outputs.acrLoginServer.value | tr -d '"')
        echo "ACR_LOGIN_SERVER=$ACR_LOGIN_SERVER" >> $GITHUB_ENV

    - name: Prepare Docker buildx
      uses: docker/setup-buildx-action@v1

    - name: Login to ACR
      run: |
        access_token=$(az account get-access-token --query accessToken -o tsv)
        refresh_token=$(curl https://${{ env.ACR_LOGIN_SERVER }}/oauth2/exchange -v \
        -d "grant_type=access_token&service=${{ env.ACR_LOGIN_SERVER }}&access_token=$access_token" | jq -r .refresh_token)
        # The null GUID 0000... tells the container registry that this is an ACR refresh token during the login flow
        docker login -u 00000000-0000-0000-0000-000000000000 \
        --password-stdin ${{ env.ACR_LOGIN_SERVER }} <<< "$refresh_token"

    - name: Build and push Silo image to registry
      uses: docker/build-push-action@v2
      with:
        push: true
        tags: ${{ env.ACR_LOGIN_SERVER }}/${{ env.SILO_IMAGE_NAME }}:${{ github.sha }}
        file: Silo/Dockerfile

    - name: Flex ACA Bicep
      run: |
        az deployment group create \
          --resource-group ${{ env.AZURE_RESOURCE_GROUP_NAME }} \
          --template-file '.github/workflows/flex/main.bicep' \
          --parameters location=${{ env.AZURE_RESOURCE_GROUP_LOCATION }} \
            appName=${{ env.UNIQUE_APP_NAME }} \
            acrName=${{ env.ACR_NAME }} \
            repositoryImage=${{ env.ACR_LOGIN_SERVER }}/${{ env.SILO_IMAGE_NAME }}:${{ github.sha }} \
          --debug

    - name: Get Container App URL
      run: |
        ACA_URL=$(az deployment group show -g ${{ env.AZURE_RESOURCE_GROUP_NAME }} \
        -n main --query properties.outputs.acaUrl.value | tr -d '"')
        echo $ACA_URL

    - name: Logout of Azure
      run: az logout
The preceding GitHub workflow will:
- Publish the shopping cart app as a zip file, using the dotnet publish command.
- Login to Azure using the credentials from the Create a service principal step.
- Evaluate the acr.bicep file and start a deployment group using az deployment group create.
- Get the Azure Container Registry (ACR) login server from the deployment group.
- Login to ACR using the repositories
AZURE_CREDENTIALSsecret. - Build and publish the silo image to the ACR.
- Evaluate the main.bicep file and start a deployment group using az deployment group create.
- Deploy the silo
- Logout of Azure.
The workflow is triggered by a push to the main branch. For more information, see GitHub Actions and .NET.
Tip
If you encounter issues when running the workflow, you might need to verify that the service principal has all the required provider namespaces registered. The following provider namespaces are required:
Microsoft.AppMicrosoft.ContainerRegistryMicrosoft.InsightsMicrosoft.OperationalInsightsMicrosoft.Storage
For more information, see Resolve errors for resource provider registration.
Azure imposes naming restrictions and conventions for resources. You need to update the deploy.yml file values for the following:
UNIQUE_APP_NAMESILO_IMAGE_NAMEAZURE_RESOURCE_GROUP_NAMEAZURE_RESOURCE_GROUP_LOCATION
Set these values to your unique app name and your Azure resource group name and location.
For more information, see Naming rules and restrictions for Azure resources.
Explore the Bicep templates
When the az deployment group create command is run, it will evaluate a given .bicep file reference. This file contains declarative information that details the Azure resources you want to deploy. One way to think of this step is that it provisions all of the resources for deployment.
Important
If you're using Visual Studio Code, the Bicep authoring experience is improved when using the Bicep Extension.
The first Bicep file that is evaluated is the acr.bicep file. This file contains the Azure Container Registry (ACR) login server resource details:
param location string = resourceGroup().location

resource acr 'Microsoft.ContainerRegistry/registries@2021-09-01' = {
  name: toLower('${uniqueString(resourceGroup().id)}acr')
  location: location
  sku: {
    name: 'Basic'
  }
  properties: {
    adminUserEnabled: true
  }
}

output acrLoginServer string = acr.properties.loginServer
output acrName string = acr.name
This bicep file outputs the ACR login server and corresponding name. The next Bicep file encountered contains more than just a single resource. Consider the main.bicep file comprised primarily of delegating module definitions:
param appName string
param acrName string
param repositoryImage string
param location string = resourceGroup().location

resource acr 'Microsoft.ContainerRegistry/registries@2021-09-01' existing = {
  name: acrName
}

module env 'environment.bicep' = {
  name: 'containerAppEnvironment'
  params: {
    location: location
    operationalInsightsName: '${appName}-logs'
    appInsightsName: '${appName}-insights'
  }
}

var envVars = [
  {
    name: 'APPINSIGHTS_INSTRUMENTATIONKEY'
    value: env.outputs.appInsightsInstrumentationKey
  }
  {
    name: 'APPLICATIONINSIGHTS_CONNECTION_STRING'
    value: env.outputs.appInsightsConnectionString
  }
  {
    name: 'ORLEANS_AZURE_STORAGE_CONNECTION_STRING'
    value: storageModule.outputs.connectionString
  }
  {
    name: 'ASPNETCORE_FORWARDEDHEADERS_ENABLED'
    value: 'true'
  }
]

module storageModule 'storage.bicep' = {
  name: 'orleansStorageModule'
  params: {
    name: '${appName}storage'
    location: location
  }
}

module siloModule 'container-app.bicep' = {
  name: 'orleansSiloModule'
  params: {
    appName: appName
    location: location
    containerAppEnvironmentId: env.outputs.id
    repositoryImage: repositoryImage
    registry: acr.properties.loginServer
    registryPassword: acr.listCredentials().passwords[0].value
    registryUsername: acr.listCredentials().username
    envVars: envVars
  }
}

output acaUrl string = siloModule.outputs.acaUrl
The preceding Bicep file:
- References an
existingACR resource, for more information, see Azure Bicep: Existing resources. - Defines a
module envthat delegates out to the environment.bicep definition file. - Defines a
module storageModulethat delegates out to the storage.bicep definition file. - Declares several shared
envVarsthat are used by the silo module. - Defines a
module siloModulethat delegates out to the container-app.bicep definition file. - Outputs the ACA URL (this could potentially be used to update an existing AAD B2C app registration's redirect URI).
The main.bicep delegates out to several other Bicep files. The first is the environment.bicep file:
param operationalInsightsName string
param appInsightsName string
param location string

resource appInsights 'Microsoft.Insights/components@2020-02-02' = {
  name: appInsightsName
  location: location
  kind: 'web'
  properties: {
    Application_Type: 'web'
    WorkspaceResourceId: logs.id
  }
}

resource logs 'Microsoft.OperationalInsights/workspaces@2021-06-01' = {
  name: operationalInsightsName
  location: location
  properties: {
    retentionInDays: 30
    features: {
      searchVersion: 1
    }
    sku: {
      name: 'PerGB2018'
    }
  }
}

resource env 'Microsoft.App/managedEnvironments@2022-03-01' = {
  name: '${resourceGroup().name}env'
  location: location
  properties: {
    appLogsConfiguration: {
      destination: 'log-analytics'
      logAnalyticsConfiguration: {
        customerId: logs.properties.customerId
        sharedKey: logs.listKeys().primarySharedKey
      }
    }
  }
}

output id string = env.id
output appInsightsInstrumentationKey string = appInsights.properties.InstrumentationKey
output appInsightsConnectionString string = appInsights.properties.ConnectionString
This bicep file defines the Azure Log Analytics and Application Insights resources. The appInsights resource is a web type, and the logs resource is a PerGB2018 type. Both the appInsights resource and the logs resource are provisioned in the resource group's location. The appInsights resource is linked to the logs resource via the WorkspaceResourceId property. There are three outputs defined in this bicep, used later by the Container Apps module. Next, let's look at the storage.bicep file:
param name string
param location string

resource storage 'Microsoft.Storage/storageAccounts@2021-08-01' = {
  name: name
  location: location
  kind: 'StorageV2'
  sku: {
    name: 'Standard_LRS'
  }
}

var key = listKeys(storage.name, storage.apiVersion).keys[0].value
var protocol = 'DefaultEndpointsProtocol=https'
var accountBits = 'AccountName=${storage.name};AccountKey=${key}'
var endpointSuffix = 'EndpointSuffix=${environment().suffixes.storage}'

output connectionString string = '${protocol};${accountBits};${endpointSuffix}'
The preceding Bicep file defines the following:
- Two parameters for the resource group name and the app name.
- The
resource storagedefinition for the storage account. - A single
outputthat constructs the connection string for the storage account.
The last Bicep file is the container-app.bicep file:
param appName string
param location string
param containerAppEnvironmentId string
param repositoryImage string = 'mcr.microsoft.com/azuredocs/containerapps-helloworld:latest'
param envVars array = []
param registry string
param registryUsername string
@secure()
param registryPassword string

resource containerApp 'Microsoft.App/containerApps@2022-03-01' = {
  name: appName
  location: location
  properties: {
    managedEnvironmentId: containerAppEnvironmentId
    configuration: {
      activeRevisionsMode: 'multiple'
      secrets: [
        {
          name: 'container-registry-password'
          value: registryPassword
        }
      ]
      registries: [
        {
          server: registry
          username: registryUsername
          passwordSecretRef: 'container-registry-password'
        }
      ]
      ingress: {
        external: true
        targetPort: 80
      }
    }
    template: {
      revisionSuffix: uniqueString(repositoryImage, appName)
      containers: [
        {
          image: repositoryImage
          name: appName
          env: envVars
        }
      ]
      scale: {
        minReplicas: 1
        maxReplicas: 1
      }
    }
  }
}

output acaUrl string = containerApp.properties.configuration.ingress.fqdn
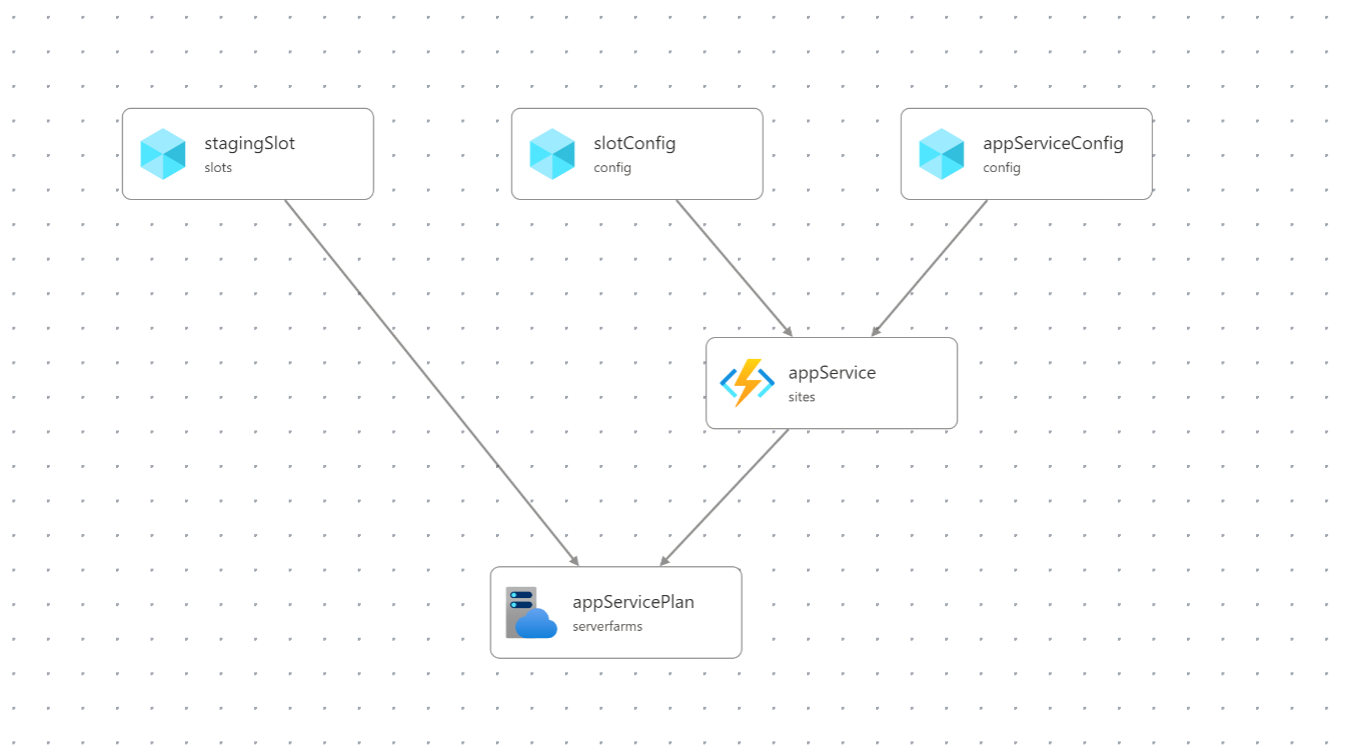
The aforementioned Visual Studio Code extension for Bicep includes a visualizer. All of these Bicep files are visualized as follows:
Summary
As you update the source code and push changes to the main branch of the repository, the deploy.yml workflow will run. It provisions the Azure resources defined in the Bicep files and deploys the application. Revisions are automatically registered in your Azure Container Registry.
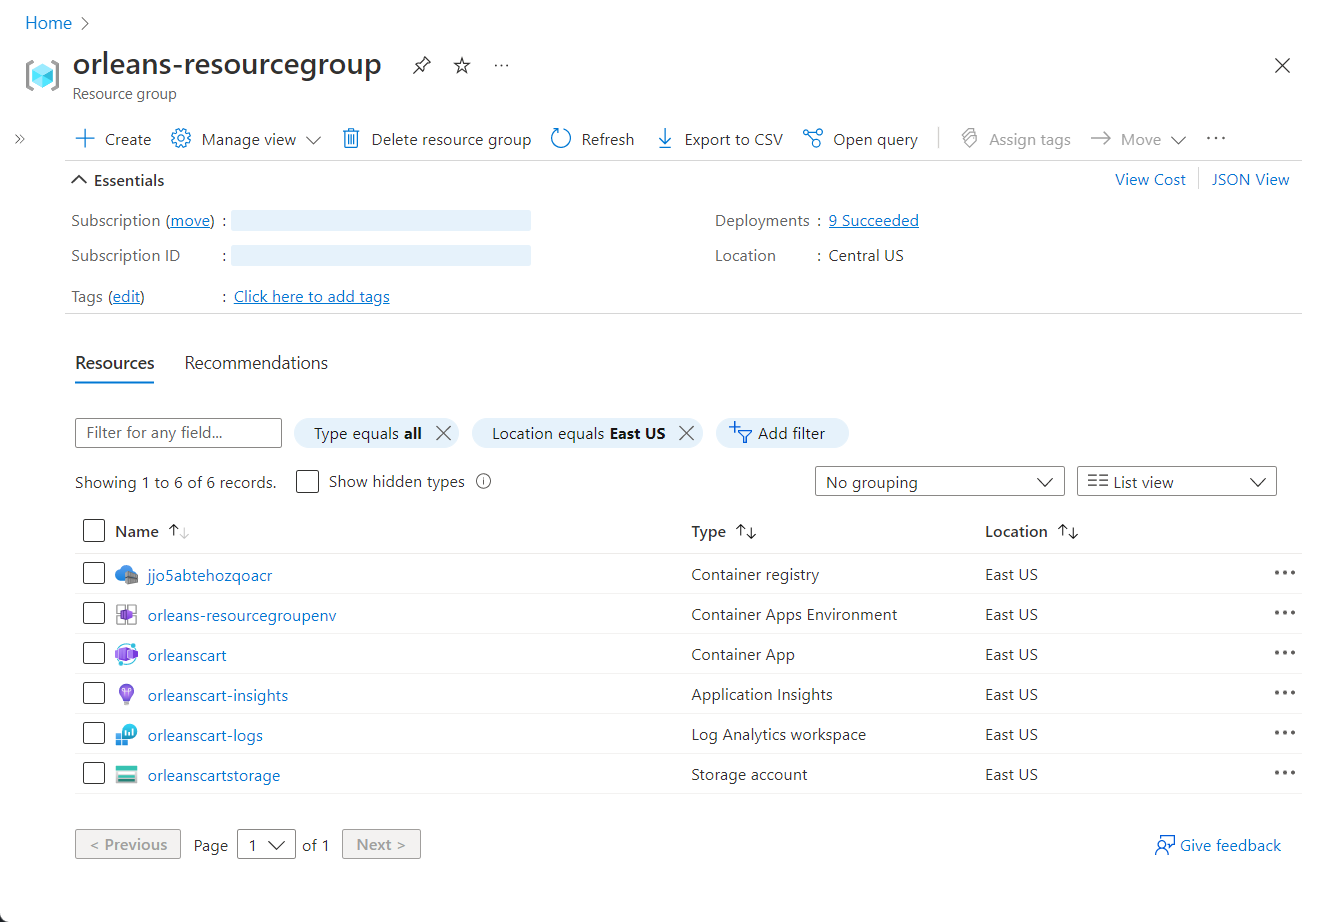
In addition to the visualizer from the Bicep extension, the Azure portal resource group page would look similar to the following example after provisioning and deploying the application:


