Authenticate Azure-hosted .NET apps to Azure resources using a system-assigned managed identity
The recommended approach to authenticate an Azure-hosted app to other Azure resources is to use a managed identity. This approach is supported for most Azure services, including apps hosted on Azure App Service, Azure Container Apps, and Azure Virtual Machines. Discover more about different authentication techniques and approaches on the authentication overview page. In the sections ahead, you'll learn:
- Essential managed identity concepts
- How to create a system-assigned managed identity for your app
- How to assign roles to the system-assigned managed identity
- How to authenticate using the system-assigned managed identity from your app code
Essential managed identity concepts
A managed identity enables your app to securely connect to other Azure resources without the use of secret keys or other application secrets. Internally, Azure tracks the identity and which resources it's allowed to connect to. Azure uses this information to automatically obtain Microsoft Entra tokens for the app to allow it to connect to other Azure resources.
There are two types of managed identities to consider when configuring your hosted app:
- System-assigned managed identities are enabled directly on an Azure resource and are tied to its life cycle. When the resource is deleted, Azure automatically deletes the identity for you. System-assigned identities provide a minimalistic approach to using managed identities.
- User-assigned managed identities are created as standalone Azure resources and offer greater flexibility and capabilities. They're ideal for solutions involving multiple Azure resources that need to share the same identity and permissions. For example, if multiple virtual machines need to access the same set of Azure resources, a user-assigned managed identity provides reusability and optimized management.
Tip
Learn more about selecting and managing system-assigned managed identities and user-assigned managed identities in the Managed identity best practice recommendations article.
The sections ahead describe the steps to enable and use a system-assigned managed identity for an Azure-hosted app. If you need to use a user-assigned managed identity, visit the user-assigned managed identities article for more information.
Enable a system-assigned managed identity on the Azure hosting resource
To get started using a system-assigned managed identity with your app, enable the identity on the Azure resource hosting your app, such as an Azure App Service, Azure Container App, or Azure Virtual Machine.
You can enable a system-assigned managed identity for an Azure resource using either the Azure portal or the Azure CLI.
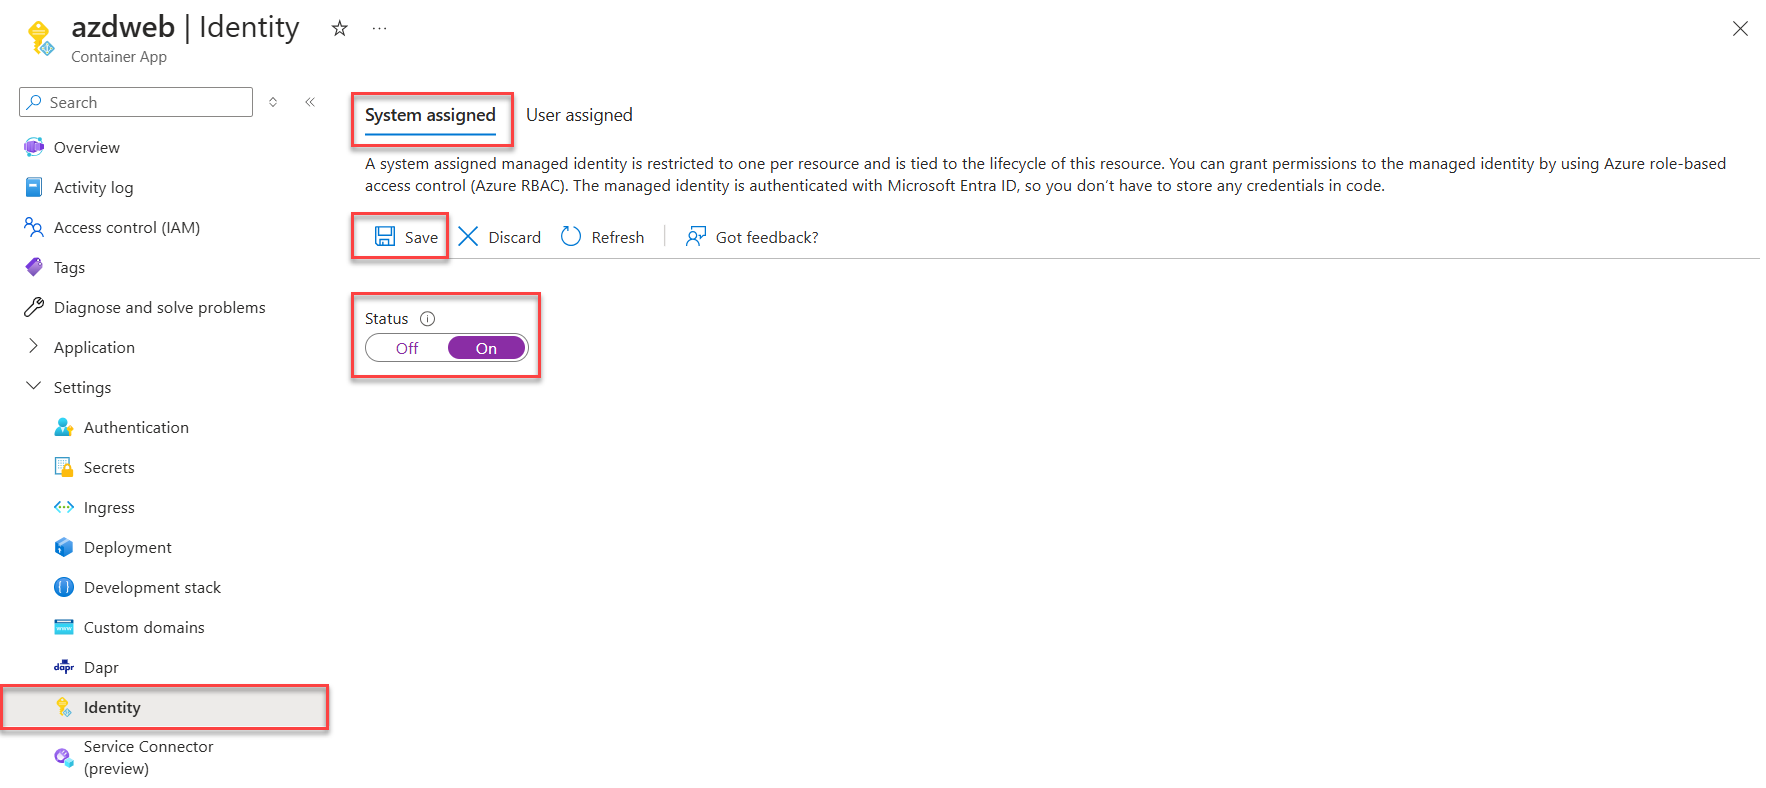
In the Azure portal, navigate to the resource that hosts your application code, such as an Azure App Service or Azure Container App instance.
From the resource's Overview page, expand Settings and select Identity from the navigation.
On the Identity page, toggle the Status slider to On.
Select Save to apply your changes.
Assign roles to the managed identity
Next, determine which roles your app needs and assign those roles to the managed identity. You can assign roles to a managed identity at the following scopes:
- Resource: The assigned roles only apply to that specific resource.
- Resource group: The assigned roles apply to all resources contained in the resource group.
- Subscription: The assigned roles apply to all resources contained in the subscription.
The following example shows how to assign roles at the resource group scope, since many apps manage all their related Azure resources using a single resource group.
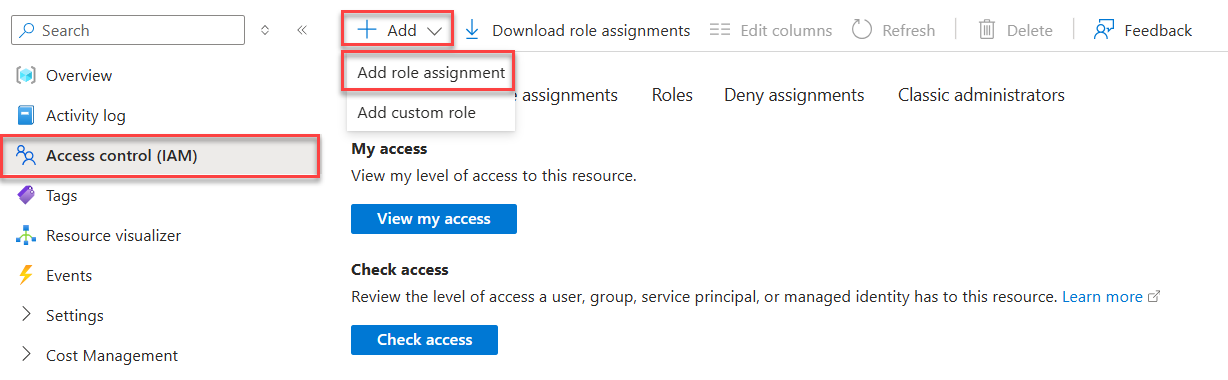
Navigate to the Overview page of the resource group that contains the app with the system-assigned managed identity.
Select Access control (IAM) on the left navigation.
On the Access control (IAM) page, select + Add on the top menu and then choose Add role assignment to navigate to the Add role assignment page.
The Add role assignment page presents a tabbed, multi-step workflow to assign roles to identities. On the initial Role tab, use the search box at the top to locate the role you want to assign to the identity.
Select the role from the results and then choose Next to move to the Members tab.
For the Assign access to option, select Managed identity.
For the Members option, choose + Select members to open the Select managed identities panel.
On the Select managed identities panel, use the Subscription and Managed identity dropdowns to filter the search results for your identities. Use the Select search box to locate the system-identity you enabled for the Azure resource hosting your app.
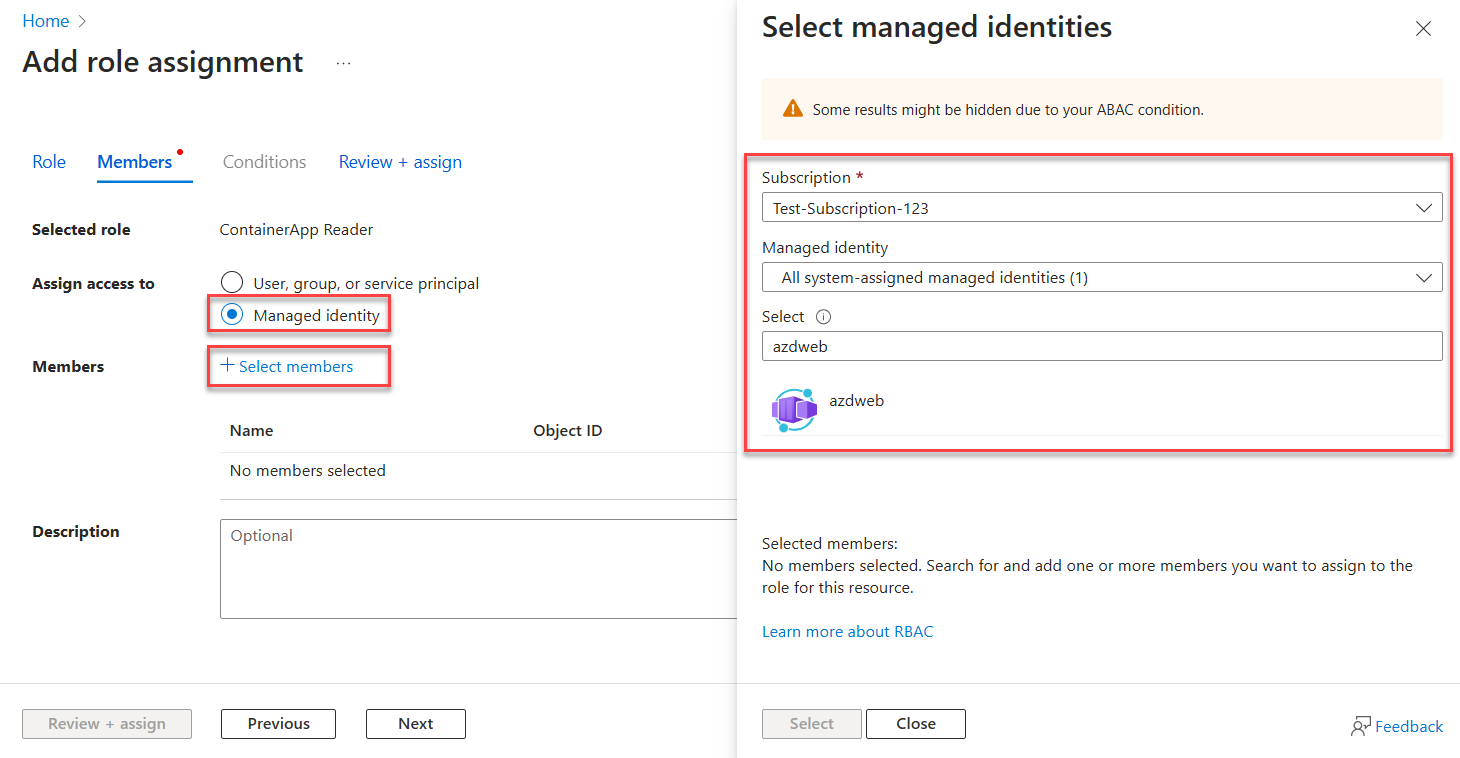
Select the identity and choose Select at the bottom of the panel to continue.
Select Review + assign at the bottom of the page.
On the final Review + assign tab, select Review + assign to complete the workflow.
Authenticate to Azure services from your app
The Azure Identity library provides various credentials—implementations of TokenCredential adapted to supporting different scenarios and Microsoft Entra authentication flows. Since managed identity is unavailable when running locally, the steps ahead demonstrate which credential to use in which scenario:
- Local dev environment: During local development only, use a class called DefaultAzureCredential for an opinionated, preconfigured chain of credentials.
DefaultAzureCredentialdiscovers user credentials from your local tooling or IDE, such as the Azure CLI or Visual Studio. It also provides flexibility and convenience for retries, wait times for responses, and support for multiple authentication options. Visit the Authenticate to Azure services during local development article to learn more. - Azure-hosted apps: When your app is running in Azure, use ManagedIdentityCredential to safely discover the managed identity configured for your app. Specifying this exact type of credential prevents other available credentials from being picked up unexpectedly.
Implement the code
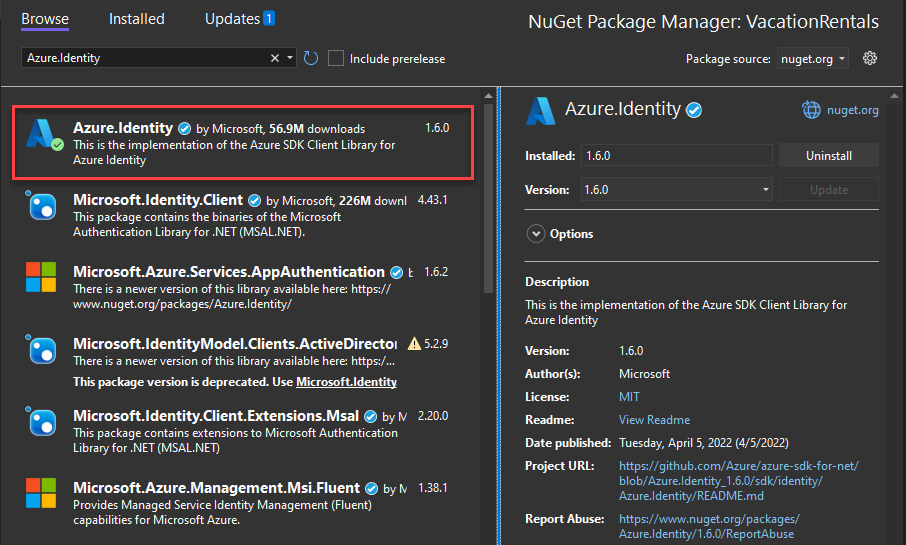
Add the Azure.Identity package. In an ASP.NET Core project, also install the Microsoft.Extensions.Azure package:
In a terminal of your choice, navigate to the application project directory and run the following commands:
dotnet add package Azure.Identity
dotnet add package Microsoft.Extensions.Azure
Azure services are accessed using specialized client classes from the various Azure SDK client libraries. These classes and your own custom services should be registered for dependency injection so they can be used throughout your app. In Program.cs, complete the following steps to configure a client class for dependency injection and token-based authentication:
- Include the
Azure.IdentityandMicrosoft.Extensions.Azurenamespaces viausingdirectives. - Register the Azure service client using the corresponding
Add-prefixed extension method. - Pass an appropriate
TokenCredentialinstance to theUseCredentialmethod:- Use
DefaultAzureCredentialwhen your app is running locally. - Use
ManagedIdentityCredentialwhen your app is running in Azure.
- Use
builder.Services.AddAzureClients(clientBuilder =>
{
    clientBuilder.AddBlobServiceClient(
        new Uri("https://<account-name>.blob.core.windows.net"));

    TokenCredential credential = null;

    if (builder.Environment.IsProduction())
    {
        // Managed identity token credential discovered when running in Azure environments
        credential = new ManagedIdentityCredential();
    }
    else
    {
        // Running locally on dev machine - DO NOT use in production or outside of local dev
        credential = new DefaultAzureCredential();
    }

    clientBuilder.UseCredential(credential);
});
An alternative to the UseCredential method is to provide the credential to the service client directly:
TokenCredential credential = null;

if (builder.Environment.IsProduction() || builder.Environment.IsStaging())
{
    // Managed identity token credential discovered when running in Azure environments
    credential = new ManagedIdentityCredential();
}
else
{
    // Running locally on dev machine - DO NOT use in production or outside of local dev
    credential = new DefaultAzureCredential();
}

builder.Services.AddSingleton<BlobServiceClient>(_ =>
    new BlobServiceClient(
        new Uri("https://<account-name>.blob.core.windows.net"), credential));
The preceding code behaves differently depending on the environment where it's running:
- On your local development workstation,
DefaultAzureCredentiallooks in the environment variables for an application service principal or at locally installed developer tools, such as Visual Studio, for a set of developer credentials. - When deployed to Azure,
ManagedIdentityCredentialdiscovers your managed identity configurations to authenticate to other services automatically.