Custom resource commands in .NET Aspire
Each resource in the .NET Aspire app model is represented as an IResource and when added to the distributed application builder, it's the generic-type parameter of the IResourceBuilder<T> interface. You use the resource builder API to chain calls, configuring the underlying resource, and in some situations, you might want to add custom commands to the resource. Some common scenario for creating a custom command might be running database migrations or seeding/resetting a database. In this article, you learn how to add a custom command to a Redis resource that clears the cache.
Important
These .NET Aspire dashboard commands are only available when running the dashboard locally. They're not available when running the dashboard in Azure Container Apps.
Add custom commands to a resource
Start by creating a new .NET Aspire Starter App from the available templates. To create the solution from this template, follow the Quickstart: Build your first .NET Aspire solution. After creating this solution, add a new class named RedisResourceBuilderExtensions.cs to the app host project. Replace the contents of the file with the following code:
using Microsoft.Extensions.DependencyInjection;
using Microsoft.Extensions.Diagnostics.HealthChecks;
using Microsoft.Extensions.Logging;
using StackExchange.Redis;

namespace Aspire.Hosting;

internal static class RedisResourceBuilderExtensions
{
    public static IResourceBuilder<RedisResource> WithClearCommand(
        this IResourceBuilder<RedisResource> builder)
    {
        builder.WithCommand(
            name: "clear-cache",
            displayName: "Clear Cache",
            executeCommand: context => OnRunClearCacheCommandAsync(builder, context),
            updateState: OnUpdateResourceState,
            iconName: "AnimalRabbitOff",
            iconVariant: IconVariant.Filled);

        return builder;
    }

    private static async Task<ExecuteCommandResult> OnRunClearCacheCommandAsync(
        IResourceBuilder<RedisResource> builder,
        ExecuteCommandContext context)
    {
        var connectionString = await builder.Resource.GetConnectionStringAsync() ??
            throw new InvalidOperationException(
                $"Unable to get the '{context.ResourceName}' connection string.");

        await using var connection = ConnectionMultiplexer.Connect(connectionString);

        var database = connection.GetDatabase();

        await database.ExecuteAsync("FLUSHALL");

        return CommandResults.Success();
    }

    private static ResourceCommandState OnUpdateResourceState(
        UpdateCommandStateContext context)
    {
        var logger = context.ServiceProvider.GetRequiredService<ILogger<Program>>();

        if (logger.IsEnabled(LogLevel.Information))
        {
            logger.LogInformation(
                "Updating resource state: {ResourceSnapshot}",
                context.ResourceSnapshot);
        }

        return context.ResourceSnapshot.HealthStatus is HealthStatus.Healthy
            ? ResourceCommandState.Enabled
            : ResourceCommandState.Disabled;
    }
}
The preceding code:
- Shares the Aspire.Hosting namespace so that it's visible to the app host project.
- Is a
static classso that it can contain extension methods. - It defines a single extension method named
WithClearCommand, extending theIResourceBuilder<RedisResource>interface. - The
WithClearCommandmethod registers a command namedclear-cachethat clears the cache of the Redis resource. - The
WithClearCommandmethod returns theIResourceBuilder<RedisResource>instance to allow chaining.
The WithCommand API adds the appropriate annotations to the resource, which are consumed in the .NET Aspire dashboard. The dashboard uses these annotations to render the command in the UI. Before getting too far into those details, let's ensure that you first understand the parameters of the WithCommand method:
name: The name of the command to invoke.displayName: The name of the command to display in the dashboard.executeCommand: TheFunc<ExecuteCommandContext, Task<ExecuteCommandResult>>to run when the command is invoked, which is where the command logic is implemented.updateState: TheFunc<UpdateCommandStateContext, ResourceCommandState>callback is invoked to determine the "enabled" state of the command, which is used to enable or disable the command in the dashboard.iconName: The name of the icon to display in the dashboard. The icon is optional, but when you do provide it, it should be a valid Fluent UI Blazor icon name.iconVariant: The variant of the icon to display in the dashboard, valid options areRegular(default) orFilled.
Execute command logic
The executeCommand delegate is where the command logic is implemented. This parameter is defined as a Func<ExecuteCommandContext, Task<ExecuteCommandResult>>. The ExecuteCommandContext provides the following properties:
ExecuteCommandContext.ServiceProvider: TheIServiceProviderinstance that's used to resolve services.ExecuteCommandContext.ResourceName: The name of the resource instance that the command is being executed on.ExecuteCommandContext.CancellationToken: The CancellationToken that's used to cancel the command execution.
In the preceding example, the executeCommand delegate is implemented as an async method that clears the cache of the Redis resource. It delegates out to a private class-scoped function named OnRunClearCacheCommandAsync to perform the actual cache clearing. Consider the following code:
private static async Task<ExecuteCommandResult> OnRunClearCacheCommandAsync(
    IResourceBuilder<RedisResource> builder,
    ExecuteCommandContext context)
{
    var connectionString = await builder.Resource.GetConnectionStringAsync() ??
        throw new InvalidOperationException(
            $"Unable to get the '{context.ResourceName}' connection string.");

    await using var connection = ConnectionMultiplexer.Connect(connectionString);

    var database = connection.GetDatabase();

    await database.ExecuteAsync("FLUSHALL");

    return CommandResults.Success();
}
The preceding code:
- Retrieves the connection string from the Redis resource.
- Connects to the Redis instance.
- Gets the database instance.
- Executes the
FLUSHALLcommand to clear the cache. - Returns a
CommandResults.Success()instance to indicate that the command was successful.
Update command state logic
The updateState delegate is where the command state is determined. This parameter is defined as a Func<UpdateCommandStateContext, ResourceCommandState>. The UpdateCommandStateContext provides the following properties:
UpdateCommandStateContext.ServiceProvider: TheIServiceProviderinstance that's used to resolve services.UpdateCommandStateContext.ResourceSnapshot: The snapshot of the resource instance that the command is being executed on.
The immutable snapshot is an instance of CustomResourceSnapshot, which exposes all sorts of valuable details about the resource instance. Consider the following code:
private static ResourceCommandState OnUpdateResourceState(
    UpdateCommandStateContext context)
{
    var logger = context.ServiceProvider.GetRequiredService<ILogger<Program>>();

    if (logger.IsEnabled(LogLevel.Information))
    {
        logger.LogInformation(
            "Updating resource state: {ResourceSnapshot}",
            context.ResourceSnapshot);
    }

    return context.ResourceSnapshot.HealthStatus is HealthStatus.Healthy
        ? ResourceCommandState.Enabled
        : ResourceCommandState.Disabled;
}
The preceding code:
- Retrieves the logger instance from the service provider.
- Logs the resource snapshot details.
- Returns
ResourceCommandState.Enabledif the resource is healthy; otherwise, it returnsResourceCommandState.Disabled.
Test the custom command
To test the custom command, update your app host project's Program.cs file to include the following code:
var builder = DistributedApplication.CreateBuilder(args);

var cache = builder.AddRedis("cache")
                   .WithClearCommand();

var apiService = builder.AddProject<Projects.AspireApp_ApiService>("apiservice");

builder.AddProject<Projects.AspireApp_Web>("webfrontend")
    .WithExternalHttpEndpoints()
    .WithReference(cache)
    .WaitFor(cache)
    .WithReference(apiService)
    .WaitFor(apiService);

builder.Build().Run();
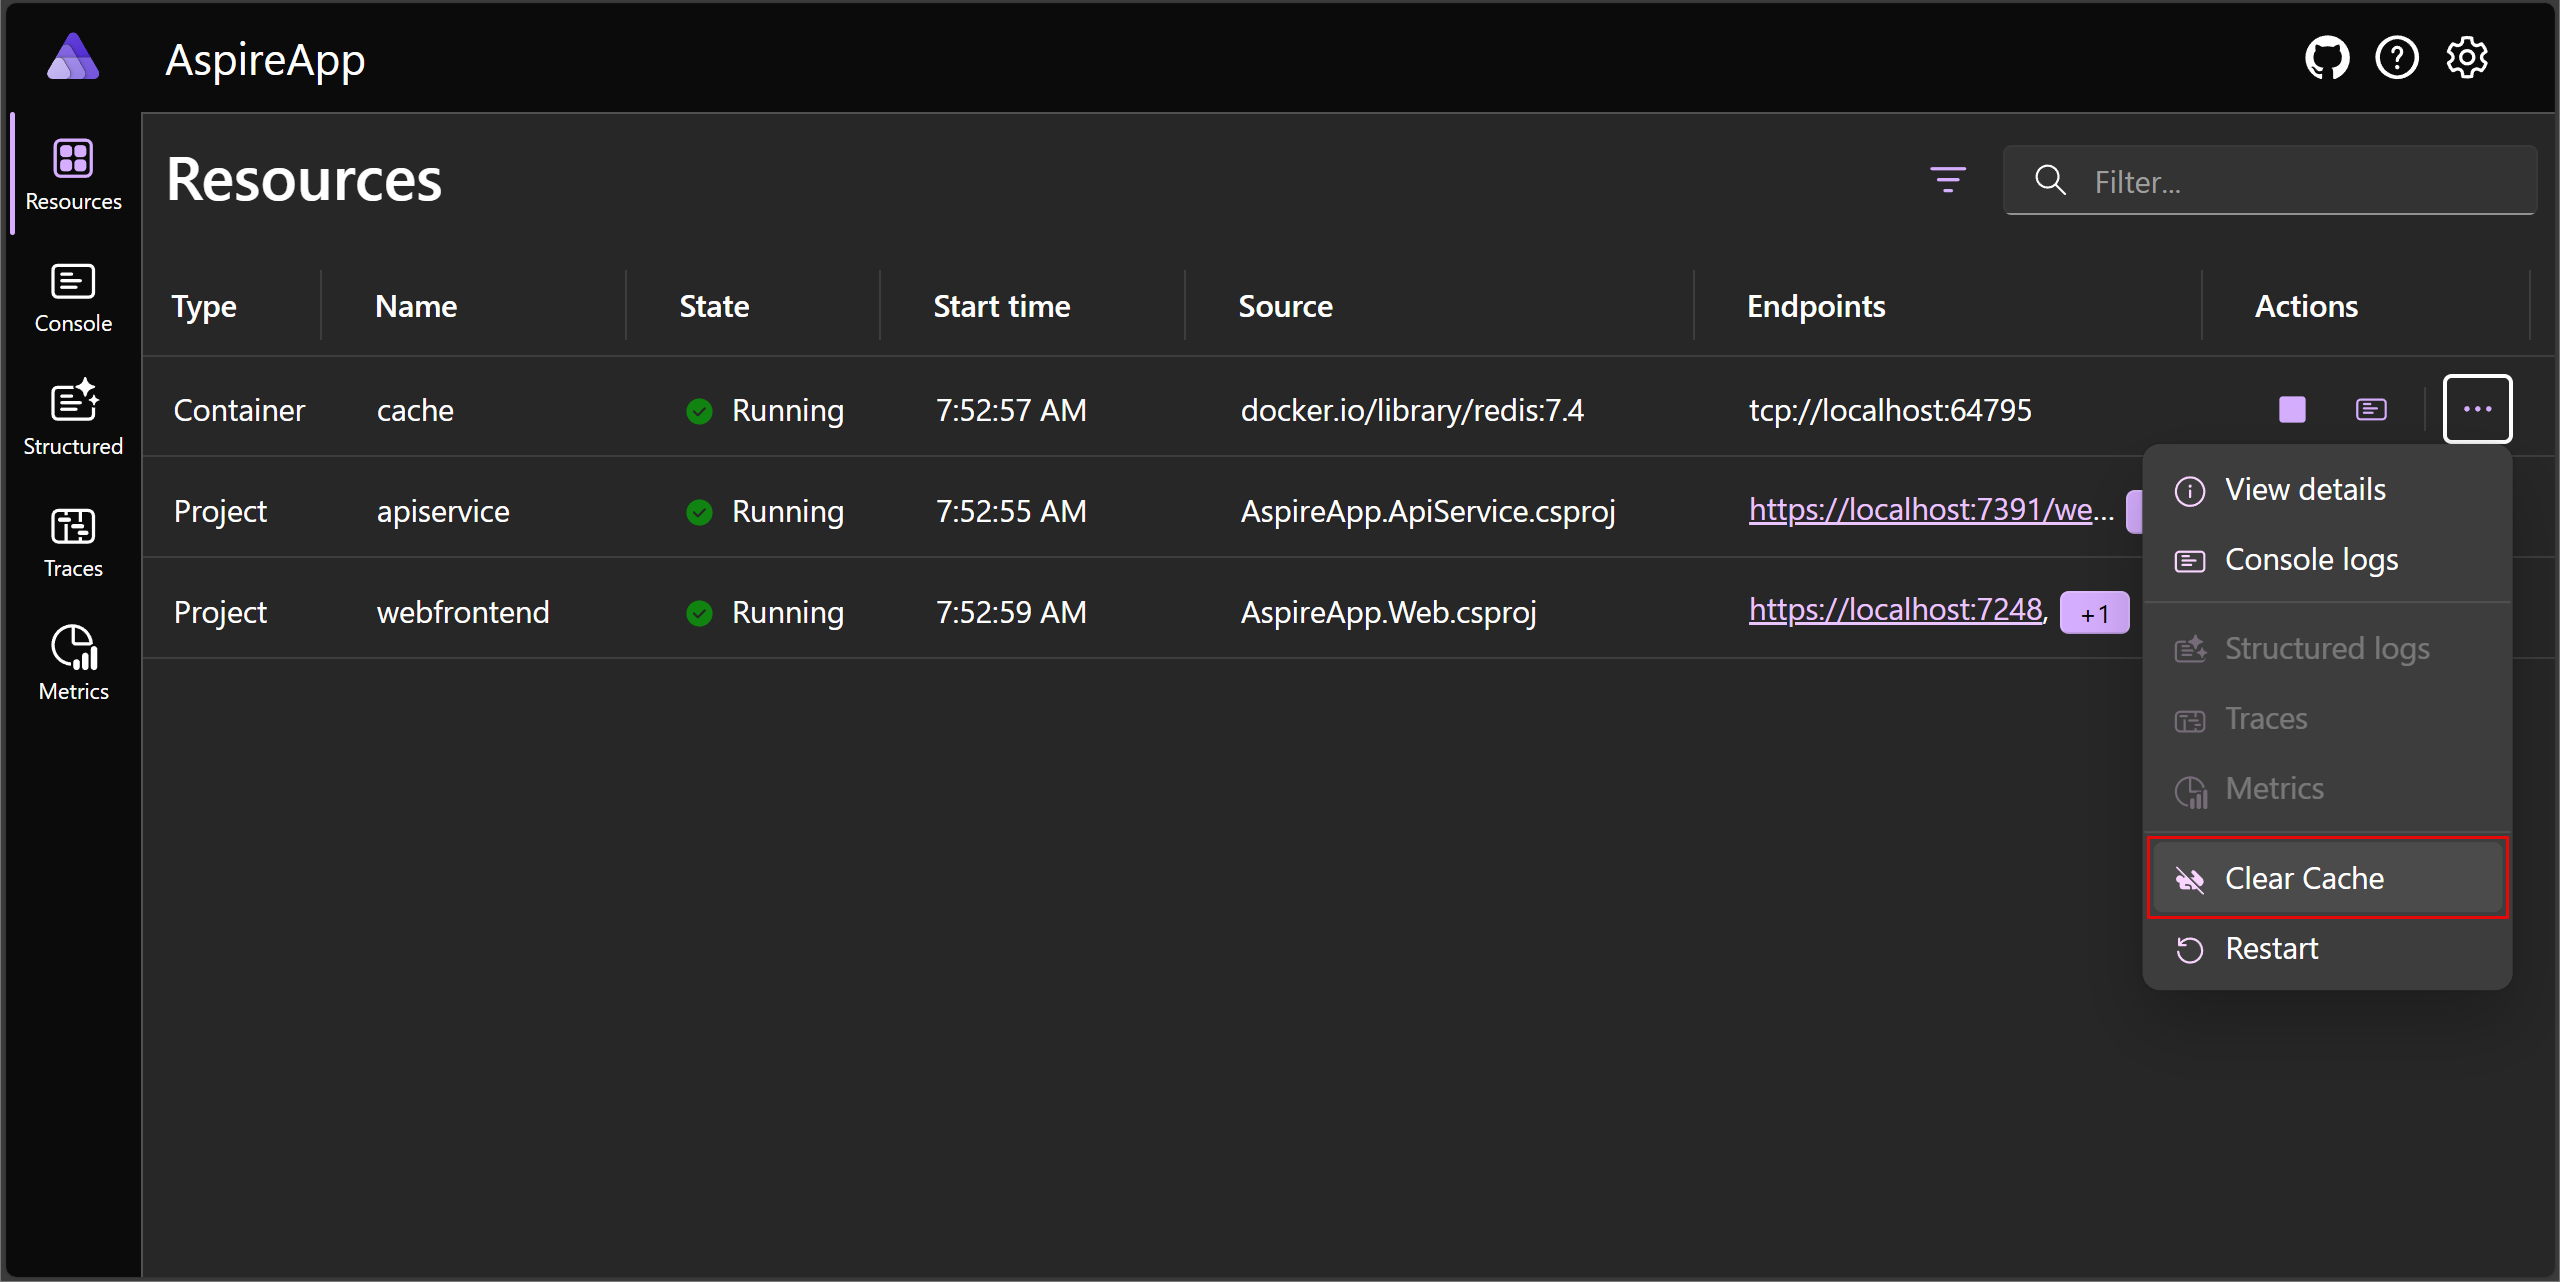
The preceding code calls the WithClearCommand extension method to add the custom command to the Redis resource. Run the app and navigate to the .NET Aspire dashboard. You should see the custom command listed under the Redis resource. On the Resources page of the dashboard, select the ellipsis button under the Actions column:
The preceding image shows the Clear cache command that was added to the Redis resource. The icon displays as a rabbit crosses out to indicate that the speed of the dependant resource is being cleared.
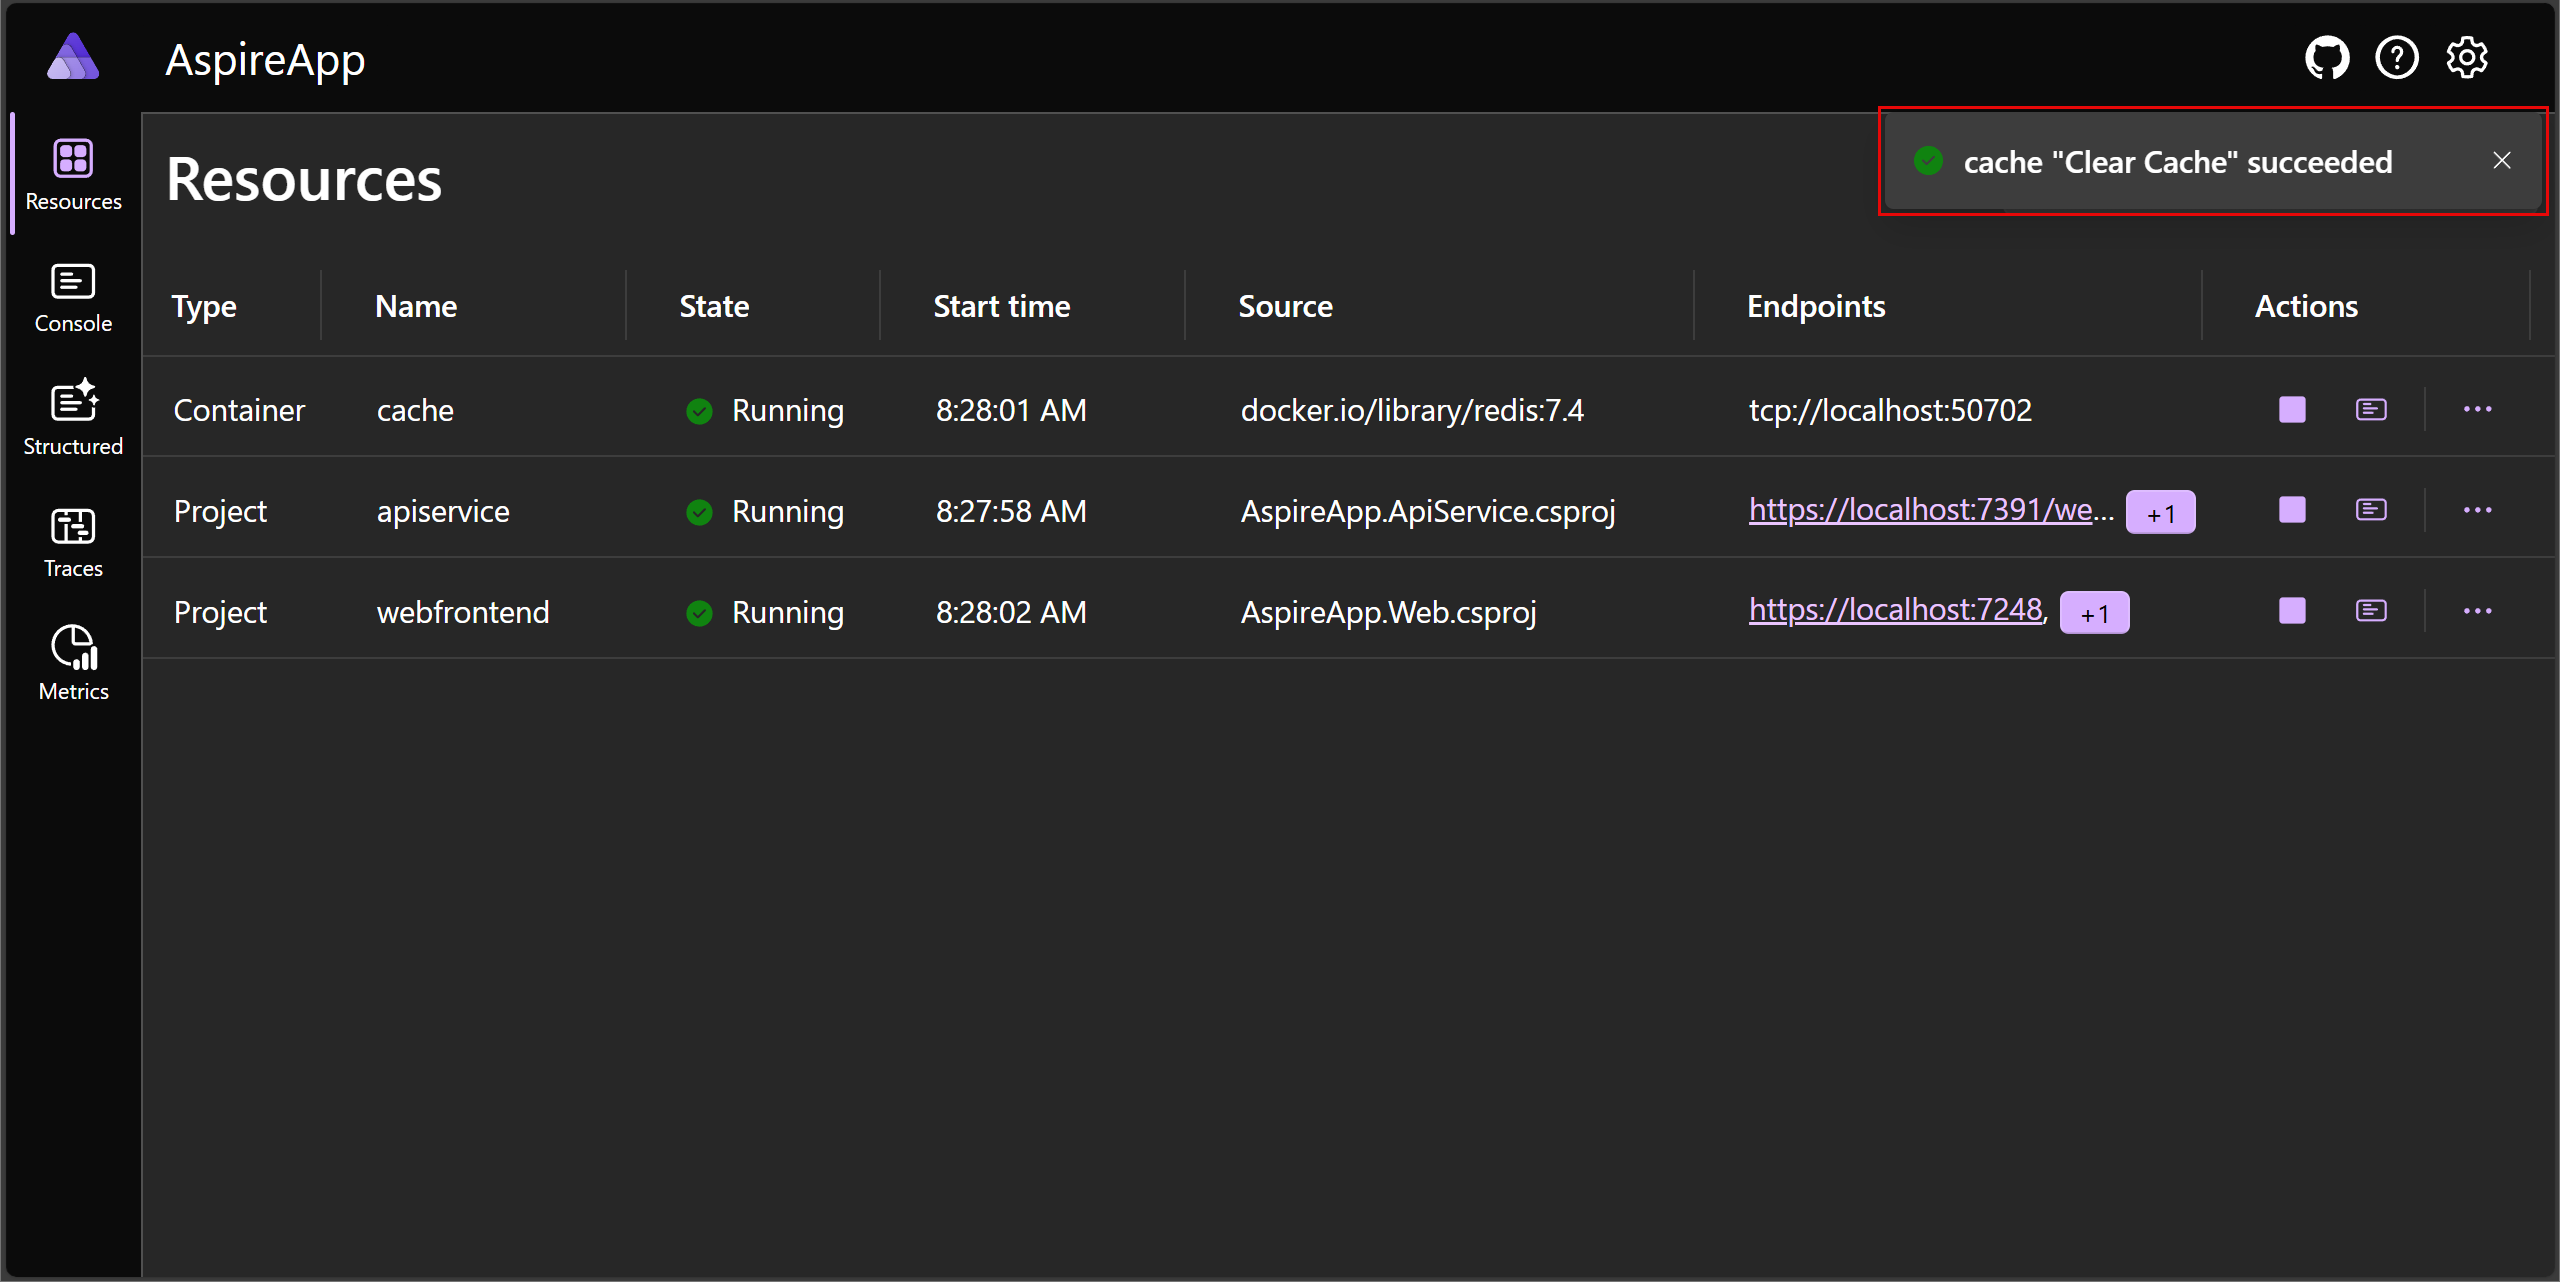
Select the Clear cache command to clear the cache of the Redis resource. The command should execute successfully, and the cache should be cleared:
See also
.NET Aspire


