Quickstart: Configure dedicated SQL pool workload isolation using a workload group in the Azure portal
In this quickstart, you will configure workload isolation by creating a workload group for reserving resources. For purposes of this tutorial, we will create the workload group for data loading called DataLoads. The workload group will reserve 20% of the system resources. With 20% isolation for data loads, they are guaranteed resources that allow them to hit SLAs. After creating the workload group, create a workload classifier to assign queries to this workload group.
If you don't have an Azure subscription, create a free Azure account before you begin.
Sign in to the Azure portal
Sign in to the Azure portal.
Note
Creating a dedicated SQL pool instance in Azure Synapse Analytics may result in a new billable service. For more information, see Azure Synapse Analytics pricing.
Prerequisites
This quickstart assumes you already have a dedicated SQL pool instance in Synapse SQL and that you have CONTROL DATABASE permissions. If you need to create one, use Quickstart: Create dedicated SQL pool - portal to create a data warehouse called mySampleDataWarehouse.
Important
Your dedicated SQL pool must be online to configure workload management.
Configure workload isolation
Dedicated SQL pool resources can be isolated and reserved for specific workloads by creating workload groups. For more information on how workload groups help you achieve managing your workload, see Workload Isolation. The Create and Connect - portal quickstart created mySampleDataWarehouse and initialized it at DW100c. The following steps create a workload group in mySampleDataWarehouse.
To create a workload group with 20 percent isolation:
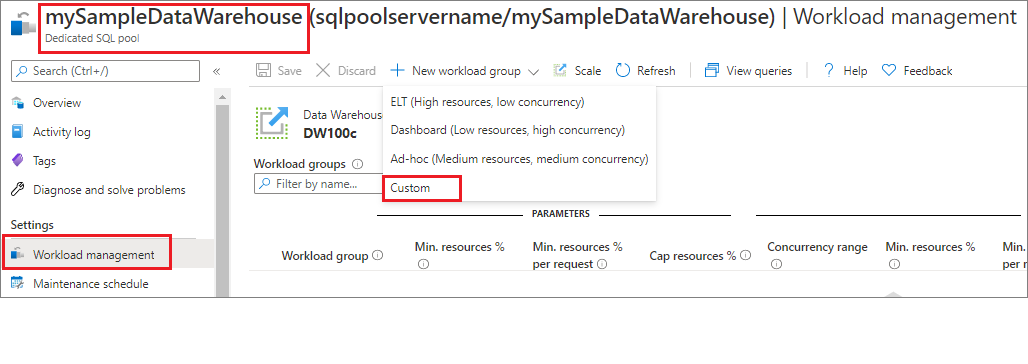
Navigate to your
mySampleDataWarehousededicated SQL pool page.Select Workload management.
Select New workload group.
Select Custom.

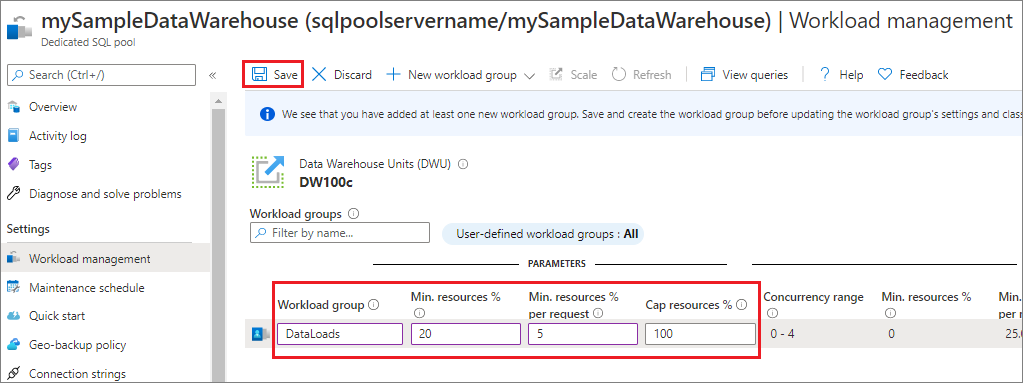
Enter
DataLoadsfor the Workload group.Enter
20for Min. resources %.Enter
5for Min. resources % per request.Enter
100for Cap resources %.Enter Save.

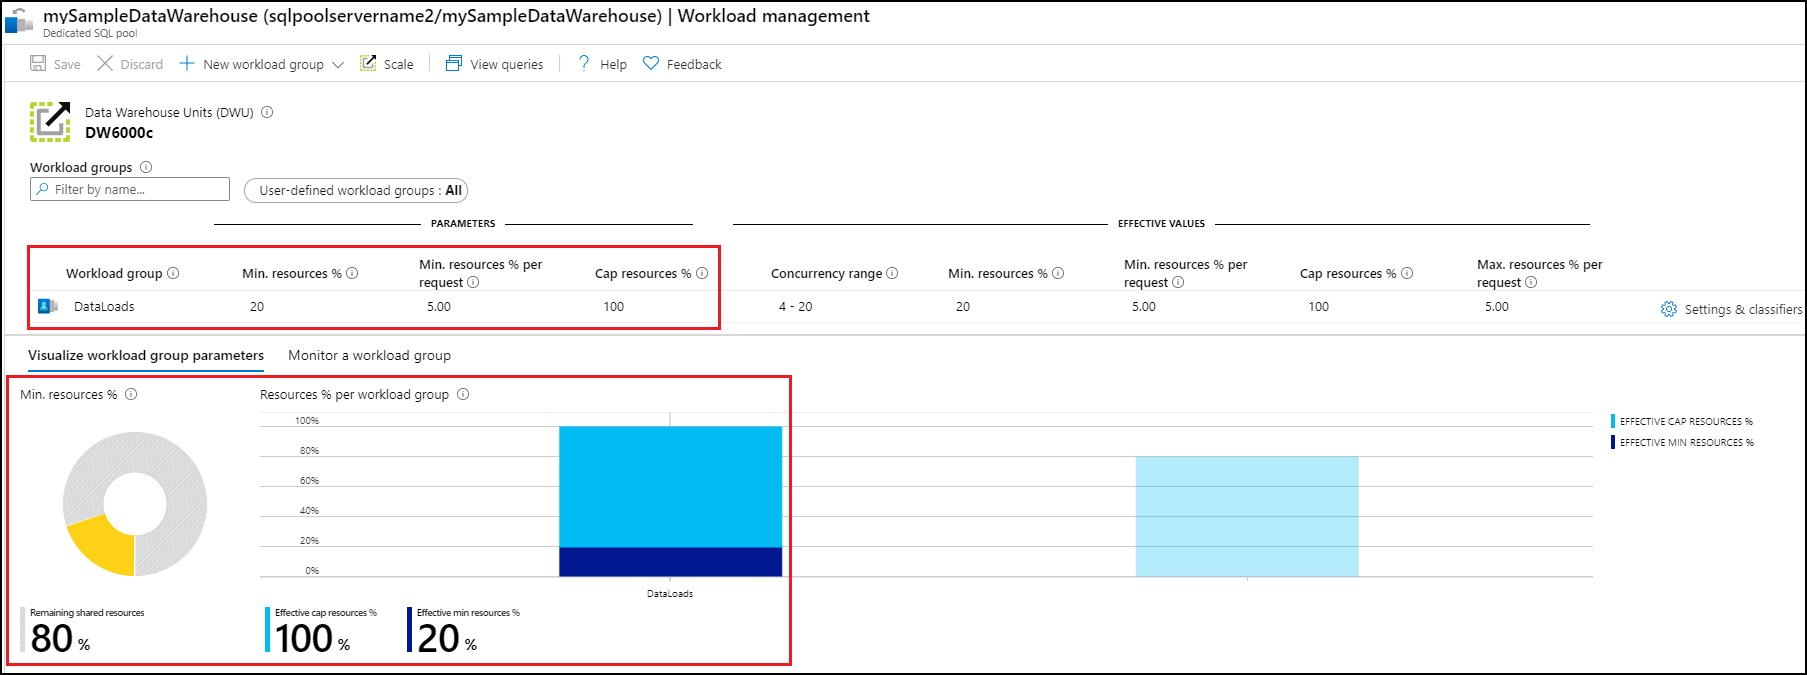
A portal notification appears when the workload group is created. The workload group resources are displayed in the charts below the configured values.

Clean up resources
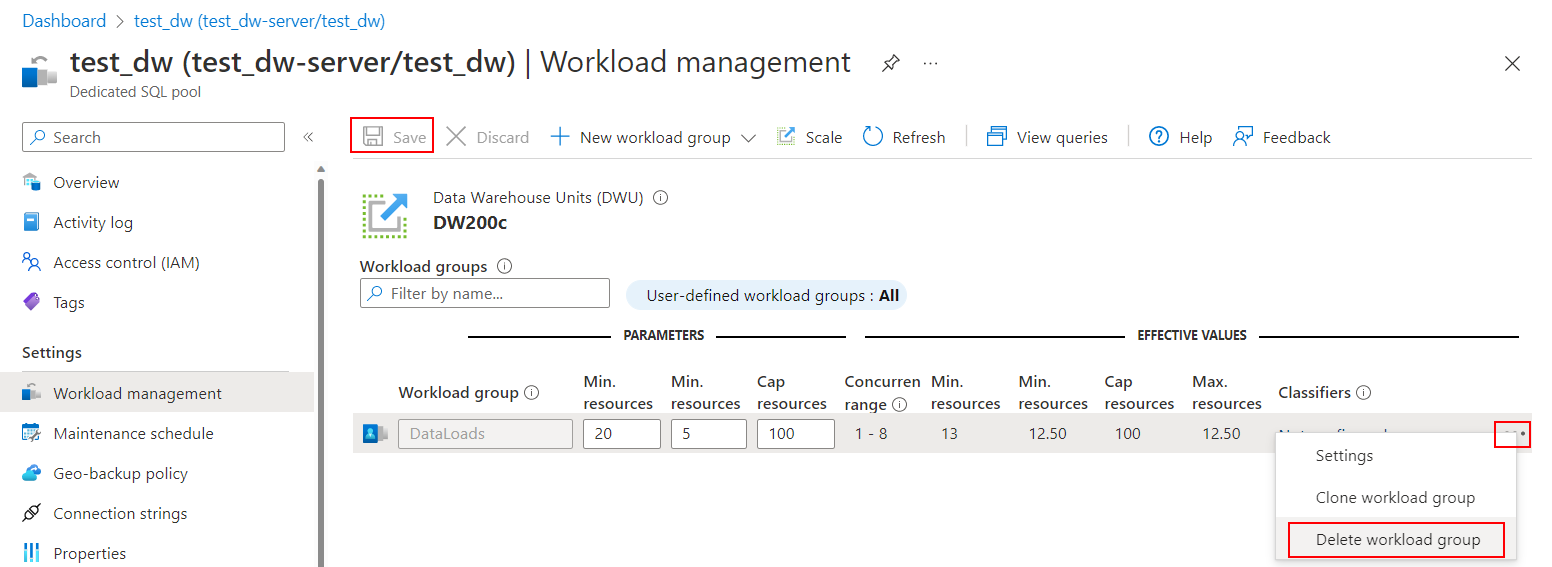
To delete the DataLoads workload group created in this tutorial:
Select on the
...to the right of theDataLoadsworkload group.Select on Delete workload group.
Select on Yes when prompted to confirm deletion of the workload group.
Select on Save.

You're being charged for data warehouse units and data stored in your data warehouse. These compute and storage resources are billed separately.
- If you want to keep the data in storage, you can pause compute when you aren't using the data warehouse. By pausing compute, you're only charged for data storage. When you're ready to work with the data, resume compute.
- If you want to remove future charges, you can delete the data warehouse.
Follow these steps to clean up resources.
Sign in to the Azure portal, select your dedicated SQL pool.

To pause compute, select the Pause button. When the data warehouse is paused, you see a Start button. To resume compute, select Start.
To remove the data warehouse so you're not charged for compute or storage, select Delete.
Next steps
To use the DataLoads workload group, a workload classifier needs to be created to route requests to the workload group. Continue to the create workload classifier tutorial to create a workload classifier for DataLoads.