Tutorial: Use a managed identity to invoke Azure Functions from an Azure Spring Apps app
Note
The Basic, Standard, and Enterprise plans will be deprecated starting from mid-March, 2025, with a 3 year retirement period. We recommend transitioning to Azure Container Apps. For more information, see the Azure Spring Apps retirement announcement.
The Standard consumption and dedicated plan will be deprecated starting September 30, 2024, with a complete shutdown after six months. We recommend transitioning to Azure Container Apps. For more information, see Migrate Azure Spring Apps Standard consumption and dedicated plan to Azure Container Apps.
This article applies to: ✅ Basic/Standard ✅ Enterprise
This article shows you how to create a managed identity for an app hosted in Azure Spring Apps and use it to invoke HTTP triggered Functions.
Both Azure Functions and App Services have built in support for Microsoft Entra authentication. By using this built-in authentication capability along with Managed Identities for Azure Spring Apps, you can invoke RESTful services using modern OAuth semantics. This method doesn't require storing secrets in code and provides more granular controls for controlling access to external resources.
Prerequisites
- An Azure subscription. If you don't have a subscription, create a free account before you begin.
- Azure CLI version 2.45.0 or higher.
- Git.
- Apache Maven version 3.0 or higher.
- Install the Azure Functions Core Tools version 4.x.
Create a resource group
A resource group is a logical container into which Azure resources are deployed and managed. Use the following command to create a resource group to contain a Function app:
az group create --name <resource-group-name> --location <location>
For more information, see the az group create command.
Create a Function app
To create a Function app, you must first create a backing storage account. You can use the az storage account create command.
Important
Each Function app and storage account must have a unique name.
Use the following command to create the storage account. Replace <function-app-name> with the name of your Function app and <storage-account-name> with the name of your storage account.
az storage account create \
    --resource-group <resource-group-name> \
    --name <storage-account-name> \
    --location <location> \
    --sku Standard_LRS
After the storage account is created, use the following command to create the Function app:
az functionapp create \
    --resource-group <resource-group-name> \
    --name <function-app-name> \
    --consumption-plan-location <location> \
    --os-type windows \
    --runtime node \
    --storage-account <storage-account-name> \
    --functions-version 4
Make a note of the returned hostNames value, which is in the format https://<your-functionapp-name>.azurewebsites.net. Use this value in the Function app's root URL for testing the Function app.
Enable Microsoft Entra authentication
Use the following steps to enable Microsoft Entra authentication to access your Function app.
- In the Azure portal, navigate to your resource group and then open the Function app you created.
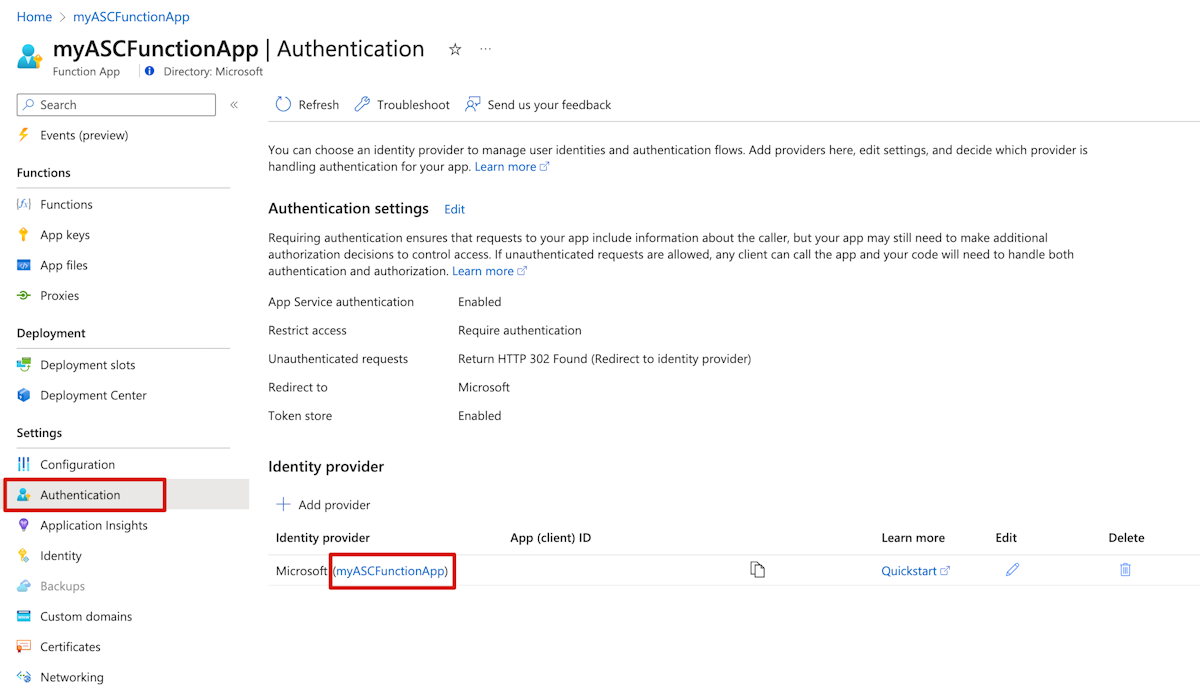
- In the navigation pane, select Authentication and then select Add identity provider on the main pane.
- On the Add an identity provider page, select Microsoft from the Identity provider dropdown menu.
- Select Add.
- For the Basics settings on the Add an identity provider page, set Supported account types to Any Microsoft Entra directory - Multi-tenant.
- Set Unauthenticated requests to HTTP 401 Unauthorized: recommended for APIs. This setting ensures that all unauthenticated requests are denied (401 response).
- Select Add.
After you add the settings, the Function app restarts and all subsequent requests are prompted to sign in through Microsoft Entra ID. You can test that unauthenticated requests are currently being rejected with the Function app's root URL (returned in the hostNames output of the az functionapp create command). You should then be redirected to your organization's Microsoft Entra sign-in screen.
You need the Application ID and the Application ID URI for later use. In the Azure portal, navigate to the Function app you created.
To get the Application ID, select Authentication in the navigation pane, and then copy the App (client) ID value for the identity provider that includes the name of the Function app.
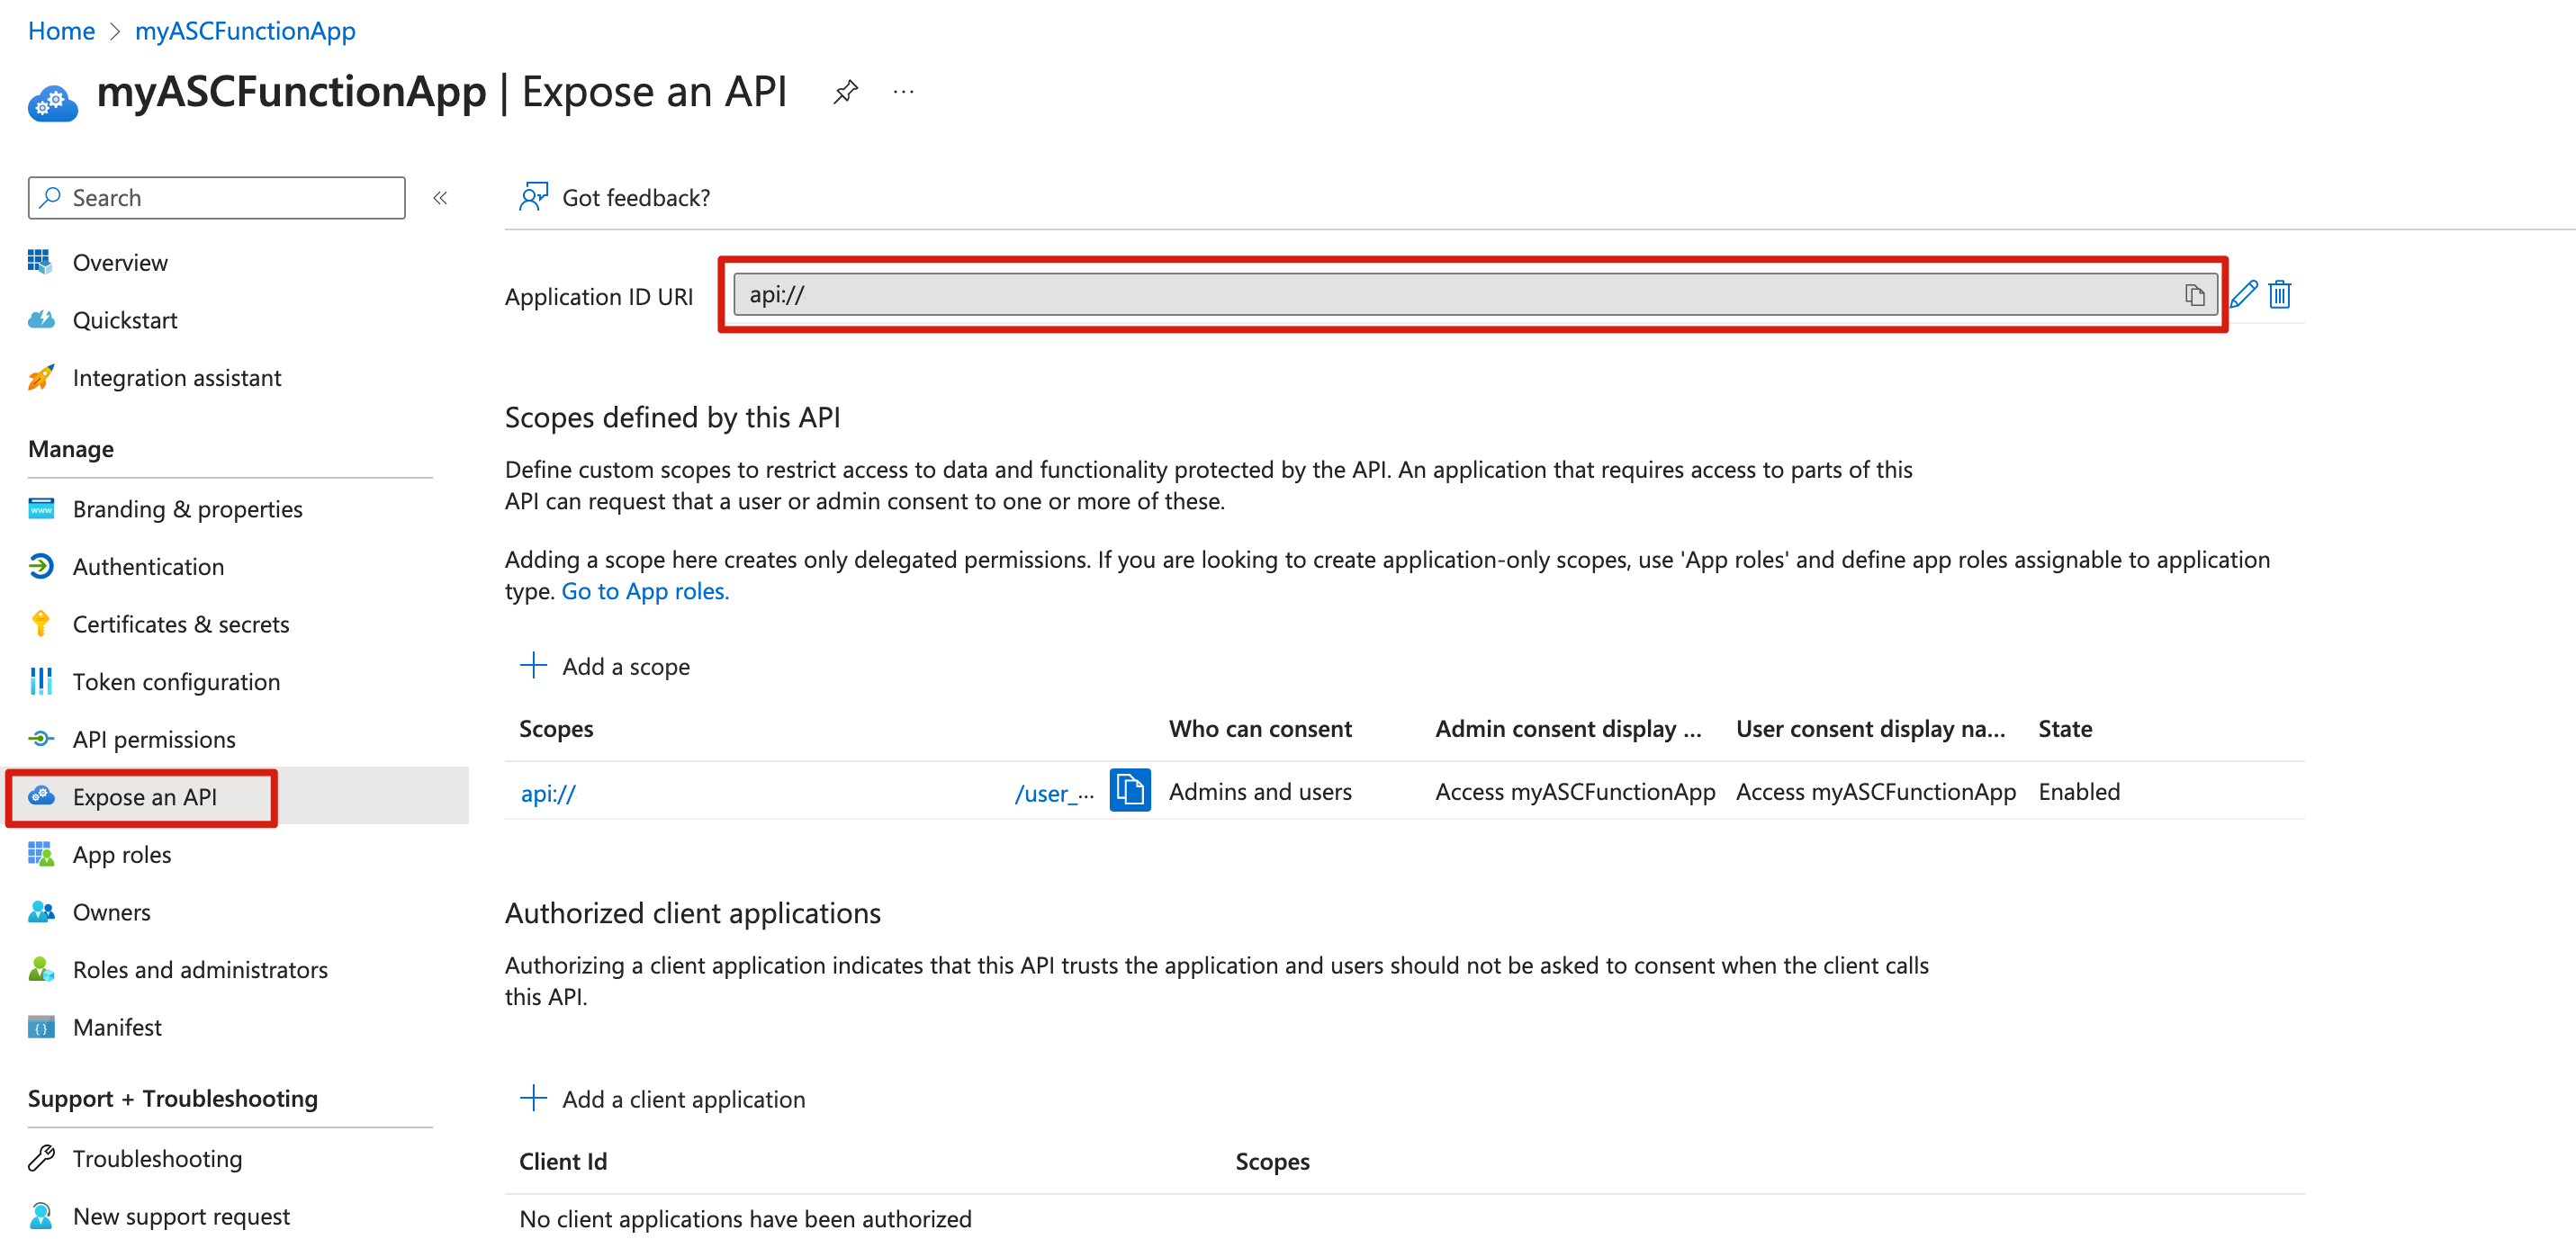
To get the Application ID URI, select Expose an API in the navigation pane, and then copy the Application ID URI value.
Create an HTTP triggered function
In an empty local directory, use the following commands to create a new function app and add an HTTP triggered function:
func init --worker-runtime node
func new --template HttpTrigger --name HttpTrigger
By default, functions use key-based authentication to secure HTTP endpoints. To enable Microsoft Entra authentication to secure access to the functions, set the authLevel key to anonymous in the function.json file, as shown in the following example:
{
  "bindings": [
    {
      "authLevel": "anonymous",
      "type": "httpTrigger",
      ...
    }
  ]
}
For more information, see the Secure HTTP endpoints section of Securing Azure Functions.
Use the following command to publish the app to the instance created in the previous step:
func azure functionapp publish <function-app-name>
The output from the publish command should list the URL to your newly created function, as shown in the following output:
Deployment completed successfully.
Syncing triggers...
Functions in <your-functionapp-name>:
    HttpTrigger - [httpTrigger]
        Invoke url: https://<function-app-name>.azurewebsites.net/api/httptrigger
Create an Azure Spring Apps service instance and application
Use the following commands to add the spring extension and to create a new instance of Azure Spring Apps:
az extension add --upgrade --name spring
az spring create \
    --resource-group <resource-group-name> \
    --name <Azure-Spring-Apps-instance-name> \
    --location <location>
Use the following command to create an application named msiapp with a system-assigned managed identity, as requested by the --assign-identity parameter:
az spring app create \
    --resource-group <resource-group-name> \
    --service <Azure-Spring-Apps-instance-name> \
    --name "msiapp" \
    --assign-endpoint true \
    --assign-identity
Build a sample Spring Boot app to invoke the Function
This sample invokes the HTTP triggered function by first requesting an access token from the MSI endpoint and using that token to authenticate the function HTTP request. For more information, see the Get a token using HTTP section of How to use managed identities for Azure resources on an Azure VM to acquire an access token.
Use the following command clone the sample project:
git clone https://github.com/Azure-Samples/azure-spring-apps-samples.gitUse the following command to specify your function URI and the trigger name in your app properties:
cd azure-spring-apps-samples/managed-identity-function
vim src/main/resources/application.properties
To use managed identity for Azure Spring Apps apps, add the following properties with these values to src/main/resources/application.properties:
azure.function.uri=https://<function-app-name>.azurewebsites.net
azure.function.triggerPath=httptrigger
azure.function.application-id.uri=<function-app-application-ID-uri>
Use the following command to package your sample app:
mvn clean packageUse the following command to deploy the app to Azure Spring Apps:
az spring app deploy \
    --resource-group <resource-group-name> \
    --service <Azure-Spring-Apps-instance-name> \
    --name "msiapp" \
    --artifact-path target/asc-managed-identity-function-sample-0.1.0.jar
Use the following command to access the public endpoint or test endpoint to test your app:
curl https://<Azure-Spring-Apps-instance-name>-msiapp.azuremicroservices.io/func/springcloudThe following message is returned in the response body.
Function Response: Hello, springcloud. This HTTP triggered function executed successfully.

