Tutorial: Connect an AKS app to Azure SQL Database
In this tutorial, you learn how to connect an application deployed to AKS, to an Azure SQL Database, using service connector. You complete the following tasks:
- Create an Azure SQL Database resource
- Create a connection between the AKS cluster and the database with Service Connector.
- Update your container
- Update your application code
- Clean up Azure resources.
Prerequisites
- An Azure account with an active subscription. Create an account for free.
- An application deployed to AKS.
-
Use the Bash environment in Azure Cloud Shell. For more information, see Quickstart for Bash in Azure Cloud Shell.
If you prefer to run CLI reference commands locally, install the Azure CLI. If you're running on Windows or macOS, consider running Azure CLI in a Docker container. For more information, see How to run the Azure CLI in a Docker container.
If you're using a local installation, sign in to the Azure CLI by using the az login command. To finish the authentication process, follow the steps displayed in your terminal. For other sign-in options, see Sign in with the Azure CLI.
When you're prompted, install the Azure CLI extension on first use. For more information about extensions, see Use extensions with the Azure CLI.
Run az version to find the version and dependent libraries that are installed. To upgrade to the latest version, run az upgrade.
Create an Azure SQL Database
Create a resource group to store the Azure resources you create in this tutorial using the
az group createcommand.az group create \ --name $RESOURCE_GROUP \ --location eastusFollow the instructions to create an Azure SQL Database in the resource group you created in the previous step. Make note of the server name, database name, and the database credentials for use throughout this tutorial.
Create a service connection in AKS with Service Connector
Register the Service Connector and Kubernetes Configuration resource providers
Register the Service Connector and Kubernetes Configuration resource providers using the az provider register command.
az provider register --namespace Microsoft.ServiceLinker
az provider register --namespace Microsoft.KubernetesConfiguration
Tip
You can check if these resource providers are already registered using the az provider show --namespace "Microsoft.ServiceLinker" --query registrationState and az provider show --namespace "Microsoft.KubernetesConfiguration" --query registrationState commands. If the output is Registered, then the service provider is already registered.
Create a new connection
Create a service connection between your AKS cluster and your SQL database using Microsoft Entra Workload ID
In the Azure portal, navigate to your AKS cluster resource.
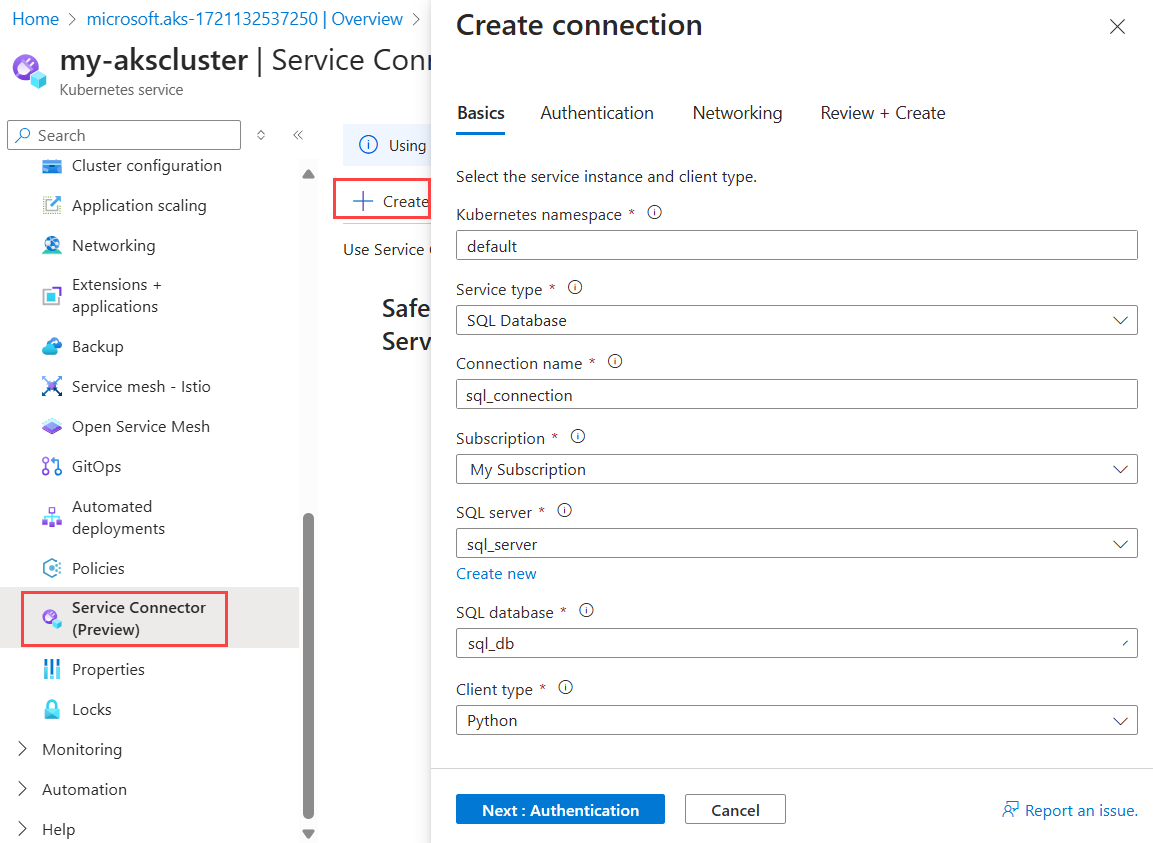
Select Settings > Service Connector > Create.
On the Basics tab, configure the following settings:
- Kubernetes namespace: Select default.
- Service type: Select SQL Database.
- Connection name: Use the connection name provided by Service Connector or enter your own connection name.
- Subscription: Select the subscription that includes the Azure SQL Database service.
- SQL server: Select your SQL server.
- SQL database: Select your SQL database.
- Client type: The code language or framework you use to connect to the target service, such as Python.

Select Next: Authentication. On the Authentication tab, select Workload Identity and choose one User assigned managed identity.
Select Next: Networking > Next: Review + create >Create On Cloud Shell.
The Cloud Shell will be launched and execute the commands to create a connection. You may need to confirm some configuration changes during the command processing. Once command runs successfully, it will show connection information, and you can click refresh button in Service Connector pane to show the latest result.
Warning
Microsoft recommends that you use the most secure authentication flow available. The authentication flow described in this procedure requires a very high degree of trust in the application, and carries risks that are not present in other flows. You should only use this flow when other more secure flows, such as managed identities, aren't viable. Select the authentication method Workload ID (Recommended).
Create a service connection between your AKS cluster and your SQL database using a connection string
In the Azure portal, navigate to your AKS cluster resource.
Select Settings > Service Connector > Create.
On the Basics tab, configure the following settings:
- Kubernetes namespace: Select default.
- Service type: Select SQL Database.
- Connection name: Use the connection name provided by Service Connector or enter your own connection name.
- Subscription: Select the subscription that includes the Azure SQL Database service.
- SQL server: Select your SQL server.
- SQL database: Select your SQL database.
- Client type: The code language or framework you use to connect to the target service, such as Python.

Select Next: Authentication. On the Authentication tab, enter your database username and password.
Select Next: Networking > Next: Review + create >Create.
Once the deployment is successful, you can view information about the new connection in the Service Connector pane.
Update your container
Now that you created a connection between your AKS cluster and the database, you need to retrieve the connection secrets and deploy them in your container.
In the Azure portal, navigate to your AKS cluster resource. Under Settings, select Service Connector.
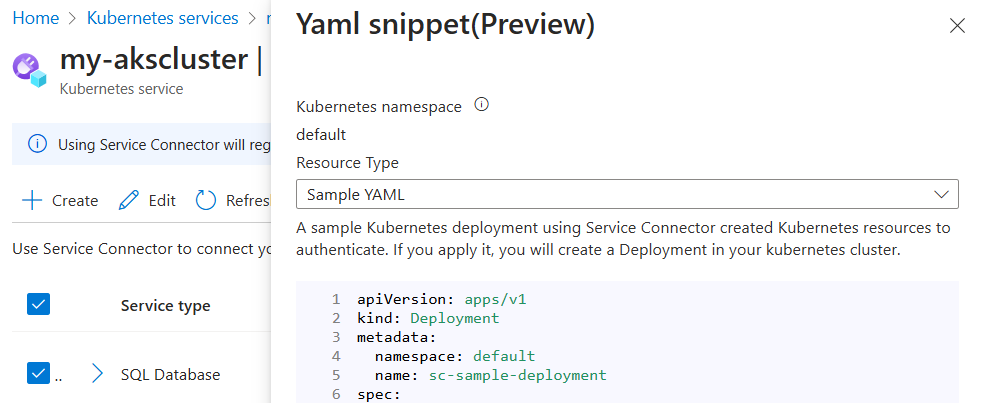
Select the newly created connection, and then select YAML snippet. This action opens a panel displaying a sample YAML file generated by Service Connector.
To set the connection secrets as environment variables in your container, you have two options:
Directly create a deployment using the YAML sample code snippet provided. The snippet includes highlighted sections showing the secret object that will be injected as the environment variables. Select Apply to proceed with this method.

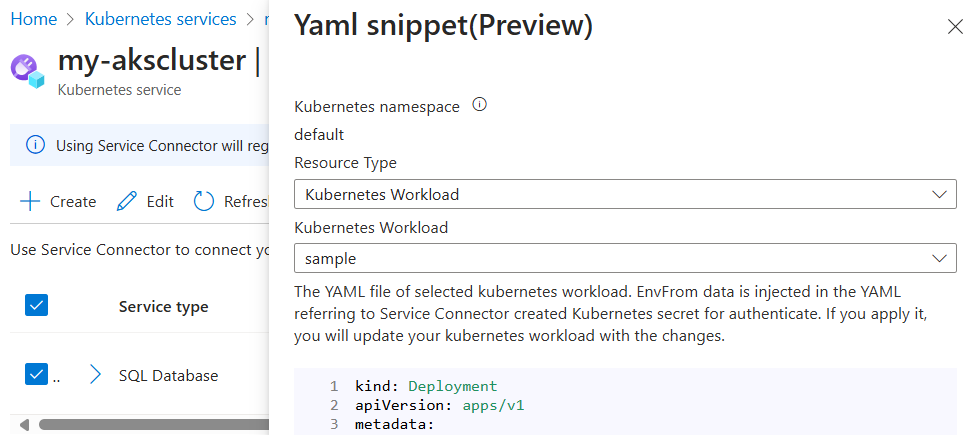
Alternatively, under Resource Type, select Kubernetes Workload, and then select an existing Kubernetes workload. This action sets the secret object of your new connection as the environment variables for the selected workload. After selecting the workload, select Apply.

Update your application code
As a final step, update your application code to use your environment variables, by following these instructions.
Clean up resources
If you no longer need the resources you created when following this tutorial, you can remove them by deleting the Azure resource group.
Delete your resource group using the az group delete command.
az group delete --resource-group $RESOURCE_GROUP
Related content
Read the following articles to learn more about Service Connector concepts and how it helps AKS connect to Azure services:
