Use Private Link (preview)
This article describes how to use Private Link to restrict access to managing resources in your subscriptions. Private links enable you to access Azure services over a private endpoint in your virtual network. This prevents exposure of the service to the public internet.
This article describes the Private Link setup process using the Azure portal.
Important
You can enable this feature on tiers, for an additional fee.
Note
The ability to use private links with Azure Notification Hubs is currently in preview. If you're interested in using this feature, contact your customer success manager at Microsoft, or create an Azure support ticket.
Create a private endpoint along with a new notification hub in the portal
The following procedure creates a private endpoint along with a new notification hub using the Azure portal:
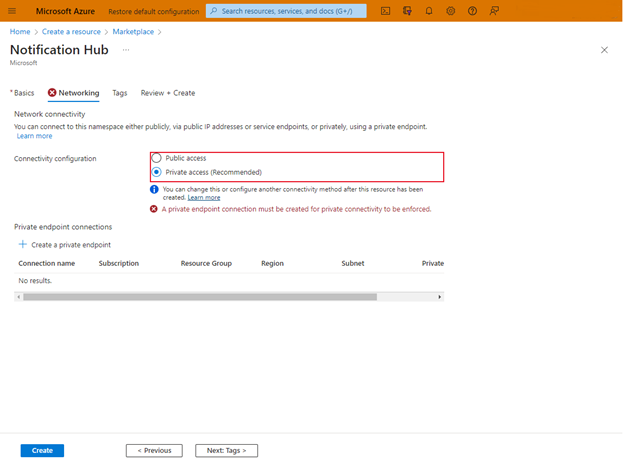
Create a new notification hub, and select the Networking tab.
Select Private access, then select Create.
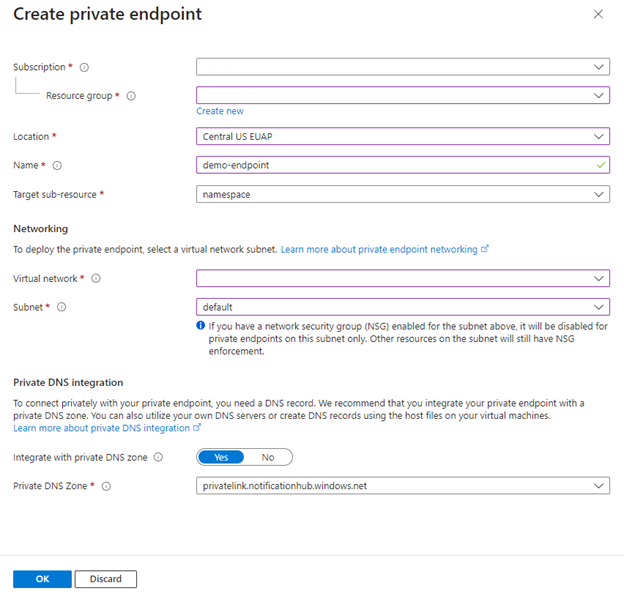
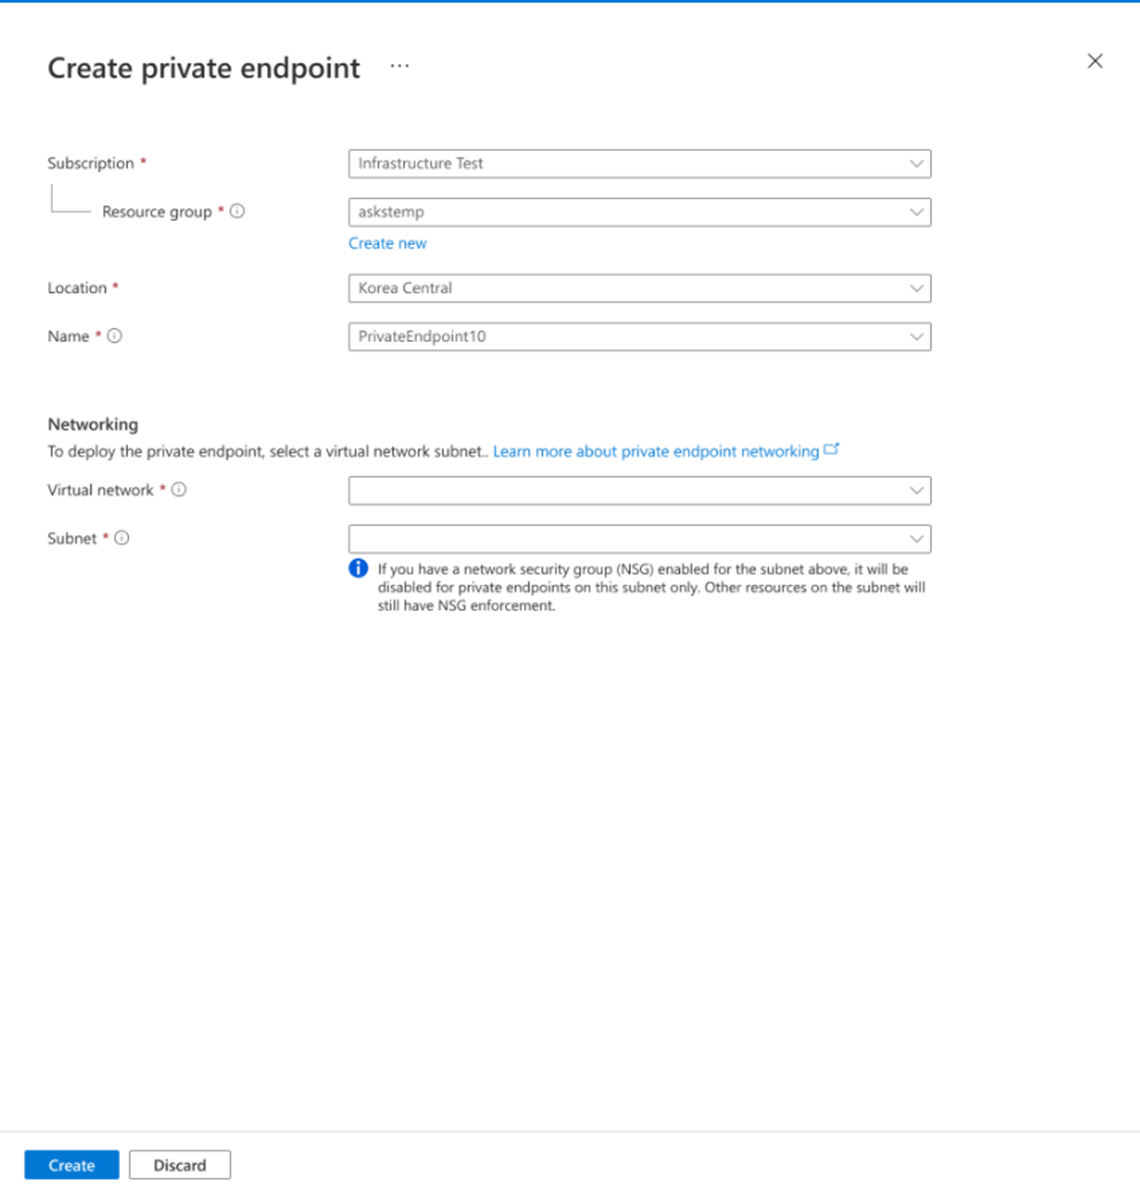
Fill in the subscription, resource group, location, and a name for the new private endpoint. Choose a virtual network and a subnet. In Integrate with Private DNS Zone, select Yes and type privatelink.notificationhubs.windows.net in the Private DNS Zone box.
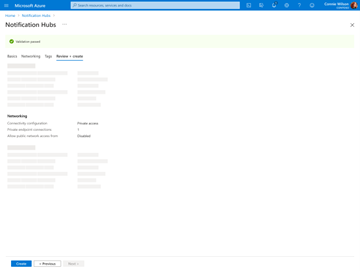
Select OK to see confirmation of namespace and hub creation with a private endpoint.
Select Create to create the notification hub with a private endpoint connection.
Create a private endpoint for an existing notification hub in the portal
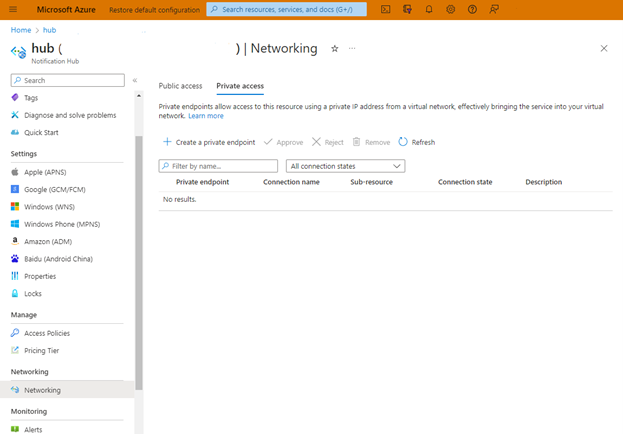
In the portal, on the left-hand side under the Security + networking section, select Notification Hubs, then select Networking.
Select the Private access tab.
Fill in the subscription, resource group, location, and a name for the new private endpoint. Choose a virtual network and subnet. Select Create.
Create a private endpoint using CLI
Sign in to Azure CLI and set a subscription:
az login
az account set --subscription <azure_subscription_id>
Create a new resource group:
az group create -n <resource_group_name> -l <azure_region>Register Microsoft.NotificationHubs as a provider:
az provider register -n Microsoft.NotificationHubsCreate a new Notification Hubs namespace and hub:
az notification-hub namespace create
     --name <namespace_name>
     --resource-group <resource_group_name>
     --location <azure_region>
     --sku "Standard"

 az notification-hub create
     --name <notification_hub_name>
     --namespace-name <namespace_name>
     --resource-group <resource_group_name>
     --location <azure_region>
Create a virtual network with a subnet:
az network vnet create
     --resource-group <resource_group_name>
     --name <vNet name>
     --location <azure_region>

az network vnet subnet create
     --resource-group <resource_group_name>
     --vnet-name <vNet_name>
     --name <subnet_name>
     --address-prefixes <address_prefix>
Disable virtual network policies:
az network vnet subnet update
     --name <subnet_name>
     --resource-group <resource_group_name>
     --vnet-name <vNet_name>
     --disable-private-endpoint-network-policies true
Add private DNS zones and link them to a virtual network:
az network private-dns zone create
     --resource-group <resource_group_name>
     --name privatelink.servicebus.windows.net

az network private-dns zone create
     --resource-group <resource_group_name>
     --name privatelink.notoficationhub.windows.net

az network private-dns link vnet create
     --resource-group <resource_group_name>
     --virtual-network <vNet_name>
     --zone-name privatelink.servicebus.windows.net
     --name <dns_zone_link_name>
     --registration-enabled true

az network private-dns link vnet create
     --resource-group <resource_group_name>
     --virtual-network <vNet_name>
     --zone-name privatelink.notificationhub.windows.net
     --name <dns_zone_link_name>
     --registration-enabled true
Create a private endpoint (automatically approved):
az network private-endpoint create
     --resource-group <resource_group_name>
     --vnet-name <vNet_name>
     --subnet <subnet_name>
     --name <private_endpoint_name>
     --private-connection-resource-id "/subscriptions/<azure_subscription_id>/resourceGroups/<resource_group_name>/providers/Microsoft.NotificationHubs/namespaces/<namespace_name>"
     --group-ids namespace
     --connection-name <private_link_connection_name>
     --location <azure-region>
Create a private endpoint (with manual request approval):
az network private-endpoint create
     --resource-group <resource_group_name>
     --vnet-name <vnet_name>
     --subnet <subnet_name>
     --name <private_endpoint_name>
     --private-connection-resource-id "/subscriptions/<azure_subscription_id>/resourceGroups/<resource_group_name>/providers/Microsoft.NotificationHubs/namespaces/<namespace_name>"
     --group-ids namespace
     --connection-name <private_link_connection_name>
     --location <azure-region>
     --manual-request
Show the connection status:
az network private-endpoint show --resource-group <resource_group_name> --name <private_endpoint_name>
Manage private endpoints using the portal
When you create a private endpoint, the connection must be approved. If the resource for which you're creating a private endpoint is in your directory, you can approve the connection request, provided you have sufficient permissions. If you're connecting to an Azure resource in another directory, you must wait for the owner of that resource to approve your connection request.
There are four provisioning states:
| Service action | Service consumer private endpoint state | Description |
|---|---|---|
| None | Pending | Connection is created manually and is pending approval from the private link resource owner. |
| Approve | Approved | Connection was automatically or manually approved and is ready to be used. |
| Reject | Rejected | Connection was rejected by the private link resource owner. |
| Remove | Disconnected | Connection was removed by the private link resource owner. The private endpoint becomes informative and should be deleted for cleanup. |
Approve, reject, or remove a private endpoint connection
- Sign in to the Azure portal.
- In the search bar, type Notification Hubs.
- Select the namespace that you want to manage.
- Select the Networking tab.
- Go to the appropriate section based on the operation you want to approve, reject, or remove.
Approve a private endpoint connection
If there are any connections that are pending, a connection is displayed with Pending in the provisioning state.
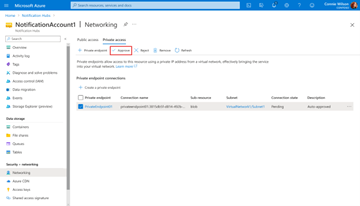
Select the private endpoint you want to approve.
Select Approve.
On the Approve connection page, enter an optional comment, then select Yes. If you select No, nothing happens.
You should see the status of the connection in the list change to Approved.
Reject a private endpoint connection
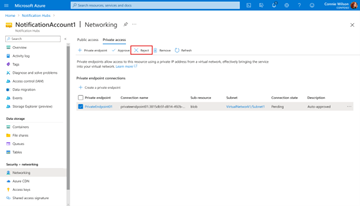
If there are any private endpoint connections you want to reject, whether it is a pending request or existing connection that was approved earlier, select the endpoint connect icon and select Reject.
On the Reject connection page, enter an optional comment, then select Yes. If you select No, nothing happens.
You should see the status of the connection in the list change to Rejected.
Remove a private endpoint connection
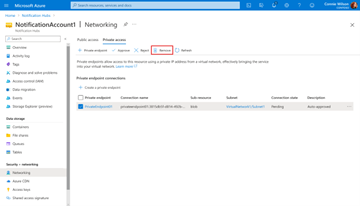
To remove a private endpoint connection, select it in the list, and select Remove on the toolbar:
On the Delete connection page, select Yes to confirm the deletion of the private endpoint. If you select No, nothing happens.
You should see the status of the connection in the list change to Disconnected. The endpoint then disappears from the list.
Validate that the private link connection works
You should validate that resources within the virtual network of the private endpoint are connecting to your Notification Hubs namespace over a private IP address, and that they have the correct private DNS zone integration.
First, create a virtual machine by following the steps in Create a Windows virtual machine in the Azure portal.
In the Networking tab:
- Specify the Virtual network and Subnet. You must select the Virtual Network on which you deployed the private endpoint.
- Specify a public IP resource.
- For NIC network security group, select None.
- For Load balancing, select No.
Connect to the VM, open a command line, and run the following command:
Resolve-DnsName <namespace_name>.privatelink.servicebus.windows.net
When the command is executed from the VM, it returns the IP address of the private endpoint connection. When it's executed from an external network, it returns the public IP address of one of the Notification Hubs clusters.
Limitations and design considerations
Limitations: This feature is available in all Azure public regions. Maximum number of private endpoints per Notification Hubs namespace: 200
For more information, see Azure Private Link service: Limitations.
