Note
Access to this page requires authorization. You can try signing in or changing directories.
Access to this page requires authorization. You can try changing directories.
In this article you'll learn to create a custom environment in Azure Machine learning. Custom Environments allow you to extend curated environments and add Hugging Face (HF) transformers, datasets or install any other external packages with Azure Machine Learning. Azure machine Learning offers to create a new environment with docker context containing ACPT curated environment as a base image and additional packages on top of it.
Prerequisites
Before following the steps in this article, make sure you have the following prerequisites:
- An Azure subscription. If you don't have an Azure subscription, create a free account before you begin. Try the free or paid version of Azure Machine Learning.
- An Azure Machine Learning workspace. If you don't have one, use the steps in the Quickstart: Create workspace resources article to create one.
Navigate to environments
In the Azure Machine Learning studio, navigate to the "Environments" section by selecting the "Environments" option.
Navigate to curated environments
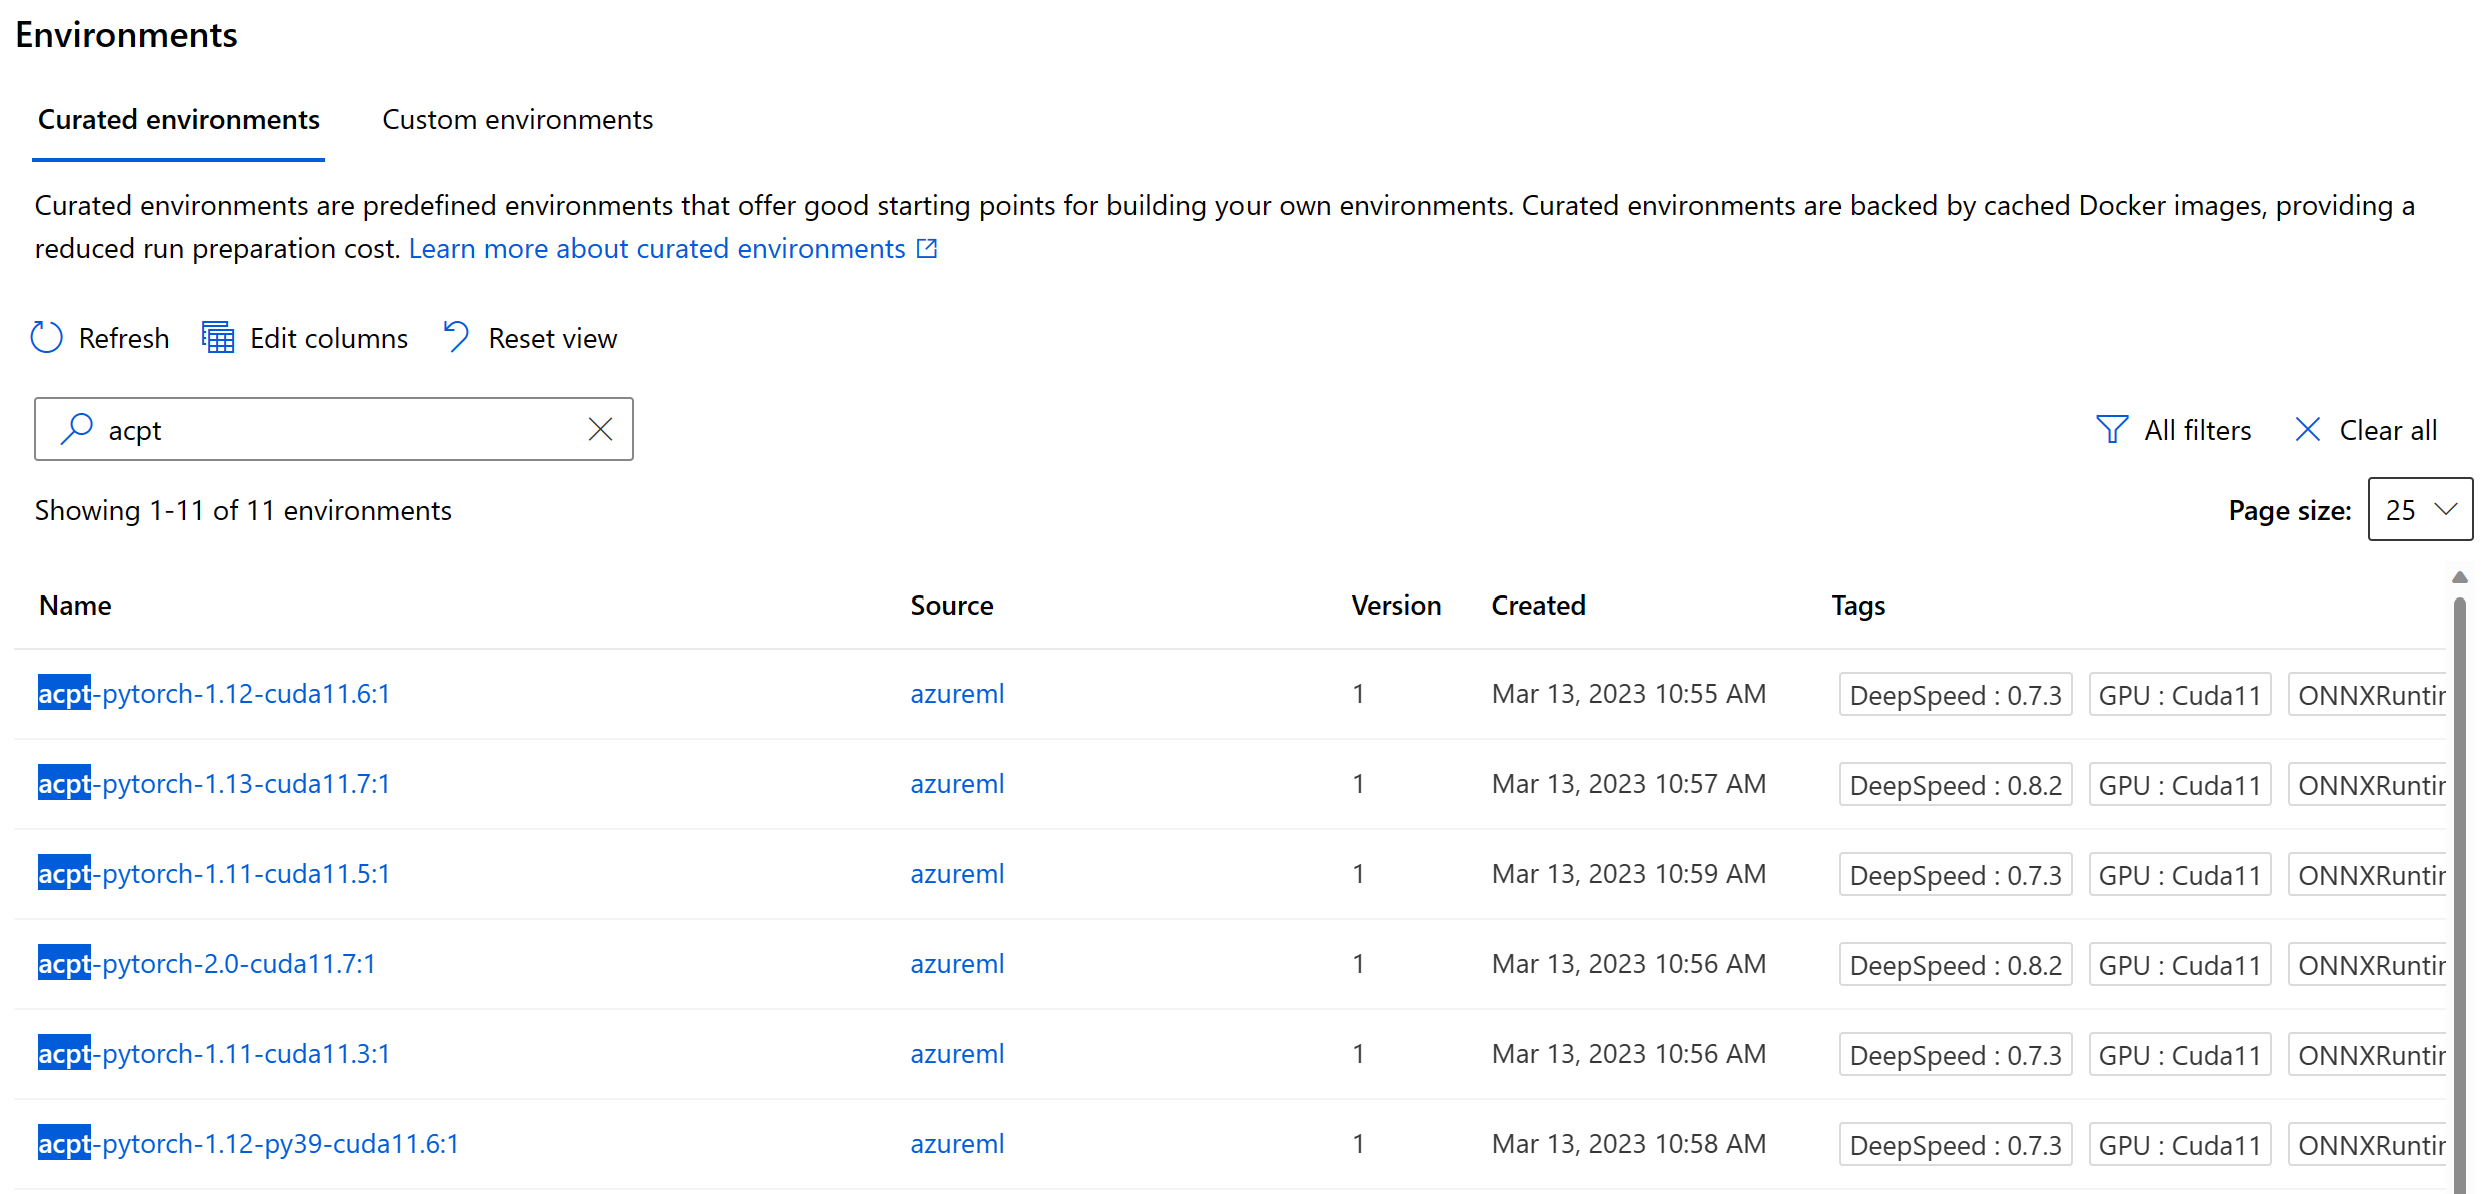
Navigate to curated environments and search "acpt" to list all the available ACPT curated environments. Selecting the environment shows details of the environment.
Get details of the curated environments
To create a custom environment, you need the base docker image repository, which can be found in the Description section as Azure Container Registry. Copy the Azure Container Registry name, which is used later when you create a new custom environment.
Navigate to custom environments
Go back and select the Custom Environments tab.
Create custom environments
Select + Create. In the "Create Environment" window, name the environment, description, and select Create a new docker context in the Select environments type section.
Paste the docker image name that you copied in previously. Configure your environment by declaring the base image and add any env variables you want to use and the packages that you want to include.
Review your environment settings, add any tags if needed and select on the Create button to create your custom environment.
That's it! You've now created a custom environment in Azure Machine Learning studio and can use it to run your machine learning models.
Next steps
- Learn more about environment objects:
- What are Azure Machine Learning environments? .
- Learn more about curated environments.
- Learn more about training models in Azure Machine Learning.
- Azure Container for PyTorch (ACPT) reference


