Tutorial: Send data from an OPC UA server to Azure Data Lake Storage Gen 2
In the quickstart, you created a data flow that sends data from Azure IoT Operations to Event Hubs, and then to Microsoft Fabric via EventStreams.
However, it's also possible to send the data directly to a storage endpoint without using Event Hubs. This approach requires creating a Delta Lake schema that represents the data, uploading the schema to Azure IoT Operations, and then creating a data flow that reads the data from the OPC UA server and writes it to the storage endpoint.
This tutorial builds on the quickstart setup and demonstrates how to bifurcate the data to Azure Data Lake Storage Gen 2. This approach allows you to store the data directly in a scalable and secure data lake, which can be used for further analysis and processing.
Prerequisites
Finish the second step of the quickstart which gets you the data from the OPC UA server to the Azure IoT Operations MQTT broker. Make sure you can see the data in Event Hubs.
Create a storage account with Data Lake Storage capability
First, follow steps to create a storage account with Data Lake Storage Gen 2 capability.
- Choose a memorable but unique name for the storage account, since it's needed in the next steps.
- For best results, use a location that's close to the Kubernetes cluster where Azure IoT Operations is running.
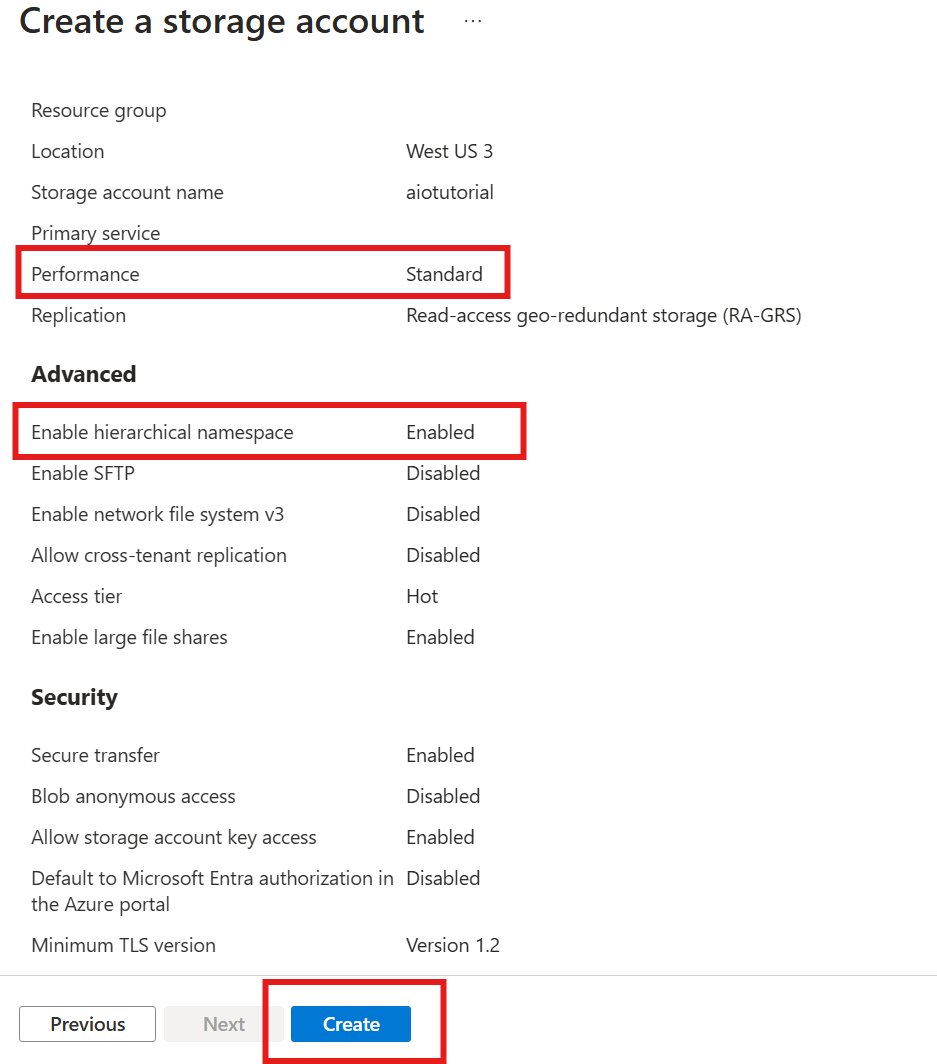
- During the creation process, enable the Hierarchical namespace setting. This setting is required for Azure IoT Operations to write to the storage account.
- You can leave other settings as default.
At the Review step, verify the settings and select Create to create the storage account.
Get the extension name of Azure IoT Operations
In Azure portal, find the Azure IoT Operations instance you created in the quickstart. In the Overview blade, find the Arc extension section and see the name of the extension. It should look like azure-iot-operations-xxxxx.
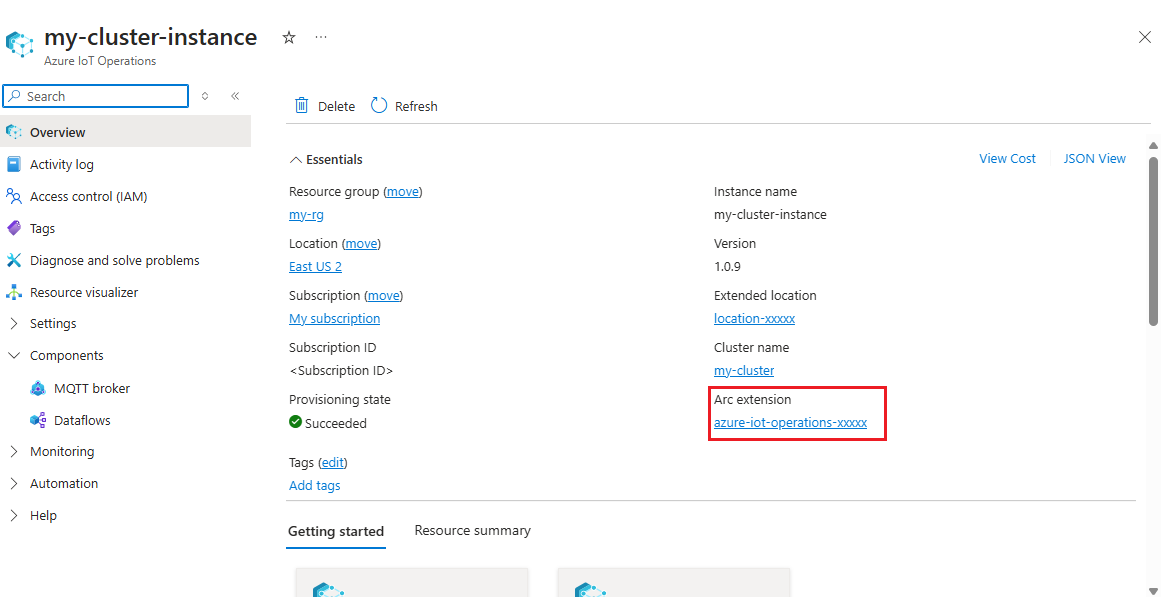
This extension name is used in the next steps to assign permissions to the storage account.
Assign permission to Azure IoT Operations to write to the storage account
First, in the storage account, go to the Access control (IAM) blade and select + Add role assignment. In the Add role assignment blade, search for the role Storage Blob Data Contributor and select it.
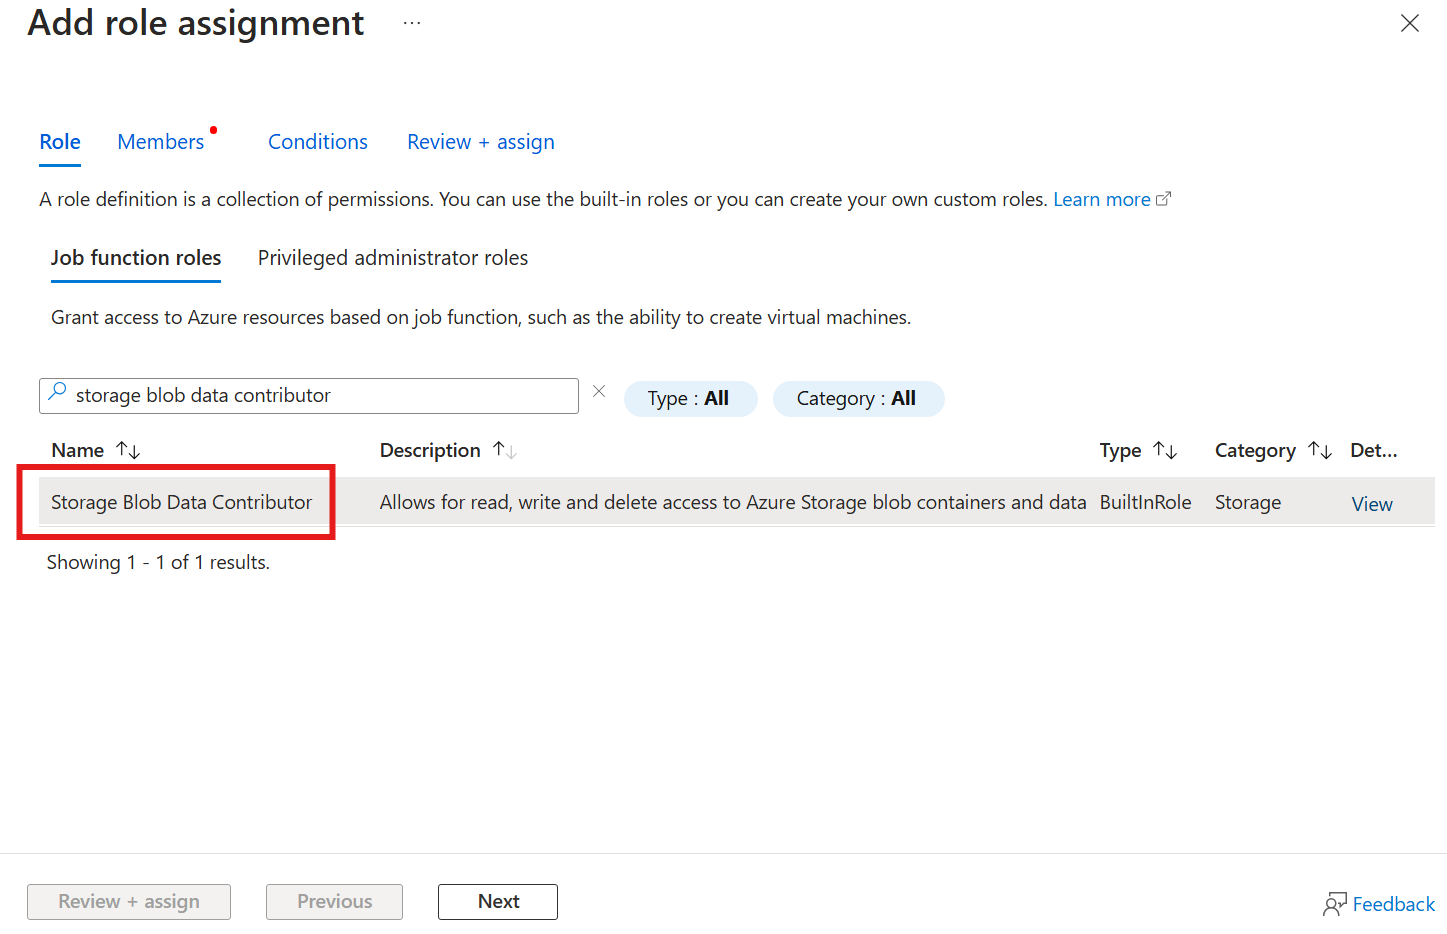
Then, select Next to get to the Members section.
Next, choose Select members and in the Select box, search for the managed identity of the Azure IoT Operations Arc extension named azure-iot-operations-xxxxx and select it.
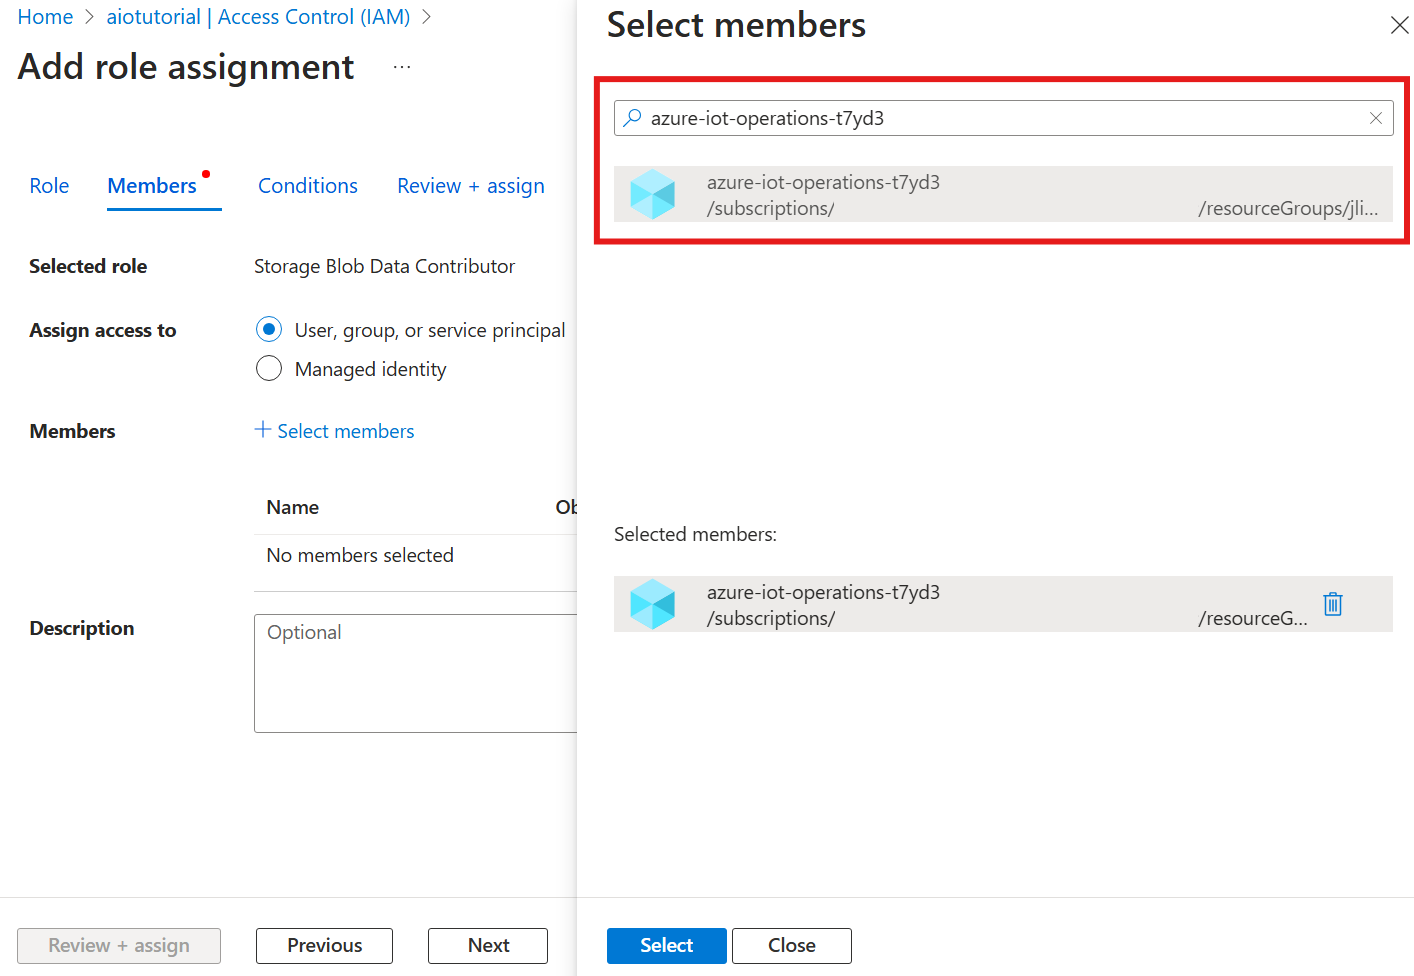
Finish the assignment with Review + assign.
Create a container in the storage account
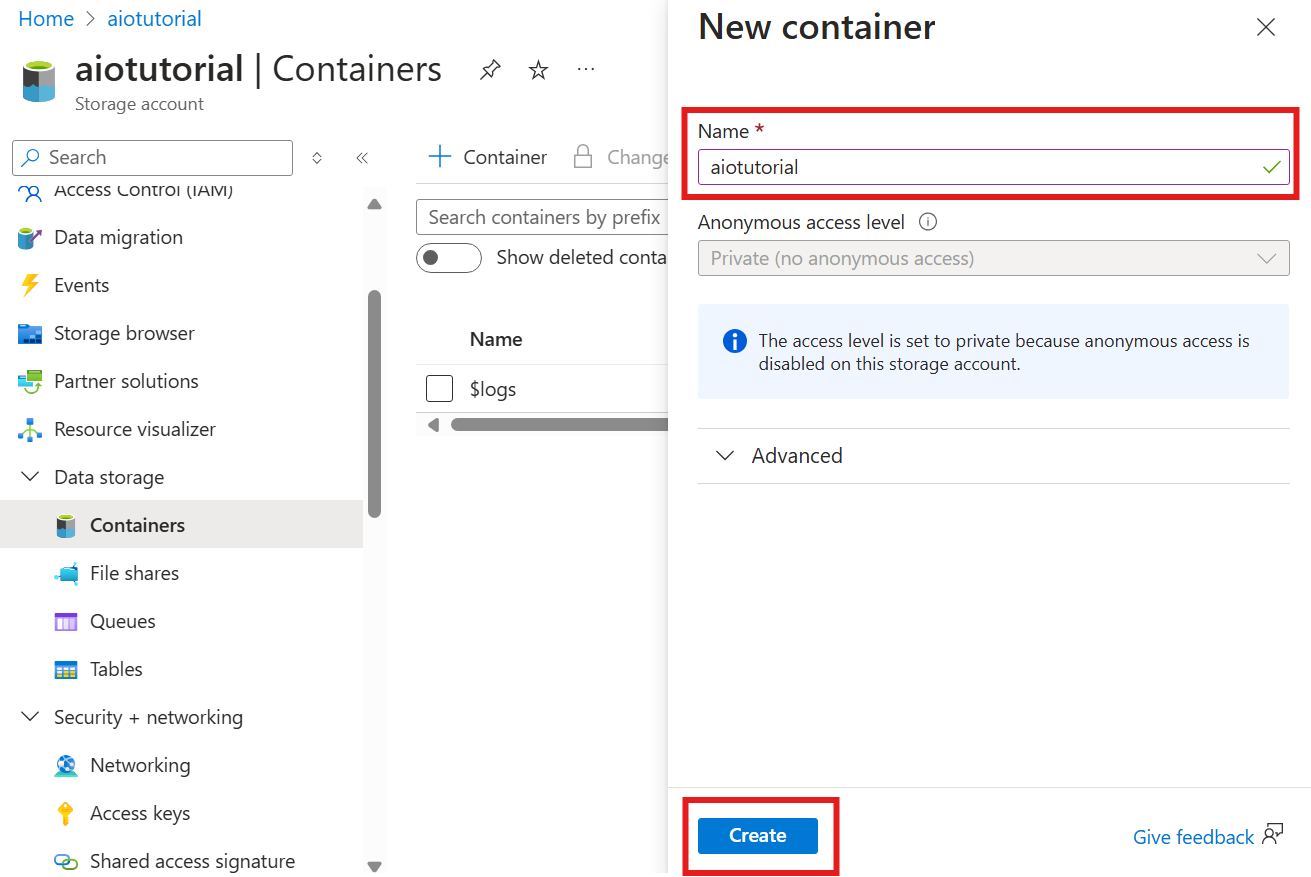
In the storage account, go to the Containers blade and select + Container. For this tutorial, name the container aiotutorial. Select Create to create the container.
Get the schema registry name and namespace
To upload the schema to Azure IoT Operations, you need to know the schema registry name and namespace. You can get this information using the Azure CLI.
Run the following command to get the schema registry name and namespace. Replace the placeholders with your values.
az iot ops schema registry list -g <RESOURCE_GROUP> --query "[0].{name: name, namespace: properties.namespace}" -o tsv
The output should look like this:
<REGISTRY_NAME> <SCHEMA_NAMESPACE>
Save the values for the next steps.
Upload schema to Azure IoT Operations
In the quickstart, the data that comes from the oven asset looks like:
{
  "Temperature": {
    "SourceTimestamp": "2024-11-15T21:40:28.5062427Z",
    "Value": 6416
  },
  "FillWeight": {
    "SourceTimestamp": "2024-11-15T21:40:28.5063811Z",
    "Value": 6416
  },
  "EnergyUse": {
    "SourceTimestamp": "2024-11-15T21:40:28.506383Z",
    "Value": 6416
  }
}
The required schema format for Delta Lake is a JSON object that follows the Delta Lake schema serialization format. The schema should define the structure of the data, including the types and properties of each field. For more details on the schema format, see Delta Lake schema serialization format documentation.
Tip
To generate the schema from a sample data file, use the Schema Gen Helper.
For this tutorial, the schema for the data looks like this:
{
  "$schema": "Delta/1.0",
  "type": "object",
  "properties": {
    "type": "struct",
    "fields": [
      {
        "name": "Temperature",
        "type": {
          "type": "struct",
          "fields": [
            {
              "name": "SourceTimestamp",
              "type": "timestamp",
              "nullable": false,
              "metadata": {}
            },
            {
              "name": "Value",
              "type": "integer",
              "nullable": false,
              "metadata": {}
            }
          ]
        },
        "nullable": false,
        "metadata": {}
      },
      {
        "name": "FillWeight",
        "type": {
          "type": "struct",
          "fields": [
            {
              "name": "SourceTimestamp",
              "type": "timestamp",
              "nullable": false,
              "metadata": {}
            },
            {
              "name": "Value",
              "type": "integer",
              "nullable": false,
              "metadata": {}
            }
          ]
        },
        "nullable": false,
        "metadata": {}
      },
      {
        "name": "EnergyUse",
        "type": {
          "type": "struct",
          "fields": [
            {
              "name": "SourceTimestamp",
              "type": "timestamp",
              "nullable": false,
              "metadata": {}
            },
            {
              "name": "Value",
              "type": "integer",
              "nullable": false,
              "metadata": {}
            }
          ]
        },
        "nullable": false,
        "metadata": {}
      }
    ]
  }
}
Save it as a file named opcua-schema.json.
Then, upload the schema to Azure IoT Operations using the Azure CLI. Replace the placeholders with your values.
az iot ops schema create -n opcua-schema -g <RESOURCE_GROUP> --registry <REGISTRY_NAME> --format delta --type message --version-content opcua-schema.json --ver 1
This creates a schema named opcua-schema in the Azure IoT Operations registry with version 1.
To verify the schema is uploaded, list the schema versions using the Azure CLI.
az iot ops schema version list -g <RESOURCE_GROUP> --schema opcua-schema --registry <REGISTRY_NAME>
Create data flow endpoint
The data flow endpoint is the destination where the data is sent. In this case, the data is sent to Azure Data Lake Storage Gen 2. The authentication method is system assigned managed identity, which you set up to have right permissions to write to the storage account.
Create a data flow endpoint using Bicep. Replace the placeholders with your values.
// Replace with your values
param aioInstanceName string = '<AIO_INSTANCE_NAME>'
param customLocationName string = '<CUSTOM_LOCATION_NAME>'

// Tutorial specific values
param endpointName string = 'adls-gen2-endpoint'
param host string = 'https://<ACCOUNT>.blob.core.windows.net'

resource aioInstance 'Microsoft.IoTOperations/instances@2024-11-01' existing = {
  name: aioInstanceName
}

resource customLocation 'Microsoft.ExtendedLocation/customLocations@2021-08-31-preview' existing = {
  name: customLocationName
}

resource adlsGen2Endpoint 'Microsoft.IoTOperations/instances/dataflowEndpoints@2024-11-01' = {
  parent: aioInstance
  name: endpointName
  extendedLocation: {
    name: customLocation.id
    type: 'CustomLocation'
  }
  properties: {
    endpointType: 'DataLakeStorage'
    dataLakeStorageSettings: {
      host: host
      authentication: {
        method: 'SystemAssignedManagedIdentity'
        systemAssignedManagedIdentitySettings: {}
      }
    }
  }
}
Save the file as adls-gen2-endpoint.bicep and deploy it using the Azure CLI
az deployment group create -g <RESOURCE_GROUP> --template-file adls-gen2-endpoint.bicep
Create a data flow
To send data to Azure Data Lake Storage Gen 2, you need to create a data flow that reads data from the OPC UA server and writes it to the storage account. No transformation is needed in this case, so the data is written as-is.
Create a data flow using Bicep. Replace the placeholders with your values.
// Replace with your values
param aioInstanceName string = '<AIO_INSTANCE_NAME>'
param customLocationName string = '<CUSTOM_LOCATION_NAME>'
param schemaNamespace string = '<SCHEMA_NAMESPACE>'

// Tutorial specific values
param schema string = 'opcua-schema'
param schemaVersion string = '1'
param dataflowName string = 'tutorial-adls-gen2'
param assetName string = 'oven'
param endpointName string = 'adls-gen2-endpoint'
param containerName string = 'aiotutorial'
param serialFormat string = 'Delta'

resource aioInstance 'Microsoft.IoTOperations/instances@2024-11-01' existing = {
  name: aioInstanceName
}

resource customLocation 'Microsoft.ExtendedLocation/customLocations@2021-08-31-preview' existing = {
  name: customLocationName
}

// Pointer to the default data flow profile
resource defaultDataflowProfile 'Microsoft.IoTOperations/instances/dataflowProfiles@2024-11-01' existing = {
  parent: aioInstance
  name: 'default'
}

resource adlsEndpoint 'Microsoft.IoTOperations/instances/dataflowEndpoints@2024-11-01' existing = {
  parent: aioInstance
  name: endpointName
}

resource defaultDataflowEndpoint 'Microsoft.IoTOperations/instances/dataflowEndpoints@2024-11-01' existing = {
  parent: aioInstance
  name: 'default'
}

resource asset 'Microsoft.DeviceRegistry/assets@2024-11-01' existing = {
  name: assetName
}

resource dataflow 'Microsoft.IoTOperations/instances/dataflowProfiles/dataflows@2024-11-01' = {
  // Reference to the parent data flow profile, the default profile in this case
  // Same usage as profileRef in Kubernetes YAML
  parent: defaultDataflowProfile
  name: dataflowName
  extendedLocation: {
    name: customLocation.id
    type: 'CustomLocation'
  }
  properties: {
    mode: 'Enabled'
    operations: [
      {
        operationType: 'Source'
        sourceSettings: {
          endpointRef: defaultDataflowEndpoint.name
          assetRef: asset.name
          dataSources: ['azure-iot-operations/data/${assetName}']
        }
      }
      // Transformation optional
      {
        operationType: 'BuiltInTransformation'
        builtInTransformationSettings: {
          serializationFormat: serialFormat
          schemaRef: 'aio-sr://${schemaNamespace}/${schema}:${schemaVersion}'
          map: [
            {
              type: 'PassThrough'
              inputs: [
                '*'
              ]
              output: '*'
            }
         ]
        }
      }
      {
        operationType: 'Destination'
        destinationSettings: {
          endpointRef: adlsEndpoint.name
          dataDestination: containerName
        }
      }
    ]
  }
}
Save the file as adls-gen2-dataflow.bicep and deploy it using the Azure CLI
az deployment group create -g <RESOURCE_GROUP> --template-file adls-gen2-dataflow.bicep
Verify data in Azure Data Lake Storage Gen 2
In the storage account, go to the Containers blade and select the container aiotutorial you created. You should see a folder named aiotutorial and inside it, you should see Parquet files with the data from the OPC UA server. The file names are in the format part-00001-44686130-347f-4c2c-81c8-eb891601ef98-c000.snappy.parquet.
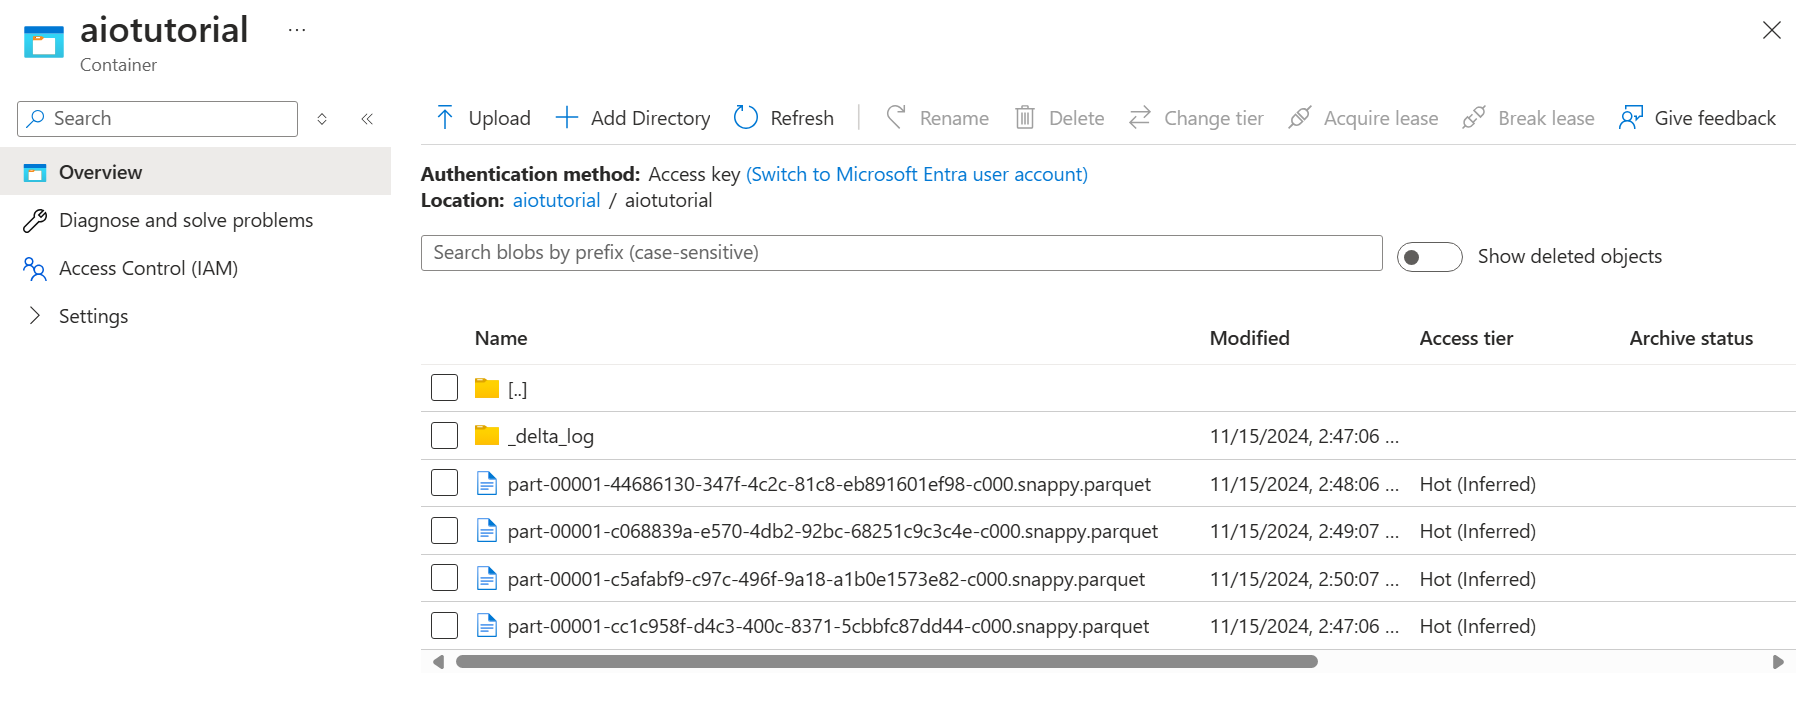
To see the content of the files, select each file and select Edit.
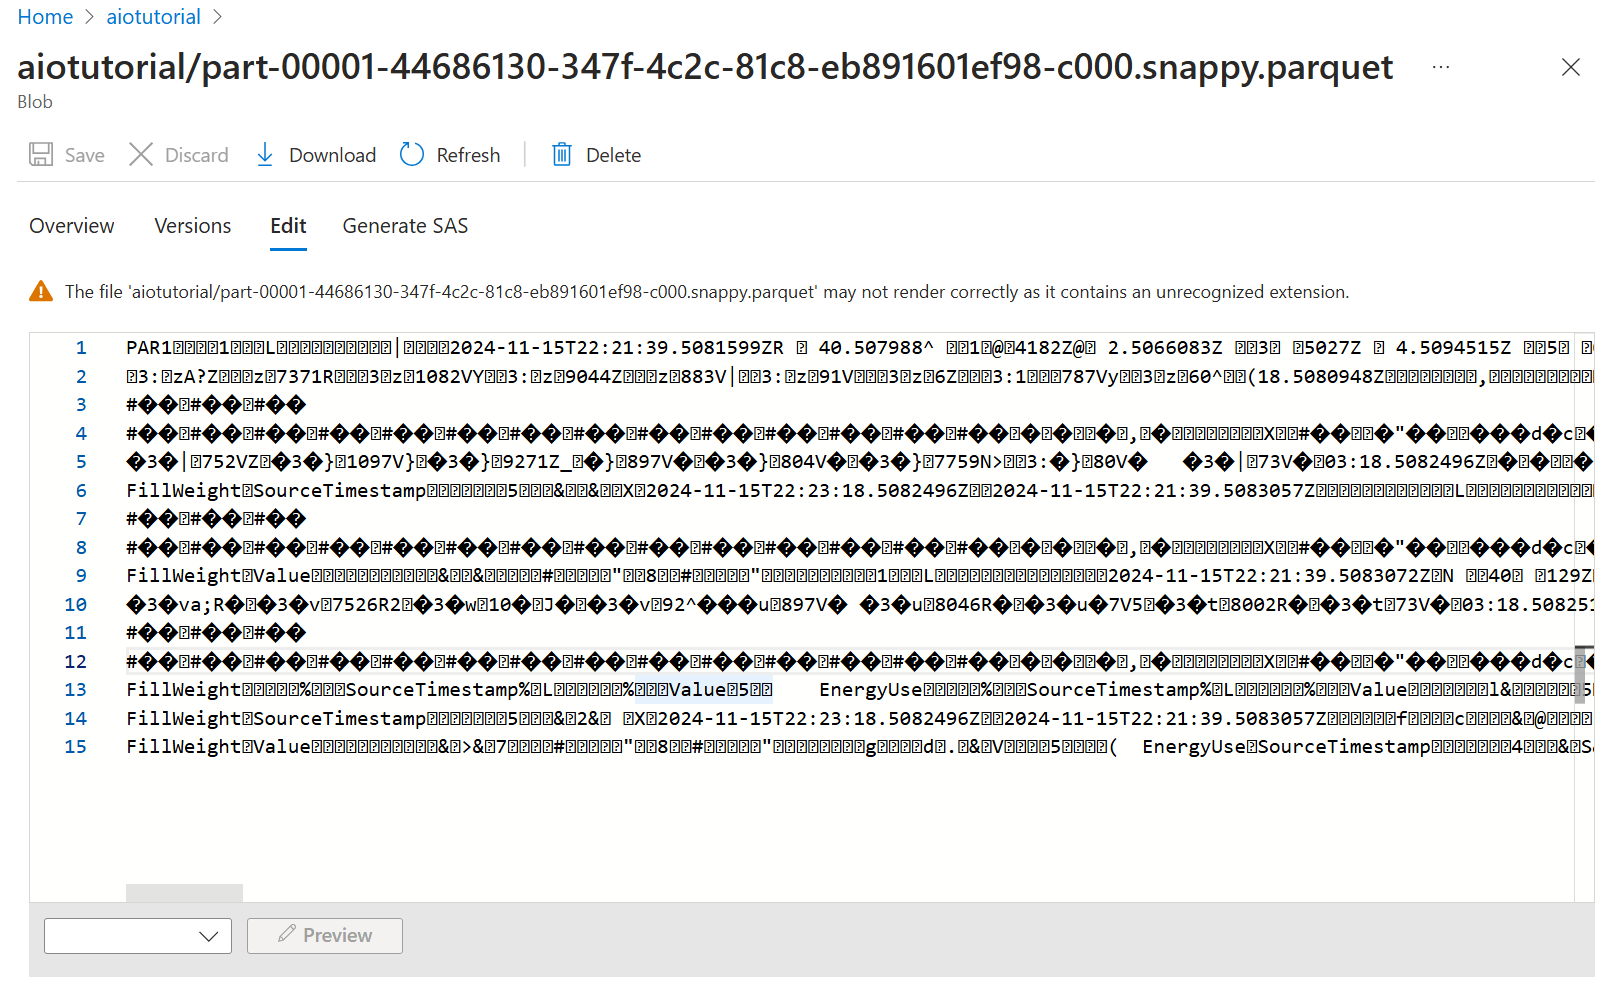
The content doesn't render properly in the Azure portal, but you can download the file and open it in a tool like Parquet Viewer.