Tutorial: Build an image analysis web app with TypeScript

In this tutorial, you learn how to locally build and deploy a React/TypeScript client application to an Azure Static Web App with a GitHub action. The React app allows you to analyze an image with Cognitive Services Computer Vision.

In this tutorial, learn how to:

  • Create Azure resources with Azure CLI
  • Add environment variables to remote environment
  • Use GitHub action with environment variables
  • View deployed web app

Prerequisites

  • Azure user account with an active subscription. Create one for free.
  • Node.js and npm - installed to your local machine.
  • Visual Studio Code - installed to your local machine.
  • Git - used to push to GitHub - which activates the GitHub action.
  • GitHub account - to fork and push to a repo.
  • Use Azure Cloud Shell using the bash environment.
  • Your Azure account must have a Cognitive Services Contributor role assigned in order for you to agree to the responsible AI terms and create a resource. To get this role assigned to your account, follow the steps in the Assign roles documentation, or contact your administrator.

What is an Azure Static web app

When building static web apps, you have several choices on Azure, based on the degree of functionality and control you're interested in. This tutorial focuses on the easiest service with many of the choices made for you, so you can focus on your front-end code and not the hosting environment.

The React (create-react-app) provides the following functionality:

  • Display message if Azure key and endpoint for Cognitive Services Computer Vision isn't found
  • Allows you to analyze an image with Cognitive Services Computer Vision
    • Enter a public image URL or analyze image from collection
    • When analysis is complete
      • Display image
      • Display Computer Vision JSON results

Screenshot of React Cognitive Service Computer Vision sample results.

To deploy the static web app, use a GitHub action, which starts when a push to a specific branch happens:

  • Inserts GitHub secrets for Computer Vision key and endpoint into build
  • Builds the React (create-react-app) client
  • Moves the resulting files to your Azure Static Web app resource

Fork the sample repo

Fork the repository, instead of just cloning it to your local computer, in order to have a GitHub repository of your own to push changes to.

  1. Open a separate browser window or tab, and to sign in to GitHub.

  2. Navigate to the GitHub sample repository.

    https://github.com/Azure-Samples/js-e2e-client-cognitive-services
    
  3. On the top-right section of the page, select Fork.

  4. Select Code then copy the location URL for your fork.

    Screenshot of GitHub website, select **Code** then copy the location for your fork.

Create local development environment

  1. In a terminal or bash window, clone your fork to your local computer. Replace YOUR-ACCOUNT-NAME with your GitHub account name.

    git clone https://github.com/YOUR-ACCOUNT-NAME/js-e2e-client-cognitive-services
    
  2. Change to the new directory and install the dependencies.

    cd js-e2e-client-cognitive-services && npm install
    

    The installation step installs the required dependencies, including @azure/cognitiveservices-computervision.

Run the local sample

  1. Run the sample.

    npm start
    

    Screenshot of React Cognitive Service Computer Vision sample for image analysis before key and endpoint set.

  2. Stop the app. Either close the terminal window or use control+c at the terminal.

Create your resource group

At a terminal or bash shell, enter the Azure CLI command to create an Azure resource group, with the name rg-demo:

az group create \
    --location eastus \
    --name rg-demo \
    --subscription YOUR-SUBSCRIPTION-NAME-OR-ID

Create a Computer Vision resource

Creating a resource group allows you to easily find the resources, and delete them when you're done. This type of resource requires that you agree to the Responsible Use agreement. Use the following list to know how you can quickly create the correct resource:

Create your first Computer Vision resource

If this is your first AI service, you must create the service through the portal and agree to the Responsible Use agreement, as part of that resource creation. If this isn't your first resource requiring the Responsible Use agreement, you can create the resource with the Azure CLI, found in the next section.

Use the following table to help create the resource within the Azure portal.

Setting Value
Resource group rg-demo
Name demo-ComputerVision
Sku S1
Location eastus

Create an additional Computer Vision resource

Run the following command to create a Computer Vision resource:

az cognitiveservices account create \
    --name demo-ComputerVision \
    --resource-group rg-demo \
    --kind ComputerVision \
    --sku S1 \
    --location eastus \
    --yes

Get Computer Vision resource endpoint and keys

  1. In the results, find and copy the properties.endpoint. You'll need that later.

    ...
    "properties":{
        ...
        "endpoint": "https://eastus.api.cognitive.microsoft.com/",
        ...
    }
    ...
    
  2. Run the following command to get your keys.

    az cognitiveservices account keys list \
    --name demo-ComputerVision \
    --resource-group rg-demo
    
  3. Copy one of the keys, you'll need that later.

    {
      "key1": "8eb7f878bdce4e96b26c89b2b8d05319",
      "key2": "c2067cea18254bdda71c8ba6428c1e1a"
    }
    

Add environment variables to your local environment

To use your resource, the local code needs to have the key and endpoint available. This code base stores those in environment variables:

  • REACT_APP_AZURE_COMPUTER_VISION_KEY
  • REACT_APP_AZURE_COMPUTER_VISION_ENDPOINT
  1. Run the following command to add these variables to your environment.

    export REACT_APP_AZURE_COMPUTER_VISION_KEY="REPLACE-WITH-YOUR-KEY"
    export REACT_APP_AZURE_COMPUTER_VISION_ENDPOINT="REPLACE-WITH-YOUR-ENDPOINT"
    

Add environment variables to your remote environment

When using Azure Static web apps, environment variables such as secrets, need to be passed from the GitHub action to the Static web app. The GitHub action builds the app, including the Computer Vision key and endpoint passed in from the GitHub secrets for that repository, then pushes the code with the environment variables to the static web app.

  1. In a web browser, on your GitHub repository, select Settings, then Secrets, then New repository secret..

    Screenshot of GitHub repository, creating new repository secret.

  2. Enter the same name and value for the endpoint you used in the previous section. Then create another secret with the same name and value for the key as used in the previous section.

    Screenshot of entering the same name and value for the endpoint. Then create another secret with the same name and value for the key.

Run local react app with ComputerVision resource

  1. Start the app again, at the command line:

    npm start
    

    Screenshot of React Cognitive Service Computer Vision sample ready for URL or press enter.

  2. Leave the text field empty, to select an image from the default catalog, and select the Analyze button.

    Screenshot of React Cognitive Service Computer Vision sample results.

    The image is selected randomly from a catalog of images defined in ./src/DefaultImages.js.

  3. Continue to select the Analyze button to see the other images and results.

Push the local branch to GitHub

In the Visual Studio Code terminal, push the local branch, main to your remote repository.

git push origin main

You didn't need to commit any changes because no changes were made yet.

Create a Static Web app resource

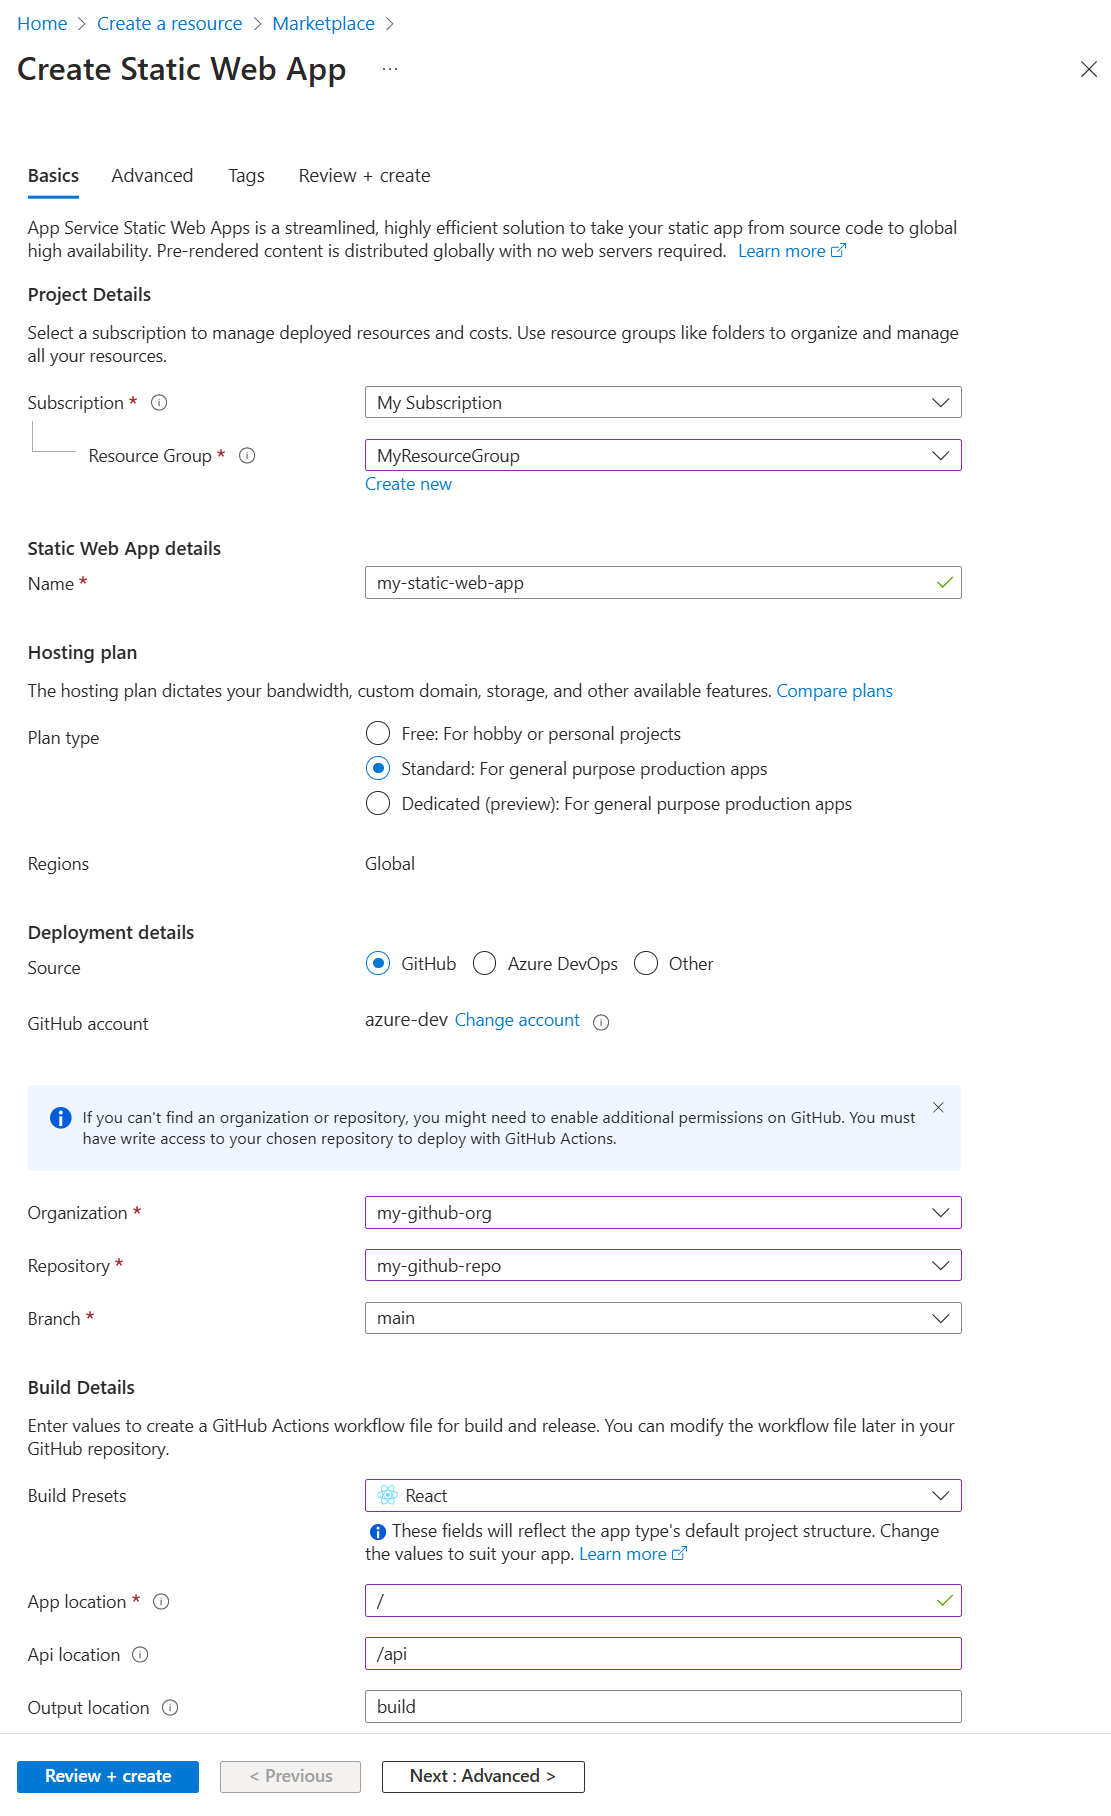
  1. Select the Azure icon, then right-click on the Static Web Apps service, then select Create Static Web App (Advanced).

    Screenshot with Visual Studio extension.

  2. If a pop-up window asks if you want to continue on the main branch, select Continue.

  3. Enter the following information in the subsequent fields, presented one at a time.

    Field name value
    Select a resource group for new resources. Select the resource group you created for your ComputerVision resource, demo-ComputerVision.
    Enter a name for the new static web app. Demo-ComputerVisionAnalyzer
    Select pricing option Select free.
    Select the location of your application code. Select the same location you selected when you created your resource group, eastus.
    Choose build preset to configure default project structure. React
    Choose the location of your application code. /
    Enter the location of your Azure Functions code. Take the default value.
    Enter the path of your build output relative to your app's location. build

Update the GitHub action with secret environment variables

The Computer Vision key and endpoint are in the repository's secrets collection but aren't in the GitHub action yet. This step adds the key and endpoint to the action.

  1. Pull down the changes made from creating the Azure resource, to get the GitHub action file.

    git pull origin main
    
  2. In the Visual Studio Code editor, edit the GitHub Action file found at ./.github/workflows/ to add the secrets.

    name: Azure Static Web Apps CI/CD
    
    on:
      push:
        branches:
          - from-local
      pull_request:
        types: [opened, synchronize, reopened, closed]
        branches:
          - from-local
    
    jobs:
      build_and_deploy_job:
        if: github.event_name == 'push' || (github.event_name == 'pull_request' && github.event.action != 'closed')
        runs-on: ubuntu-latest
        name: Build and Deploy Job
        steps:
          - uses: actions/checkout@v2
            with:
              submodules: true
          - name: Build And Deploy
            id: builddeploy
            uses: Azure/static-web-apps-deploy@v0.0.1-preview
            with:
              azure_static_web_apps_api_token: ${{ secrets.AZURE_STATIC_WEB_APPS_API_TOKEN_RANDOM_NAME_HERE }}
              repo_token: ${{ secrets.GITHUB_TOKEN }} # Used for Github integrations (i.e. PR comments)
              action: "upload"
              ###### Repository/Build Configurations - These values can be configured to match you app requirements. ######
              # For more information regarding Static Web App workflow configurations, please visit: https://aka.ms/swaworkflowconfig
              app_location: "/" # App source code path
              api_location: "api" # Api source code path - optional
              output_location: "build" # Built app content directory - optional
              ###### End of Repository/Build Configurations ######
            env:
              REACT_APP_AZURE_COMPUTER_VISION_ENDPOINT: ${{secrets.REACT_APP_AZURE_COMPUTER_VISION_ENDPOINT}}
              REACT_APP_AZURE_COMPUTER_VISION_KEY:  ${{secrets.REACT_APP_AZURE_COMPUTER_VISION_KEY}}
    
      close_pull_request_job:
        if: github.event_name == 'pull_request' && github.event.action == 'closed'
        runs-on: ubuntu-latest
        name: Close Pull Request Job
        steps:
          - name: Close Pull Request
            id: closepullrequest
            uses: Azure/static-web-apps-deploy@v0.0.1-preview
            with:
              azure_static_web_apps_api_token: ${{ secrets.AZURE_STATIC_WEB_APPS_API_TOKEN_RANDOM_NAME_HERE }}
              action: "close"
    
  3. Add and commit the change to the local main branch.

    git add . && git commit -m "add secrets to action"
    
  4. Push the change to the remote repository, starting a new build-and-deploy action to your Azure Static web app.

    git push origin main
    

View the GitHub Action build process

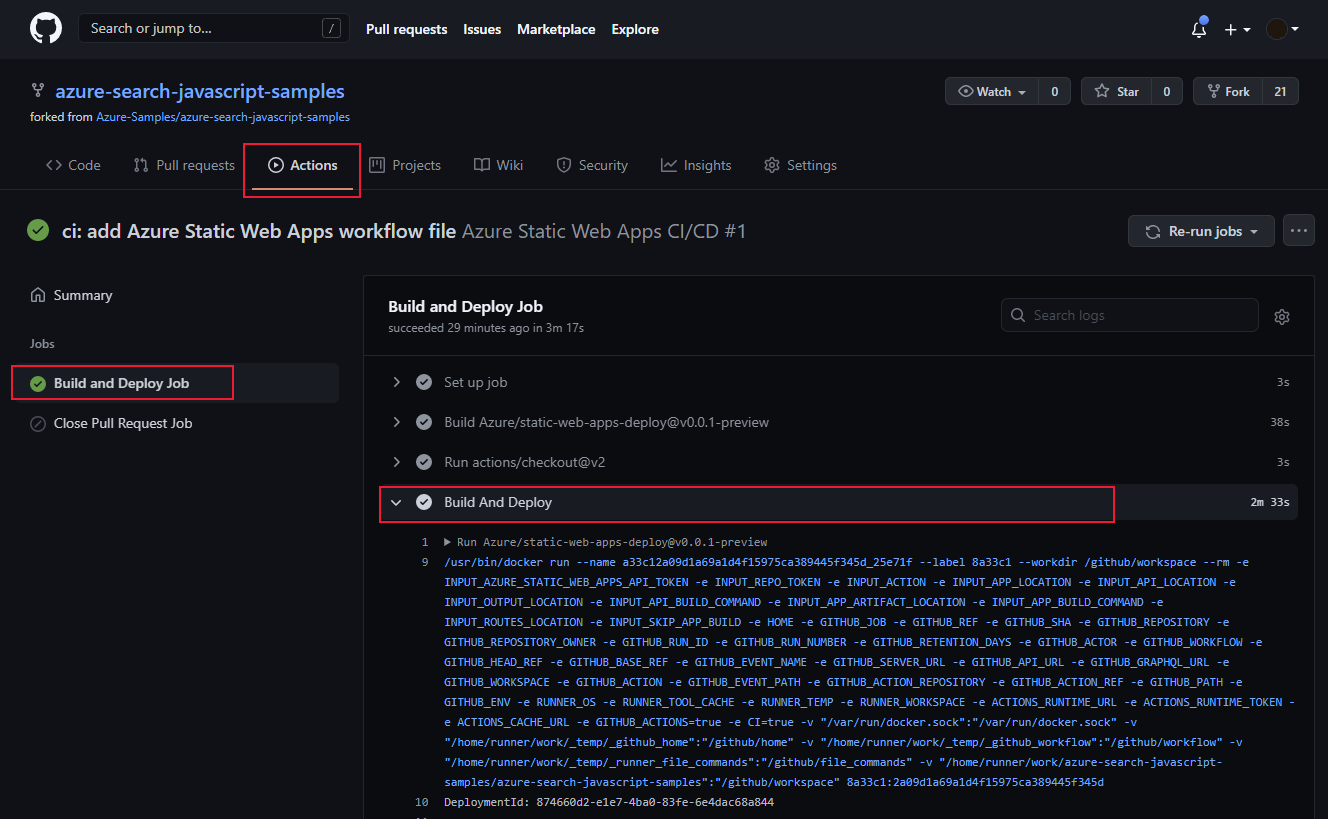
  1. In a web browser, open your GitHub repository for this tutorial, and select Actions.

  2. Select the top build in the list, then select Build and Deploy Job on the left-side menu to watch the build process. Wait until the Build And Deploy successfully finishes.

    Screenshot of GitHub action building the app.

View remote Azure static web site in browser

  1. In Visual Studio Code, select the Azure icon in the far right menu, then select your Static web app, then right-click Browse site, then select Open to view the public static web site.

Screenshot of web browser: Select `Browse site`, then select `Open` to view the public static web site.

You can also find the URL for the site at:

  • the Azure portal for your resource, on the Overview page.
  • the GitHub action's build-and-deploy output has the site URL at the very end of the script

Code: Add Computer Vision to local React app

Use npm to add Computer Vision to the package.json file.

npm install @azure/cognitiveservices-computervision 

Code: Add Computer Vision code as separate module

The Computer Vision code is contained in a separate file named ./src/azure-cognitiveservices-computervision.js. The main function of the module is highlighted.

// ./src/azure-cognitiveservices-computervision.js

// Azure SDK client libraries
import { ComputerVisionClient } from '@azure/cognitiveservices-computervision';
import { ApiKeyCredentials } from '@azure/ms-rest-js';

// List of sample images to use in demo
import RandomImageUrl from './DefaultImages';

// Authentication requirements
const key = process.env.REACT_APP_AZURE_COMPUTER_VISION_KEY;
const endpoint = process.env.REACT_APP_AZURE_COMPUTER_VISION_ENDPOINT;

console.log(`key = ${key}`)
console.log(`endpoint = ${endpoint}`)

// Cognitive service features
const visualFeatures = [
    "ImageType",
    "Faces",
    "Adult",
    "Categories",
    "Color",
    "Tags",
    "Description",
    "Objects",
    "Brands"
];

export const isConfigured = () => {
    const result = (key && endpoint && (key.length > 0) && (endpoint.length > 0)) ? true : false;
    console.log(`key = ${key}`)
    console.log(`endpoint = ${endpoint}`)
    console.log(`ComputerVision isConfigured = ${result}`)
    return result;
}

// Computer Vision detected Printed Text
const includesText = async (tags) => {
    return tags.filter((el) => {
        return el.name.toLowerCase() === "text";
    });
}
// Computer Vision detected Handwriting
const includesHandwriting = async (tags) => {
    return tags.filter((el) => {
        return el.name.toLowerCase() === "handwriting";
    });
}
// Wait for text detection to succeed
const wait = (timeout) => {
    return new Promise(resolve => {
        setTimeout(resolve, timeout);
    });
}

// Analyze Image from URL
export const computerVision = async (url) => {

    // authenticate to Azure service
    const computerVisionClient = new ComputerVisionClient(
        new ApiKeyCredentials({ inHeader: { 'Ocp-Apim-Subscription-Key': key } }), endpoint);

    // get image URL - entered in form or random from Default Images
    const urlToAnalyze = url || RandomImageUrl();
    
    // analyze image
    const analysis = await computerVisionClient.analyzeImage(urlToAnalyze, { visualFeatures });

    // text detected - what does it say and where is it
    if (includesText(analysis.tags) || includesHandwriting(analysis.tags)) {
        analysis.text = await readTextFromURL(computerVisionClient, urlToAnalyze);
    }

    // all information about image
    return { "URL": urlToAnalyze, ...analysis};
}
// analyze text in image
const readTextFromURL = async (client, url) => {
    
    let result = await client.read(url);
    let operationID = result.operationLocation.split('/').slice(-1)[0];

    // Wait for read recognition to complete
    // result.status is initially undefined, since it's the result of read
    const start = Date.now();
    console.log(`${start} -${result?.status} `);
    
    while (result.status !== "succeeded") {
        await wait(500);
        console.log(`${Date.now() - start} -${result?.status} `);
        result = await client.getReadResult(operationID);
    }
    
    // Return the first page of result. 
    // Replace[0] with the desired page if this is a multi-page file such as .pdf or.tiff.
    return result.analyzeResult; 
}

Code: Add catalog of images as separate module

The app selects a random image from a catalog if the user doesn't enter an image URL. The random selection function is highlighted

// ./src/DefaultImages.js

const describeURL = 'https://raw.githubusercontent.com/Azure-Samples/cognitive-services-sample-data-files/master/ComputerVision/Images/celebrities.jpg';
const categoryURLImage = 'https://moderatorsampleimages.blob.core.windows.net/samples/sample16.png';
const tagsURL = 'https://moderatorsampleimages.blob.core.windows.net/samples/sample16.png';
const objectURL = 'https://raw.githubusercontent.com/Azure-Samples/cognitive-services-node-sdk-samples/master/Data/image.jpg';
const brandURLImage = 'https://docs.microsoft.com/en-us/azure/cognitive-services/computer-vision/images/red-shirt-logo.jpg';
const facesImageURL = 'https://raw.githubusercontent.com/Azure-Samples/cognitive-services-sample-data-files/master/ComputerVision/Images/faces.jpg';
const printedTextSampleURL = 'https://moderatorsampleimages.blob.core.windows.net/samples/sample2.jpg';
const multiLingualTextURL = 'https://raw.githubusercontent.com/Azure-Samples/cognitive-services-sample-data-files/master/ComputerVision/Images/MultiLingual.png';
const adultURLImage = 'https://raw.githubusercontent.com/Azure-Samples/cognitive-services-sample-data-files/master/ComputerVision/Images/celebrities.jpg';
const colorURLImage = 'https://raw.githubusercontent.com/Azure-Samples/cognitive-services-sample-data-files/master/ComputerVision/Images/celebrities.jpg';
// don't use with picture analysis
// eslint-disable-next-line
const mixedMultiPagePDFURL = 'https://raw.githubusercontent.com/Azure-Samples/cognitive-services-sample-data-files/master/ComputerVision/Images/MultiPageHandwrittenForm.pdf';
const domainURLImage = 'https://raw.githubusercontent.com/Azure-Samples/cognitive-services-sample-data-files/master/ComputerVision/Images/landmark.jpg';
const typeURLImage = 'https://raw.githubusercontent.com/Azure-Samples/cognitive-services-python-sdk-samples/master/samples/vision/images/make_things_happen.jpg';

const DefaultImages = [
    describeURL,
    categoryURLImage,
    tagsURL,
    objectURL,
    brandURLImage,
    facesImageURL,
    adultURLImage,
    colorURLImage,
    domainURLImage,
    typeURLImage,
    printedTextSampleURL,
    multiLingualTextURL,
    //mixedMultiPagePDFURL
];

const RandomImageUrl = () => {
    return DefaultImages[Math.floor(Math.random() * Math.floor(DefaultImages.length))];
}

export default RandomImageUrl;

Code: Add custom Computer Vision module to React app

Add methods to the React app.js. The image analysis and display of results are highlighted.

// ./src/App.js

import React, { useState } from 'react';
import './App.css';
import { computerVision, isConfigured as ComputerVisionIsConfigured } from './azure-cognitiveservices-computervision';

function App() {

  const [fileSelected, setFileSelected] = useState(null);
  const [analysis, setAnalysis] = useState(null);
  const [processing, setProcessing] = useState(false);
  
  const handleChange = (e) => {
    setFileSelected(e.target.value)
  }
  const onFileUrlEntered = (e) => {

    // hold UI
    setProcessing(true);
    setAnalysis(null);

    computerVision(fileSelected || null).then((item) => {
      // reset state/form
      setAnalysis(item);
      setFileSelected("");
      setProcessing(false);
    });

  };

  // Display JSON data in readable format
  const PrettyPrintJson = (data) => {
    return (<div><pre>{JSON.stringify(data, null, 2)}</pre></div>);
  }

  const DisplayResults = () => {
    return (
      <div>
        <h2>Computer Vision Analysis</h2>
        <div><img src={analysis.URL} height="200" border="1" alt={(analysis.description && analysis.description.captions && analysis.description.captions[0].text ? analysis.description.captions[0].text : "can't find caption")} /></div>
        {PrettyPrintJson(analysis)}
      </div>
    )
  };
  
  const Analyze = () => {
    return (
    <div>
      <h1>Analyze image</h1>
      {!processing &&
        <div>
          <div>
            <label>URL</label>
            <input type="text" placeholder="Enter URL or leave empty for random image from collection" size="50" onChange={handleChange}></input>
          </div>
          <button onClick={onFileUrlEntered}>Analyze</button>
        </div>
      }
      {processing && <div>Processing</div>}
      <hr />
      {analysis && DisplayResults()}
      </div>
    )
  }
  
  const CantAnalyze = () => {
    return (
      <div>Key and/or endpoint not configured in ./azure-cognitiveservices-computervision.js</div>
    )
  }
  
  function Render() {
    const ready = ComputerVisionIsConfigured();
    if (ready) {
      return <Analyze />;
    }
    return <CantAnalyze />;
  }

  return (
    <div>
      {Render()}
    </div>
    
  );
}

export default App;

Clean up resources

Once you have completed this tutorial, you need to remove the resource group, which includes the Computer Vision resource and Static web app, to make sure you aren't billed for any more usage.

In VS Code, select the Azure explorer, then right-click on your resource group which is listed under the subscription, and select Delete.

Partial screen shot of VS Code, selecting resource group from list of resource groups, then right-clicking to select `Delete`.