Connect OT network sensors to Microsoft Sentinel (legacy)
This article describes the legacy method for connecting your OT sensor to Microsoft Sentinel. Stream data into Microsoft Sentinel whenever you want to use Microsoft Sentinel's advanced threat hunting, security analytics, and automation features when responding to security incidents and threats across your network.
Important
This feature will be deprecated in January 2025.
If you're using a cloud connected sensor, we recommend that you connect Defender for IoT data using the Microsoft Sentinel solution instead of the legacy integration method. For more information, see:
Prerequisites
Before you start, make sure that you have the following prerequisites as needed:
Access to the OT network sensor as an Admin user. For more information, see On-premises users and roles for OT monitoring with Defender for IoT.
A proxy machine prepared to send data to Microsoft Sentinel. For more information, see Get CEF-formatted logs from your device or appliance into Microsoft Sentinel.
If you want to encrypt the data you send to Microsoft Sentinel using TLS, make sure to generate a valid TLS certificate from the proxy server to use in your forwarding alert rule.
Set up forwarding alert rules
Sign into your OT network sensor and create a forwarding rule. For more information, see Forward on-premises OT alert information.
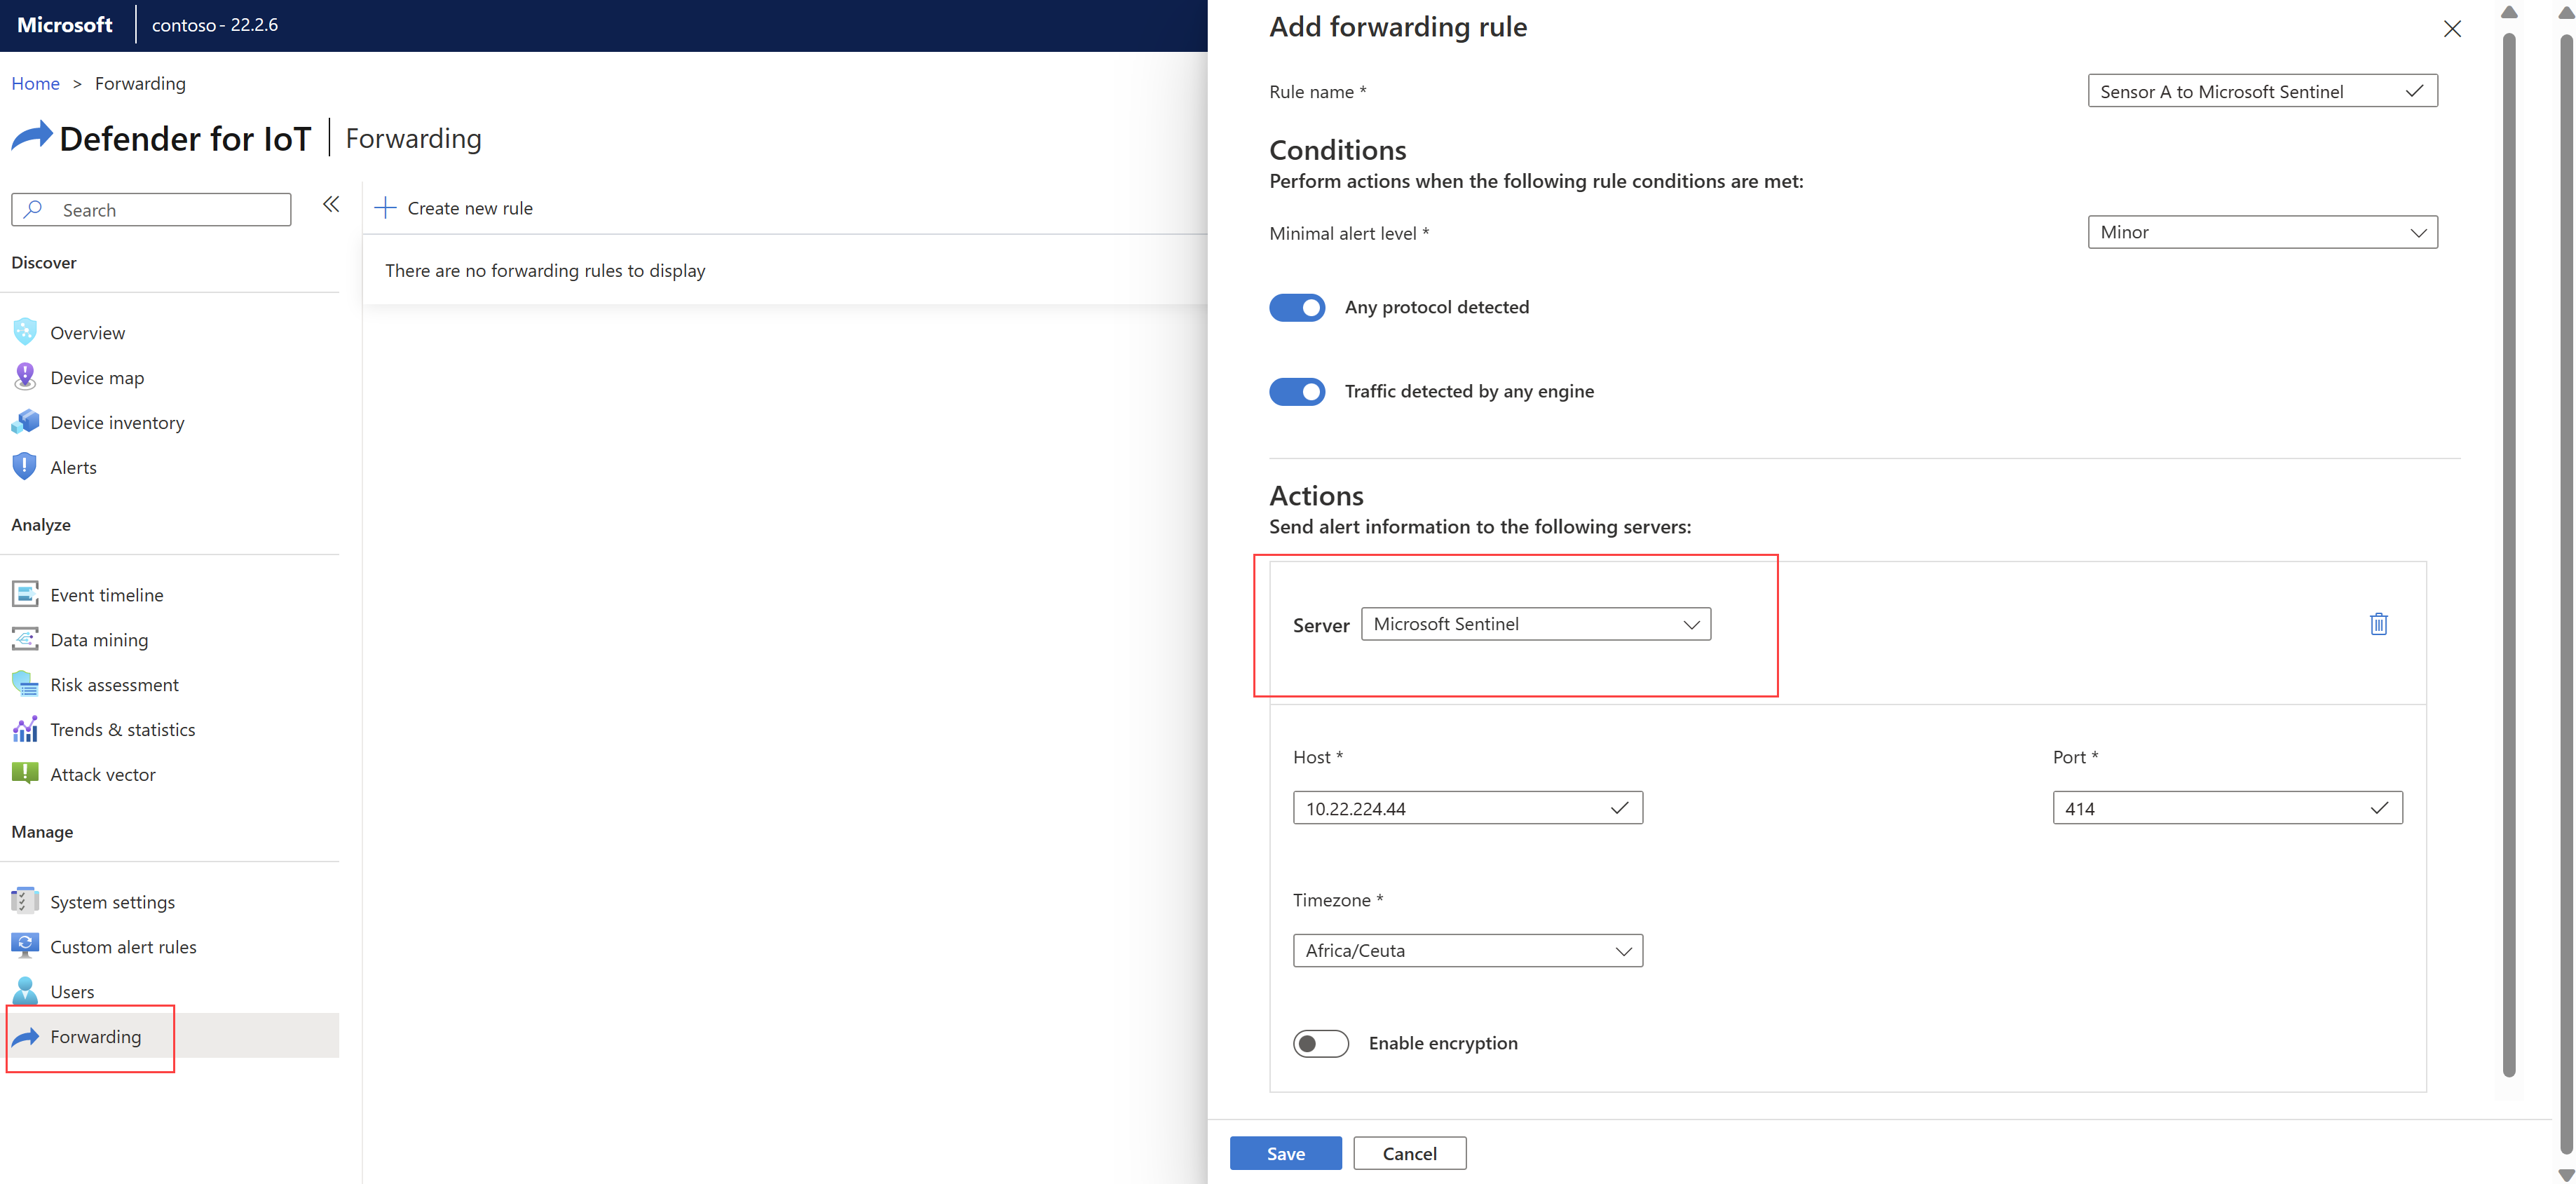
When creating your forwarding rule, make sure to select Microsoft Sentinel as the Server value. For example, on the OT sensor:
If you're using TLS encryption, make sure to select Enable encryption and upload your certificate and key files.
Select Save when you're done. Make sure to test the rule to make sure that it works as expected.
Important
To forward alert details to multiple Microsoft Sentinel instances, make sure to create a separate forwarding rule for each instance. Don't use the Add server option in the same forwarding rule to send data to multiple Microsoft Sentinel instances.
Next steps
For more information, see:
