Managing network policies for serverless egress control
Important
This feature is in Public Preview.
This document explains how to configure and manage network policies to control outbound network connections from your serverless workloads in Azure Databricks.
Permissions for managing network policies are restricted to account admin. See Azure Databricks administration introduction.
Accessing network policies
To create, view, and update network policies in your account:
- From the account console, click Cloud resources.
- Click the Network tab.
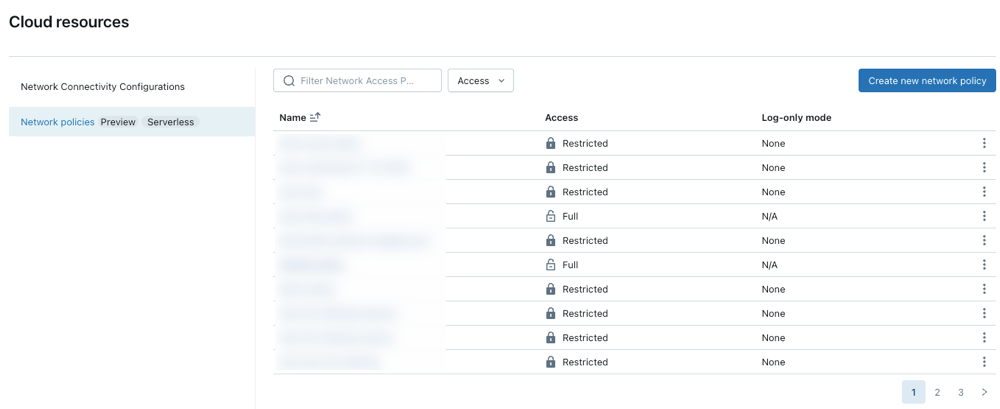
Create a new network policy
Click Create new network policy.
Choose a network access mode:
- Full access: Unrestricted outbound internet access. If you choose Full access, outbound internet access remains unrestricted.
- Restricted access: Outbound access is limited to specified destinations. For more information, see Network policy overview.
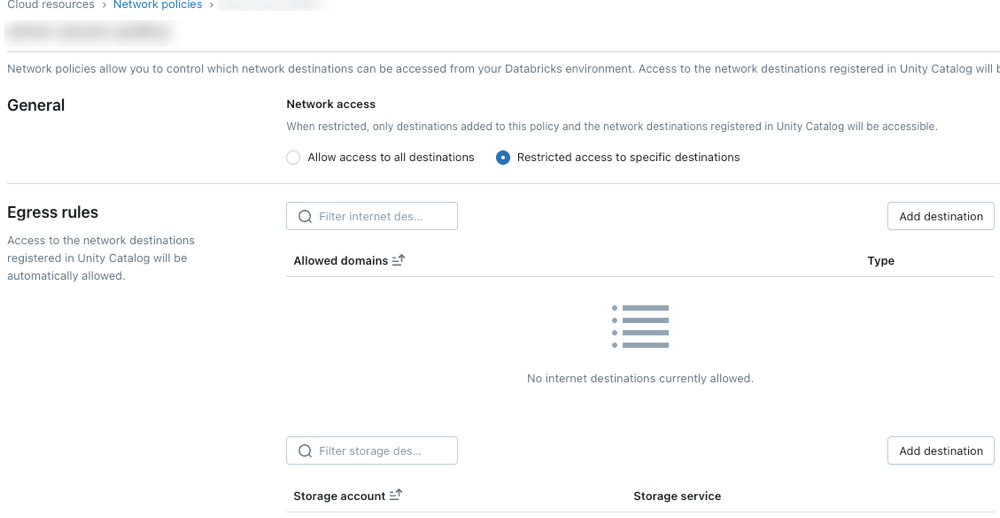
Configure network policies
The following steps outline optional settings for restricted access mode.
Egress rules
Destinations configured through Unity Catalog locations or connections are automatically allowed by the policy.
To grant your serverless compute access to additional domains, click Add destination above the Allowed domains list.
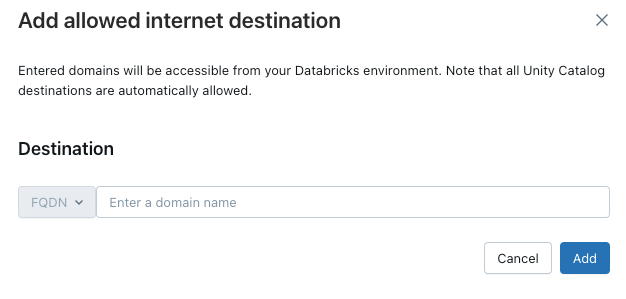
The FQDN filter allows access to all domains that share the same IP address. Model serving provisioned throughout endpoints prevents internet access when network access is set to restricted. However, granular control with FQDN filtering is not supported.
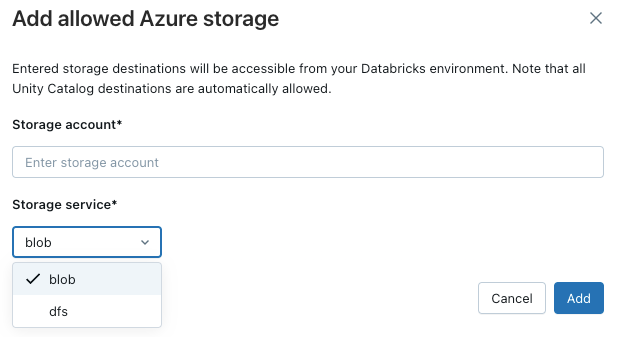
To allow your workspace to access additional Azure storage accounts, click the Add destination button above the Allowed storage accounts list.
Note
The maximum number of supported destinations is 2000. This includes all Unity Catalog locations and connections accessible from the workspace as well as destinations explicitly added in the policy.
Policy enforcement
Log-only mode allows you to test your policy configuration and monitor outbound connections without disrupting access to resources. When log-only mode is enabled, requests that violate the policy are logged but not blocked. You can select from the following options:
Databricks SQL: Databricks SQL warehouses operate in log-only mode.
AI model serving: Model serving endpoints operates in log-only mode.
All products: All Azure Databricks services operate in log-only mode, overriding all other selections.

Update the default policy
Each Azure Databricks account includes a default policy. The default policy is associated with all workspaces with no explicit network policy assignment, including newly created workspaces. You can modify this policy, but it cannot be deleted. Default policies are only applied to workspaces with at least Premium.
Associate a network policy to workspaces
If you have updated your default policy with additional configurations, they are automatically applied to workspaces that do not have an existing network policy. Your workspace will need to be in Premium.
To associate your workspace with a different policy, do the following:
- Select a workspace.
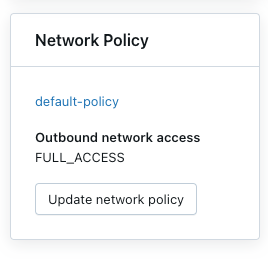
- In Network Policy, click Update network policy.
- Select the desired network policy from the list.
Apply network policy changes
Most network configuration updates automatically propagate to your serverless compute within ten minutes. This includes:
- Adding a new Unity Catalog external location or connection.
- Attaching your workspace to a different metastore.
- Changing the allowed storage or internet destinations.
Note
You must restart your compute if you modify the internet access or log-only mode setting.
Restart or redeploy serverless workloads
You only need to update when switching internet access mode or when updating log-only mode.
To determine the appropriate restart procedure, refer to the following list by product:
- Databricks ML Serving: Redeploy your ML serving endpoint. See Create custom model serving endpoints
- Delta Live Tables: Stop and then restart your running Delta Live Tables pipeline. See Run an update on a Delta Live Tables pipeline.
- Serverless SQL warehouse: Stop and restart the SQL warehouse. See Manage a SQL warehouse.
- Workflows: Network policy changes are automatically applied when a new job run is triggered or an existing job run is restarted.
- Notebooks:
- If your notebook does not interact with Spark, you can terminate and attach a new serverless cluster to refresh your network configuration applied to your notebook.
- If your notebook interacts with Spark, your serverless resource refreshes and automatically detects the change. Switching access mode and log-only mode can take up to 24 hours to be applied, and other changes can take up to 10 minutes to apply.
Verify network policy enforcement
You can validate that your network policy is correctly enforced by attempting to access restricted resources from different serverless workloads. The validation process varies depending on the serverless product.
Validate with Delta Live Tables
- Create a Python notebook. You can use the example notebook provided in the Delta Live Tables wikipedia python tutorial.
- Create a Delta Live Tables pipeline:
- Click Pipelines, under Data Engineering, in the workspace sidebar.
- Click Create Pipeline.
- Configure the pipeline with the following settings:
- Pipeline Mode: Serverless
- Source Code: Select the notebook you created.
- Storage Options: Unity Catalog. Select your desired catalog and schema.
- Click Create.
- Run the Delta Live Tables pipeline.
- In the pipeline page, click Start.
- Wait for the pipeline to complete.
- Verify the results
- Trusted destination: The pipeline should run successfully and write data to the destination.
- Untrusted destination: The pipeline should fail with errors indicating that network access is blocked.
Validate with Databricks SQL
- Create a SQL Warehouse. For instructions, see Create a SQL warehouse.
- Run a test query in the SQL editor that attempts to access a resource controlled by your network policy.
- Verify the results:
- Trusted destination: The query should succeed.
- Untrusted Destination: The query should fail with a network access error.
Validate with model serving
Create a test model
- In a Python notebook, create a model that attempts to access a public internet resource, like downloading a file or making an API request.
- Run this notebook to generate a model in the test workspace. For example:
import mlflow
import mlflow.pyfunc
import mlflow.sklearn
import requests

class DummyModel(mlflow.pyfunc.PythonModel):
    def load_context(self, context):
        pass

    def predict(self, _, model_input):
        first_row = model_input.iloc[0]
        try:
            response = requests.get(first_row['host'])
        except requests.exceptions.RequestException as e:
            # Return the error details as text
            return f"Error: An error occurred - {e}"
        return [response.status_code]

with mlflow.start_run(run_name='internet-access-model'):
    wrappedModel = DummyModel()

    mlflow.pyfunc.log_model(artifact_path="internet_access_ml_model", python_model=wrappedModel, registered_model_name="internet-http-access")
Create a serving endpoint
- In the workspace navigation, select Machine Learning.
- Click the Serving tab.
- Click Create Serving Endpoint.
- Configure the endpoint with the following settings:
- Serving Endpoint Name: Provide a descriptive name.
- Entity Details: Select Model registry model.
- Model: Choose the model you created in the previous step.
- Click Confirm.
- Wait for the serving endpoint to reach the Ready state.
Query the endpoint.
- Use the Query Endpoint option within the serving endpoint page to send a test request.
{"dataframe_records": [{"host": "https://www.google.com"}]}Verify the result:
- Internet access enabled: The query should succeed.
- Internet access restricted: The query should fail with a network access error.
Update a network policy
You can update a network policy any time after it is created. To update a network policy:
- On the details page of the network policy in your accounts console, modify the policy:
- Change the network access mode.
- Enable or disable log-only mode for specific services.
- Add or remove FQDN or storage destinations.
- Click Update.
- Refer to Apply network policy changes to verify that the updates are applied to existing workloads.
Check denial logs
Denial logs are stored in the system.access.outbound_network table in Unity Catalog. These logs track when outbound network requests are denied. To access denial logs, ensure the access schema is enabled on your Unity Catalog metastore. See Enable system table schemas.
Use a SQL query like the one below to view denial events. If log-only logs are enabled, the query returns both denial logs and log-only logs, which you can distinguish using the access_type column. Denial logs have a DROP value, while log-only logs show LOG_ONLY_DENIAL.
The following example retrieves logs from the last 2 hours:
select * from system.access.outbound_network
where event_time >= current_timestamp() - interval 2 hour
sort by event_time desc
Denials are not logged in the network outbound system table when connecting to external generative AI models using the Mosaic AI Gateway. See Mosaic AI Gateway.
Note
There may be some latency between the time of access and when the denial logs appear.
Limitations
Configuration: This feature is only configurable through the account console. API support is not yet available.
Artifact upload size: When using MLflow’s internal Databricks Filesystem with the
dbfs:/databricks/mlflow-tracking/<experiment_id>/<run_id>/artifacts/<artifactPath>format, artifact uploads are limited to 5GB forlog_artifact,log_artifacts, andlog_modelAPIs.Supported Unity Catalog connections: The following connection types are supported: MySQL, PostgreSQL, Snowflake, Redshift, Azure Synapse, SQL Server, Salesforce, BigQuery, Netsuite, Workday RaaS, Hive MetaStore, and Salesforce Data Cloud.
Model serving: Egress control does not apply when building images for model serving.
Azure storage access: Only the Azure Blob Filesystem driver for Azure Data Lake Storage is supported. Access using the Azure Blob Storage driver or WASB driver is not supported.