Organize notebook cells
This article describes Databricks customizations to help you organize notebook cells.
For information on how to format your code cells, see Format code cells.
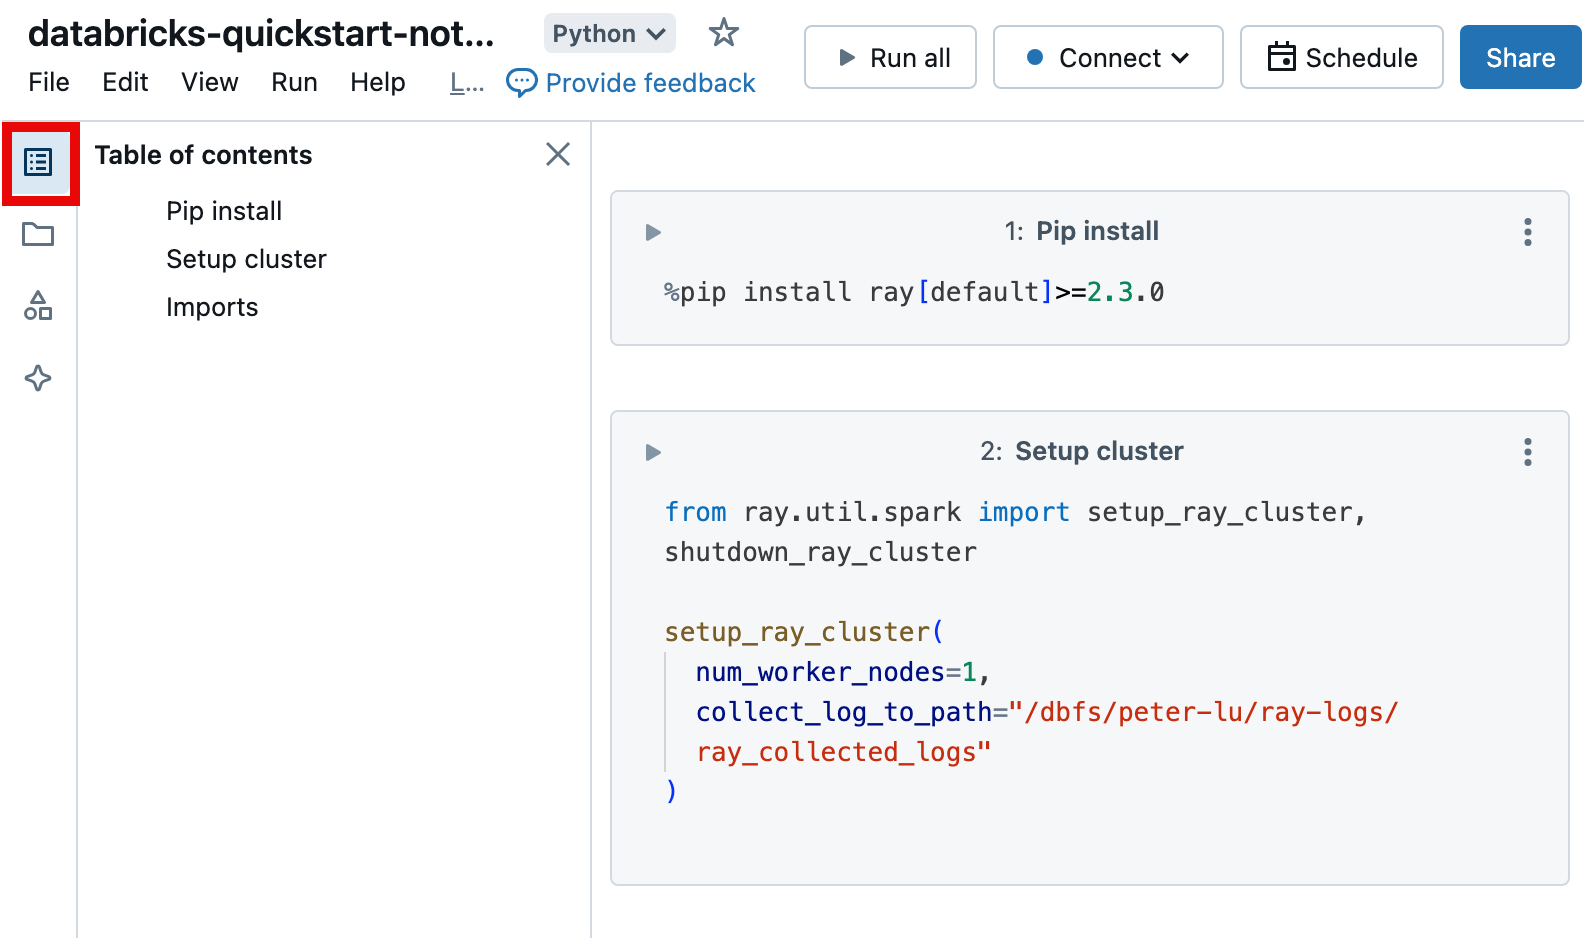
Notebook table of contents
To display an automatically generated table of contents, click the icon at the upper left of the notebook (between the left sidebar and the topmost cell). The table of contents is generated from the Markdown headings used in the notebook. Cells with titles also appear in the table of contents.

Add a cell title
To add a title to a cell, do one of the following:
- Click the cell number at the center of the top of the cell and type the title.
- Select Add title from the cell actions menu.
Cells with titles appear in the notebook’s table of contents.

Promoted cell titles
To make cell titles more visible in the UI, users can enable Show promoted cell titles.
- In the upper-right corner of any page, click your profile photo, then click Settings.
- Click Developer > Enable Show promoted cell titles.
Hide and show cell content
Cell content consists of cell code and the results of running the cell. To hide cell code or results, click the kebab menu ![]() in the upper-right of the cell and select Hide code or Hide result.
in the upper-right of the cell and select Hide code or Hide result.
You can also select Collapse cell to display only the first line of a cell. To expand a collapsed cell, select Expand cell.
To show hidden cells, click the show icon: ![]() .
.
Collapsible headings
Cells that appear after cells containing Markdown headings can be collapsed into the heading cell. To expand or collapse cells after cells containing Markdown headings throughout the notebook, select Collapse all headings from the View menu. The rest of this section describes how to expand or collapse a subset of cells.
Expand and collapse headings
The image shows a level-two heading MLflow setup with the following two cells collapsed into it.

To expand and collapse headings, hover your cursor over the Markdown cell. Click the arrow that appears to the left of the cell.
Cell display options
There are three display options for notebooks. Use the View menu to change the display option.
- Standard view: Results are displayed immediately after code cells.
- Results only: Only results are displayed.
- Side-by-side: Code and results cells are displayed side by side.
The icons on the left and right of the cell show available actions. For example, use the grip dots on the upper left of the cell to move a cell up or down ![]() . To delete a cell, use the trash can icon on the upper right of the cell.
. To delete a cell, use the trash can icon on the upper right of the cell.
For easier editing, click the focus mode icon ![]() to display the cell at full width. To exit focus mode, click
to display the cell at full width. To exit focus mode, click ![]() . You can also enlarge the displayed width of a cell by turning off View > Centered layout.
. You can also enlarge the displayed width of a cell by turning off View > Centered layout.
To automatically format all cells in the notebook to industry standard line lengths and spacing, select Edit > Format notebook.