Configure Network Security Perimeter for an Azure Cosmos DB account
APPLIES TO:
NoSQL
This article explains how to configure Network Security Perimeter on your Azure Cosmos DB account.
Important
Network Security Perimeter is in public preview. This feature is provided without a service level agreement. For more information, see Supplemental Terms of Use for Microsoft Azure Previews.
Feature overview
Network administrators can define a network isolation boundary for their PaaS services, which allows communication between their Azure Cosmos DB account and Keyvault, SQL, and other services using Azure Network Security Perimeter. Securing public access on Azure Service can be accomplished in several ways:
- Securing inbound connections: Restrict public exposure of your Azure Cosmos DB account by explicitly granting ingress access to resources inside the perimeter. By default, access from unauthorized networks is denied, and access from private endpoints into the perimeter or resources in a subscription can be configured.
- Securing service-to-service communication: All resources inside the perimeter can communicate with any other resources within the perimeter, preventing data exfiltration.
- Securing outbound connections: If Network Security Perimeter doesn't manage the destination tenant, it blocks access when attempting to copy data from one tenant to another. Access is granted based on FQDN or access from other network perimeters; all other access attempts are denied.

All of these communications are taken care of automatically once Network Security Perimeter is set up, and users don't have to manage them. Instead of setting up a private endpoint for each resource to enable communication or configure virtual network, Network Security Perimeter at the top level enables this functionality.
Note
Azure Network security perimeter complements what we currently have in place today, including private endpoint, which allows access to a private resource within the perimeter, and VNet injection, which enables managed VNet offerings to access resources within the perimeter. We currently do not support the combination of Azure Network Security Perimeter, customer-managed keys (CMK), and log store features like Analytical Store, All Versions and Deletes Change Feed Mode, Materialized Views, and Point-in-Time Restore. If you need to perform restores on a CMK-enabled account with Azure Network Security Perimeter, you'll temporarily need to relax the perimeter settings in the key vault to allow your Cosmos DB account access to the key.
Getting started
Important
Before setting up a network security perimeter create a managed identity in Azure.
- In the Azure portal, search for network security perimeters in the resource list and select Create +.
- From the list of resources, select the resources that you want to associate with the perimeter.
- Add an inbound access rule, the source type can be either an IP address or a subscription.
- Add outbound access rules to allow resources inside the perimeter to connect to the internet and resources outside of the perimeter.
In cases where you have existing Azure Cosmos DB account and looking to add security perimeter:
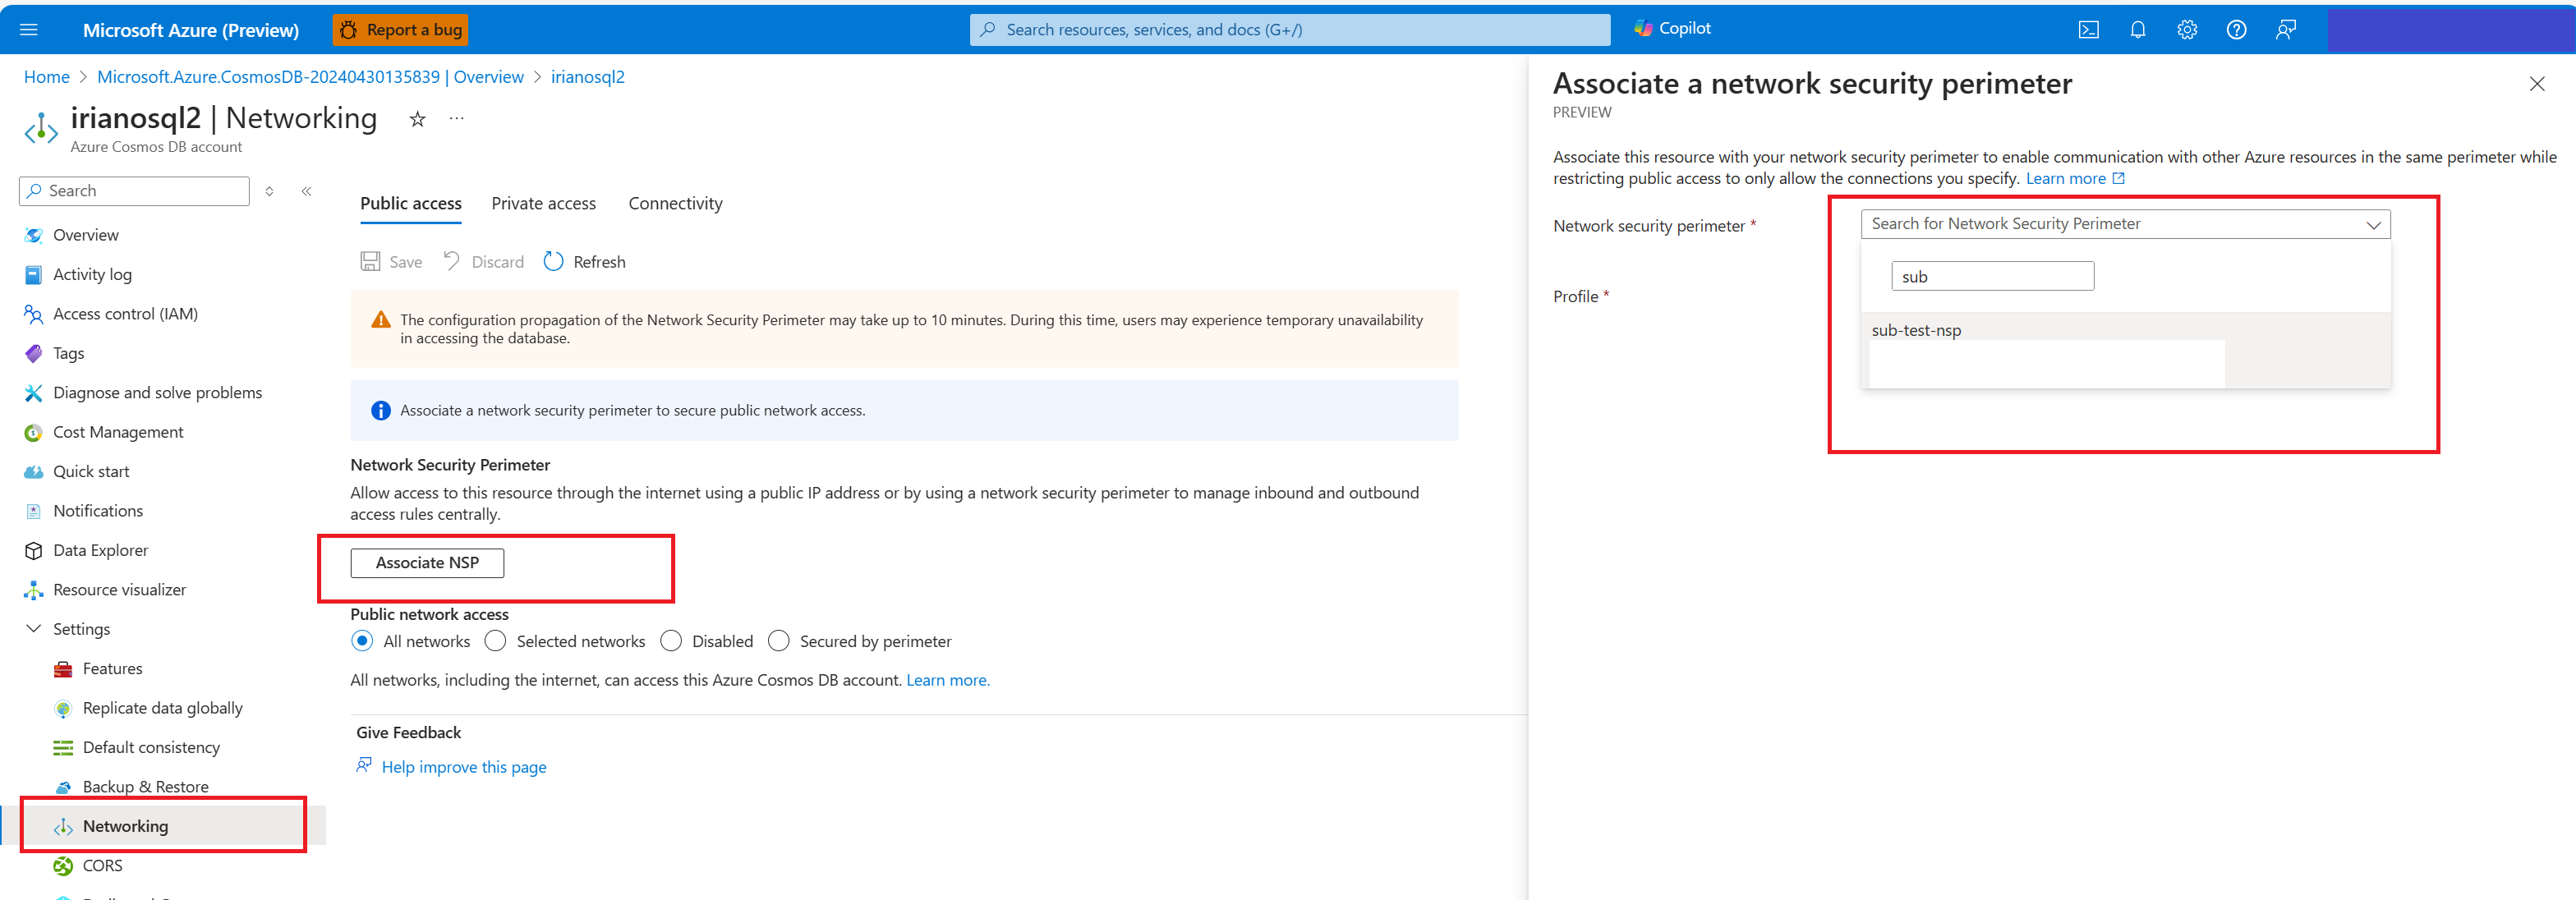
- Select Networking from the Settings

- Then select Associate NSP to associate this resource with your network security perimeter to enable communication with other Azure resources in the same perimeter while restricting public access to only allow the connections you specify.
Next steps
- Overview of network service perimeter
- Learn to monitor with diagnostic logs in network security perimeter