Tutorial: Deploy virtual nodes on Azure Container Instances in your Azure Kubernetes Service cluster
In this tutorial, you use Azure portal to deploy an Azure Kubernetes Service (AKS) cluster. After deploying the AKS cluster, you use a Helm chart to deploy virtual nodes on Azure Container Instances.
Prerequisites
This tutorial assumes you have the following tools installed:
- Azure CLI
- kubectl (version 1.29+)
- Helm
- Git
Sign in to Azure
Sign in to the Azure portal at https://portal.azure.com
If you don't have an Azure subscription, create a free account before you begin.
Create a virtual network for your AKS cluster
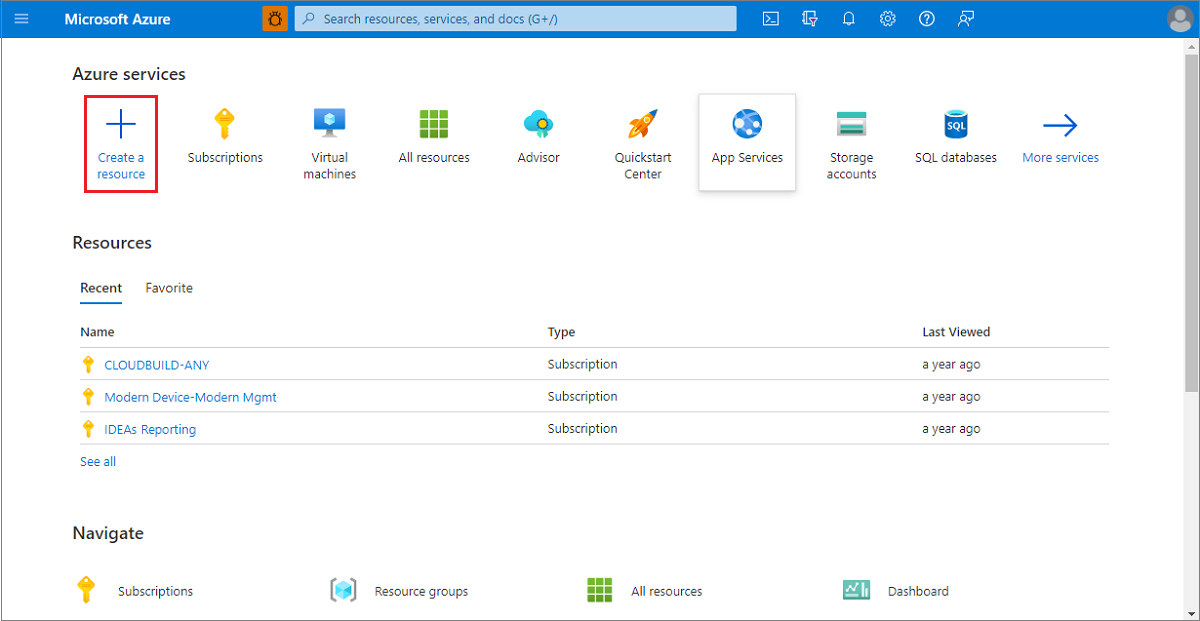
On the Azure portal home page, select Create a resource.
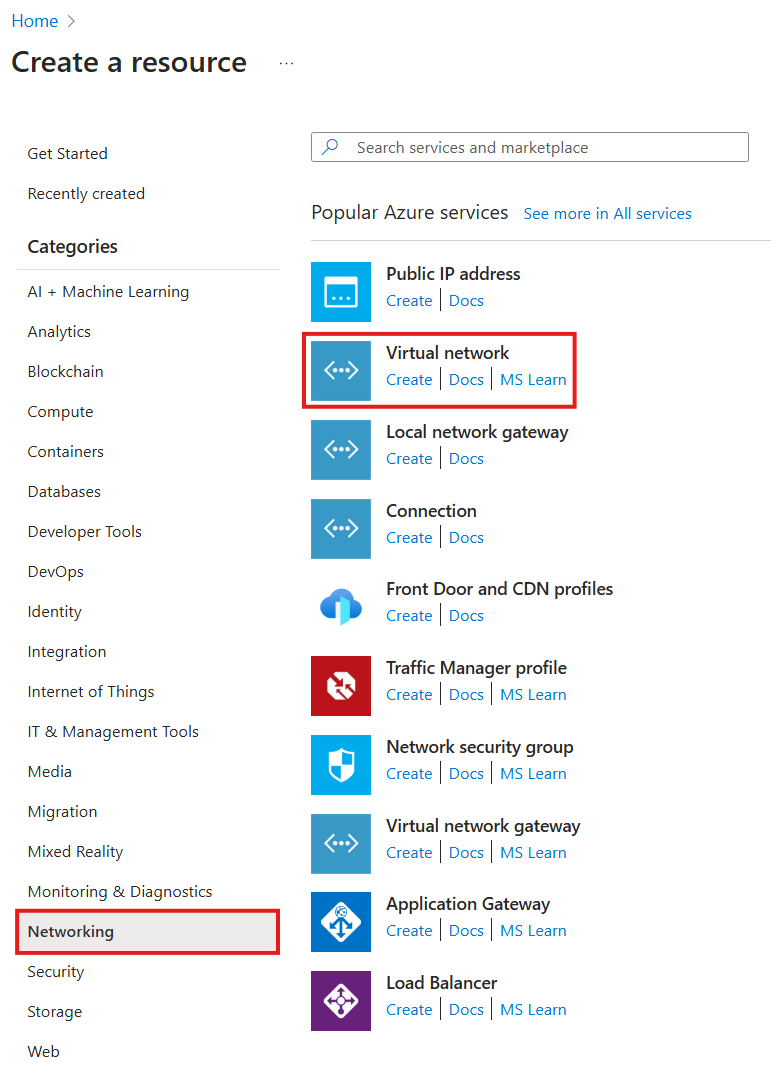
Select Networking > Virtual network.
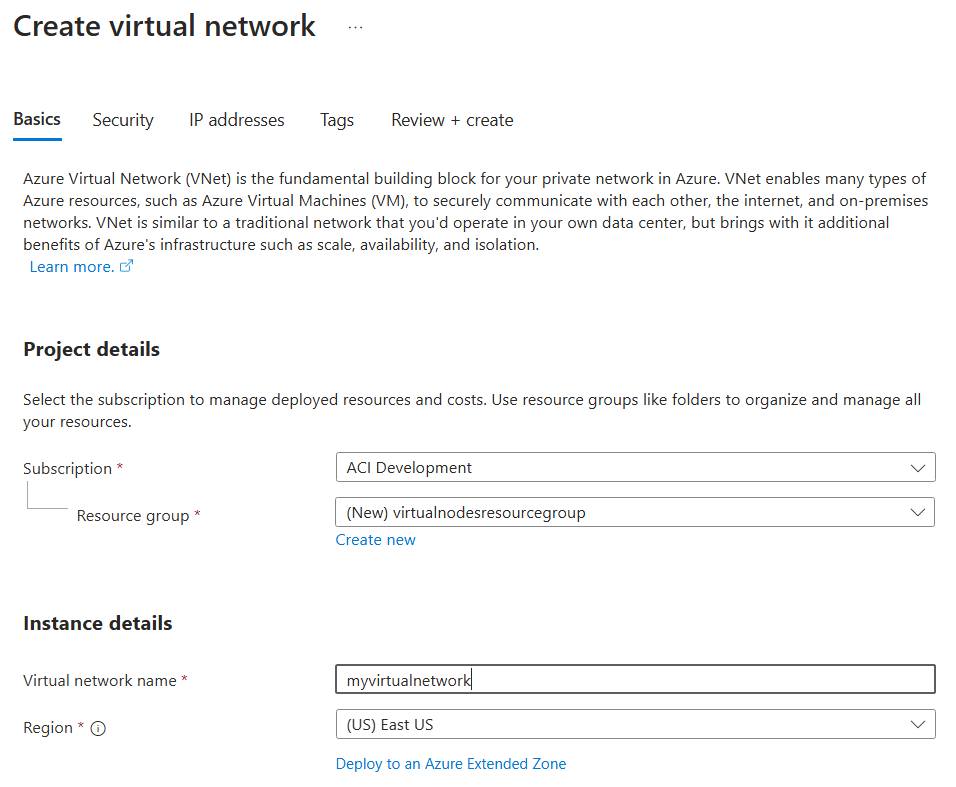
On the Basics page, choose a subscription and enter the following values:
- Resource group: Create new >
virtualnodesresourcegroup - Virtual network name:
myvirtualnetwork - Region:
East US
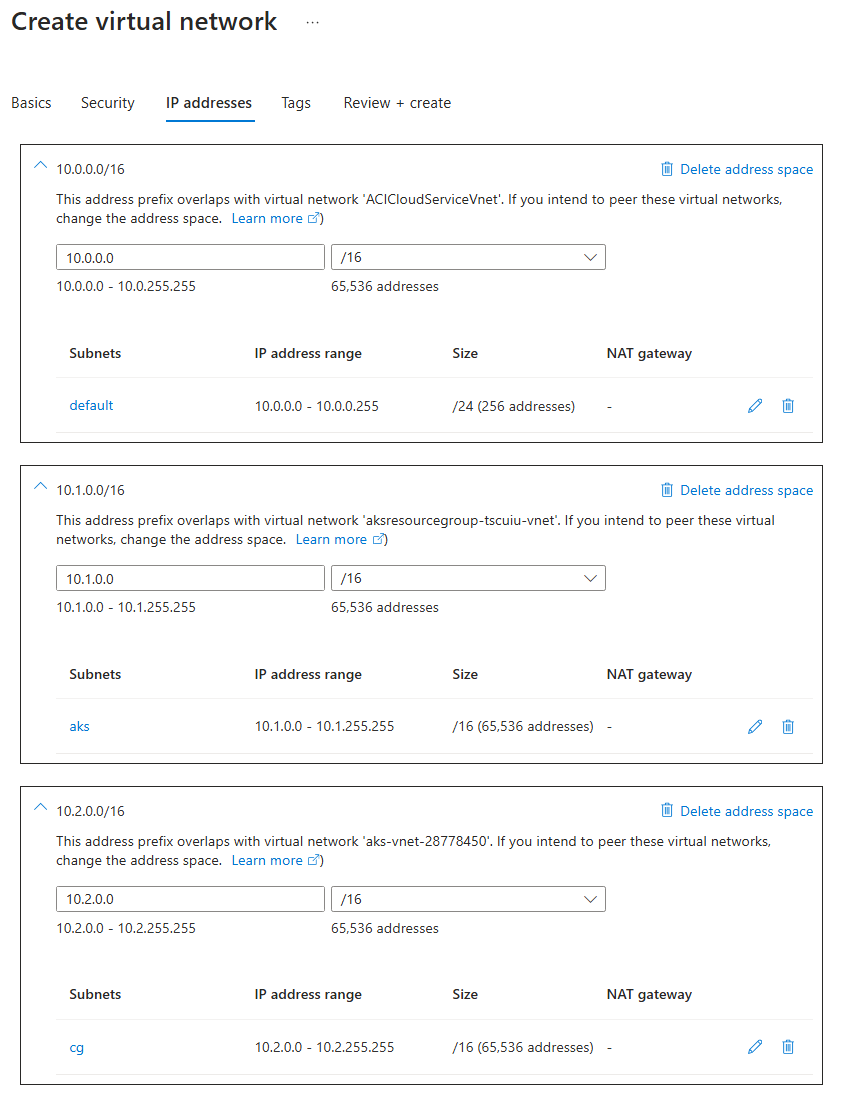
On the IP addresses page, configure the following address spaces and subnets:
- 10.0.0.0/16:
defaultsubnet with size /24 - 10.1.0.0/16:
akssubnet with size /16 - 10.2.0.0/16:
cgsubnet with size /16- The
cgsubnet must have a subnet delegation toMicrosoft.ContainerInstance/containerGroups. - If your pods running in virtual nodes need outbound networking, you must set up a NAT gateway and configure the
cgsubnet to use it. Refer to Configure a NAT gateway for static IP address for outbound traffic from a container group for instructions on this setup.
- The
Leave all other settings as their defaults, then select Review + create.
When the validation completes, you're shown a summary of the virtual network's settings. Select Create to submit your virtual network deployment request.
When deployment starts, a notification appears that indicates the deployment is in progress. Another notification is displayed when the virtual network has deployed.
Create your AKS cluster
On the Azure portal home page, select Create a resource.

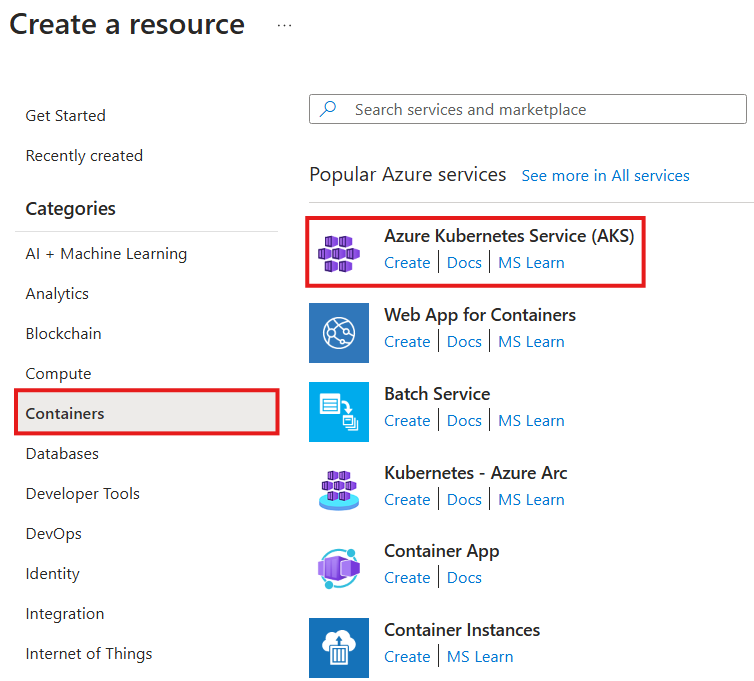
Select Containers > Azure Kubernetes Service (AKS).
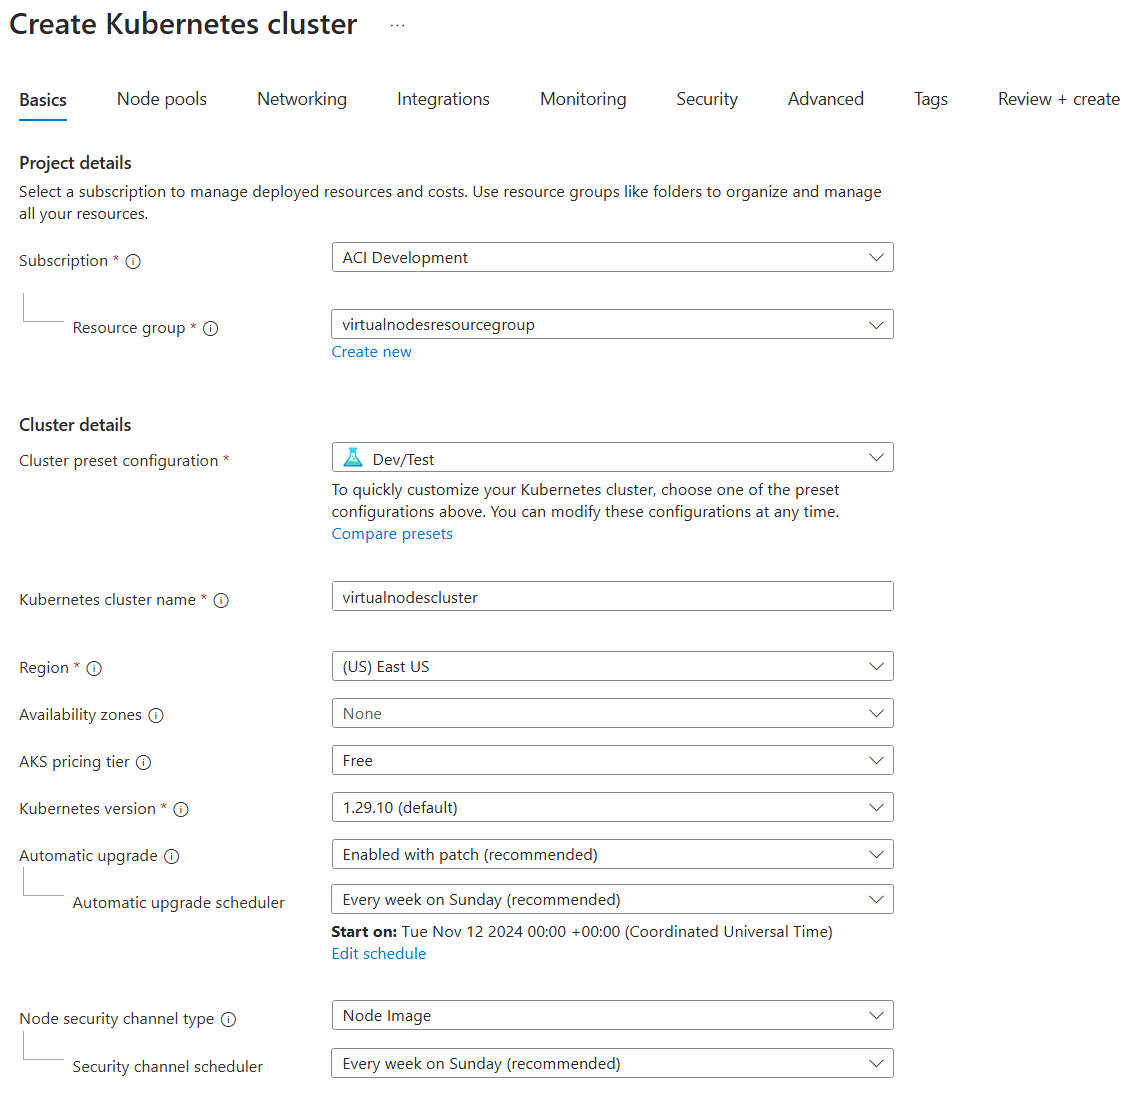
On the Basics page, choose the same subscription you used for creating the virtual network and enter the following values:
- Resource group:
virtualnodesresourcegroup - Cluster preset configuration:
Dev/Test - Kubernetes cluster name:
virtualnodescluster - Region:
East US - Kubernetes version: Any version starting with
1.29.- for example,1.29.10 - Automatic upgrade:
Enabled with patch
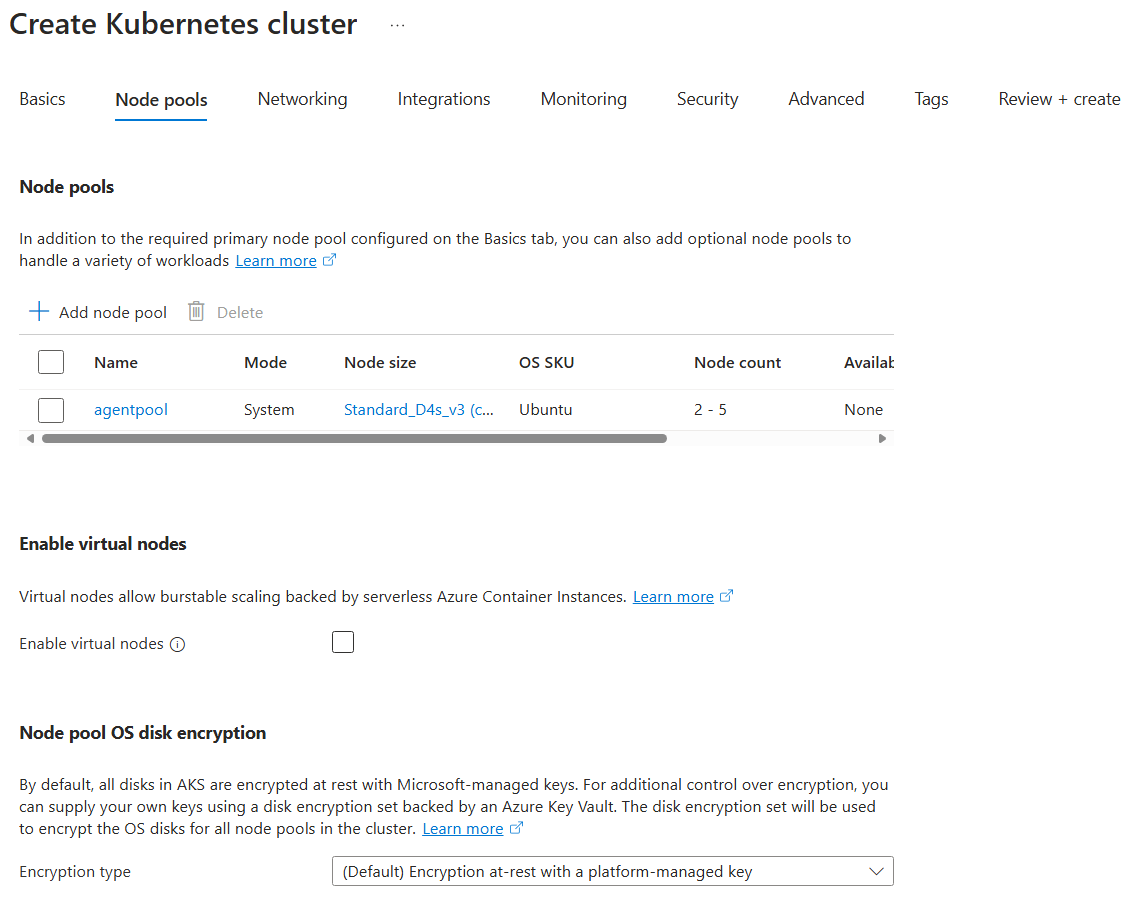
On the Node pools page, select any VM SKU with at least 4 vCPUs and 16 GB RAM for the agentpool node pool. These nodes will be used to host the virtual nodes infrastructure. Do not select Enable virtual nodes - this refers to the previous virtual nodes offering for AKS.
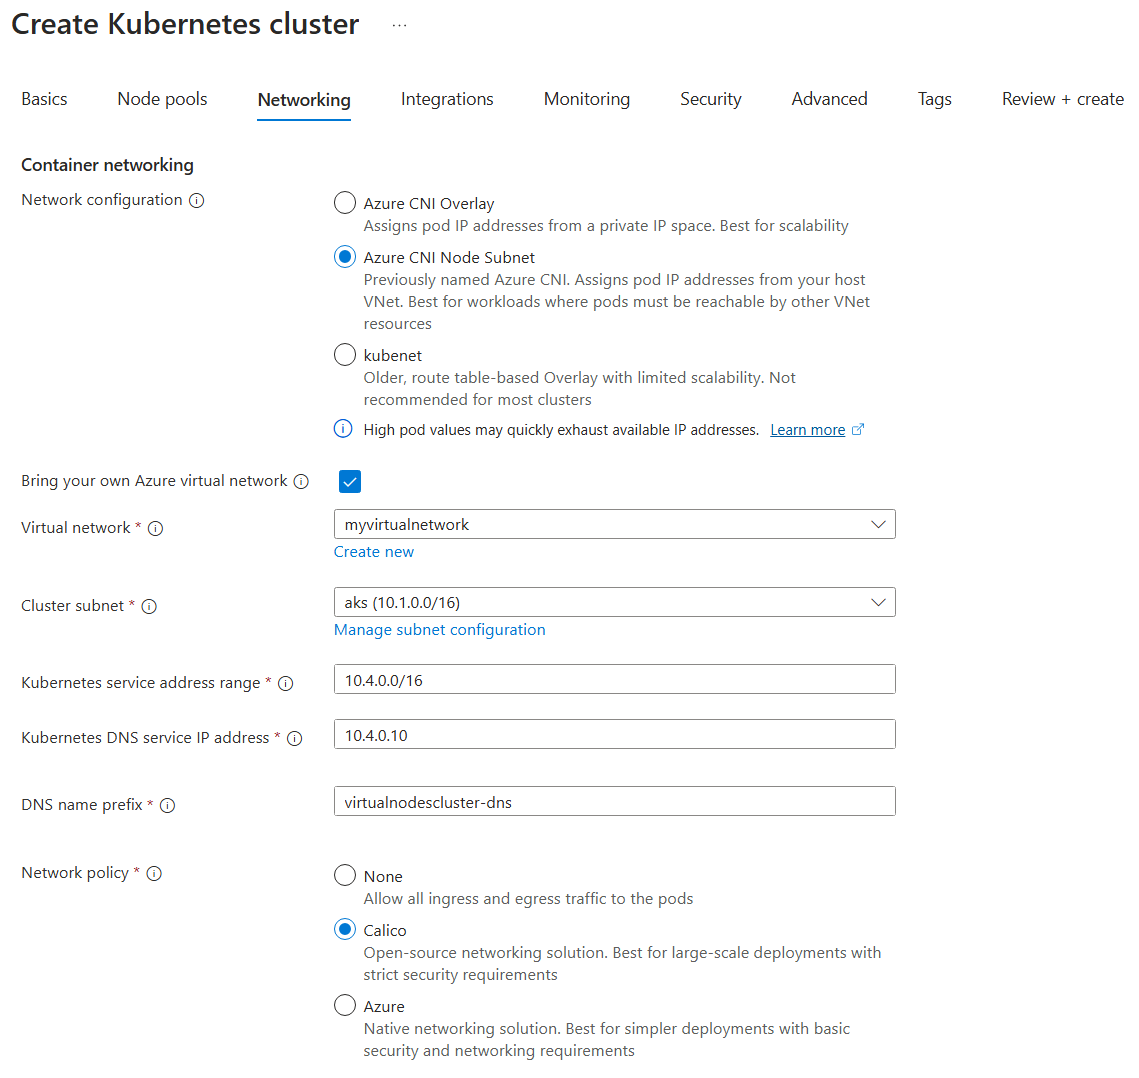
On the Networking page, enter the following values:
- Network configuration:
Azure CNI Node Subnet - Bring your own Azure virtual network:
Enabled - Virtual network:
myvirtualnetwork - Cluster subnet:
aks - Kubernetes service address range:
10.4.0.0/16 - Kubernetes DNS service IP address:
10.4.0.10 - Network policy:
Calico
Leave all other settings as their defaults, then select Review + create.
When the validation completes, you're shown a summary of the AKS cluster's settings. Select Create to submit your AKS cluster deployment request.
When deployment starts, a notification appears that indicates the deployment is in progress. Another notification is displayed when the AKS cluster has deployed.
Assign permissions to the AKS cluster managed identity
When you deploy an AKS cluster, AKS creates a node resource group in the same subscription to host cluster infrastructure. By default, this resource group has a name like MC_<resource group>_<AKS cluster>_<region>. For this tutorial, the node resource group should have the name MC_virtualnodesresourcegroup_virtualnodescluster_eastus.
One of the resources created in the node resource group is a managed identity with the name virtualnodescluster_agentpool. Navigate to this managed identity and select Azure role assignments. Then add the following two role assignments:
- Scope:
Resource group - Subscription:
<your subscription name> - Resource group:
MC_virtualnodesresourcegroup_virtualnodescluster_eastus - Role:
Contributor
This role assignment allows the creation of ACI container groups in the node resource group.
- Scope:
Resource group - Subscription:
<your subscription name> - Resource group:
virtualnodesresourcegroup - Role:
Contributor
This role assignment allows ACI container groups to be injected into the virtual network you created in this resource group.

Install virtual nodes on Azure Container Instances using the Helm chart
Use Azure CLI to pull down the configuration and credentials for the AKS cluster you created. This will configure kubectl for your AKS cluster.
az login
az account set --subscription <your subscription ID>
az aks get-credentials --name virtualnodescluster --resource-group virtualnodesresourcegroup
Additionally, we will register the ACI resource provider on your subscription so that you can deploy container groups.
az provider register -n Microsoft.ContainerInstance
Clone the virtualnodesOnAzureContainerInstances GitHub repository. The Helm chart for installing virtual nodes on Azure Container Instances is located in the Helm/virtualnode folder.
Install the Helm chart using the following command:
helm install virtualnode <cloned repository location>\Helm\virtualnode
Within a minute, a new virtual node will be registered and in a Ready state in the AKS cluster. You can check the status of your AKS cluster nodes with kubectl.
kubectl get nodes

Deploy your first pod to a virtual node
You can interact with virtual nodes like any other Kubernetes nodes. For example, the sample YAML below will deploy a pod onto the virtual node in your AKS cluster - note the use of node selectors and tolerations to place the pod appropriately. You can deploy the YAML using kubectl apply.
apiVersion: v1
kind: Pod
metadata:
  annotations:
  name: demo-pod
spec:
  containers:
  - command:
    - /bin/bash
    - -c
    - 'counter=1; while true; do echo "Hello, World! Counter: $counter"; counter=$((counter+1)); sleep 1; done'
    image: mcr.microsoft.com/azure-cli
    name: hello-world-counter
    resources:
      limits:
        cpu: 2250m
        memory: 2256Mi
      requests:
        cpu: 100m
        memory: 128Mi
  nodeSelector:
    virtualization: virtualnode2
  tolerations:
  - effect: NoSchedule
    key: virtual-kubelet.io/provider
    operator: Exists
After your pod is deployed, you can interact with it exactly as you would a "normal" Kubernetes pod.
For example, to see the pod status and events (useful for finding errors!):
kubectl describe pods demo-pod
To view logs for the pod:
kubectl logs demo-pod
To get a shell for the pod:
kubectl exec demo-pod -it -- /bin/bash
Next steps
In this tutorial, you created an AKS cluster in Azure portal, deployed virtual nodes on Azure Container Instances using a Helm chart, and deployed a pod onto your virtual node. Now you have basic familiarity with how to run Kubernetes pods on your virtual node, and you can utilize most Kubernetes capabilities and constructs on those pods out of the box!
If you are looking to utilize specialized virtual node capabilities or behaviors for your pods, see Pod Customizations.
If you are looking to customize your virtual node installation, see Node Customizations.
If you are planning to deploy high-scale workloads (thousands of pods per minute) on virtual nodes, we have best practices and recommendations.