Connect to a managed Admin for Spring in Azure Container Apps
The Admin for Spring managed component offers an administrative interface for Spring Boot web applications that expose actuator endpoints. As a managed component in Azure Container Apps, you can easily bind your container app to Admin for Spring for seamless integration and management.
This tutorial shows you how to create an Admin for Spring Java component and bind it to your container app so that you can monitor and manage your Spring applications with ease.

In this tutorial, you learn how to:
- Create an Admin for Spring Java component.
- Bind your container app to an Admin for Spring Java component.
If you want to integrate Admin for Spring with Eureka Server for Spring, see Integrate Admin for Spring with Eureka Server for Spring in Container Apps instead.
Important
This tutorial uses services that can affect your Azure bill. If you decide to follow along, make sure you delete the resources featured in this article to avoid unexpected billing.
Prerequisites
- An Azure account with an active subscription. If you don't already have one, you can can create one for free.
- Azure CLI.
Considerations
When you run the Admin for Spring component in Container Apps, be aware of the following details:
| Item | Explanation |
|---|---|
| Scope | Components run in the same environment as the connected container app. |
| Scaling | Component can’t scale. The scaling properties minReplicas and maxReplicas are both set to 1. |
| Resources | The container resource allocation for components is fixed. The number of the CPU cores is 0.5, and the memory size is 1 Gi. |
| Pricing | Component billing falls under consumption-based pricing. Resources consumed by managed components are billed at the active/idle rates. You can delete components that are no longer in use to stop billing. |
| Binding | Container apps connect to a component via a binding. The bindings inject configurations into container app environment variables. After a binding is established, the container app can read the configuration values from environment variables and connect to the component. |
Setup
Before you begin to work with the Admin for Spring component, you first need to create the required resources.
The following commands help you create your resource group and container app environment.
Create variables to support your application configuration. These values are provided for you for the purposes of this lesson.
export LOCATION=eastus
export RESOURCE_GROUP=my-resource-group
export ENVIRONMENT=my-environment
export JAVA_COMPONENT_NAME=admin
export APP_NAME=sample-admin-client
export IMAGE="mcr.microsoft.com/javacomponents/samples/sample-admin-for-spring-client:latest"
Variable Description LOCATIONThe Azure region location where you create your container app and Java component. ENVIRONMENTThe container app environment name for your demo application. RESOURCE_GROUPThe Azure resource group name for your demo application. JAVA_COMPONENT_NAMEThe name of the Java component created for your container app. In this case, you create an Admin for Spring Java component. IMAGEThe container image used in your container app. Sign in to Azure with the Azure CLI.
az loginCreate a resource group.
az group create \
    --name $RESOURCE_GROUP \
    --location $LOCATION \
    --query "properties.provisioningState"
When you use the
--queryparameter, the response filters down to a simple success or failure message.Create your container app environment.
az containerapp env create \
    --name $ENVIRONMENT \
    --resource-group $RESOURCE_GROUP \
    --location $LOCATION
Use the component
Now that you have an existing environment, you can create your container app and bind it to a Java component instance of an Admin for Spring component.
Create the Admin for Spring Java component.
az containerapp env java-component admin-for-spring create \
    --environment $ENVIRONMENT \
    --resource-group $RESOURCE_GROUP \
    --name $JAVA_COMPONENT_NAME \
    --min-replicas 1 \
    --max-replicas 1
Update the Admin for Spring Java component.
az containerapp env java-component admin-for-spring update \
    --environment $ENVIRONMENT \
    --resource-group $RESOURCE_GROUP \
    --name $JAVA_COMPONENT_NAME \
    --min-replicas 2 \
    --max-replicas 2
Bind your container app to the Admin for Spring Java component
Create the container app and bind it to the Admin for Spring component.
az containerapp create \
    --name $APP_NAME \
    --resource-group $RESOURCE_GROUP \
    --environment $ENVIRONMENT \
    --image $IMAGE \
    --min-replicas 1 \
    --max-replicas 1 \
    --ingress external \
    --target-port 8080 \
    --bind $JAVA_COMPONENT_NAME
The bind operation binds the container app to the Admin for Spring Java component. The container app can now read the configuration values from environment variables, primarily the SPRING_BOOT_ADMIN_CLIENT_URL property, and connect to the Admin for Spring component.
The binding also injects the following property:
"SPRING_BOOT_ADMIN_CLIENT_INSTANCE_PREFER-IP": "true",
This property indicates that the Admin for Spring component client should prefer the IP address of the container app instance when you connect to the Admin for Spring server.
Optional: Unbind your container app from the Admin for Spring Java component
To remove a binding from a container app, use the --unbind option.
az containerapp update \
    --name $APP_NAME \
    --unbind $JAVA_COMPONENT_NAME \
    --resource-group $RESOURCE_GROUP
View the dashboard
Important
To view the dashboard, you need to have at least the Microsoft.App/managedEnvironments/write role assigned to your account on the managed environment resource. You can explicitly assign the Owner or Contributor role on the resource. You can also follow the steps to create a custom role definition and assign it to your account.
Note
The dashboard isn't available in Azure China 21Vianet.
Create the custom role definition.
az role definition create --role-definition '{
    "Name": "<ROLE_NAME>",
    "IsCustom": true,
    "Description": "Can access managed Java Component dashboards in managed environments",
    "Actions": [
        "Microsoft.App/managedEnvironments/write"
    ],
    "AssignableScopes": ["/subscriptions/<SUBSCRIPTION_ID>"]
}'
Make sure to replace the placeholders in between the
<>brackets with your values.Assign the custom role to your account on the managed environment resource.
Get the resource ID of the managed environment:
export ENVIRONMENT_ID=$(az containerapp env show \
    --name $ENVIRONMENT --resource-group $RESOURCE_GROUP \
    --query id \
    --output tsv)
Assign the role to your account.
Before you run this command, replace the placeholder - as indicated by the
<>brackets - with your user or service principal ID or role name.az role assignment create \ --assignee <USER_OR_SERVICE_PRINCIPAL_ID> \ --role "<ROLE_NAME>" \ --scope $ENVIRONMENT_IDNote
The
<USER_OR_SERVICE_PRINCIPAL_ID>value should be the identity that you use to access the Azure portal. The<ROLE_NAME>value is the name that you assigned in step 1.Get the URL of the Admin for Spring dashboard.
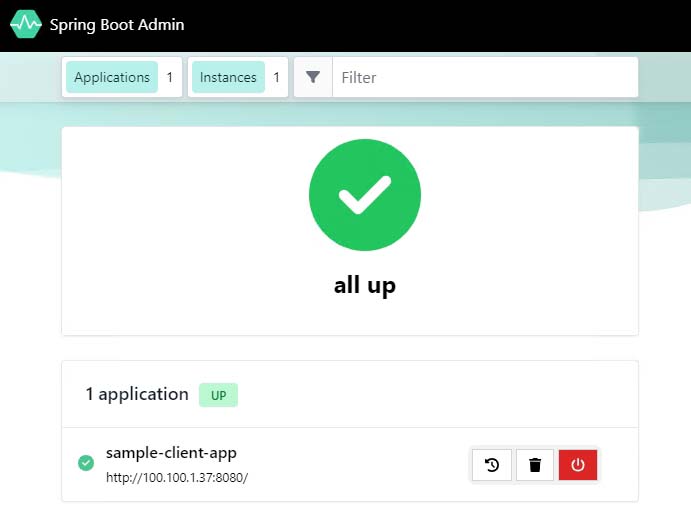
az containerapp env java-component admin-for-spring show \
    --environment $ENVIRONMENT \
    --resource-group $RESOURCE_GROUP \
    --name $JAVA_COMPONENT_NAME \
    --query properties.ingress.fqdn \
    --output tsv
This command returns the URL that you can use to access the Admin for Spring dashboard. With the dashboard, you can also see your container app, as shown in the following screenshot.

Clean up resources
The resources created in this tutorial have an effect on your Azure bill. If you aren't going to use these services long term, run the following command to remove everything you created in this tutorial.
az group delete --resource-group $RESOURCE_GROUP
Dependency
When you use the admin component in your own container app, you need to add the following dependency in your pom.xml file. Replace the version number with the latest version available on the Maven Repository.
<dependency>
    <groupId>de.codecentric</groupId>
    <version>3.3.2</version>
    <artifactId>spring-boot-admin-starter-client</artifactId>
</dependency>
Configurable properties
Starting with Spring Boot 2, endpoints other than health and info aren't exposed by default. You can expose them by adding the following configuration in your application.properties file.
management.endpoints.web.exposure.include=*
management.endpoint.health.show-details=always
Allowed configuration list for your Admin for Spring
The following list details the admin component properties you can configure for your app. For more information, see Spring Boot Admin.
| Property name | Description | Default value |
|---|---|---|
spring.boot.admin.server.enabled |
Enables the Spring Boot Admin Server. | true |
spring.boot.admin.context-path |
The path prefix where the Admin Server's statics assets and API are served. Relative to the Dispatcher-Servlet. | |
spring.boot.admin.monitor.status-interval |
Time interval in milliseconds to check the status of instances. | 10,000ms |
spring.boot.admin.monitor.status-lifetime |
Lifetime of status in milliseconds. The status isn't updated as long as the last status isn't expired. | 10,000 ms |
spring.boot.admin.monitor.info-interval |
Time interval in milliseconds to check the info of instances. | 1m |
spring.boot.admin.monitor.info-lifetime |
Lifetime of info in minutes. The info isn't updated as long as the last info isn't expired. | 1m |
spring.boot.admin.monitor.default-timeout |
Default timeout when making requests. Individual values for specific endpoints can be overridden using spring.boot.admin.monitor.timeout.*. |
10,000 |
spring.boot.admin.monitor.timeout.* |
Key-value pairs with the timeout per endpointId. |
Defaults to default-timeout value. |
spring.boot.admin.monitor.default-retries |
Default number of retries for failed requests. Requests that modify data (PUT, POST, PATCH, DELETE) are never retried. Individual values for specific endpoints can be overridden using spring.boot.admin.monitor.retries.*. |
0 |
spring.boot.admin.monitor.retries.* |
Key-value pairs with the number of retries per endpointId. Requests that modify data (PUT, POST, PATCH, DELETE) are never retried. |
Defaults to default-retries value. |
spring.boot.admin.metadata-keys-to-sanitize |
Metadata values for the keys matching these regex patterns used to sanitize in all JSON output. Starting from Spring Boot 3, all actuator values are masked by default. For more information about how to configure the unsanitization process, see Sanitize Sensitive Values. | ".*password$", ".*secret$", ".*key$", ".*token$", ".*credentials.*", ".*vcap_services$" |
spring.boot.admin.probed-endpoints |
For Spring Boot 1.x client applications, Spring Boot Admin probes for the specified endpoints using an OPTIONS request. If the path differs from the ID, you can specify this value as id:path - for example, health:ping. |
"health", "env", "metrics", "httptrace:trace", "threaddump:dump", "jolokia", "info", "logfile", "refresh", "flyway", "liquibase", "heapdump", "loggers", "auditevents" |
spring.boot.admin.instance-proxy.ignored-headers |
Headers not to forwarded when making requests to clients. | "Cookie", "Set-Cookie", "Authorization" |
spring.boot.admin.ui.title |
The displayed page title. | "Spring Boot Admin" |
spring.boot.admin.ui.poll-timer.cache |
Polling duration in milliseconds to fetch new cache data. | 2500 |
spring.boot.admin.ui.poll-timer.datasource |
Polling duration in milliseconds to fetch new data source data. | 2500 |
spring.boot.admin.ui.poll-timer.gc |
Polling duration in milliseconds to fetch new gc data. | 2500 |
spring.boot.admin.ui.poll-timer.process |
Polling duration in milliseconds to fetch new process data. | 2500 |
spring.boot.admin.ui.poll-timer.memory |
Polling duration in milliseconds to fetch new memory data. | 2500 |
spring.boot.admin.ui.poll-timer.threads |
Polling duration in milliseconds to fetch new threads data. | 2500 |
spring.boot.admin.ui.poll-timer.logfile |
Polling duration in milliseconds to fetch new logfile data. | 1000 |
spring.boot.admin.ui.enable-toasts |
Enables or disables toast notifications. | false |
spring.boot.admin.ui.title |
Browser's window title value. | "" |
spring.boot.admin.ui.brand |
HTML code rendered in the navigation header and defaults to the Spring Boot Admin label. By default, the Spring Boot Admin logo is followed by its name. | "" |
management.scheme |
Value that is substituted in the service URL used for accessing the actuator endpoints. | |
management.address |
Value that is substituted in the service URL used for accessing the actuator endpoints. | |
management.port |
Value that is substituted in the service URL used for accessing the actuator endpoints. | |
management.context-path |
Value that is appended to the service URL used for accessing the actuator endpoints. | ${spring.boot.admin.discovery.converter.management-context-path} |
health.path |
Value that is appended to the service URL used for health checking. Ignored by the EurekaServiceInstanceConverter. |
${spring.boot.admin.discovery.converter.health-endpoint} |
spring.boot.admin.discovery.enabled |
Enables the DiscoveryClient support for the admin server. |
true |
spring.boot.admin.discovery.converter.management-context-path |
Value that is appended to the service-url of the discovered service when the management-url value is converted by the DefaultServiceInstanceConverter. |
/actuator |
spring.boot.admin.discovery.converter.health-endpoint-path |
Value that is appended to the management-url of the discovered service when the health-url value is converted by the DefaultServiceInstanceConverter. |
"health" |
spring.boot.admin.discovery.ignored-services |
Services that are ignored when using discovery and not registered as application. Supports simple patterns such as "foo*", "*bar", and "foo*bar*". |
|
spring.boot.admin.discovery.services |
Services included when using discovery and registered as application. Supports simple patterns such as "foo*", "*bar", and "foo*bar*". |
"*" |
spring.boot.admin.discovery.ignored-instances-metadata |
Services ignored if they contain at least one metadata item that matches patterns in this list. Supports patterns such as "discoverable=false". |
|
spring.boot.admin.discovery.instances-metadata |
Services included if they contain at least one metadata item that matches patterns in list. Supports patterns such as "discoverable=true". |
Common configurations
- Logging related configurations:
- logging.level.*
- logging.group.*
- Any other configurations under
logging.*namespace should be forbidden. For example, writing log files by usinglogging.fileshould be forbidden.
Limitations
- The Spring Boot Admin Dashboard isn't available in Azure China 21Vianet.
Related content
Integrate the managed Admin for Spring with Eureka Server for Spring