Display call transcription state on the client
You need to collect consent from all participants in the call before you can transcribe them. Microsoft Teams allows users to start transcription in the meetings or calls. You would receive event when transcription has started. You can check the transcription state if transcription started before you joined the call or meeting. You can provide explicit consent to transcription if a meeting or call requires it, and you have already collected it.
Prerequisites
- An Azure account with an active subscription. Create an account for free.
- A deployed Communication Services resource. Create a Communication Services resource.
- A user access token to enable the calling client. For more information, see Create and manage access tokens.
- Optional: Complete the quickstart to add voice calling to your application
Support
The following tables define support of call transcription in Azure Communication Services.
Identities and call types
The following tables show support of transcription for specific call type and identity.
| Identities | Teams meeting | Room | 1:1 call | Group call | 1:1 Teams interop call | Group Teams interop call |
|---|---|---|---|---|---|---|
| Communication Services user | ✔️ | ✔️ | ✔️ | |||
| Microsoft 365 user | ✔️ | ✔️ | ✔️ |
Operations
The following tables show support of individual APIs in calling SDK to individual identity types.
| Operations | Communication Services user | Microsoft 365 user |
|---|---|---|
| Get event that transcription has started | ✔️ | ✔️ |
| Get transcription state | ✔️ | ✔️ |
| Start or stop transcription | ||
| Learn whether explicit consent is required | ✔️[1] | ✔️[1] |
| Give explicit consent for being transcribed | ✔️[1] | ✔️[1] |
[1] This functionality is available only in Teams meetings and group Teams interoperability calls.
SDKs
The following tables show support of transcription in individual Azure Communication Services SDKs.
| Platforms | Web | Web UI | iOS | iOS UI | Android | Android UI | Windows |
|---|---|---|---|---|---|---|---|
| Is Supported | ✔️ | ✔️[1] | ✔️[1] | ✔️[1] | ✔️[1] | ✔️[1] | ✔️[1] |
[1] These SDKs don't support explicit consent.
Install the SDK
Use the npm install command to install the Azure Communication Services Common and Calling SDK for JavaScript:
npm install @azure/communication-common --save
npm install @azure/communication-calling --save
Initialize required objects
A CallClient instance is required for most call operations. When you create a new CallClient instance, you can configure it with custom options like a Logger instance.
With the CallClient instance, you can create a CallAgent instance by calling the createCallAgent. This method asynchronously returns a CallAgent instance object.
The createCallAgent method uses CommunicationTokenCredential as an argument. It accepts a user access token.
You can use the getDeviceManager method on the CallClient instance to access deviceManager.
const { CallClient } = require('@azure/communication-calling');
const { AzureCommunicationTokenCredential} = require('@azure/communication-common');
const { AzureLogger, setLogLevel } = require("@azure/logger");

// Set the logger's log level
setLogLevel('verbose');

// Redirect log output to console, file, buffer, REST API, or whatever location you want
AzureLogger.log = (...args) => {
    console.log(...args); // Redirect log output to console
};

const userToken = '<USER_TOKEN>';
callClient = new CallClient(options);
const tokenCredential = new AzureCommunicationTokenCredential(userToken);
const callAgent = await callClient.createCallAgent(tokenCredential, {displayName: 'optional Azure Communication Services user name'});
const deviceManager = await callClient.getDeviceManager()
How to best manage SDK connectivity to Microsoft infrastructure
The Call Agent instance helps you manage calls (to join or start calls). In order to work your calling SDK needs to connect to Microsoft infrastructure to get notifications of incoming calls and coordinate other call details. Your Call Agent has two possible states:
Connected - A Call Agent connectionStatue value of Connected means the client SDK is connected and capable of receiving notifications from Microsoft infrastructure.
Disconnected - A Call Agent connectionStatue value of Disconnected states there's an issue that is preventing the SDK it from properly connecting. Call Agent should be re-created.
invalidToken: If a token is expired or is invalidCall Agentinstance disconnects with this error.connectionIssue: If there's an issue with the client connecting to Microsoft infrascture, after many retriesCall Agentexposes theconnectionIssueerror.
You can check if your local Call Agent is connected to Microsoft infrastructure by inspecting the current value of connectionState property. During an active call you can listen to the connectionStateChanged event to determine if Call Agent changes from Connected to Disconnected state.
const connectionState = callAgentInstance.connectionState;
console.log(connectionState); // it may return either of 'Connected' | 'Disconnected'

const connectionStateCallback = (args) => {
    console.log(args); // it will return an object with oldState and newState, each of having a value of either of 'Connected' | 'Disconnected'
    // it will also return reason, either of 'invalidToken' | 'connectionIssue'
}
callAgentInstance.on('connectionStateChanged', connectionStateCallback);
Warning
Due to changes in Microsoft Teams, JavaScript calling SDKs with versions 1.21 and lower stops Teams transcription and blocks Teams users to start transcription. If you would like to leverage Teams transcription in the calls and meetings, you need to upgrade your calling SDK to at least version 1.22.
Call transcription
Transcription is an extended feature of the class Call. You first need to obtain the transcription feature API object
const callTranscriptionFeature = call.feature(Features.Transcription);
You can check state of the transcription in the property isTranscriptionActive. If value is set to true, then transcription is active.
const isTranscriptionActive = callTranscriptionFeature.isTranscriptionActive;
You can subscribe to event that is triggered when state of transcription changes:
const isTranscriptionActiveChangedHandler = () => {
  console.log(callTranscriptionFeature.isTranscriptionActive);
};
callTranscriptionFeature.on('isTranscriptionActiveChanged', isTranscriptionActiveChangedHandler);
You can unsubscribe from the event with the following code:
callTranscriptionFeature.off('isTranscriptionActiveChanged', isTranscriptionActiveChangedHandler);
Explicit Consent
When your Teams meeting or call is configured to require explicit consent for recording or transcription, you're required to gather explicit consent from your users to allow users to be transcribed or recorded. You can provide consent proactively when joining the meeting or reactively when the recording or transcription starts. Until explicit consent is given, participants' audio, video, and screen sharing will be disabled during transcription.
You can check if the meeting transcription requires explicit consent by property isTeamsConsentRequired. If the value is set to true, then explicit consent is required for the call.
const isTranscriptionConsentRequired = callTranscriptionFeature.isTeamsConsentRequired;
If you have already obtained the user's consent for transcription, you can call the grantTeamsConsent() method to indicate explicit consent to the service. This consent is valid for one call session only and users need to provide consent again if they rejoin the meeting.
callTranscriptionFeature.grantTeamsConsent();
Attempts to enable audio, video, or screen sharing fail when transcription is active, explicit consent is required but isn't yet given. You can recognize this situation by checking property reason of class ParticipantCapabilities for capabilities turnVideoOn, unmuteMic and shareScreen. You can find those capabilities in the feature call.feature(Features.Capabilities). Those capabilities would return reason ExplicitConsentRequired as users need to provide explicit consent.
Install the SDK
Locate your project-level build.gradle file and add mavenCentral() to the list of repositories under buildscript and allprojects:
buildscript {
    repositories {
    ...
        mavenCentral()
    ...
    }
}
allprojects {
    repositories {
    ...
        mavenCentral()
    ...
    }
}
Then, in your module-level build.gradle file, add the following lines to the dependencies section:
dependencies {
    ...
    implementation 'com.azure.android:azure-communication-calling:1.0.0'
    ...
}
Initialize the required objects
To create a CallAgent instance, you have to call the createCallAgent method on a CallClient instance. This call asynchronously returns a CallAgent instance object.
The createCallAgent method takes CommunicationUserCredential as an argument, which encapsulates an access token.
To access DeviceManager, you must create a callAgent instance first. Then you can use the CallClient.getDeviceManager method to get DeviceManager.
String userToken = '<user token>';
CallClient callClient = new CallClient();
CommunicationTokenCredential tokenCredential = new CommunicationTokenCredential(userToken);
android.content.Context appContext = this.getApplicationContext(); // From within an activity, for instance
CallAgent callAgent = callClient.createCallAgent(appContext, tokenCredential).get();
DeviceManager deviceManager = callClient.getDeviceManager(appContext).get();
To set a display name for the caller, use this alternative method:
String userToken = '<user token>';
CallClient callClient = new CallClient();
CommunicationTokenCredential tokenCredential = new CommunicationTokenCredential(userToken);
android.content.Context appContext = this.getApplicationContext(); // From within an activity, for instance
CallAgentOptions callAgentOptions = new CallAgentOptions();
callAgentOptions.setDisplayName("Alice Bob");
DeviceManager deviceManager = callClient.getDeviceManager(appContext).get();
CallAgent callAgent = callClient.createCallAgent(appContext, tokenCredential, callAgentOptions).get();
Warning
Up until version 1.1.0 and beta release version 1.1.0-beta.1 of the Azure Communication Services Calling Android SDK has the isTranscriptionActive and addOnIsTranscriptionActiveChangedListener are part of the Call object. For new beta releases, those APIs have been moved as an extended feature of Call just like described below.
Call transcription is an extended feature of the core Call object. You first need to obtain the transcription feature object:
TranscriptionCallFeature callTranscriptionFeature = call.feature(Features.TRANSCRIPTION);
Then, to check if the call is being transcribed, inspect the isTranscriptionActive property of callTranscriptionFeature. It returns boolean.
boolean isTranscriptionActive = callTranscriptionFeature.isTranscriptionActive();
You can also subscribe to changes in transcription:
private void handleCallOnIsTranscriptionChanged(PropertyChangedEvent args) {
    boolean isTranscriptionActive = callTranscriptionFeature.isTranscriptionActive();
}

callTranscriptionFeature.addOnIsTranscriptionActiveChangedListener(handleCallOnIsTranscriptionChanged);
Set up your system
Follow these steps to set up your system.
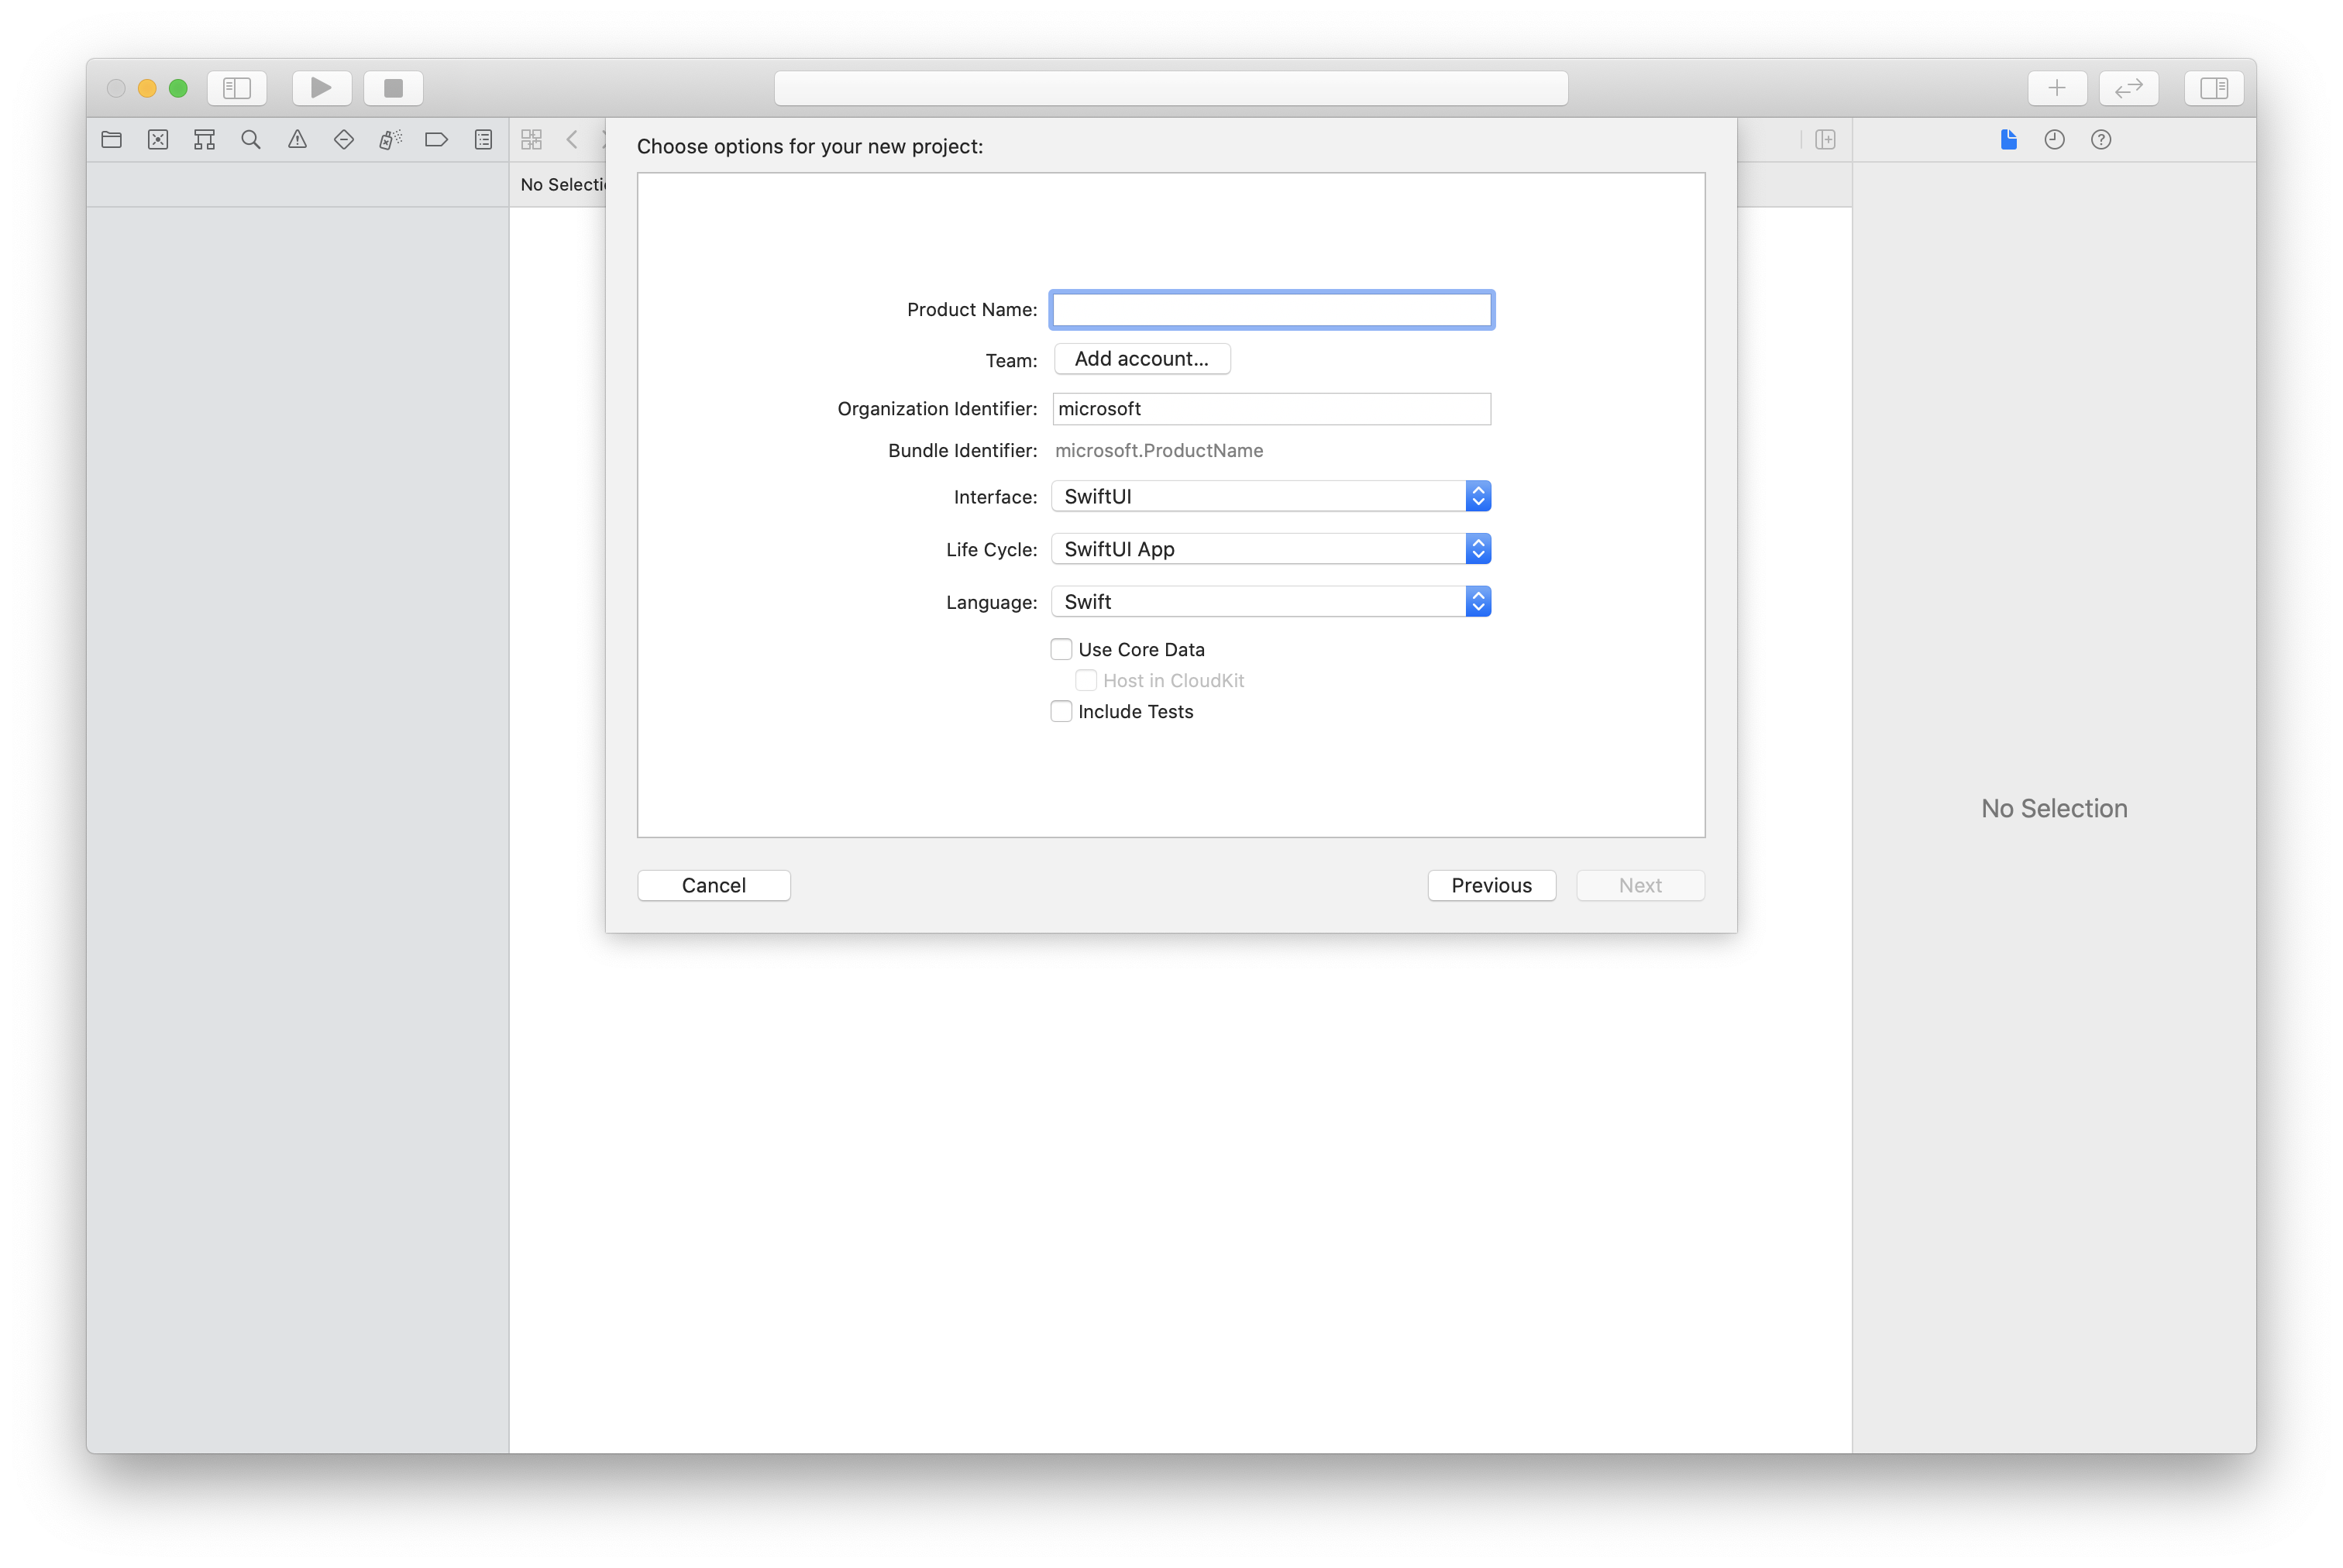
Create the Xcode project
In Xcode, create a new iOS project and select the Single View App template. This article uses the SwiftUI framework, so you should set Language to Swift and set Interface to SwiftUI.
You're not going to create tests in this article. Feel free to clear the Include Tests checkbox.
Install the package and dependencies by using CocoaPods
Create a Podfile for your application, like this example:
platform :ios, '13.0'
use_frameworks!
target 'AzureCommunicationCallingSample' do
    pod 'AzureCommunicationCalling', '~> 1.0.0'
end
Run
pod install.Open
.xcworkspaceby using Xcode.
Request access to the microphone
To access the device's microphone, you need to update your app's information property list by using NSMicrophoneUsageDescription. Set the associated value to a string that's included in the dialog that the system uses to request access from the user.
Right-click the Info.plist entry of the project tree, and then select Open As > Source Code. Add the following lines in the top-level <dict> section, and then save the file.
<key>NSMicrophoneUsageDescription</key>
<string>Need microphone access for VOIP calling.</string>
Set up the app framework
Open your project's ContentView.swift file. Add an import declaration to the top of the file to import the AzureCommunicationCalling library. In addition, import AVFoundation. You need it for audio permission requests in the code.
import AzureCommunicationCalling
import AVFoundation
Initialize CallAgent
To create a CallAgent instance from CallClient, you have to use a callClient.createCallAgent method that asynchronously returns a CallAgent object after it's initialized.
To create a call client, pass a CommunicationTokenCredential object:
import AzureCommunication

let tokenString = "token_string"
var userCredential: CommunicationTokenCredential?
do {
    let options = CommunicationTokenRefreshOptions(initialToken: token, refreshProactively: true, tokenRefresher: self.fetchTokenSync)
    userCredential = try CommunicationTokenCredential(withOptions: options)
} catch {
    updates("Couldn't created Credential object", false)
    initializationDispatchGroup!.leave()
    return
}

// tokenProvider needs to be implemented by Contoso, which fetches a new token
public func fetchTokenSync(then onCompletion: TokenRefreshOnCompletion) {
    let newToken = self.tokenProvider!.fetchNewToken()
    onCompletion(newToken, nil)
}
Pass the CommunicationTokenCredential object that you created to CallClient, and set the display name:
self.callClient = CallClient()
let callAgentOptions = CallAgentOptions()
options.displayName = " iOS Azure Communication Services User"

self.callClient!.createCallAgent(userCredential: userCredential!,
    options: callAgentOptions) { (callAgent, error) in
        if error == nil {
            print("Create agent succeeded")
            self.callAgent = callAgent
        } else {
            print("Create agent failed")
        }
})
Warning
Up until version 1.1.0 and beta release version 1.1.0-beta.1 of the Azure Communication Services Calling iOS SDK has the isTranscriptionActive as part of the Call object and didChangeTranscriptionState is part of CallDelegate delegate. For new beta releases, those APIs have been moved as an extended feature of Call just like described below.
Call transcription is an extended feature of the core Call object. You first need to obtain the transcription feature object:
let callTranscriptionFeature = call.feature(Features.transcription)
Then, to check if the call is transcribed, inspect the isTranscriptionActive property of callTranscriptionFeature. It returns Bool.
let isTranscriptionActive = callTranscriptionFeature.isTranscriptionActive;
You can also subscribe to transcription changes by implementing TranscriptionCallFeatureDelegate delegate on your class with the event didChangeTranscriptionState:
callTranscriptionFeature.delegate = self

// didChangeTranscriptionState is a member of TranscriptionCallFeatureDelegate
public func transcriptionCallFeature(_ transcriptionCallFeature: TranscriptionCallFeature, didChangeTranscriptionState args: PropertyChangedEventArgs) {
    let isTranscriptionActive = callTranscriptionFeature.isTranscriptionActive
}
Set up your system
Follow these steps to set up your system.
Create the Visual Studio project
For a Universal Windows Platform app, in Visual Studio 2022, create a new Blank App (Universal Windows) project. After you enter the project name, feel free to choose any Windows SDK later than 10.0.17763.0.
For a WinUI 3 app, create a new project with the Blank App, Packaged (WinUI 3 in Desktop) template to set up a single-page WinUI 3 app. Windows App SDK version 1.3 or later is required.
Install the package and dependencies by using NuGet Package Manager
The Calling SDK APIs and libraries are publicly available via a NuGet package.
To find, download, and install the Calling SDK NuGet package:
- Open NuGet Package Manager by selecting Tools > NuGet Package Manager > Manage NuGet Packages for Solution.
- Select Browse, and then enter Azure.Communication.Calling.WindowsClient in the search box.
- Make sure that the Include prerelease checkbox is selected.
- Select the Azure.Communication.Calling.WindowsClient package, and then select Azure.Communication.Calling.WindowsClient 1.4.0-beta.1 or a newer version.
- Select the checkbox that corresponds to the Azure Communication Services project on the right pane.
- Select Install.
Call transcription is an extended feature of the core Call object. You first need to obtain the transcription feature object:
TranscriptionCallFeature transcriptionFeature = call.Features.Transcription;
Then, to check if the call is being transcribed, inspect the IsTranscriptionActive property of transcriptionFeature. It returns boolean.
boolean isTranscriptionActive = transcriptionFeature.isTranscriptionActive;
You can also subscribe to changes in transcription:
private async void Call__OnIsTranscriptionActiveChanged(object sender, PropertyChangedEventArgs args)
    boolean isTranscriptionActive = transcriptionFeature.IsTranscriptionActive();
}

transcriptionFeature.IsTranscriptionActiveChanged += Call__OnIsTranscriptionActiveChanged;
SDK compatibility
The following table shows the minimum version of SDKs that support individual APIs.
| Operations | Web | Web UI | iOS | iOS UI | Android | Android UI | Windows |
|---|---|---|---|---|---|---|---|
| Get event that transcription has started | 1.0.0, 1.25.3-beta.1 | 1.0.0, 1.0.0-beta.8 | 2.1.0, 2.1.0-beta.1 | 1.0.0, 1.0.0-beta.8 | 1.1.0, 1.2.0-beta.1 | 1.0.0, 1.0.0-beta.8 | 1.0.0, 1.0.0-beta.31 |
| Get transcription state | 1.0.0, 1.25.3-beta.1 | 1.0.0, 1.0.0-beta.8 | 2.1.0, 2.1.0-beta.1 | 1.0.0, 1.0.0-beta.8 | 1.1.0, 1.2.0-beta.1 | 1.0.0, 1.0.0-beta.8 | 1.0.0, 1.0.0-beta.31 |
| Learn whether explicit consent is required | 1.31.2, 1.32.1-beta.1 | ❌ | ❌ | ❌ | ❌ | ❌ | ❌ |
| Give explicit consent for being recorded | 1.31.2, 1.32.1-beta.1 | ❌ | ❌ | ❌ | ❌ | ❌ | ❌ |