Access a key vault in a private network through shared private endpoints
Azure Web PubSub can access a key vault in a private network through shared private endpoint connections. This article shows you how to configure your Web PubSub resource to route outbound calls to a key vault through a shared private endpoint instead of through a public network.
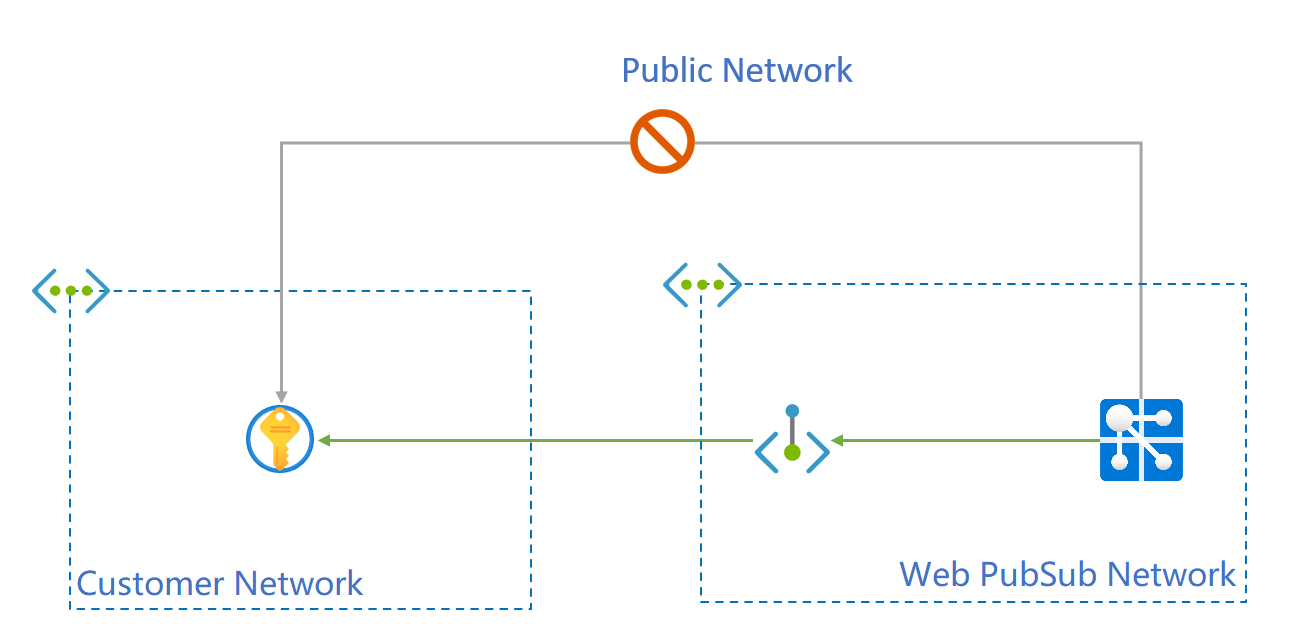
Private endpoints of secured resources created through Azure Web PubSub APIs are called shared private link resources. You "share" access to a resource, such as an instance of Azure Key Vault, that is integrated with Azure Private Link. These private endpoints are created inside the Web PubSub execution environment and aren't directly visible to you.
Note
The examples in this article use the following resource IDs:
- The resource ID of this Azure Web PubSub instance is
_/subscriptions/00000000-0000-0000-0000-000000000000/resourceGroups/contoso/providers/Microsoft.SignalRService/webpubsub/contoso-webpubsub. - The resource ID of the Azure Key Vault instance is
/subscriptions/00000000-0000-0000-0000-000000000000/resourceGroups/contoso/providers/Microsoft.KeyVault/vaults/contoso-kv.
To use the steps in the following examples, replace these values with your own subscription ID, the name of your Web PubSub resource, and the name of your Azure Key Vault resource.
Prerequisites
- An Azure account with an active subscription. Create an account for free.
- The Azure CLI 2.25.0 or later (if you use the Azure CLI).
- An Azure Web PubSub instance in a minimum Standard pricing tier.
- An Azure Key Vault resource.
Create a shared private endpoint resource to the key vault
In the Azure portal, go to your Azure Web PubSub resource.
On the left menu, select Networking.
Select the Private access tab.
Select Add shared private endpoint.
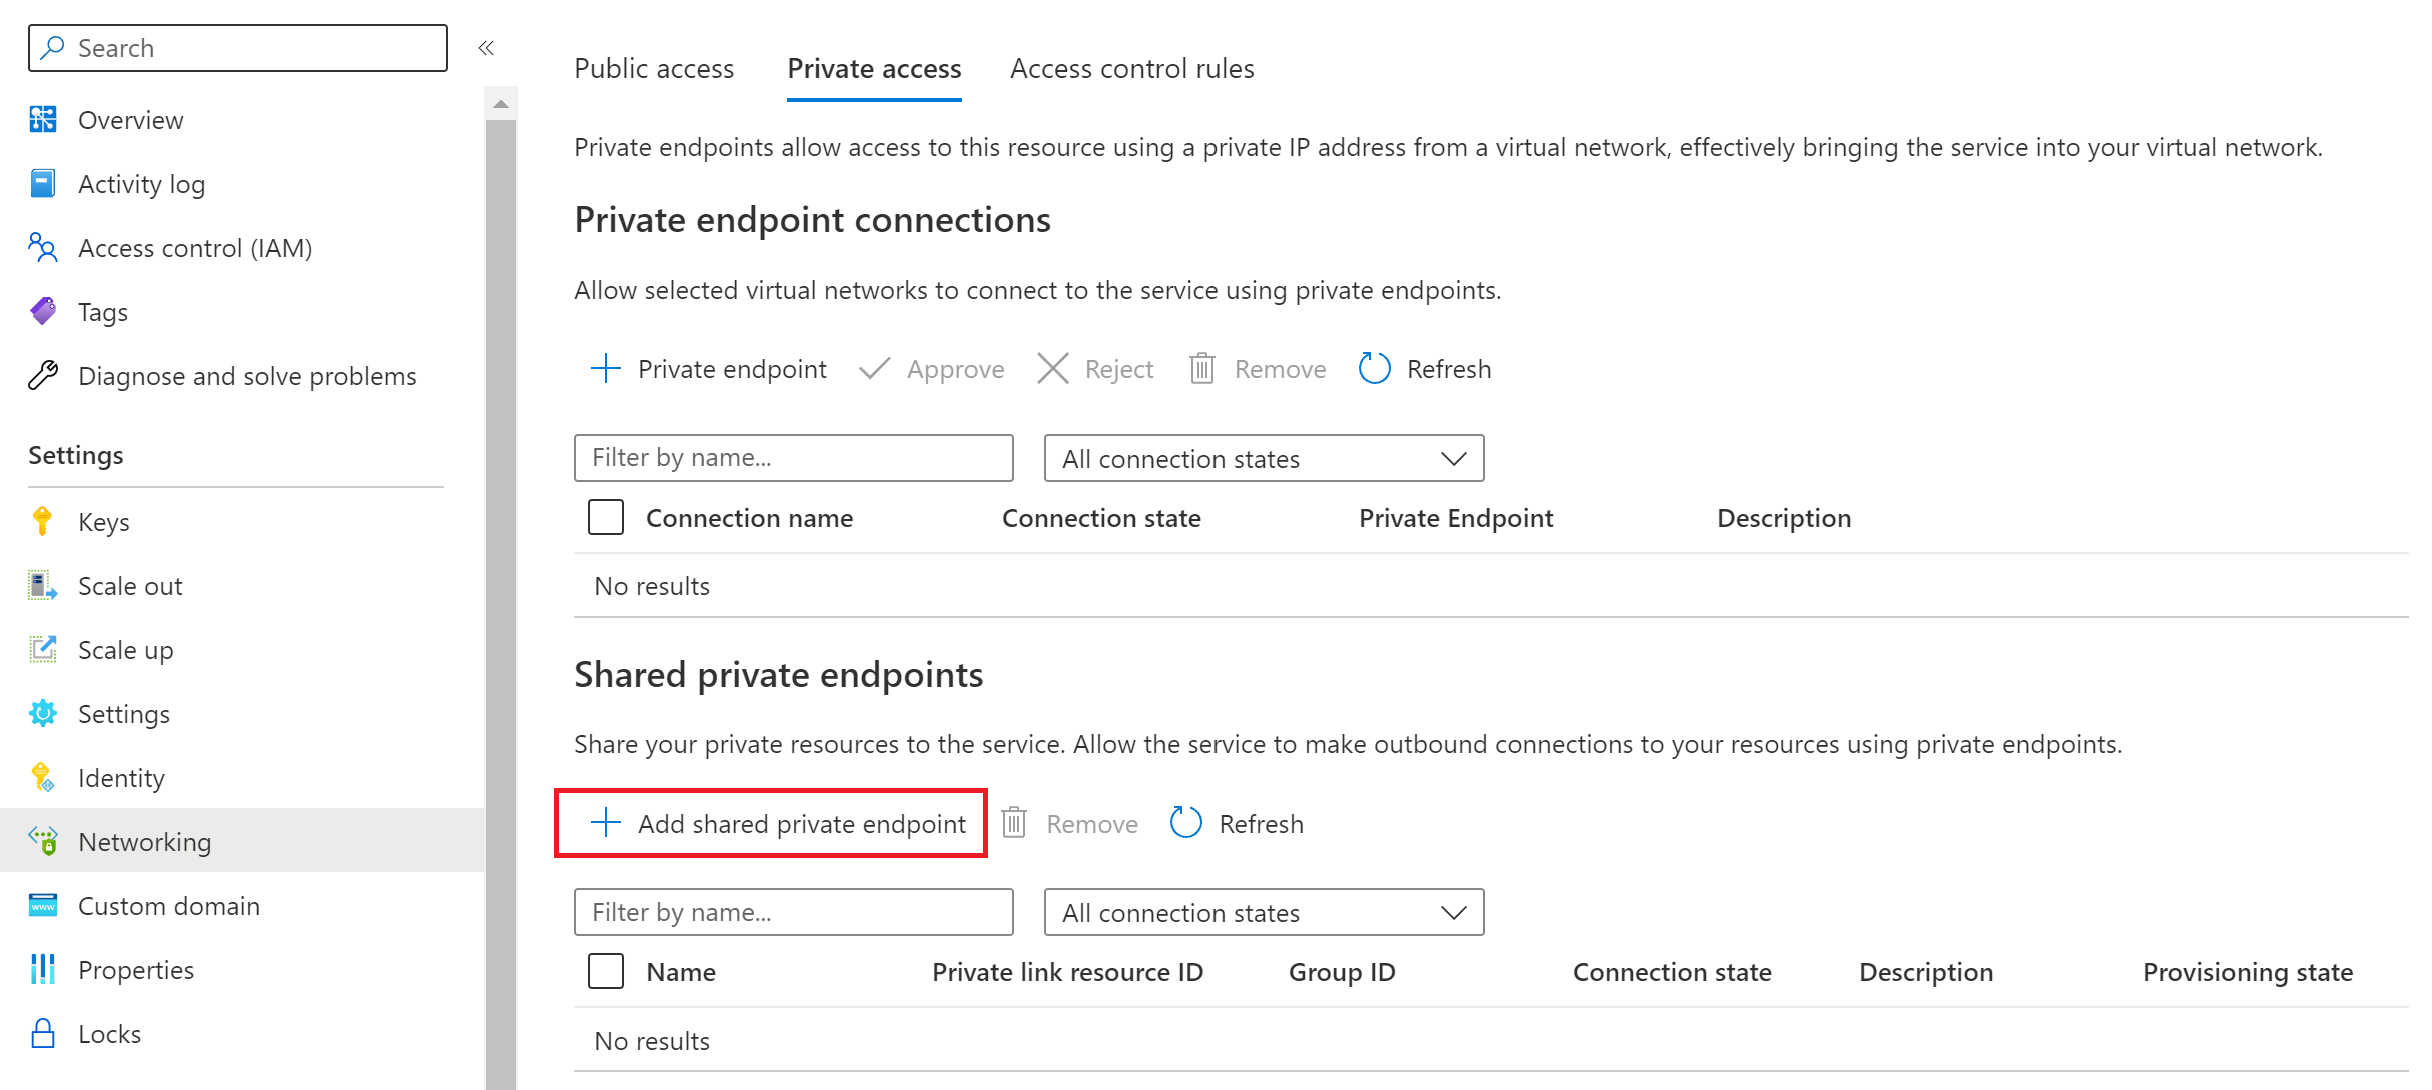
For Name, enter a name to use for the shared private endpoint.
To select your key vault resource, complete one of the following steps:
- Choose Select from your resources and select your resource from the lists.
- Select Specify resource ID and enter your key vault resource ID.
For Request message, enter Please approve.
Select Add.


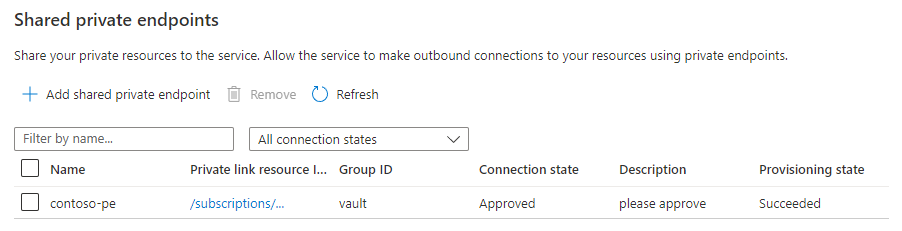
The shared private endpoint resource provisioning state is Succeeded. The connection state is Pending and waiting for approval for the target resource.

Approve the private endpoint connection for the key vault
After the private endpoint connection is created, the connection request from Web PubSub must be approved in your Key Vault resource.
In the Azure portal, go to your Key Vault resource.
On the left menu, select Networking.
Select Private endpoint connections.
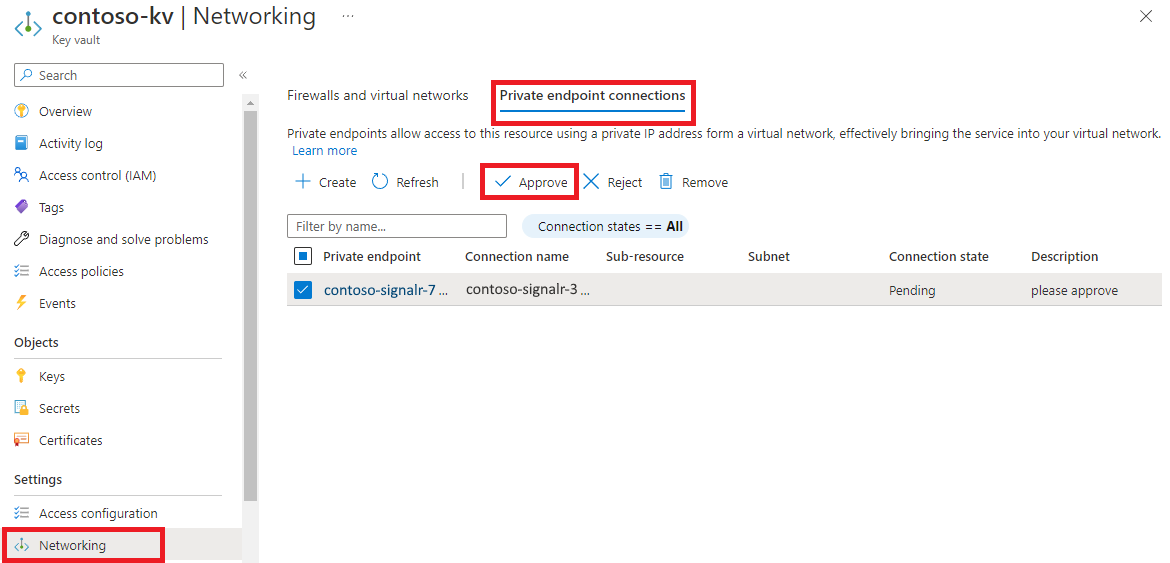
Select the private endpoint that Web PubSub created.
Select Approve, and then select Yes to confirm.
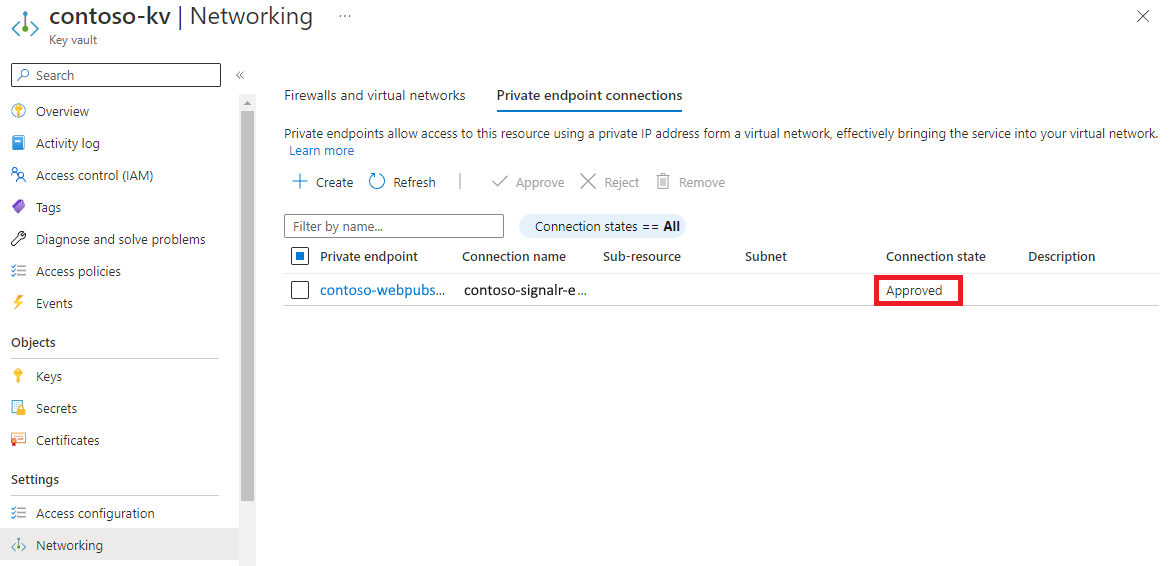
It might take a few minutes for the private endpoint connection status to change to Approved.
Query the status of the shared private link resource
It takes a few minutes for the approval to be propagated to Azure Web PubSub Service. You can check the state using either Azure portal or Azure CLI. The shared private endpoint between Azure Web PubSub Service and Azure Key Vault is active when the container state is approved.
In the Azure portal, go to your Azure Web PubSub resource.
On the left menu, select Networking.
Select Shared private link resources.

Now you can configure features like a custom domain as you typically would. You don't have to use a special domain for your key vault. Web PubSub automatically handles Domain Name System (DNS) resolution.