Quickstart: Set up a development environment with Dev Container Templates for Azure SQL Database
Dev containers provide a comprehensive solution for enhancing local development for Azure SQL Database. Dev Container Templates offer developers a seamless and efficient development environment, enabling them to build applications for Azure SQL Database with ease and confidence. Dev containers can be utilized in any development environment whether is local or in the cloud, you can promote consistency across teams and workflows.
The following video walks you through the steps to quickly set up a development environment using Dev Container Templates for Azure SQL Database, ensuring a streamlined and consistent development experience:
Prerequisites
Before you begin, ensure you have the following installed on your local machine:
- Git: For version control. Download Git
- Docker: Required for running containers. Download Docker
- Visual Studio Code: The primary IDE for this quickstart. Download Visual Studio Code
- Dev Containers extension for Visual Studio Code: Enables working with dev containers. Install the extension
Steps to set up the development environment
Begin by either opening a local folder containing your application project or cloning an existing repository into Visual Studio Code. This initial step sets the stage for integrating your project with a development container, whether you're starting from scratch or working on an existing application.
In Visual Studio Code, press
F1orCtrl+Shift+Pto open the command palette. Select the Dev Containers: Add Dev Container Configuration Files... command.
Select the Add configuration file to workspace option if you want to add the dev container configuration file to your current local repository.
- Alternatively, choose the Add configuration file to user data folder option.
- For this quickstart, select the Add configuration file to workspace option.

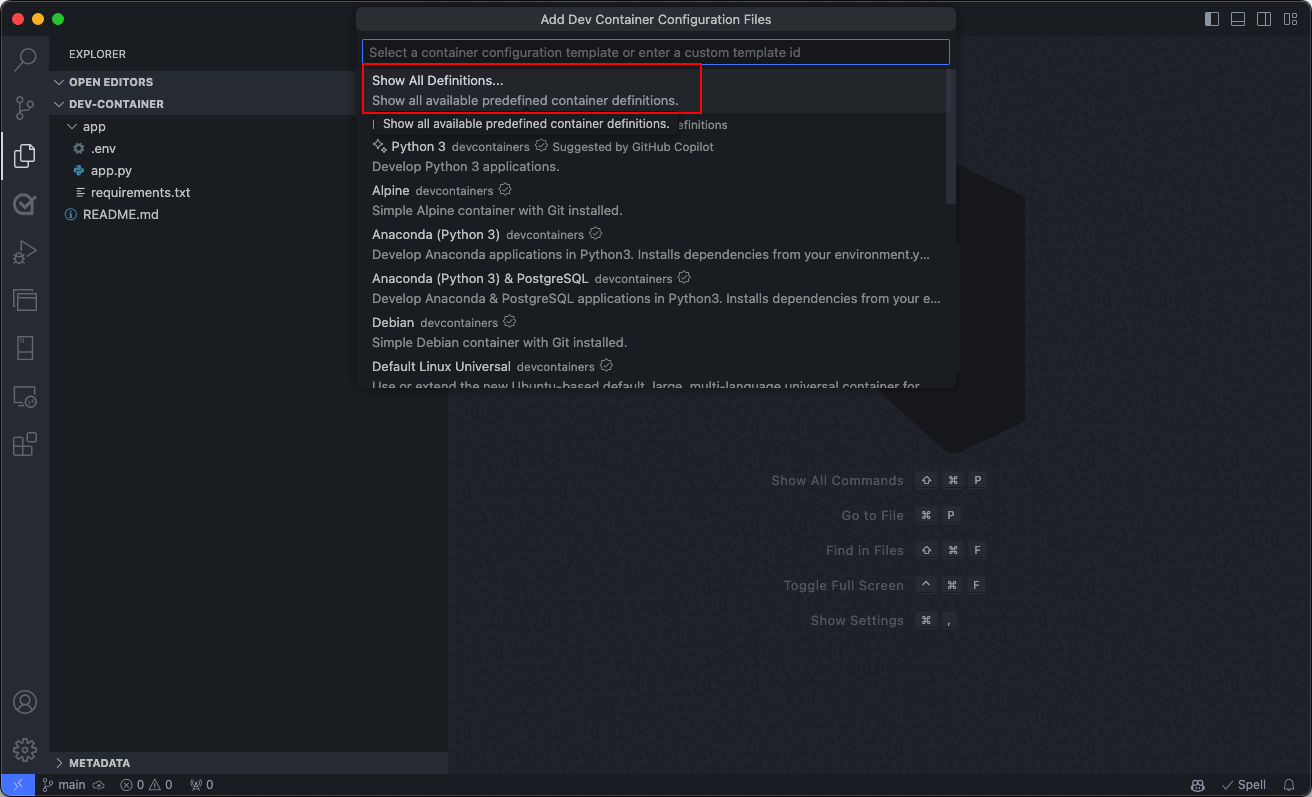
Visual Studio Code prompts you to select a Dev Container Template. The available templates are based on the tools and dependencies required for the specific development environment. Select Show All Definitions to view all available templates.
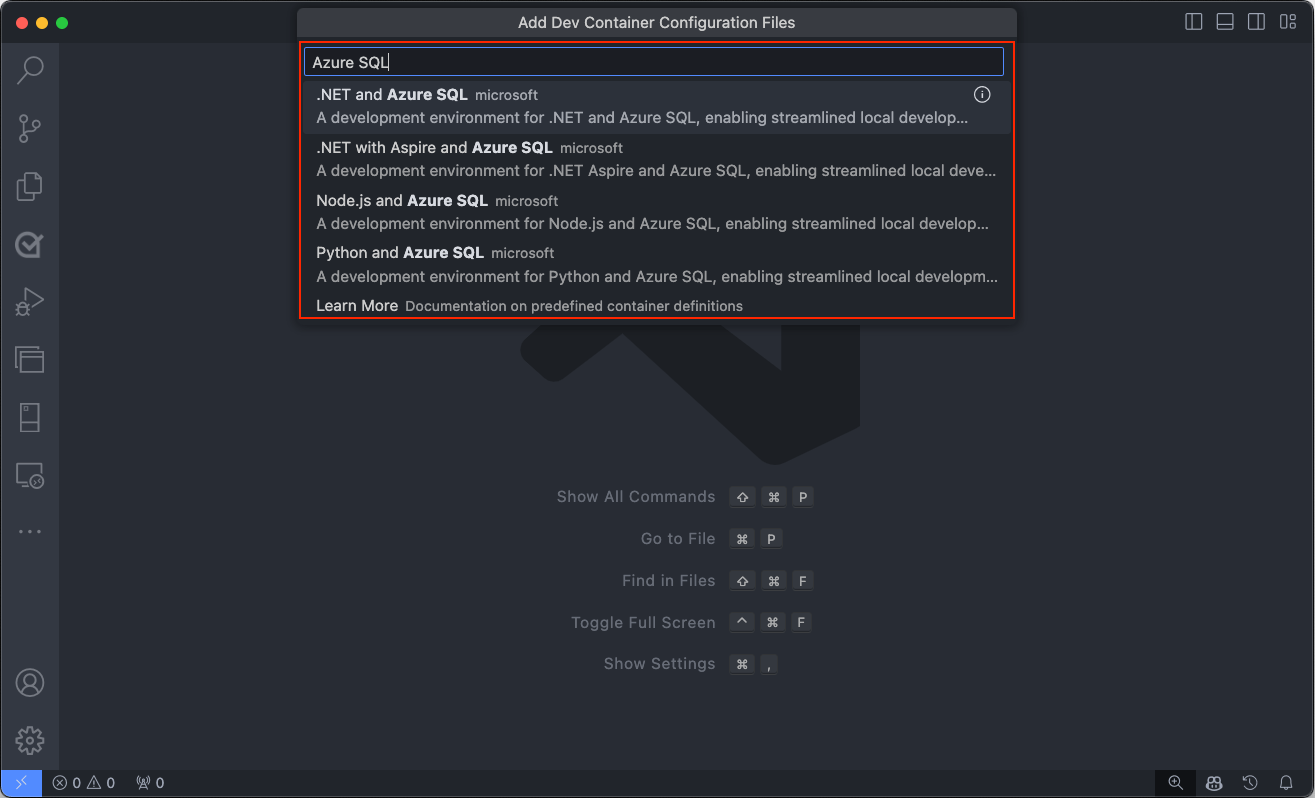
Select the desired Dev Container Template for Azure SQL Database by typing Azure SQL into the command palette. This action displays a list of available templates designed for Azure SQL development.
Upon selection, Visual Studio Code automatically generates the necessary configuration files tailored to the chosen template. These files include settings for the development environment, extensions to install, and Docker configuration details. They're stored in a
.devcontainerfolder within your project directory, ensuring a consistent and reproducible development environment.
Following the configuration file generation, Visual Studio Code prompts you to transition your project into the newly created Dev Container environment. You can do it by selecting Reopen in Container. This step is crucial as it moves your development inside the container, applying the predefined environment settings for Azure SQL development.
If you haven't already, you can also initiate this transition manually at any time using the Dev Containers extension. Use the Reopen in Container command from the command palette or select the blue icon at the bottom left corner of Visual Studio Code and select Reopen in Container.

This screenshot shows the Dev Containers command palette option to Reopen in Container, in Visual Studio Code.

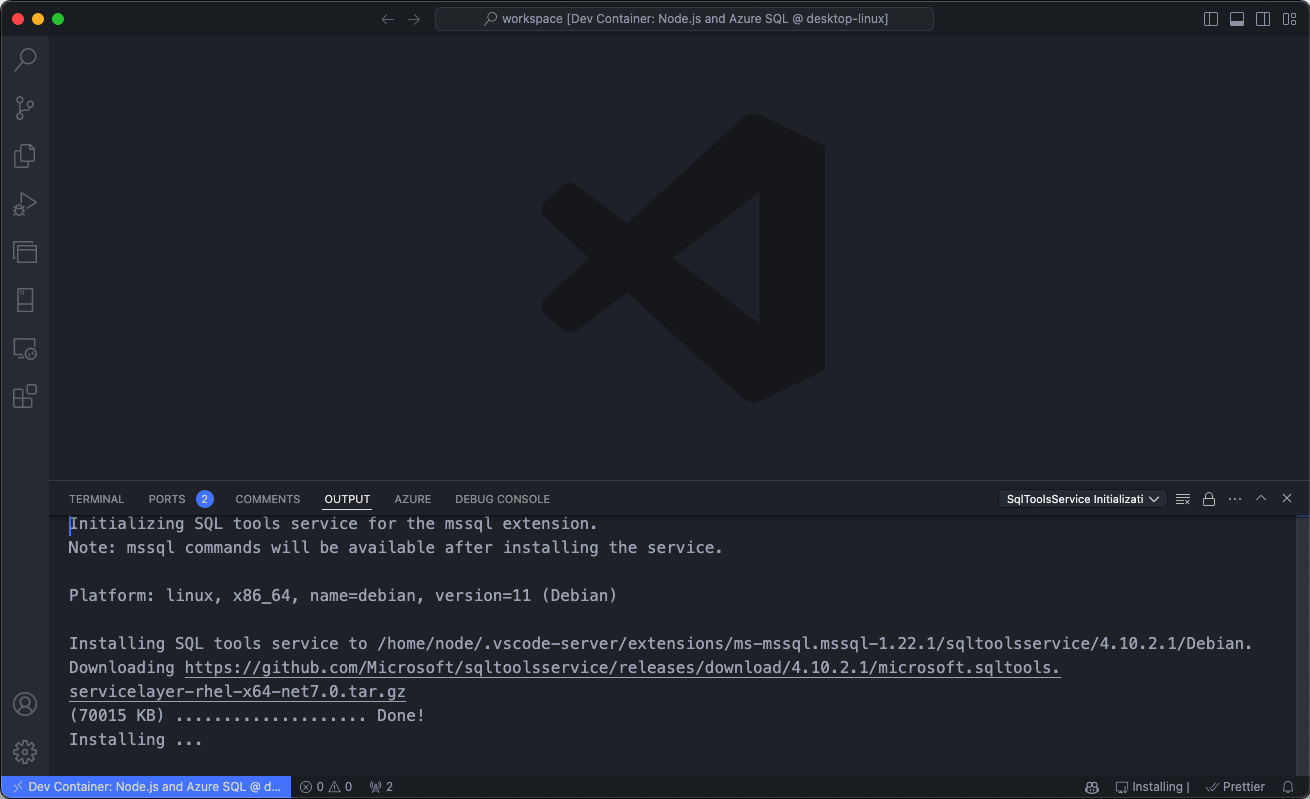
This action initiates the setup process, where Visual Studio Code generates the necessary configuration files and builds the development container based on the selected template. The process ensures that your development environment is precisely configured for Azure SQL Database development.

Visual Studio Code builds the container based on the selected configuration. The build process might take a few minutes the first time.
Once the dev container is built, you can start exploring and verifying the setup. Open a terminal within Visual Studio Code, then check that all necessary tools are installed and working correctly.

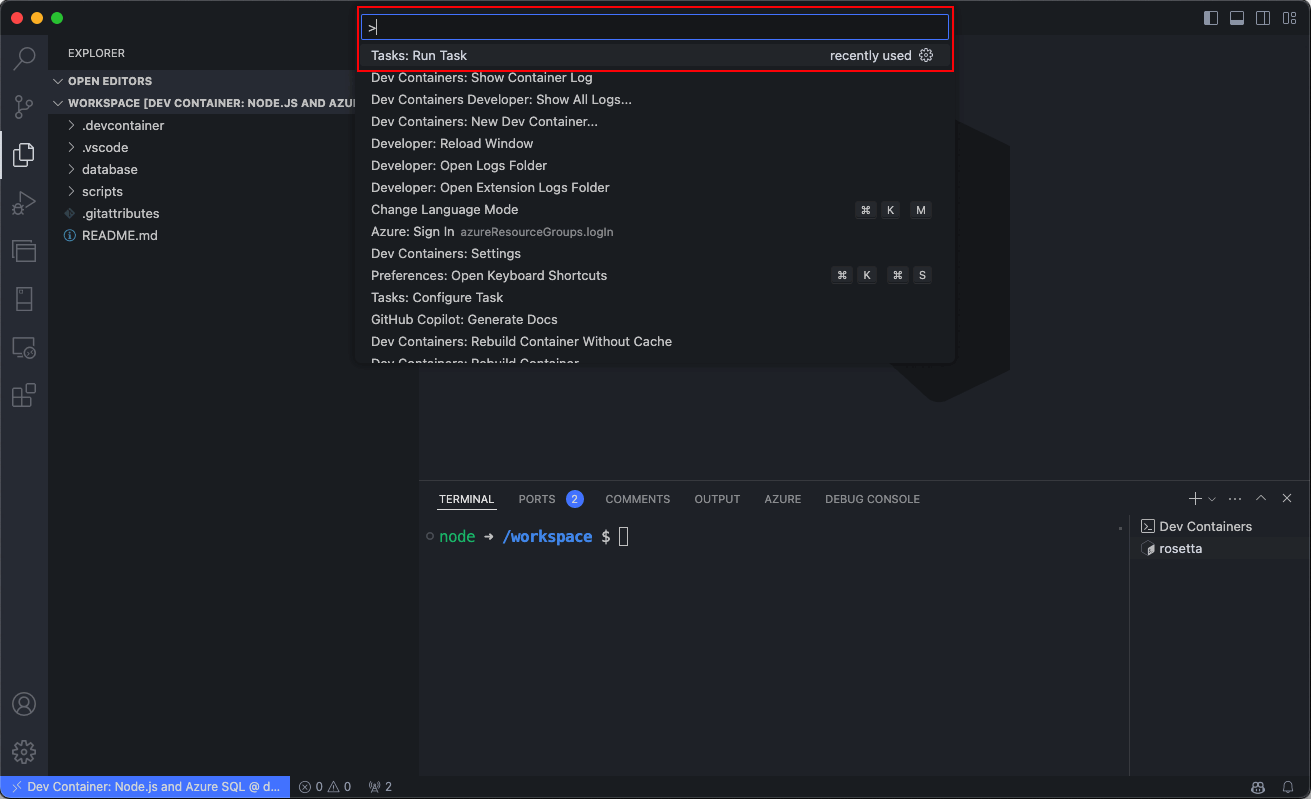
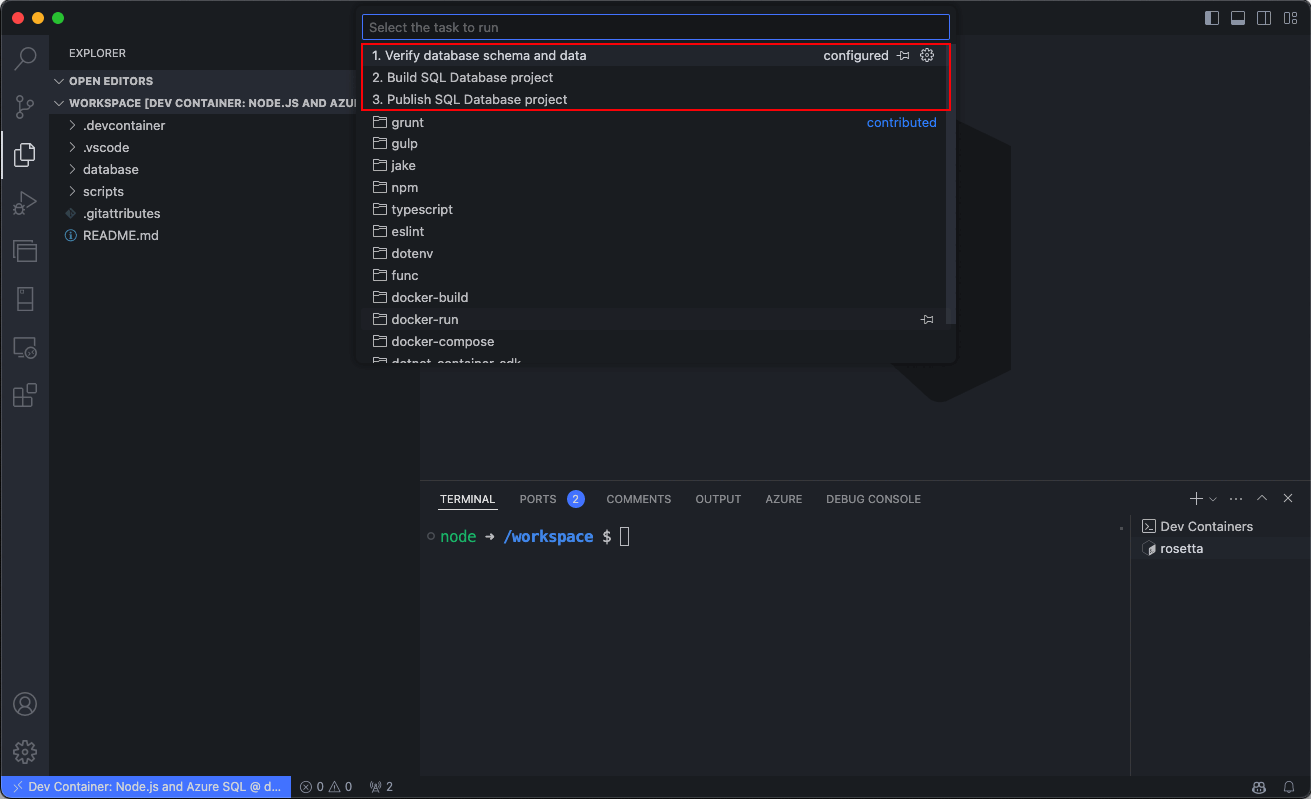
As an optional step, you can also run predefined tasks directly from the command palette, streamlining your development workflow and allowing you to focus on writing code.
This screenshot shows the Visual Studio Code command palette, with the option to run predefined tasks.
This screenshot shows the list of predefined tasks in Visual Studio Code for Dev Containers.


For more information about a specific template, see GitHub - azuresql-devcontainers.